Introduction
QuizFetch takes your study experience to the next level by creating interactive quizzes based on your study materials. Unlike standard tests, QuizFetch adds a confidence rating system and provides real-time feedback, making assessment more engaging and informative.
Accessing QuizFetch
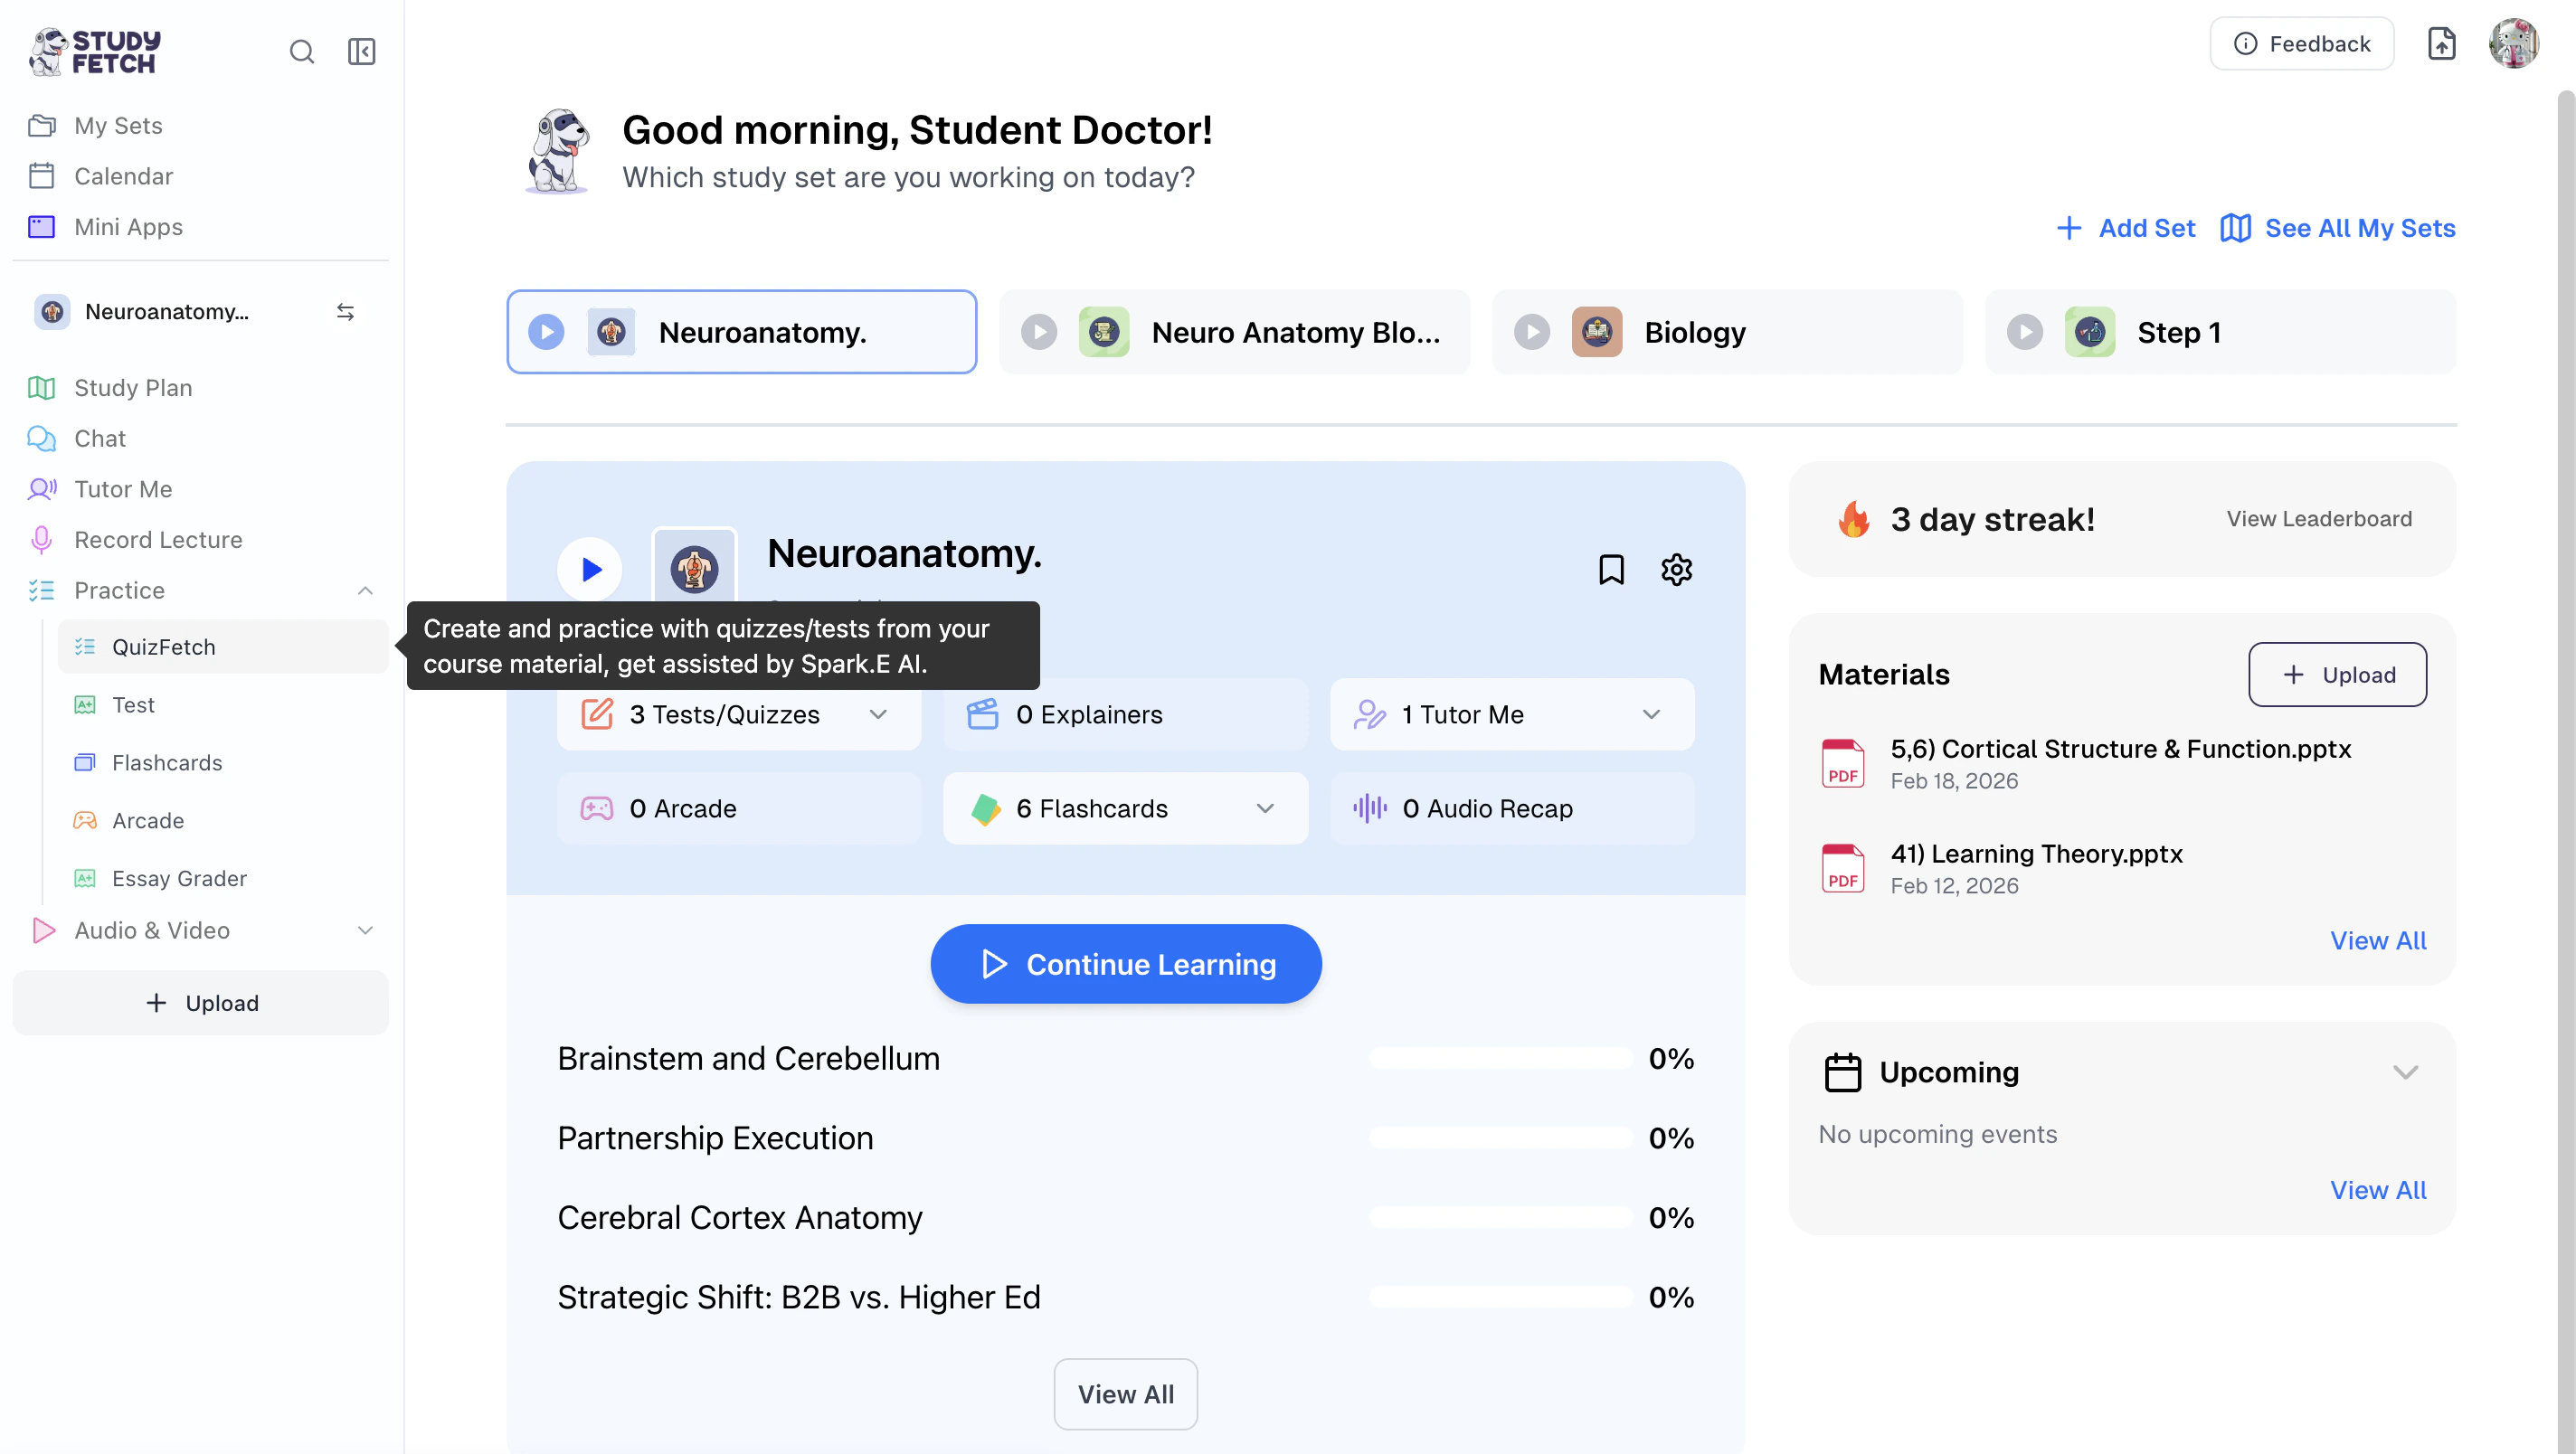
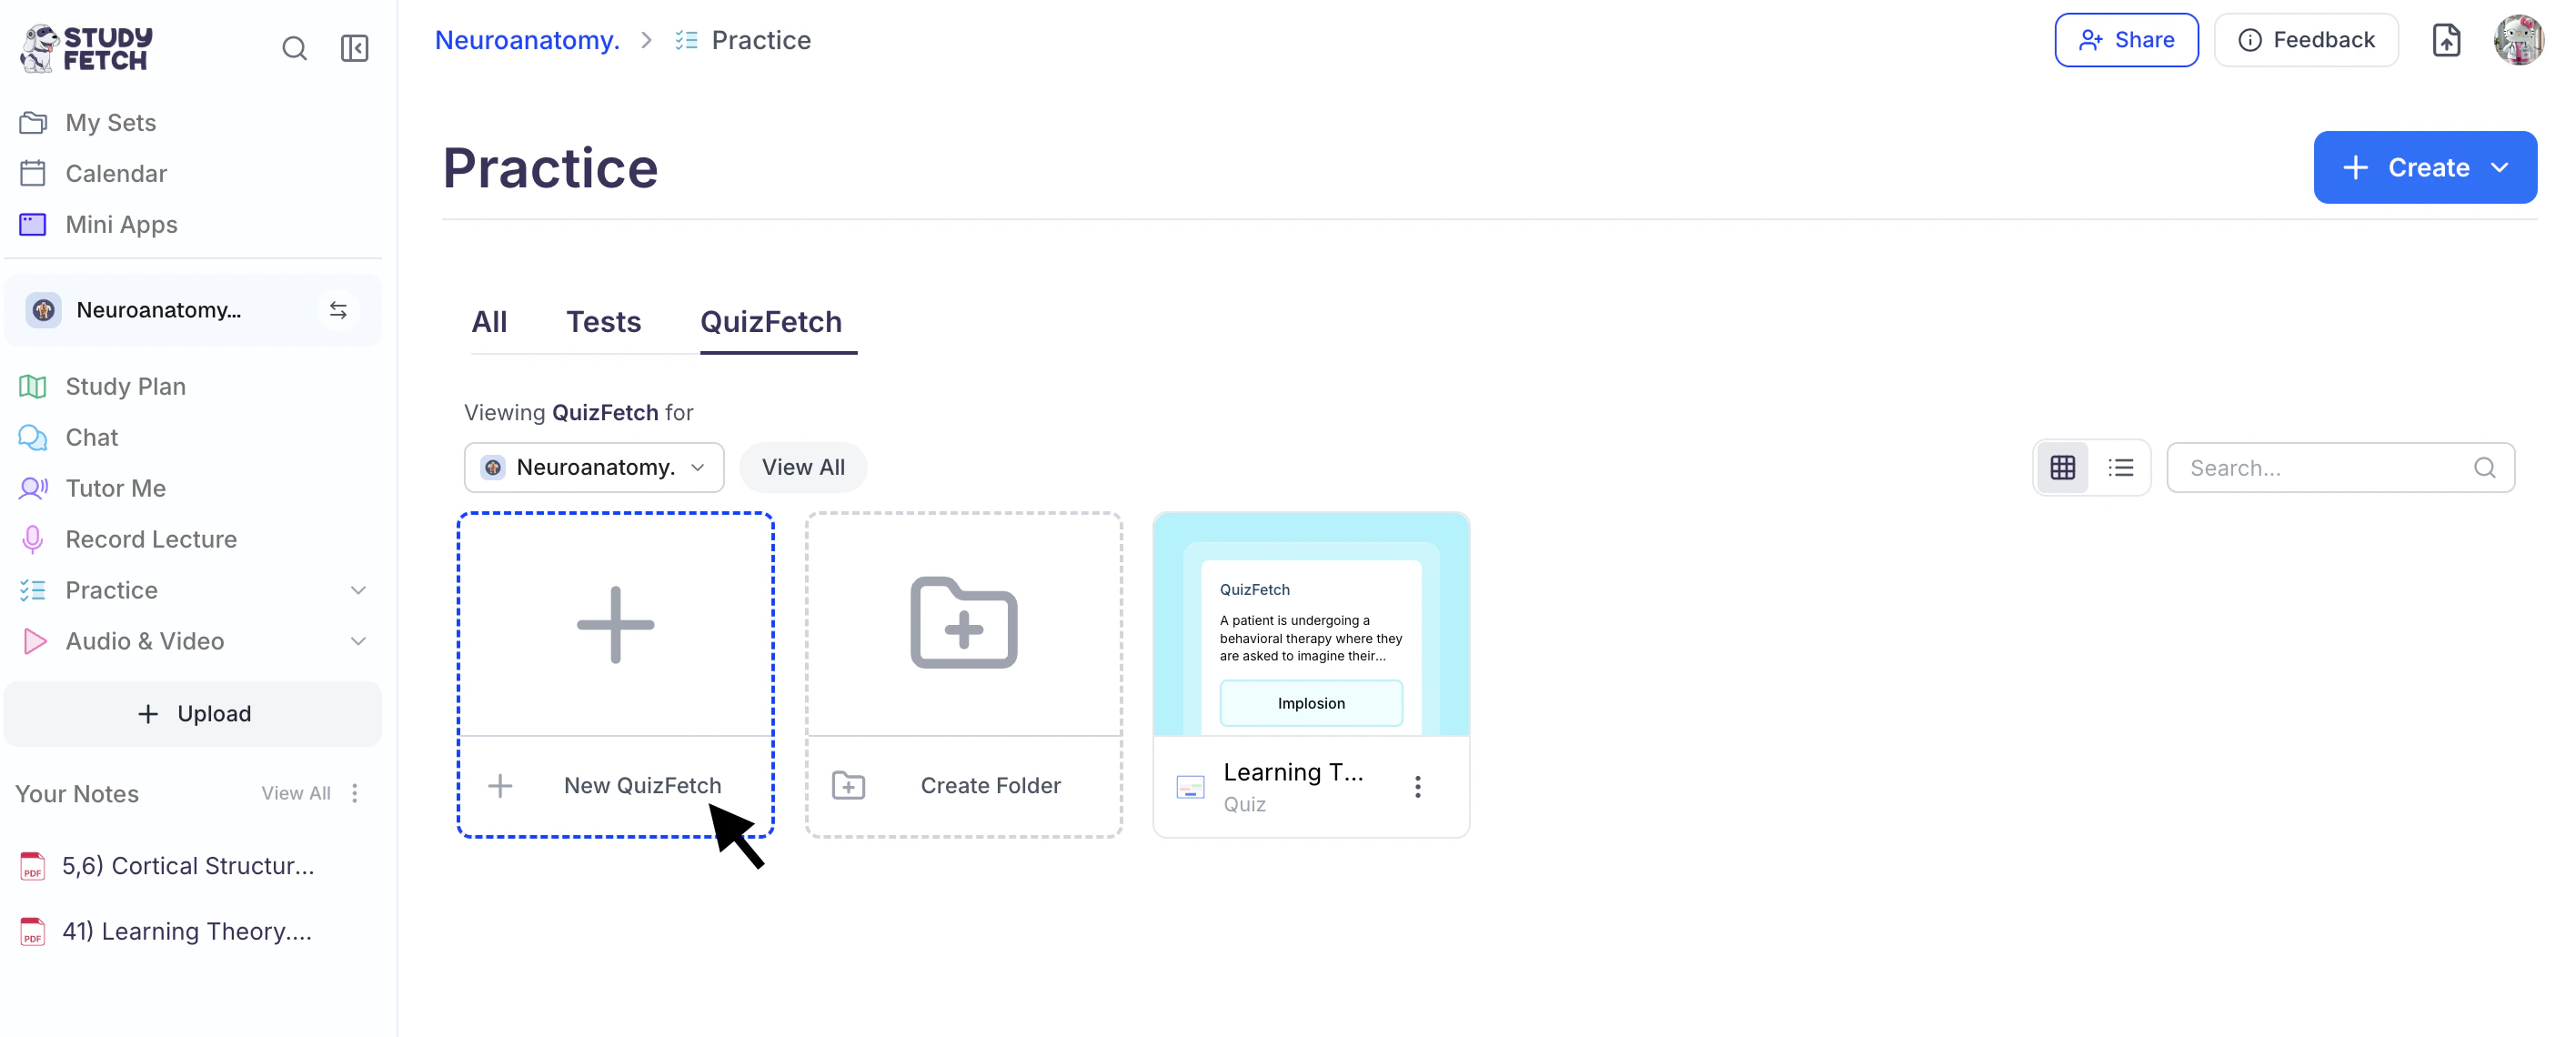
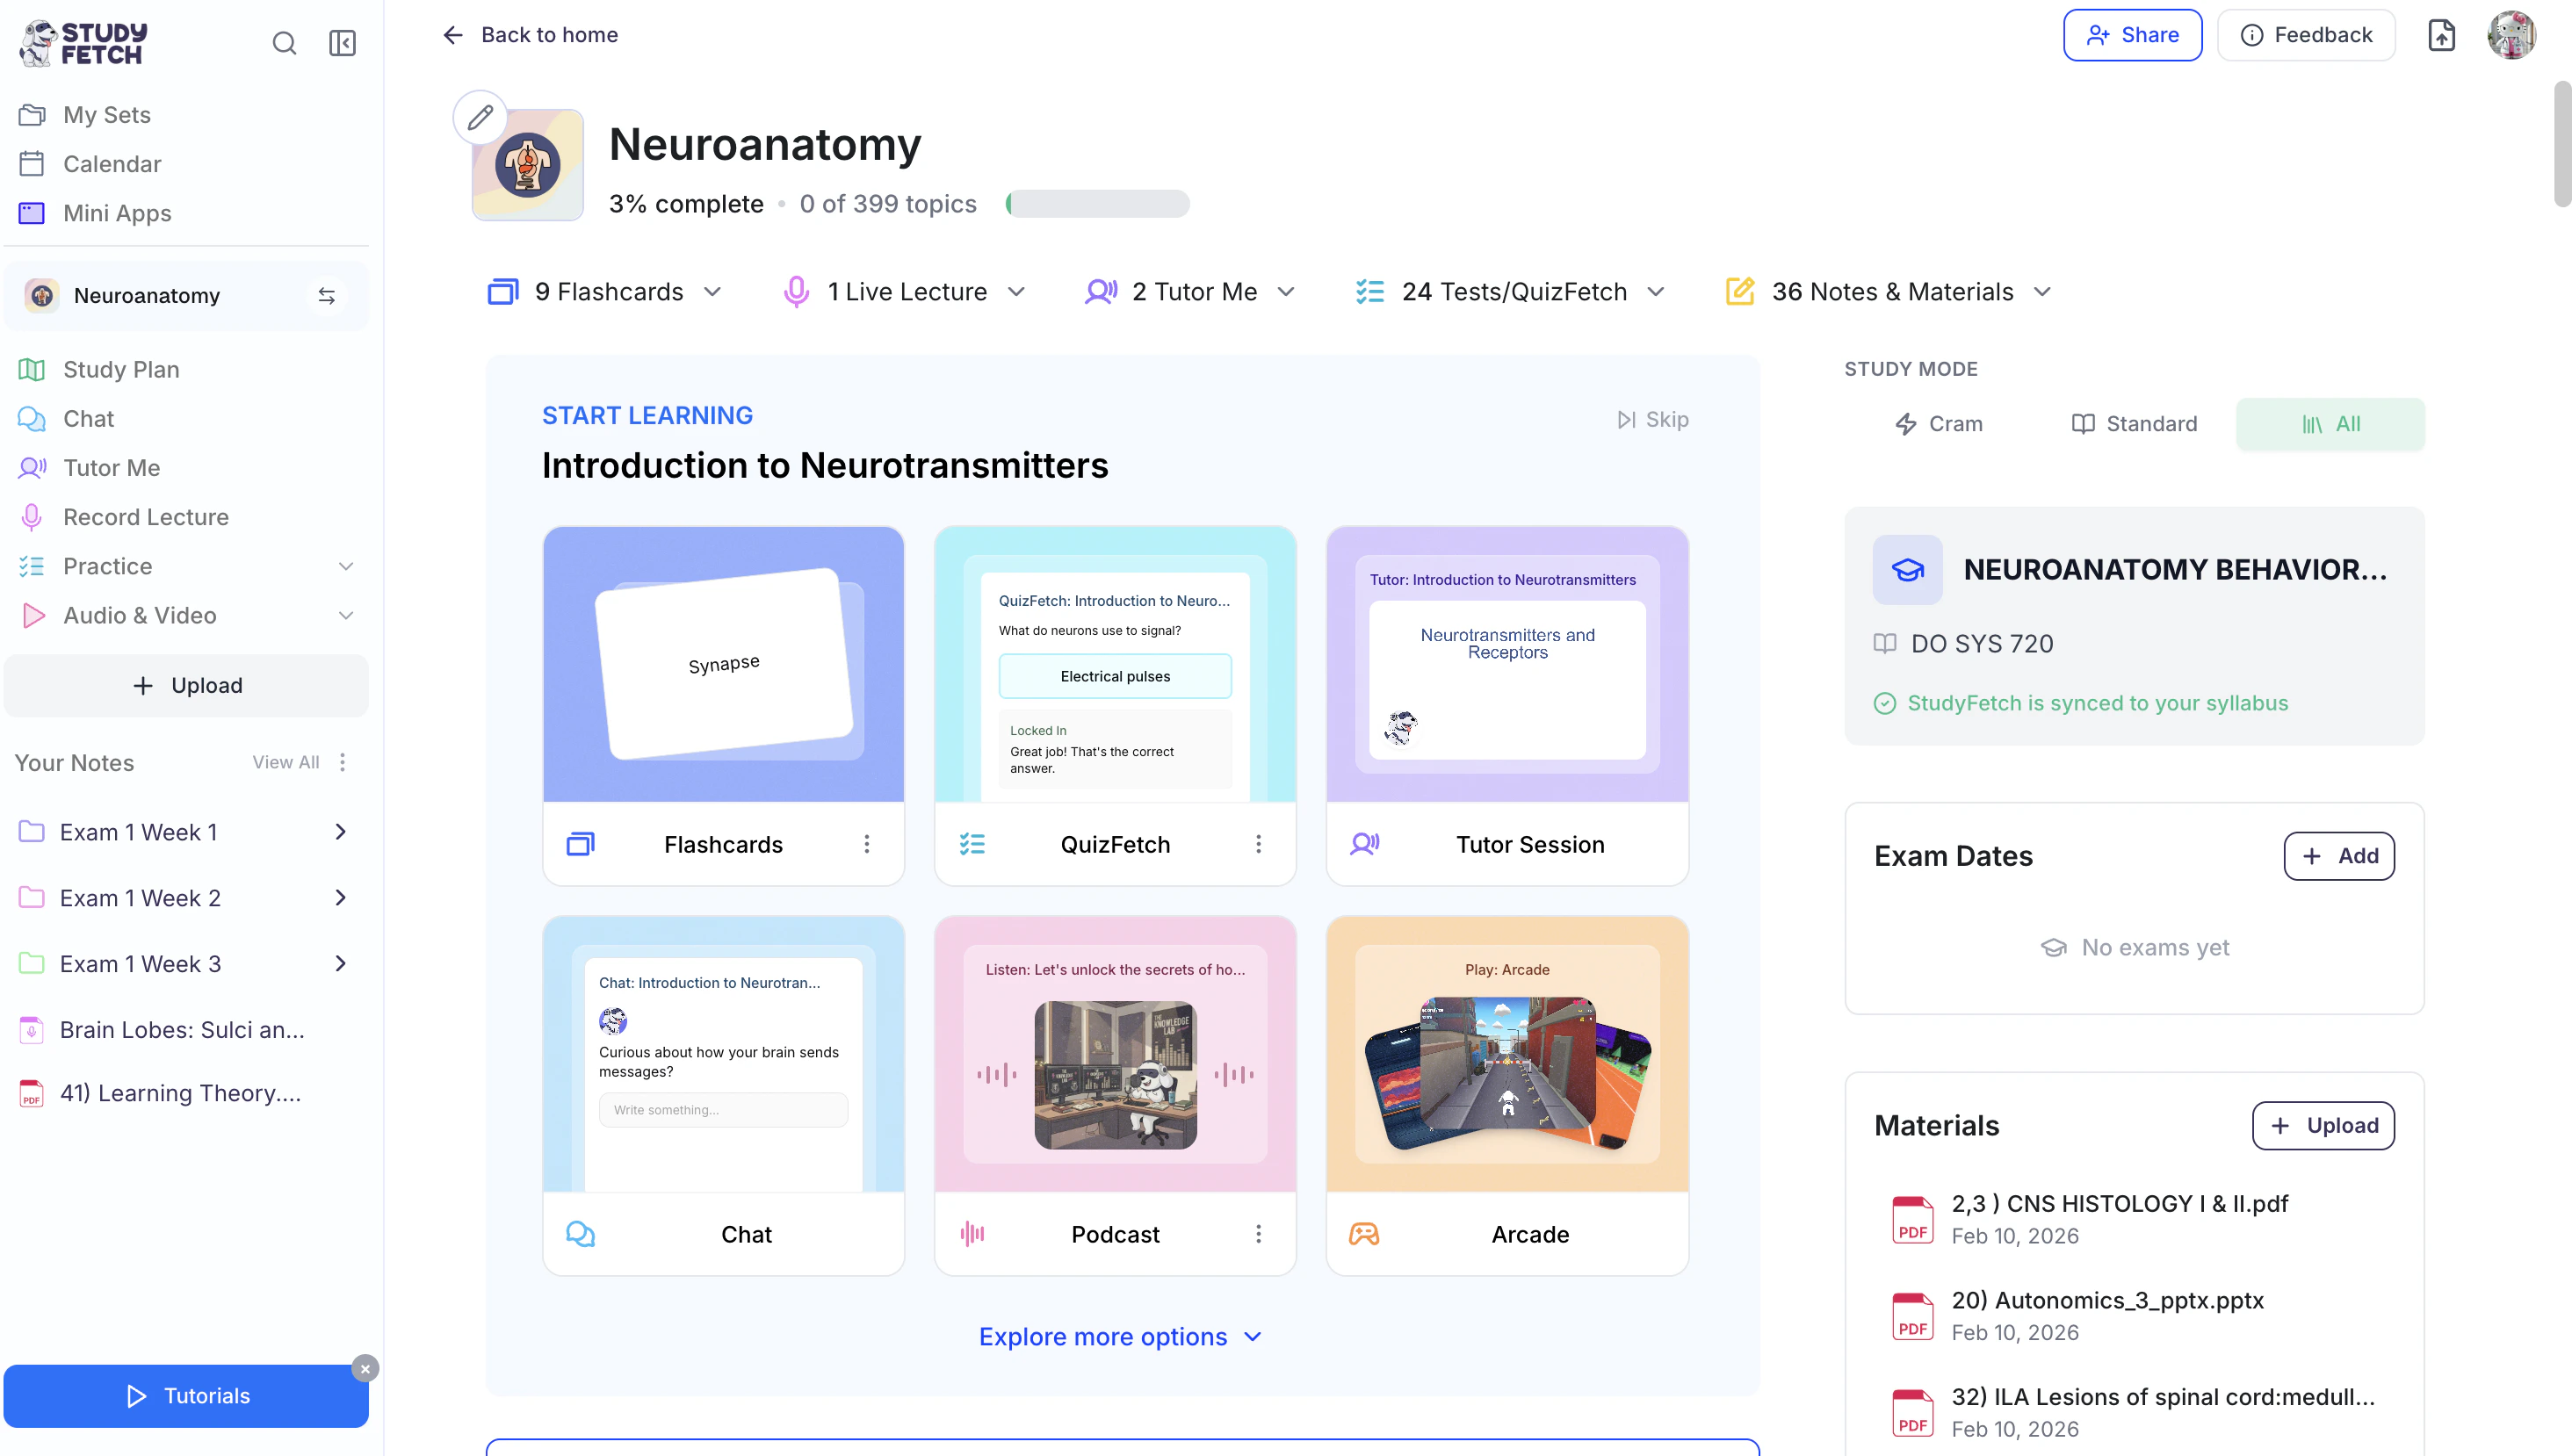
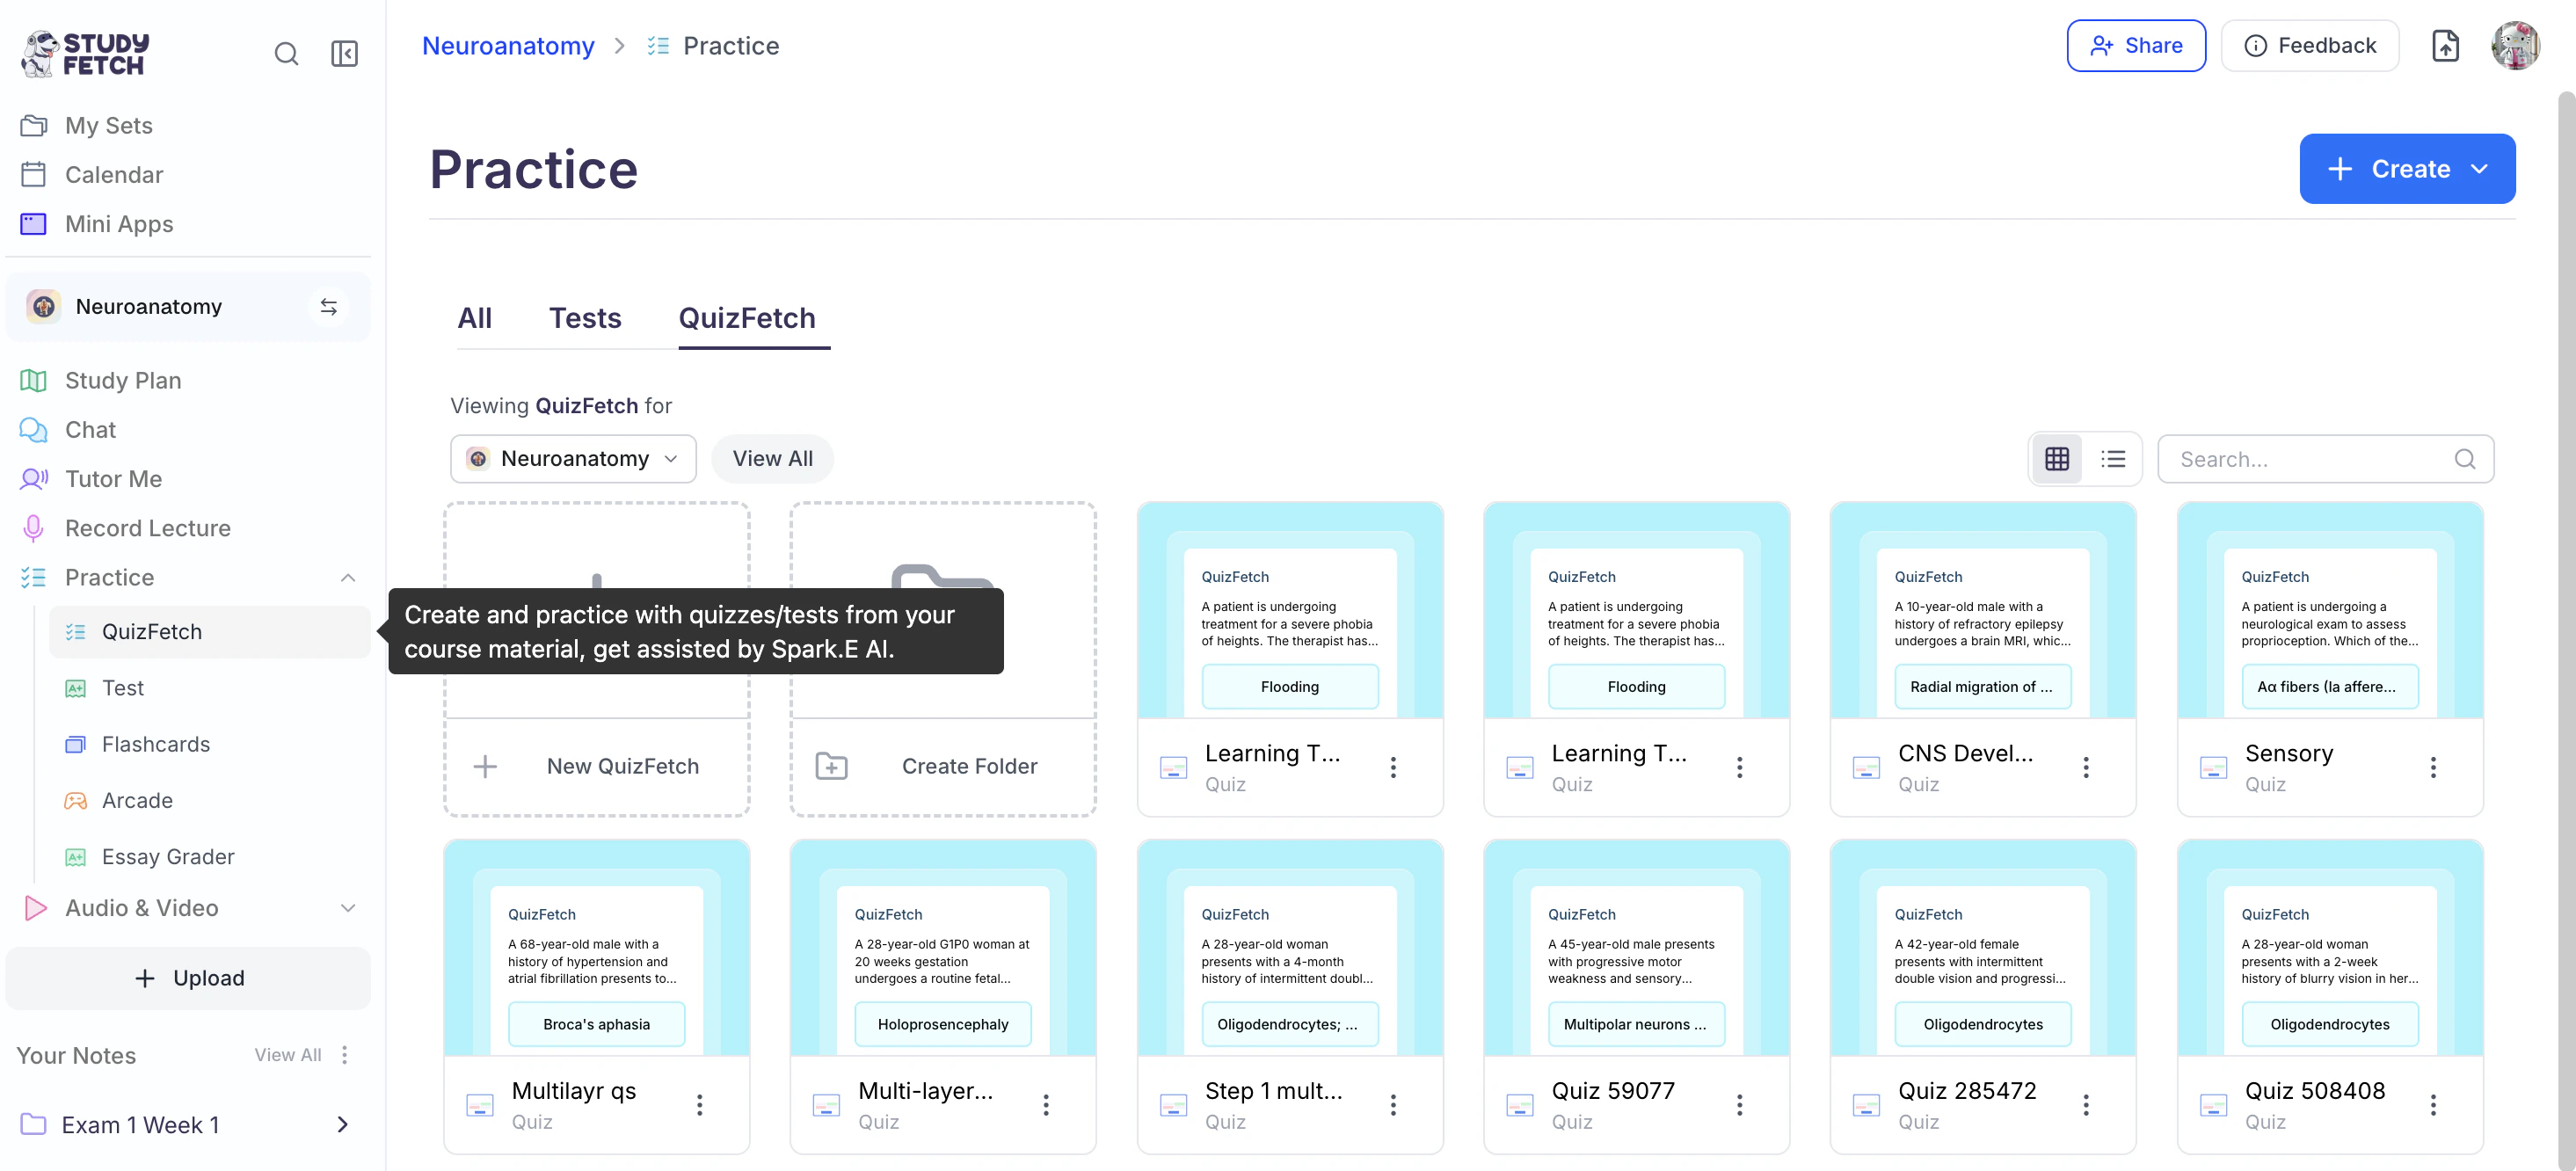
- On the left-hand side of your Dashboard click Practice and then select QuizFetch
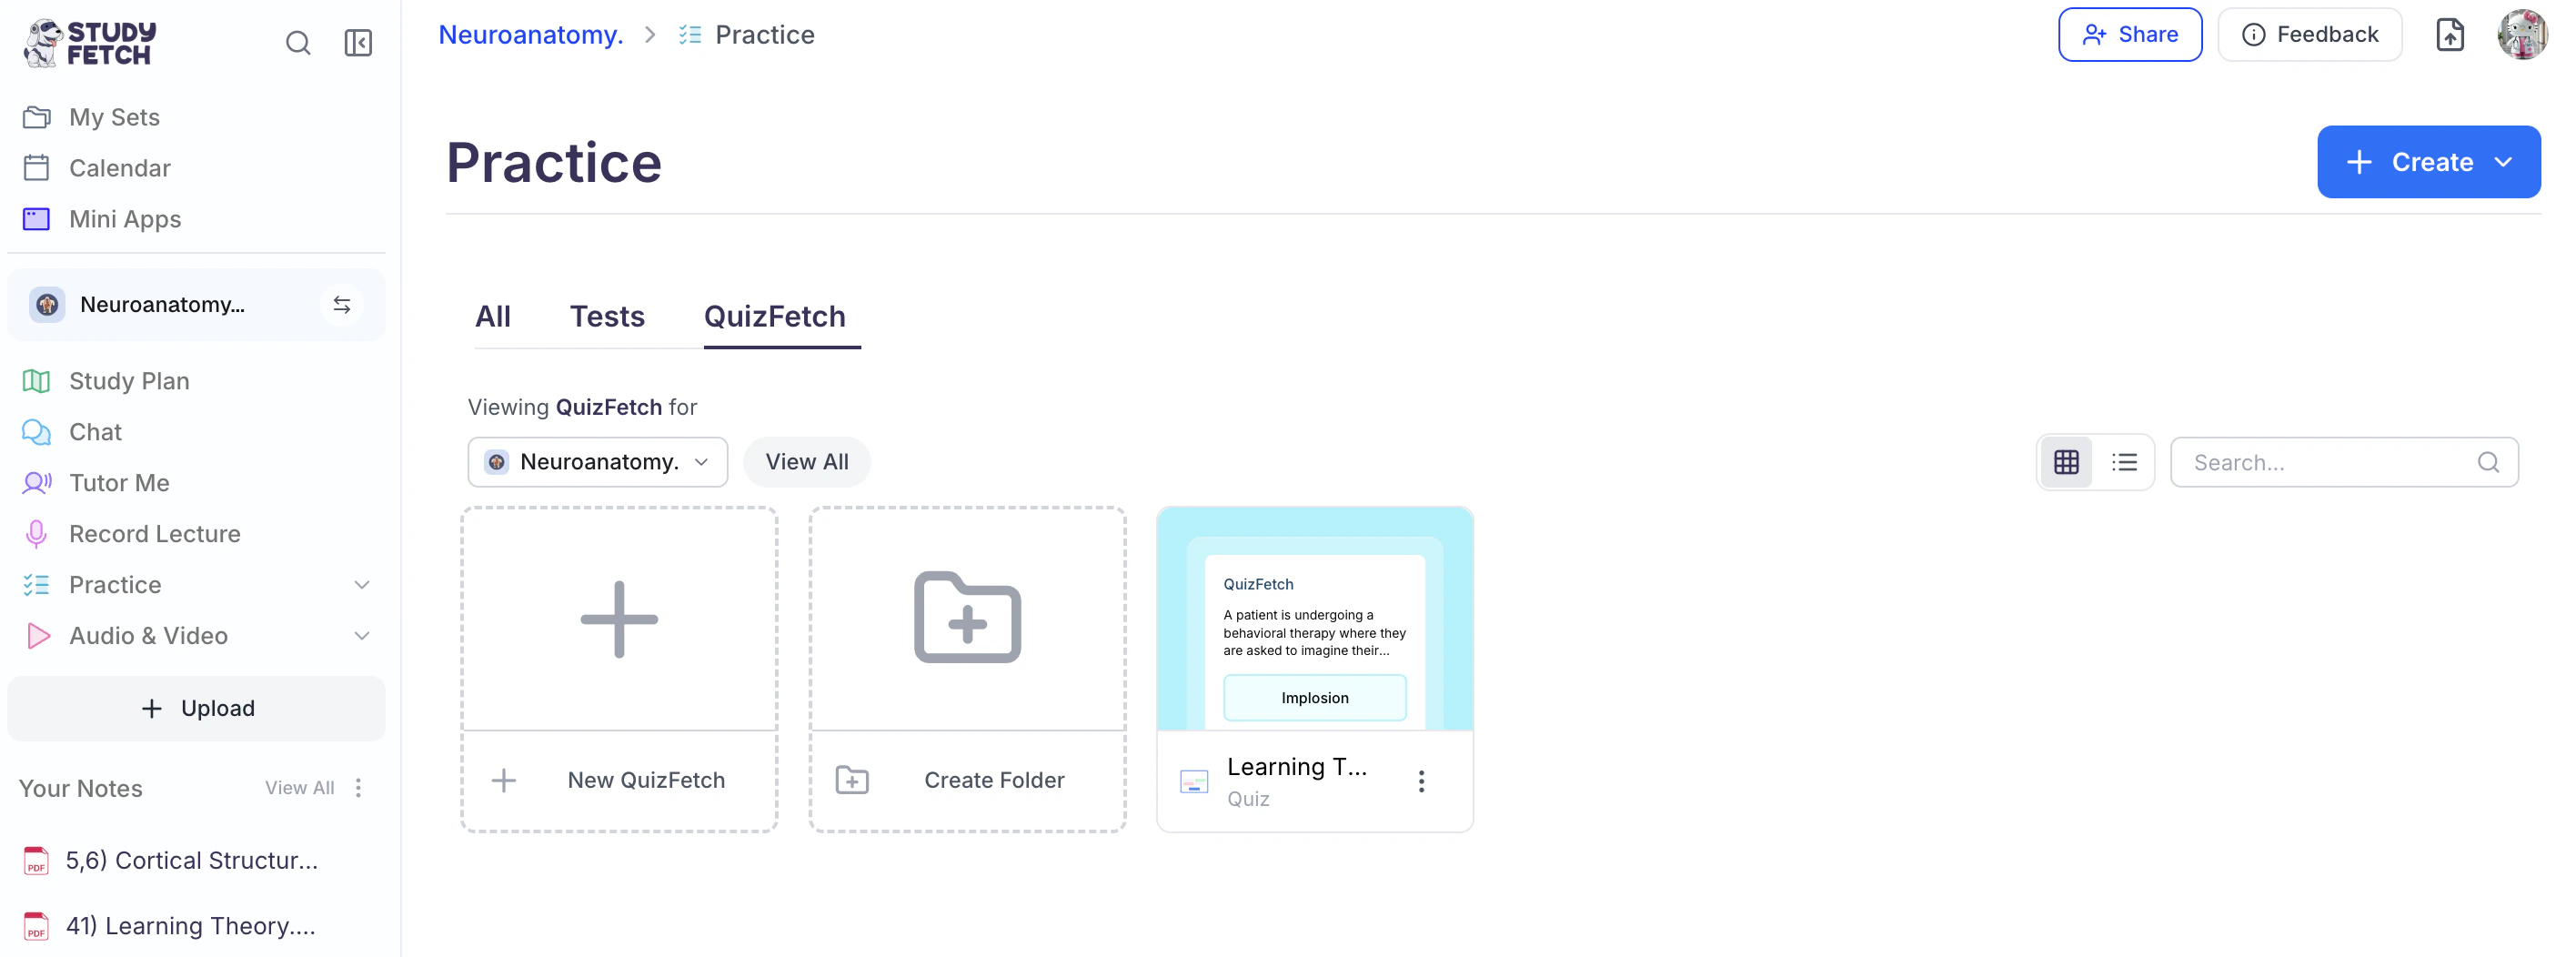
- All existing quizzes associated with your Study Set can be found on this page.
- To open a specific quiz, simply click on the name of the quiz you would like to view.
- To generate a new QuizFetch, follow the steps outlined below.
Creating Your Quiz
Step 1: Create a New Quiz
- To generate a new QuizFetch:
- Select + New QuizFetch, or
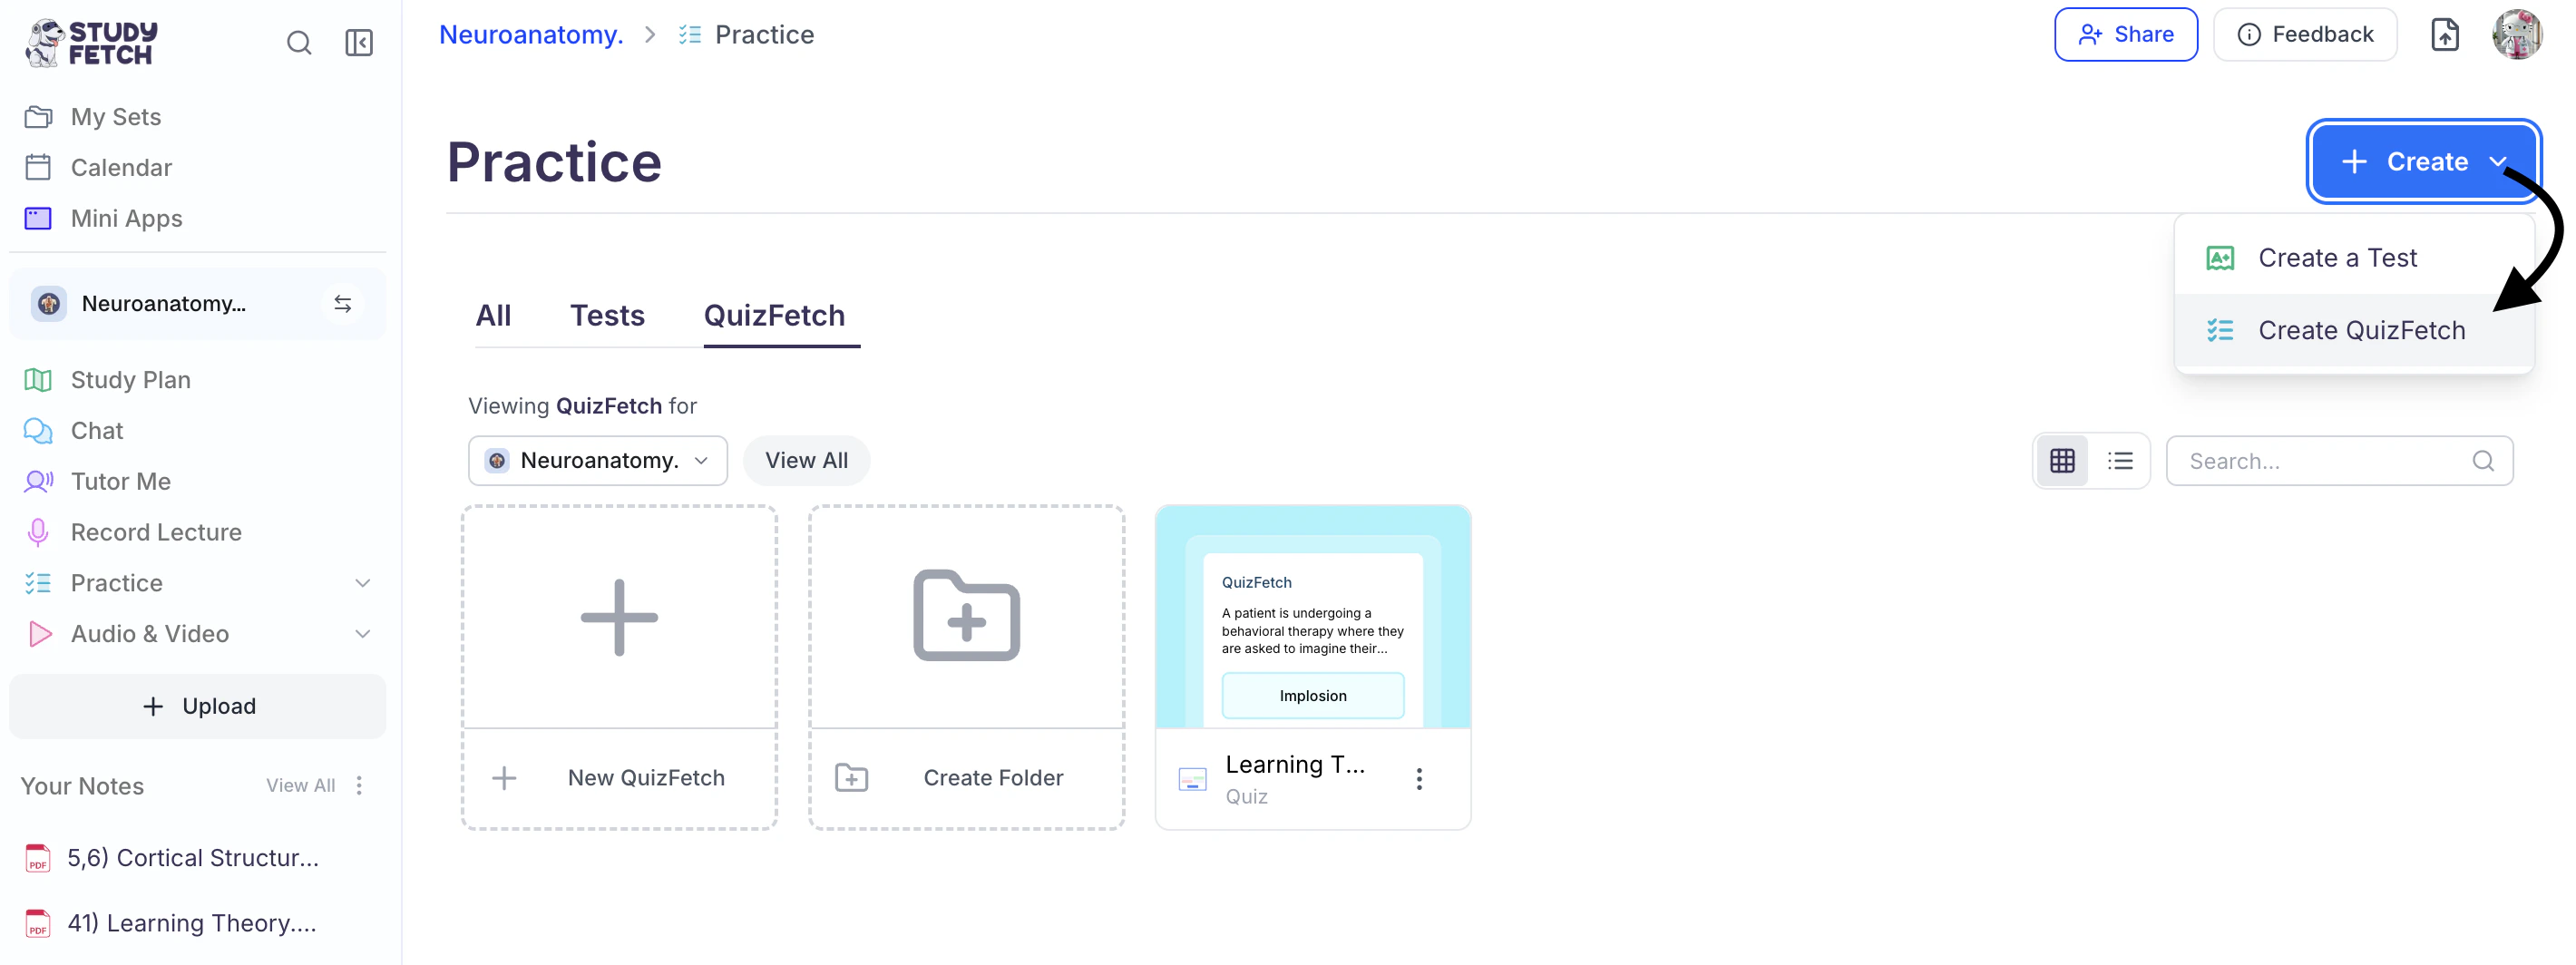
- Click the downward arrow next to the + Create button in the top-right corner.
- From the dropdown menu, select Create QuizFetch.
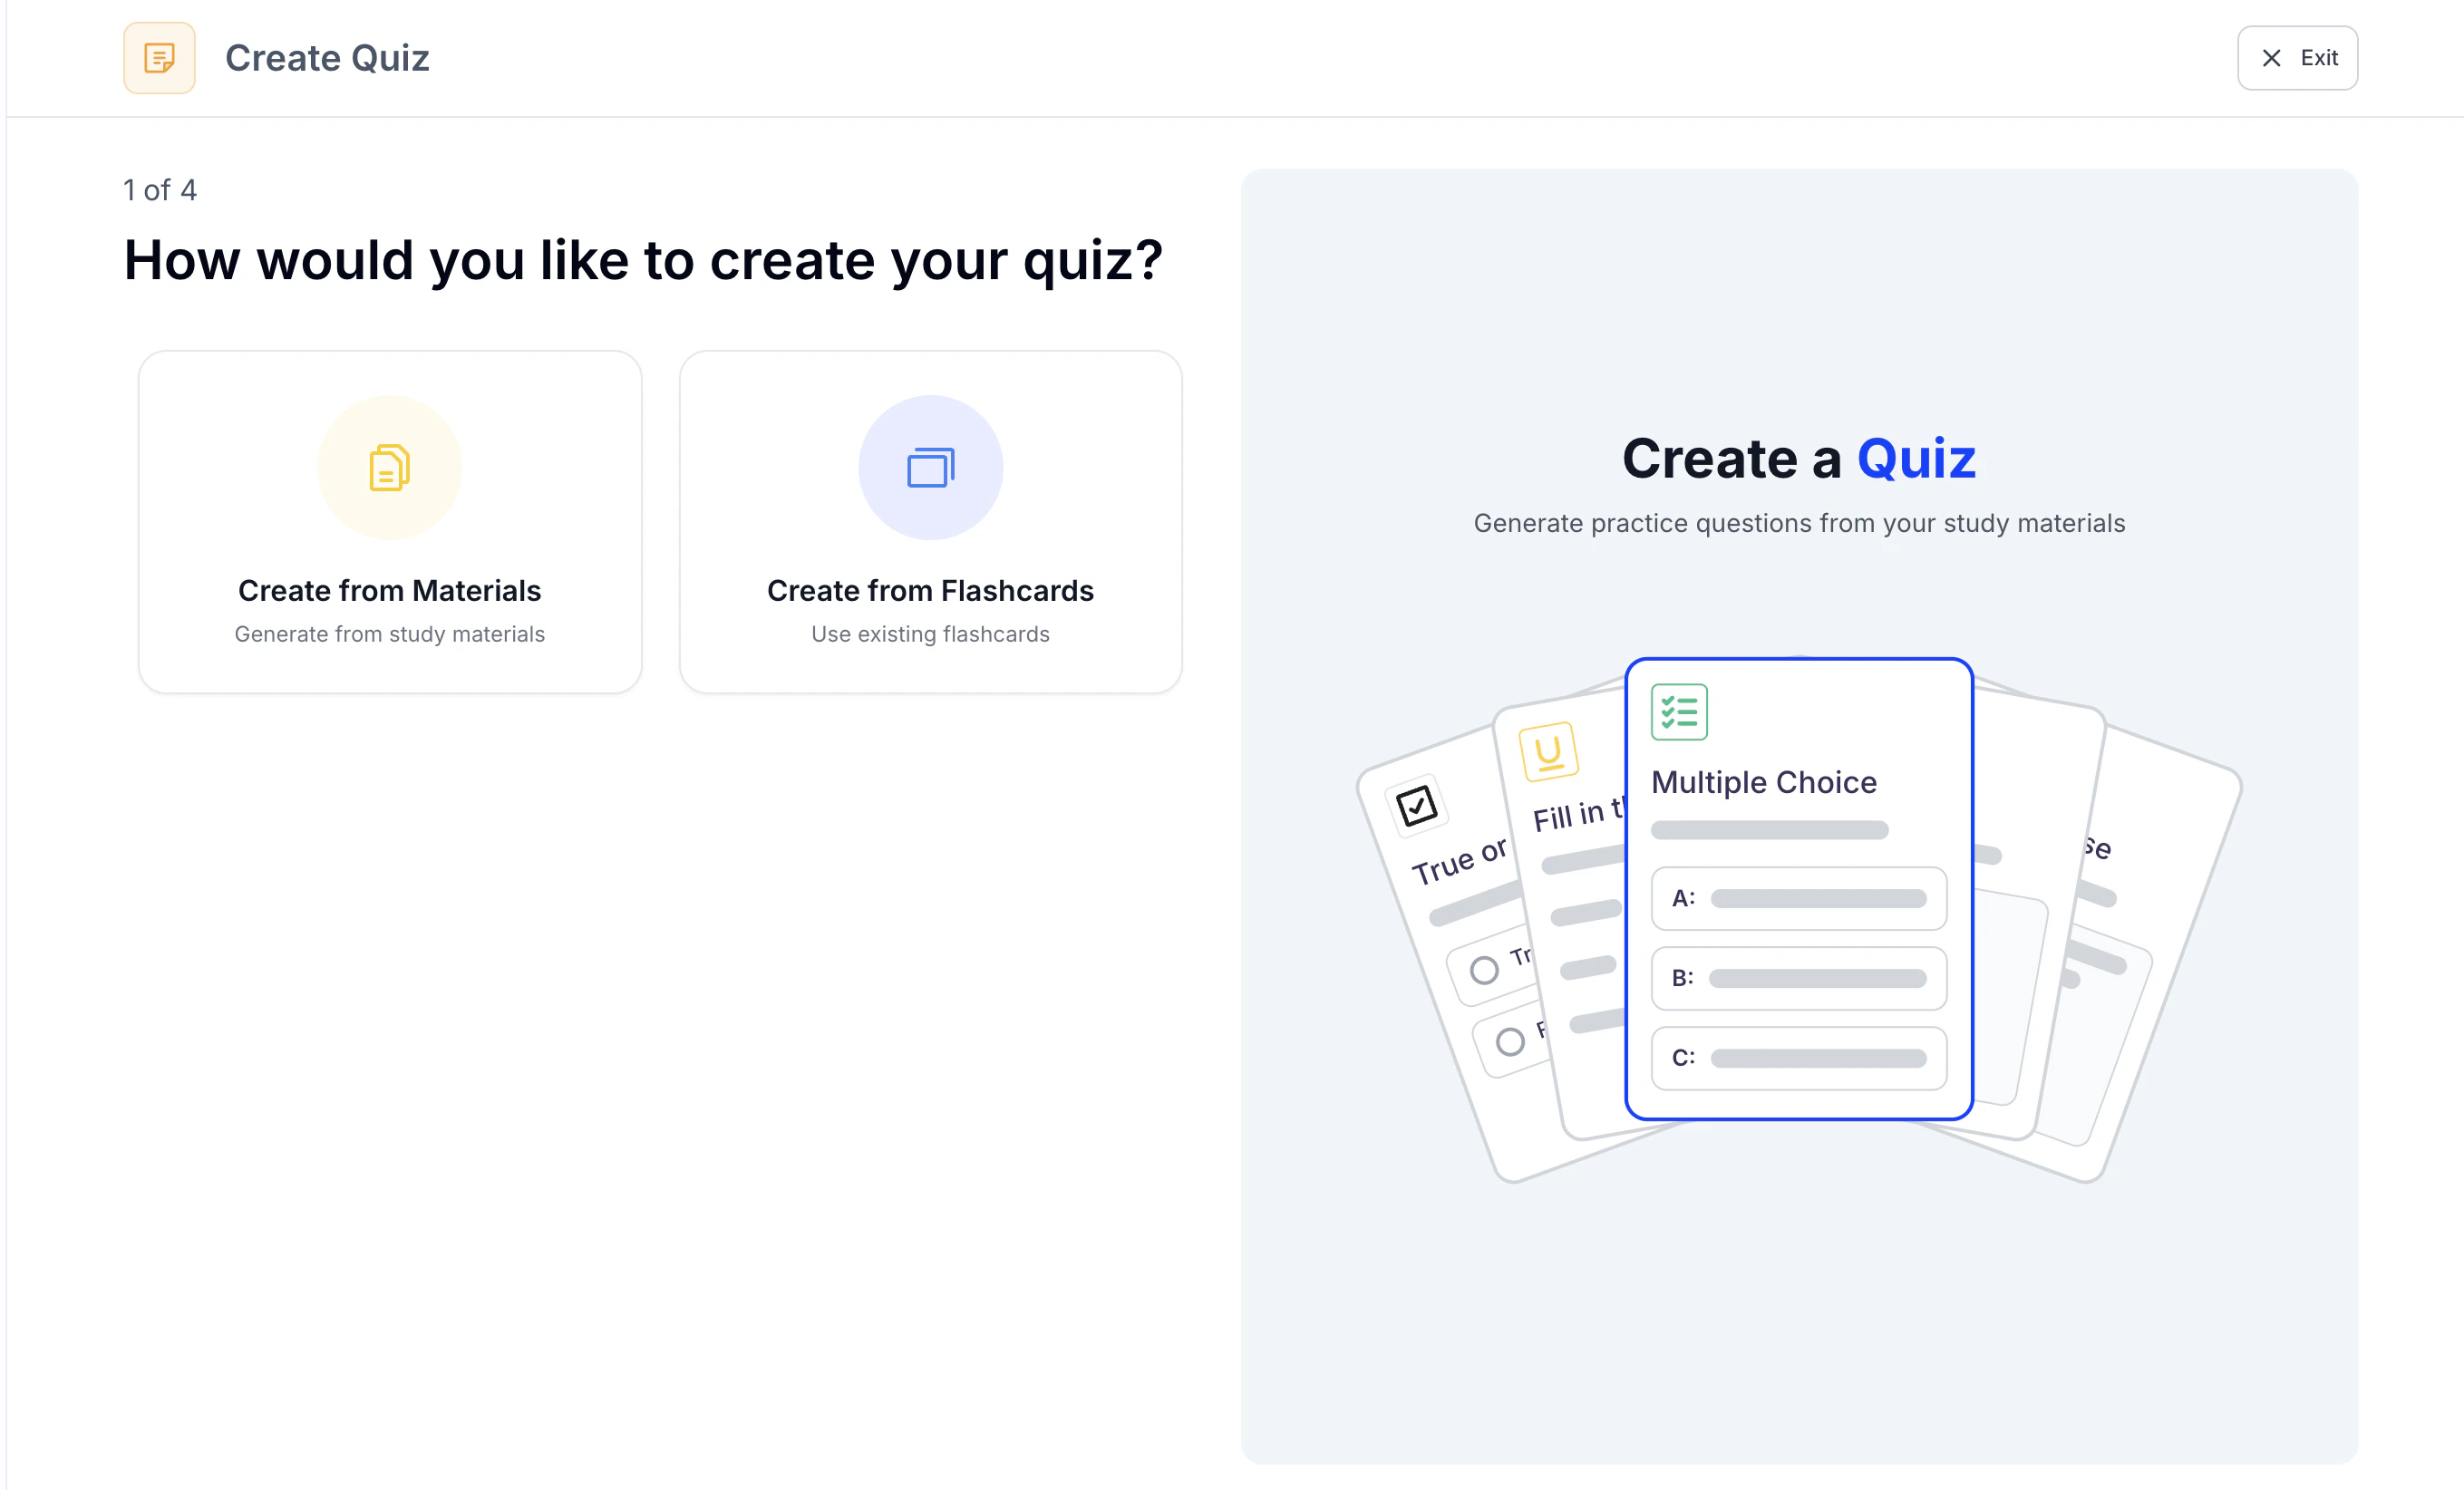
Step 2: Choose the Source
- Next, select how you would like to generate your Quiz. Choose Create from Materials to build a quiz from your study materials, or select Create from Flashcards to generate a quiz from your flashcards.
- Then follow the steps for your selected method below.
Method 1: Create from Materials
- Select Create from Materials if you want to create a quiz from your materials
- Choose which previously uploaded materials you would like to create a quiz from or select + Upload New Material to import material you haven’t uploaded, and click Next
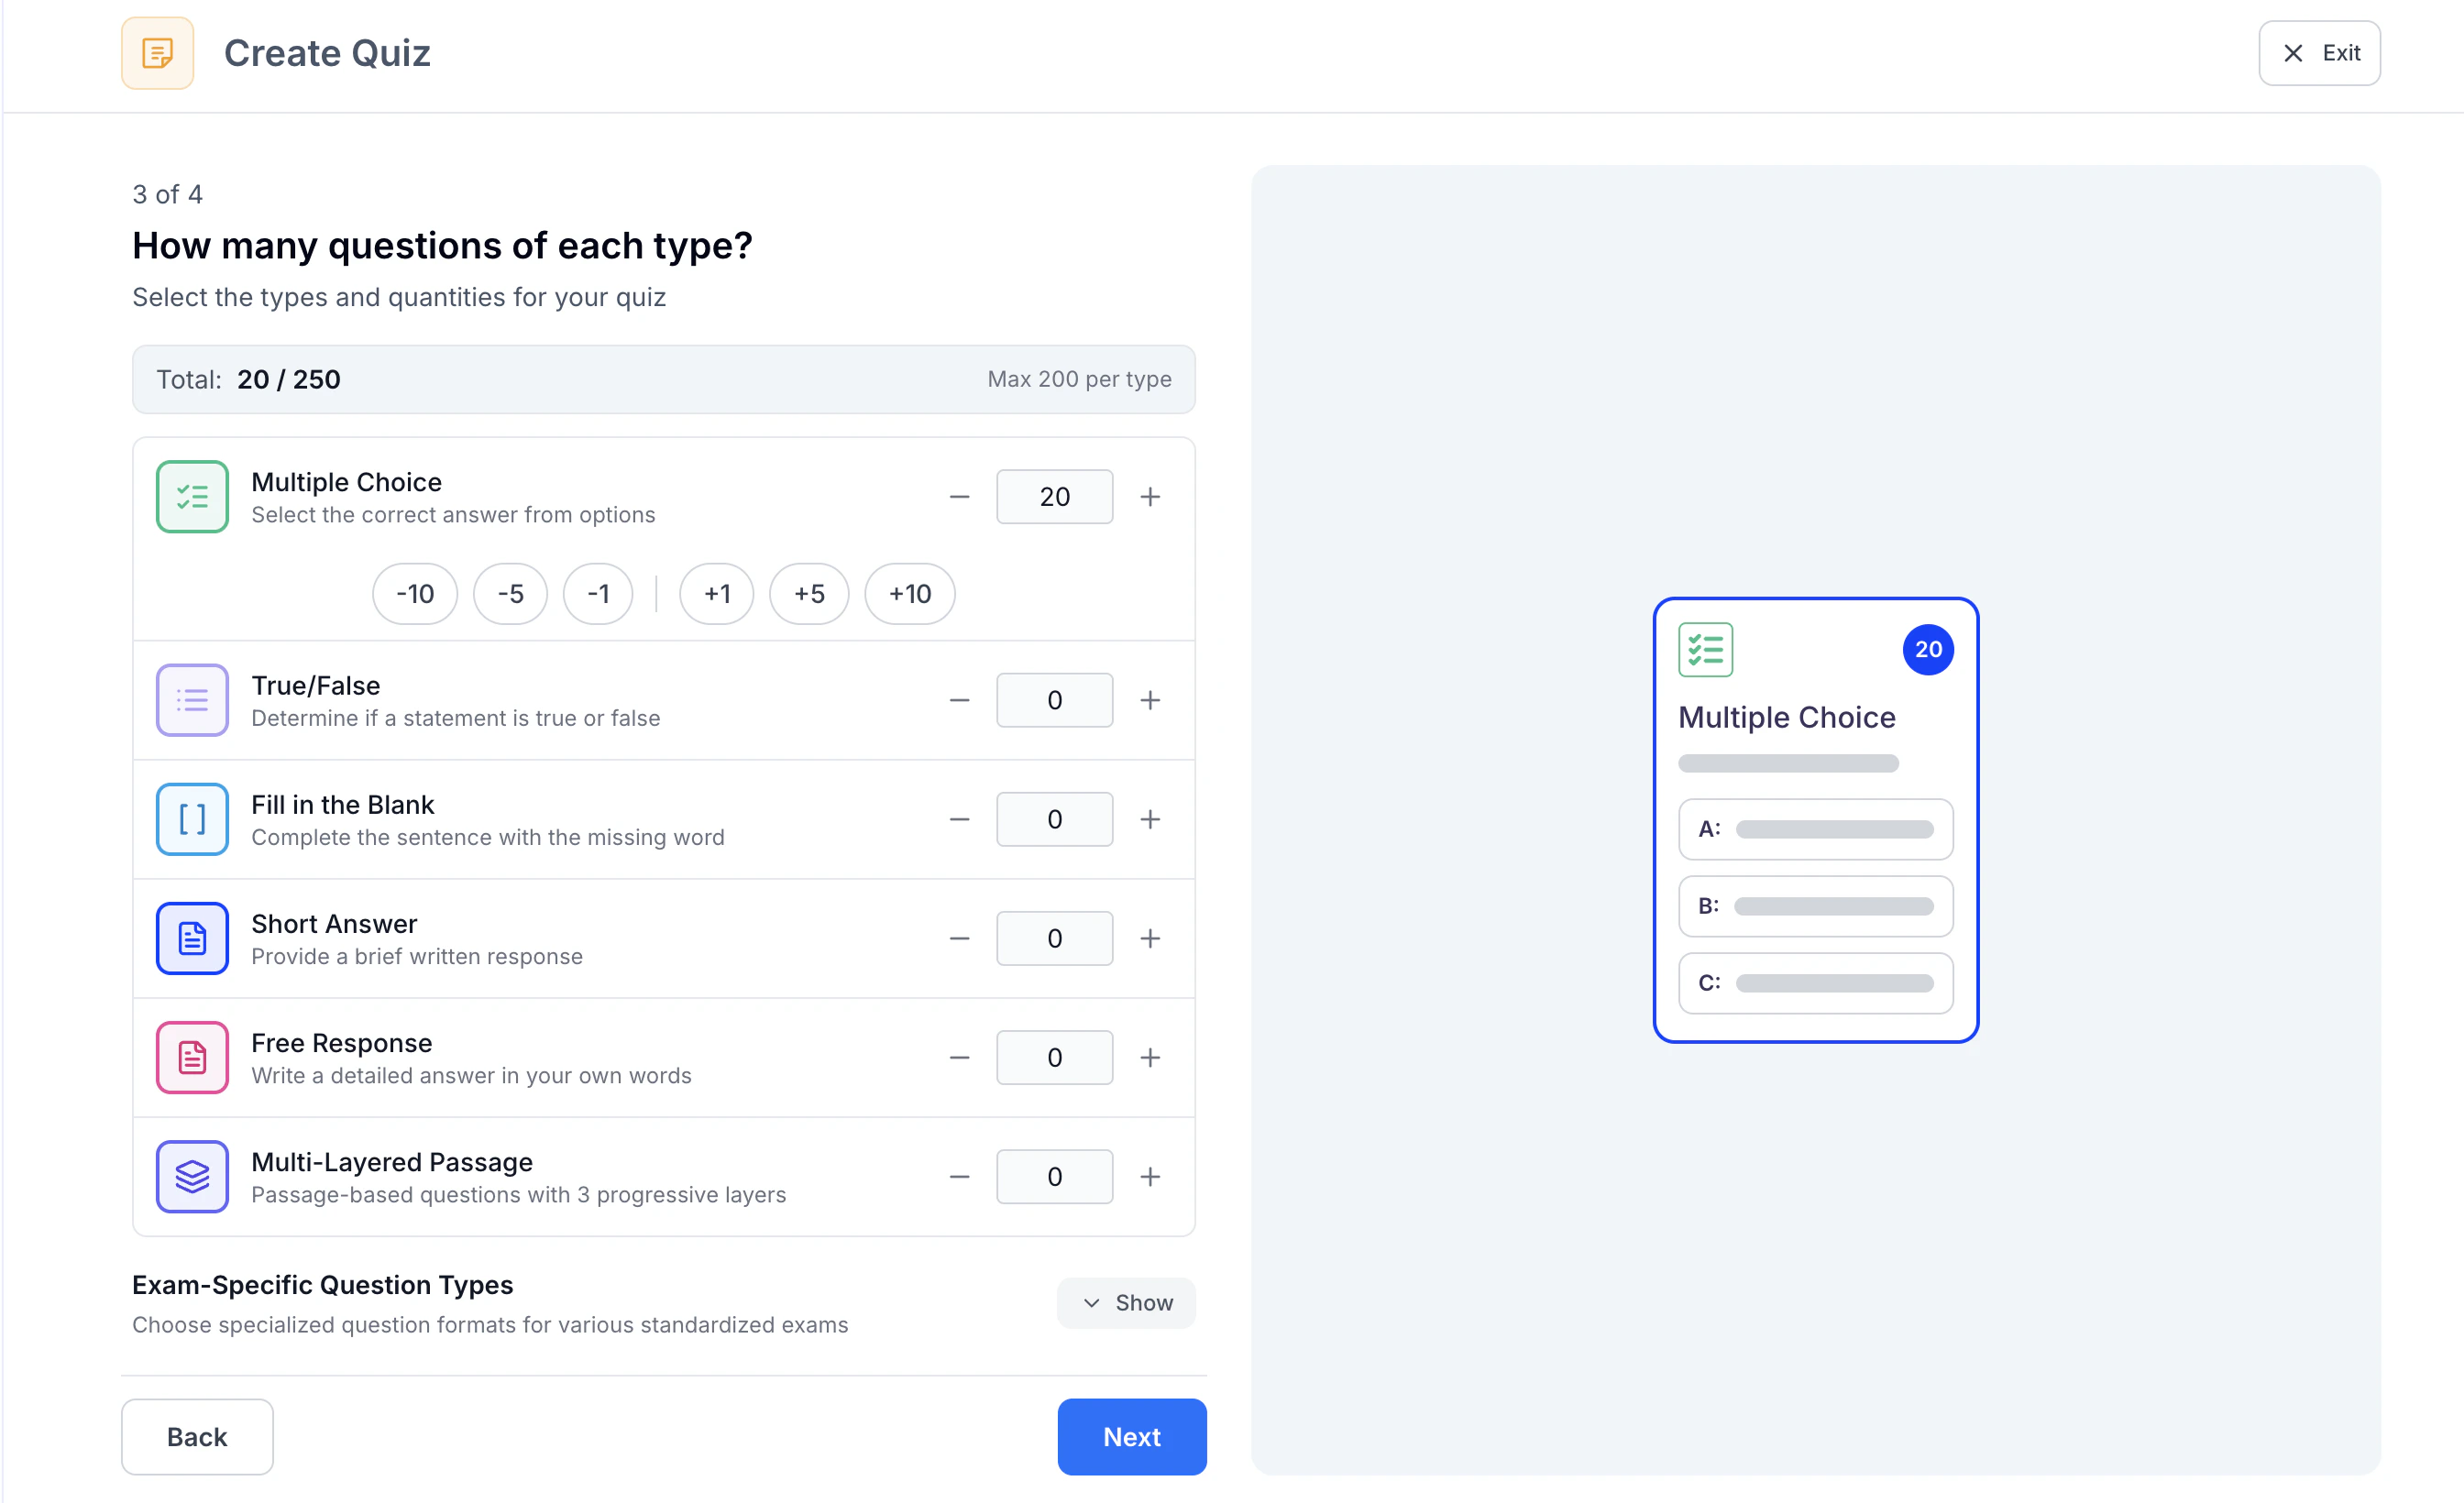
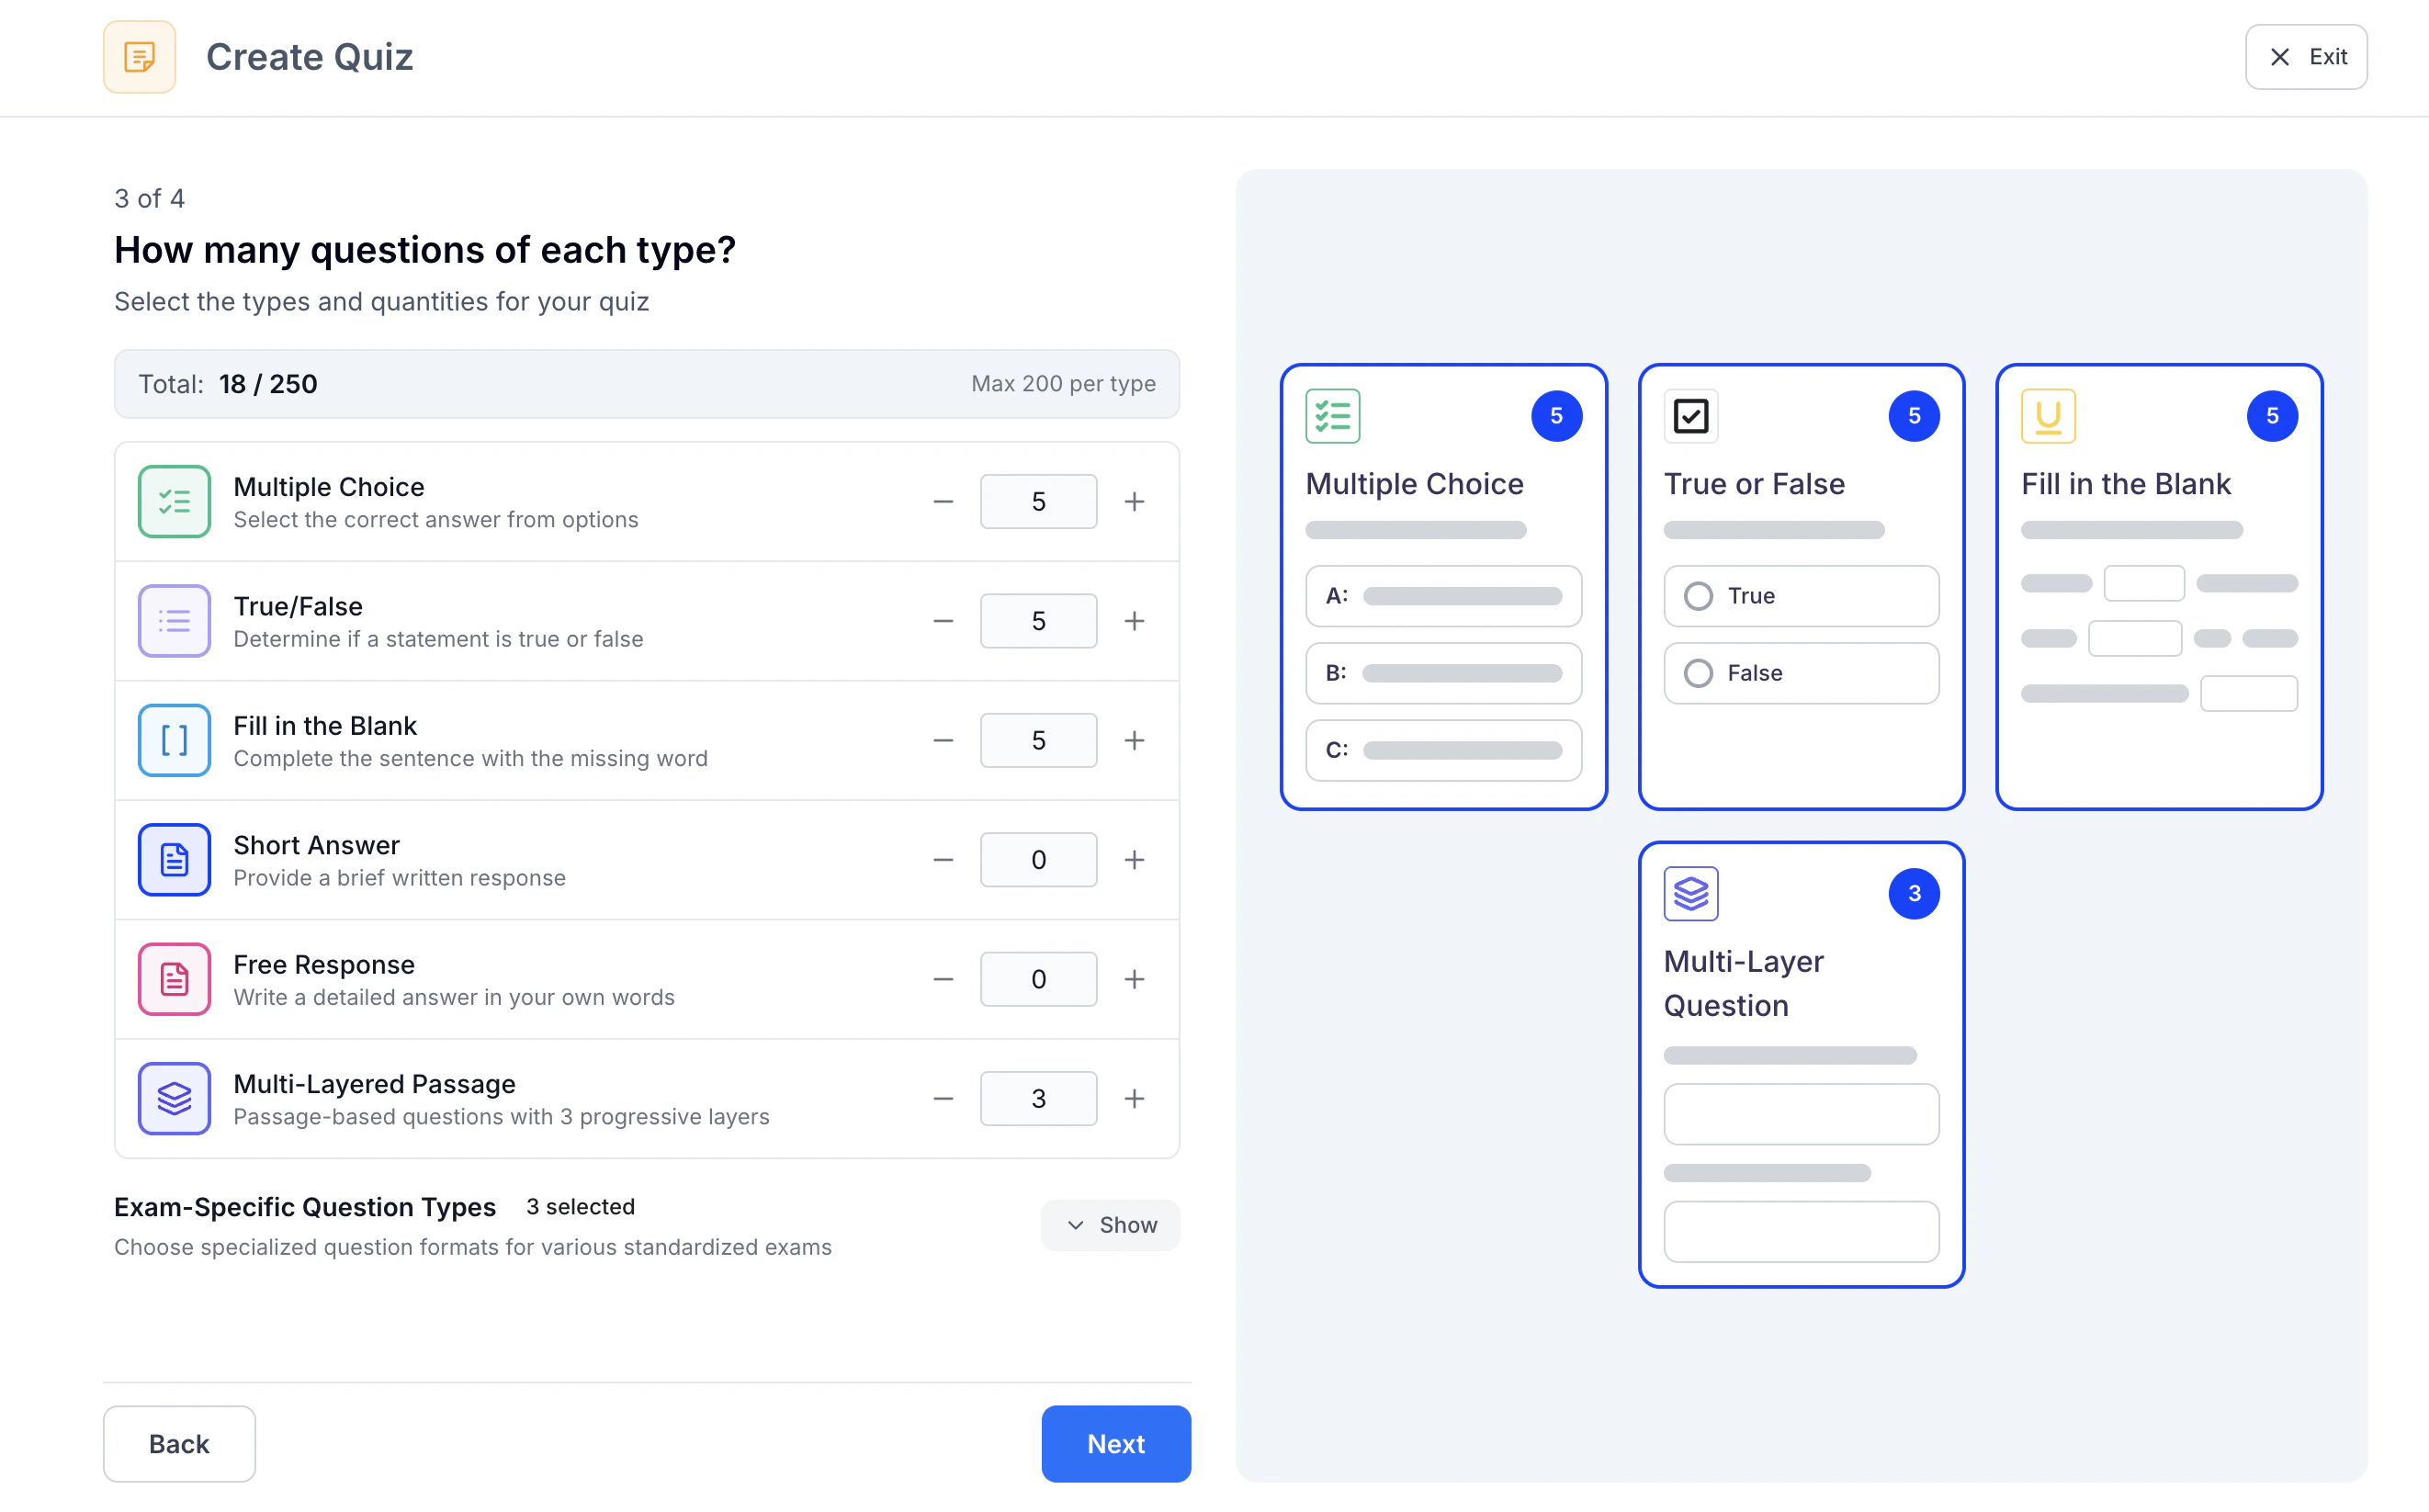
- Next, customize your quiz by selecting the desired number of questions for each format, including Multiple Choice, True/False, Fill in the Blank, Short Answer, Free Response, and Multi-Layered Passage. To adjust the number of questions, use the – and + buttons within each question type. For faster adjustments, select one of the preset options to add or remove multiple questions at once.
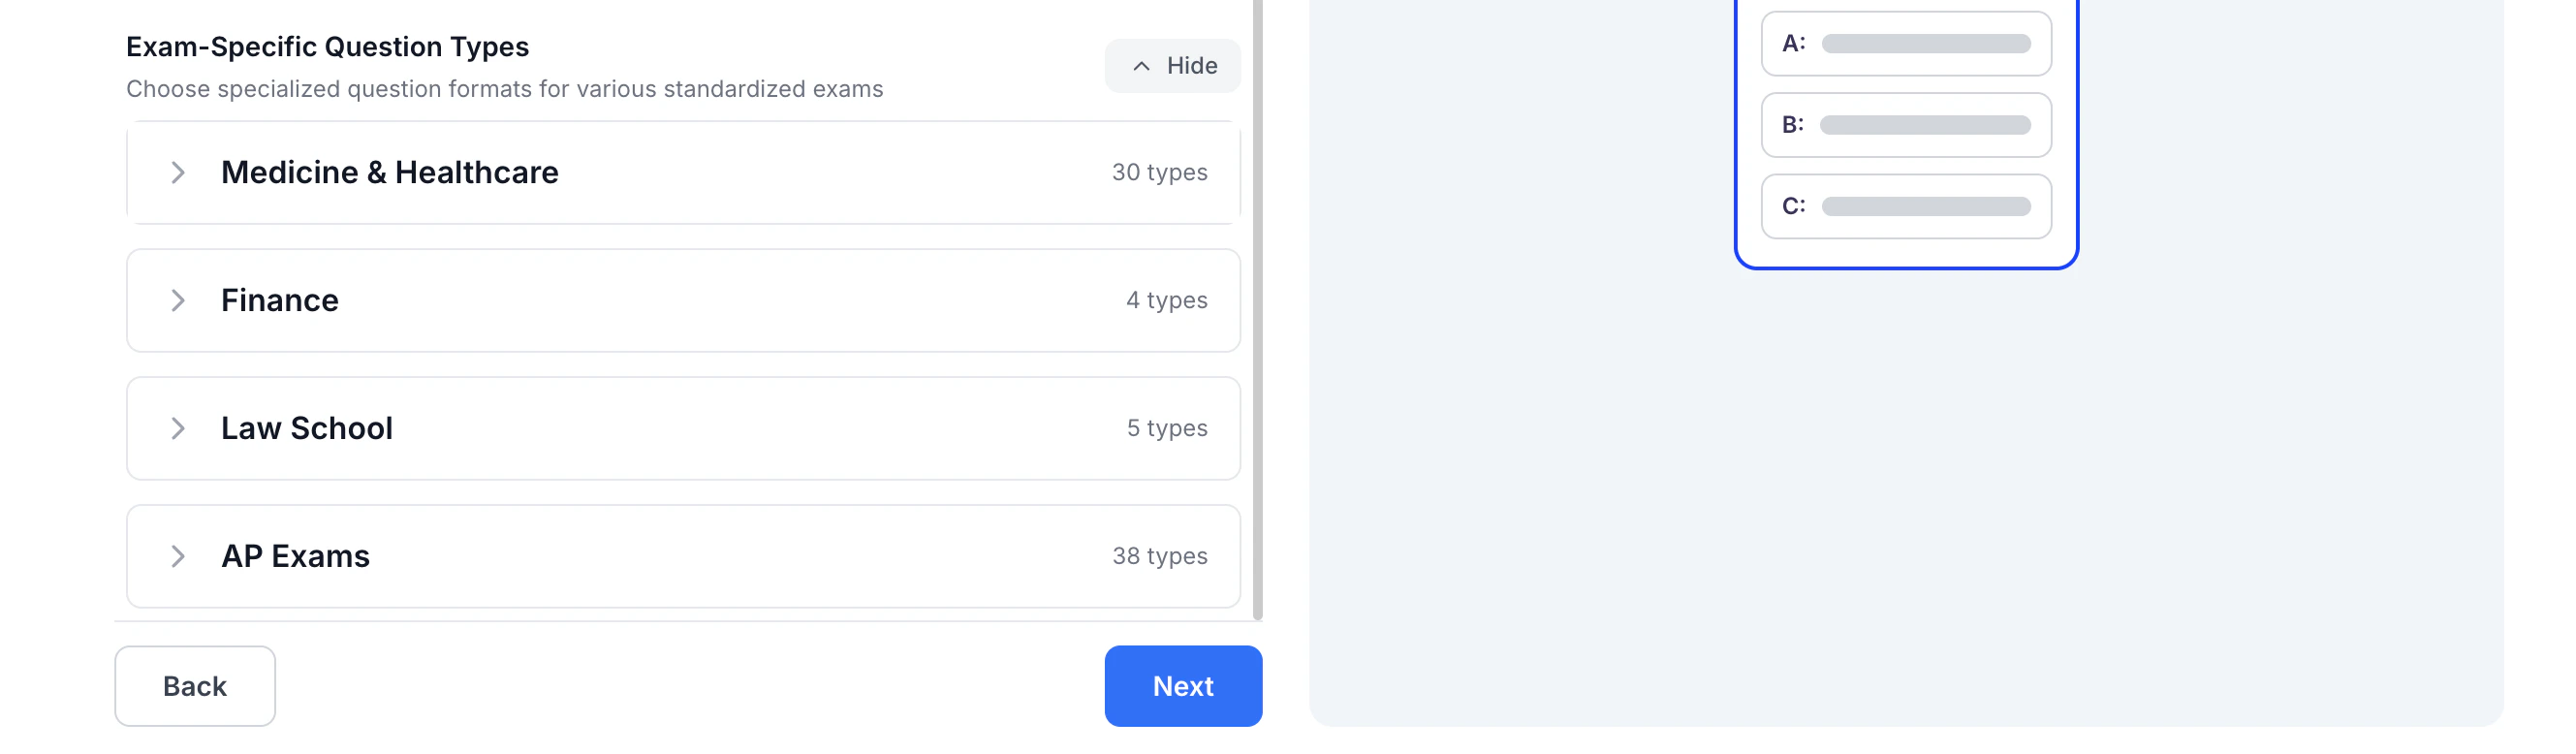
- Under Exam-Specific Question Types, you can choose the exam you are preparing for (e.g., USMLE Step 1, MCAT, NCLEX, AP Exams, and more) to generate questions that align with real exam formats.
For more details, see Exam-Specific Question Types.
- Each selected question type will appear in its own box on the right-hand side, with the number of questions displayed in a blue circle in the top-right corner.
When you are finished making your selections, click Next.
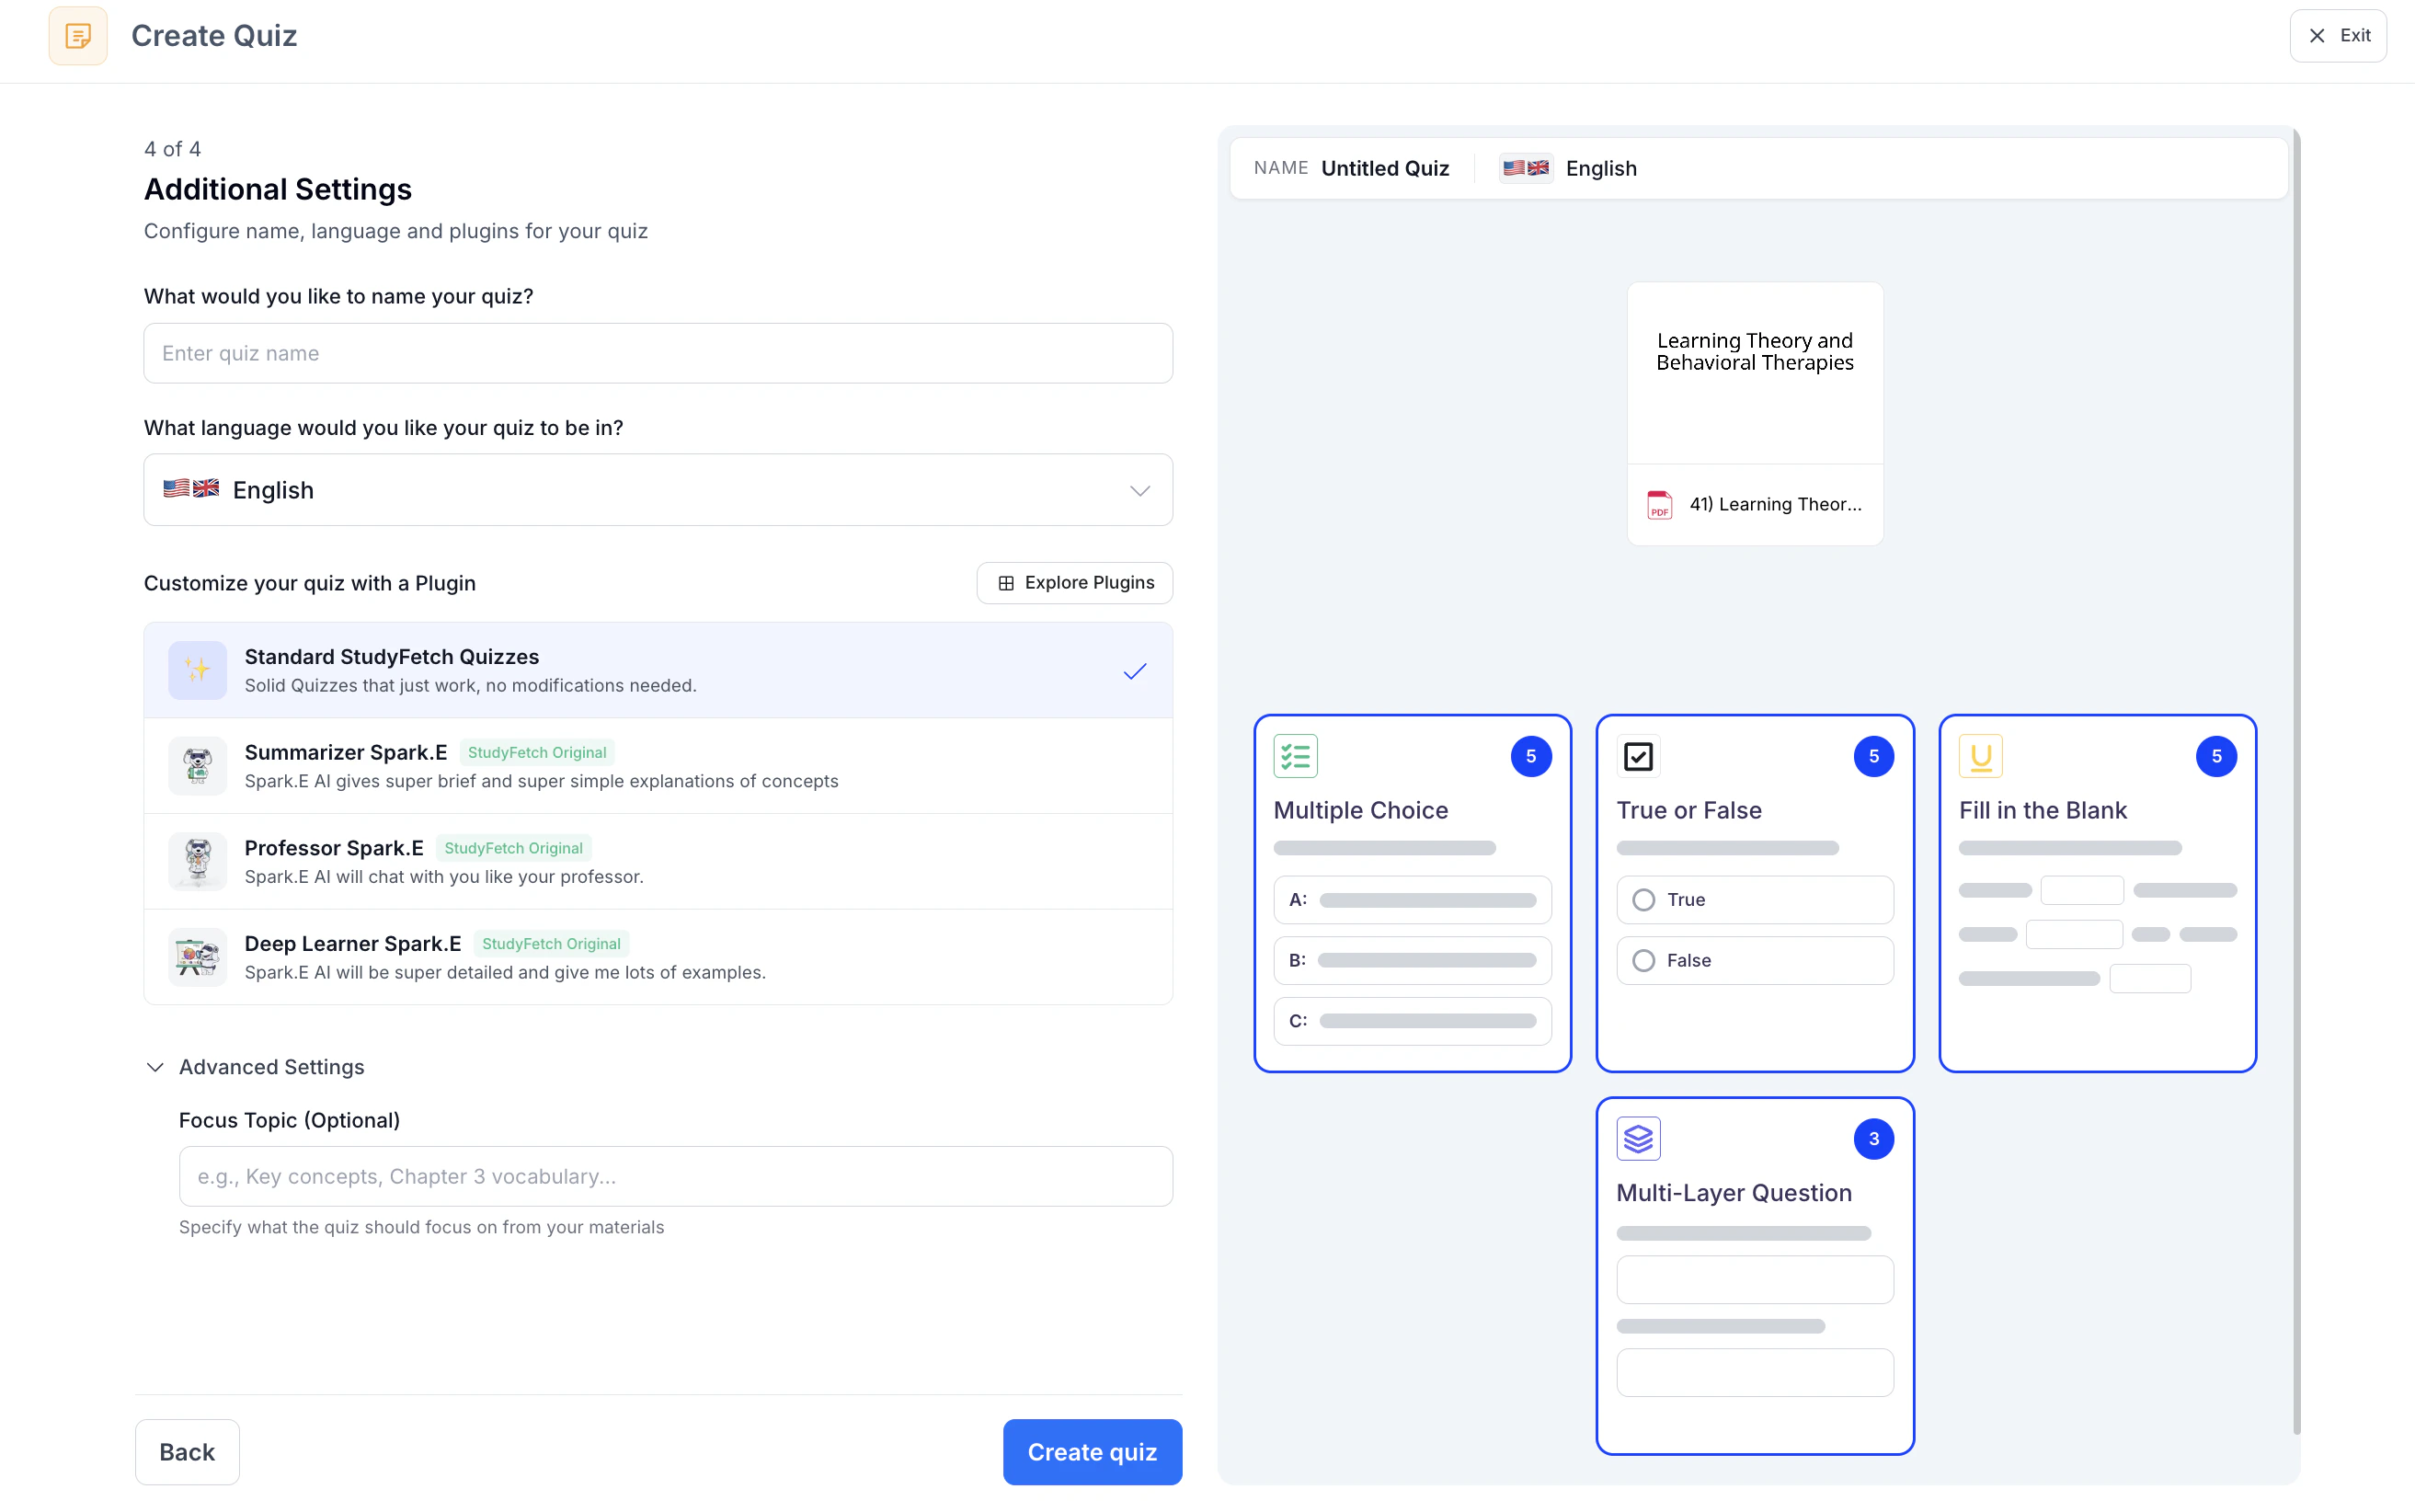
- Now you can add additional optional settings:
Name your Quiz by typing in the box under What would you like to name your quiz? If you leave this blank, don’t worry, we will name your quiz for you.
Choose the language you want your quiz to be in by clicking the box under What language would you like your quiz to be in? and selecting your preferred language from the list.
Select a customization plugin by selecting one from the list under Customize your quiz with a Plugin or click Explore Plugins to use a plugin not listed or create your own.
To ensure your quiz is tailored to your learning goals, specify a focus topic in the box under Focus Topic (optional)
- Lastly, select Create quiz and StudyFetch will automatically generate your customized quiz!
Method 2: Create from Flashcards
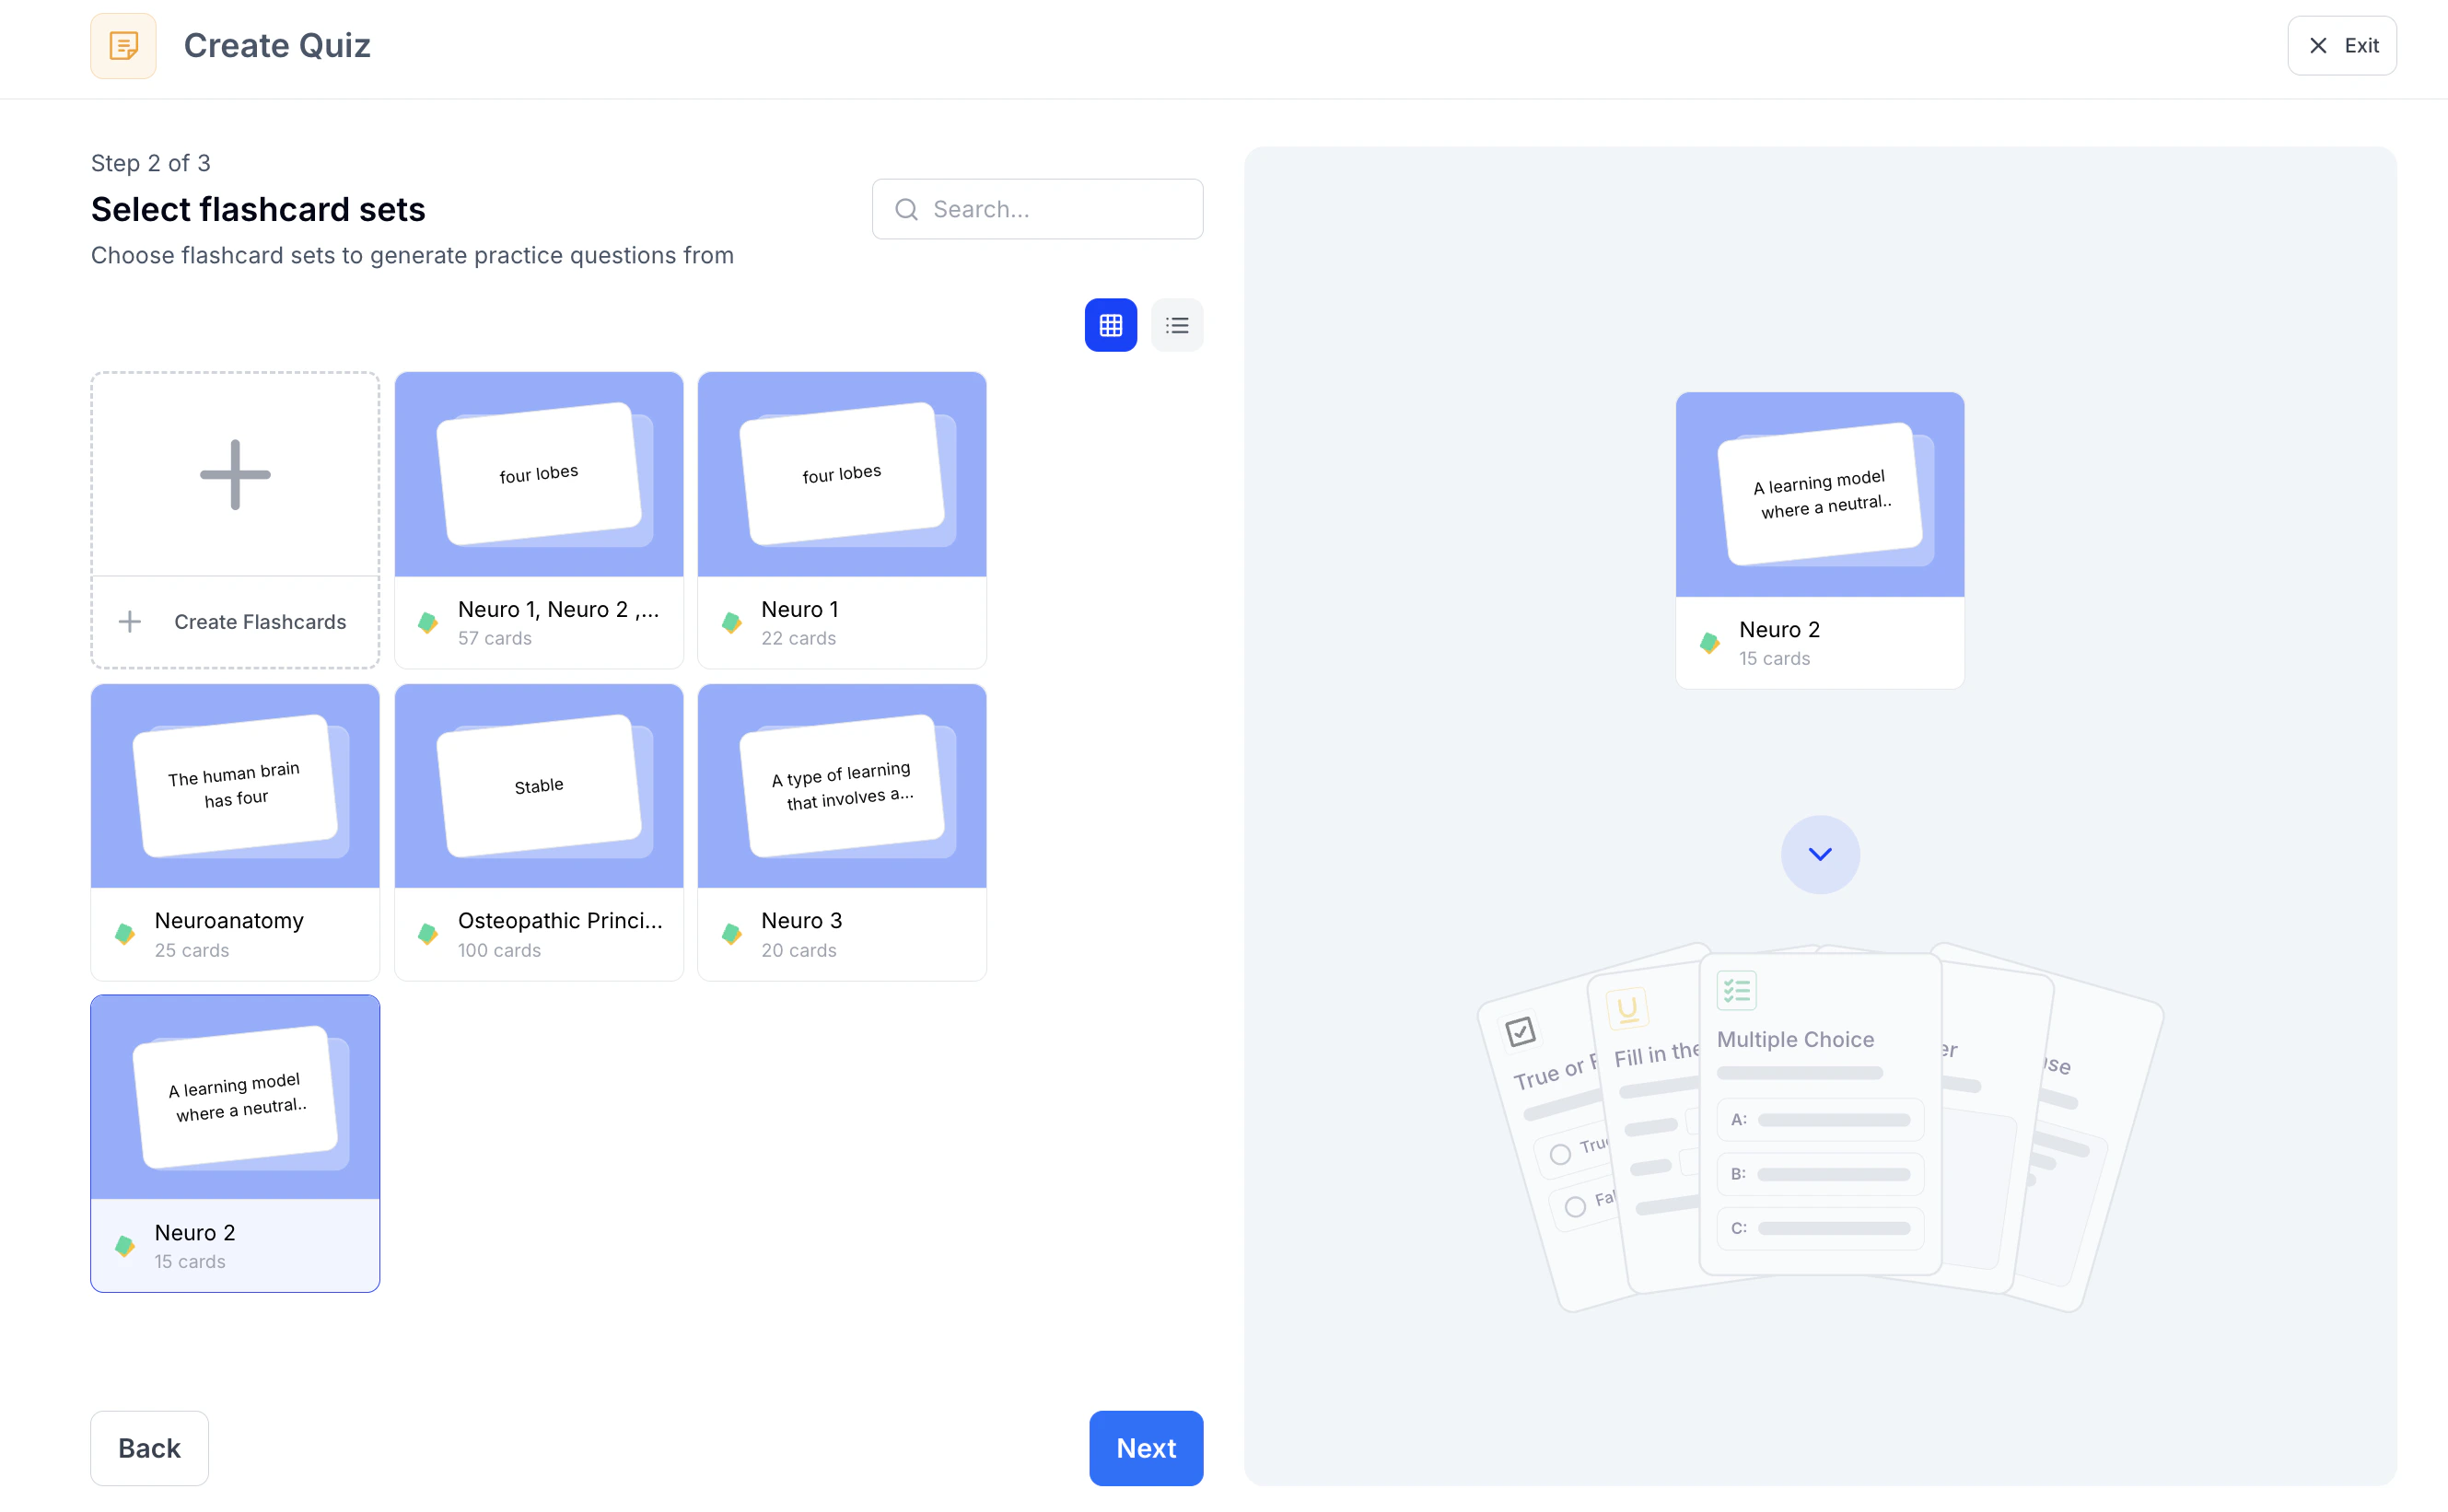
- Select Create from Flashcards if you want to create a quiz from your flashcards
- Choose the existing flashcard set(s) you want to use for your QuizFetch, or select + Create Flashcards to generate a new set. Once your selection is complete, click Next to continue.
- Name your Quiz by typing in the box under What would you like to name your quiz? If you leave this blank, don’t worry, we will name your QuizFetch for you.
Creating a quiz from flashcards automatically generates a 20-question multiple choice quiz. For more advanced customization options, use the Create from Materials method.
- Lastly, select Create quiz and StudyFetch will automatically generate your customized quiz!
Taking Your Quiz
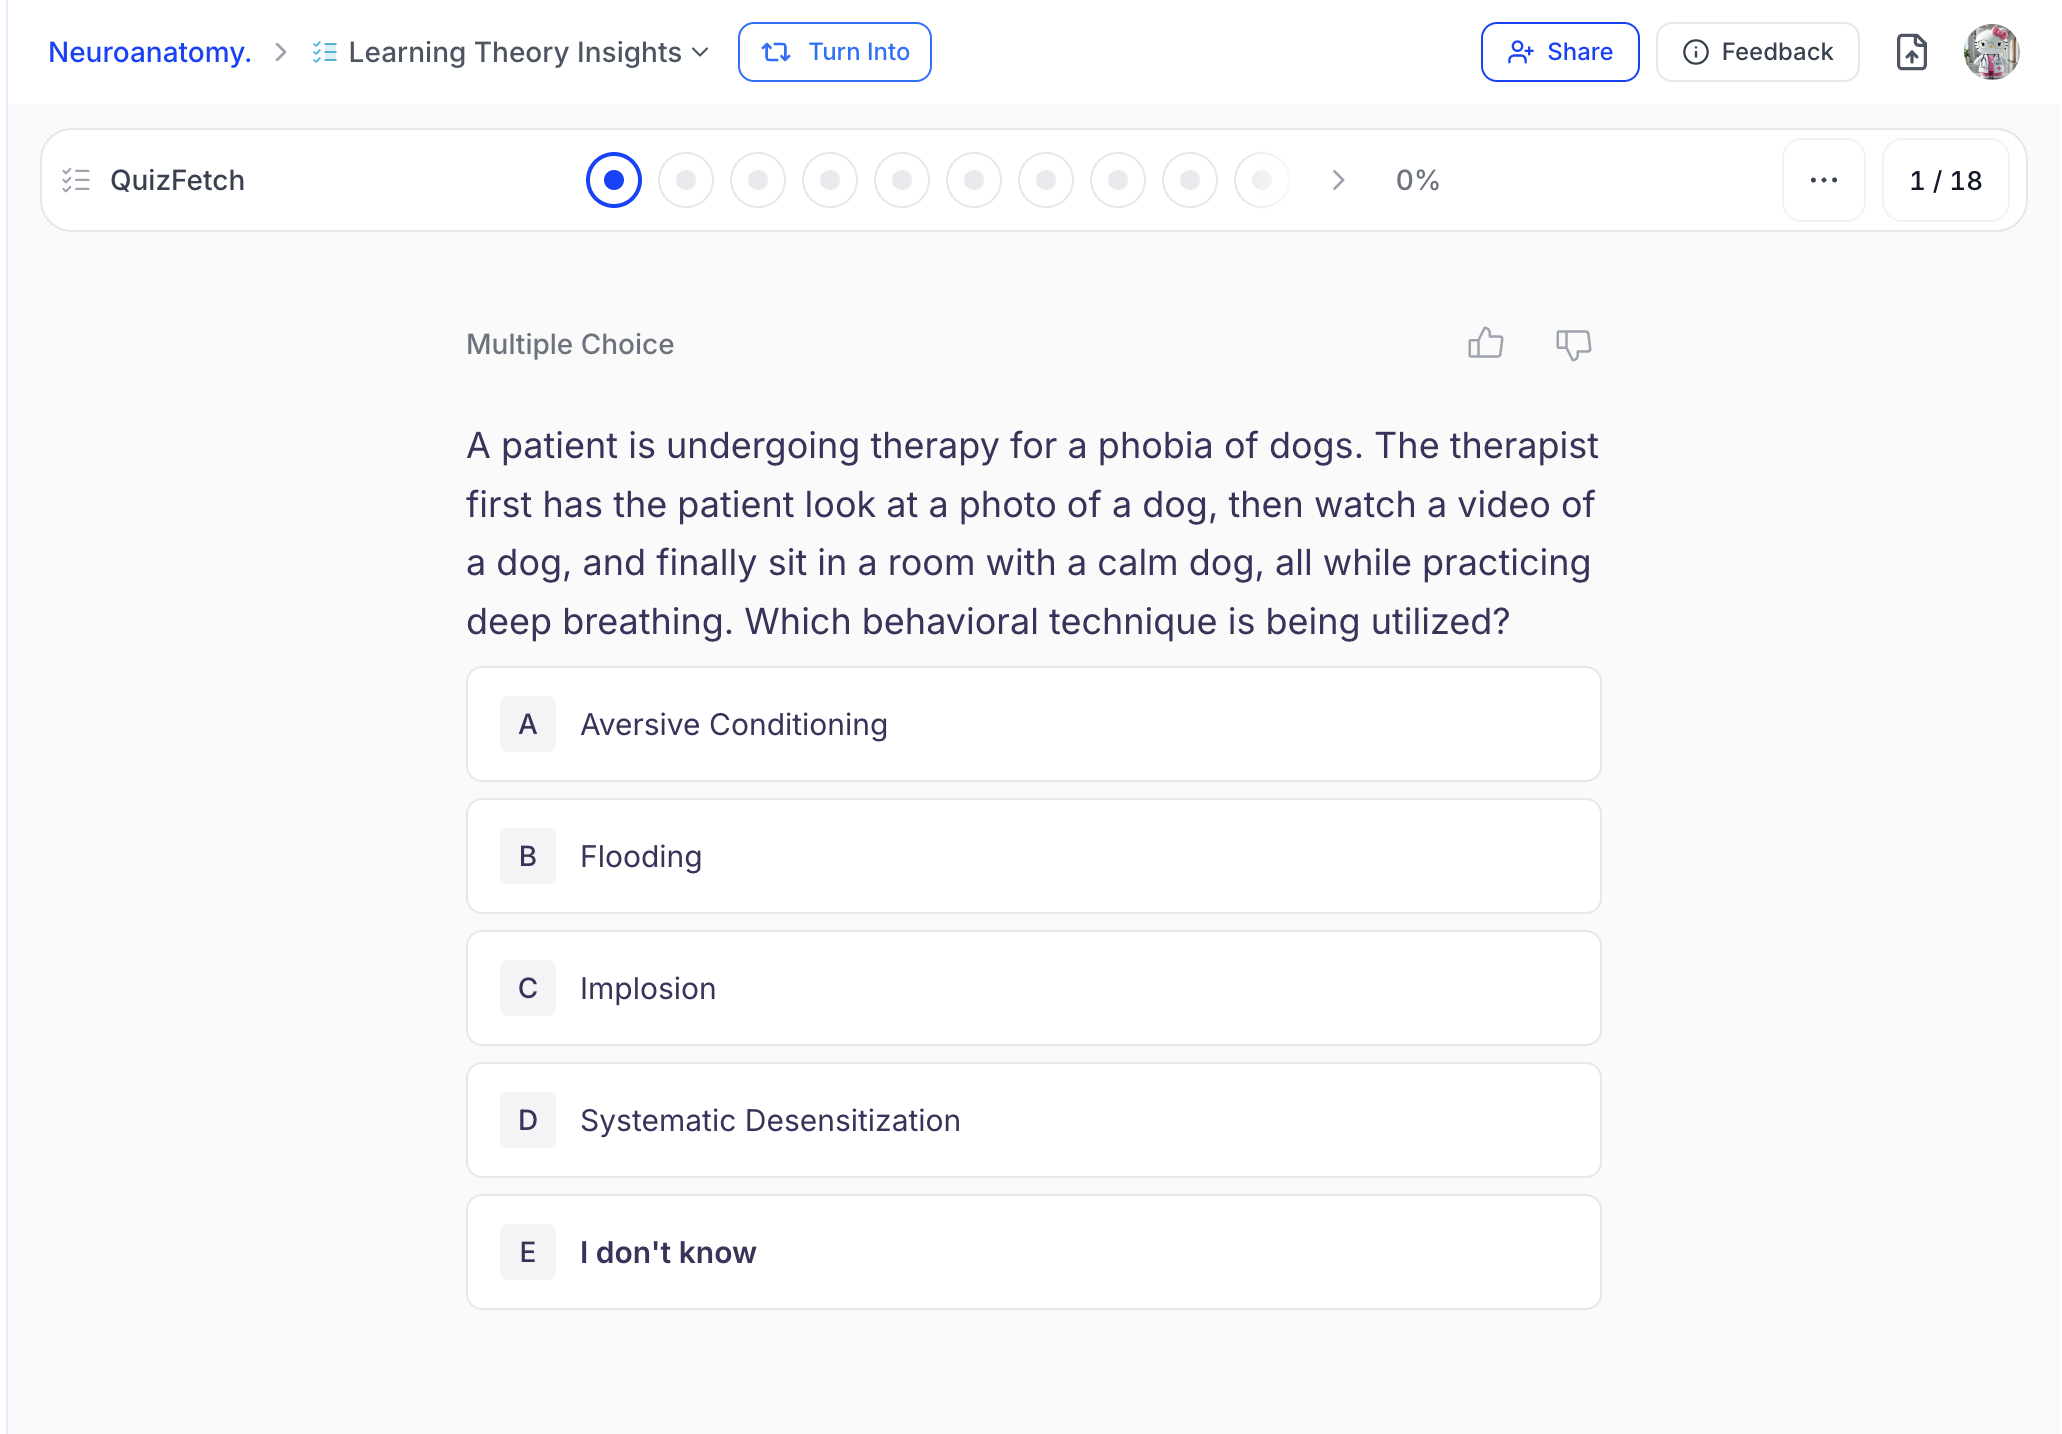
Step 1: Select an Answer
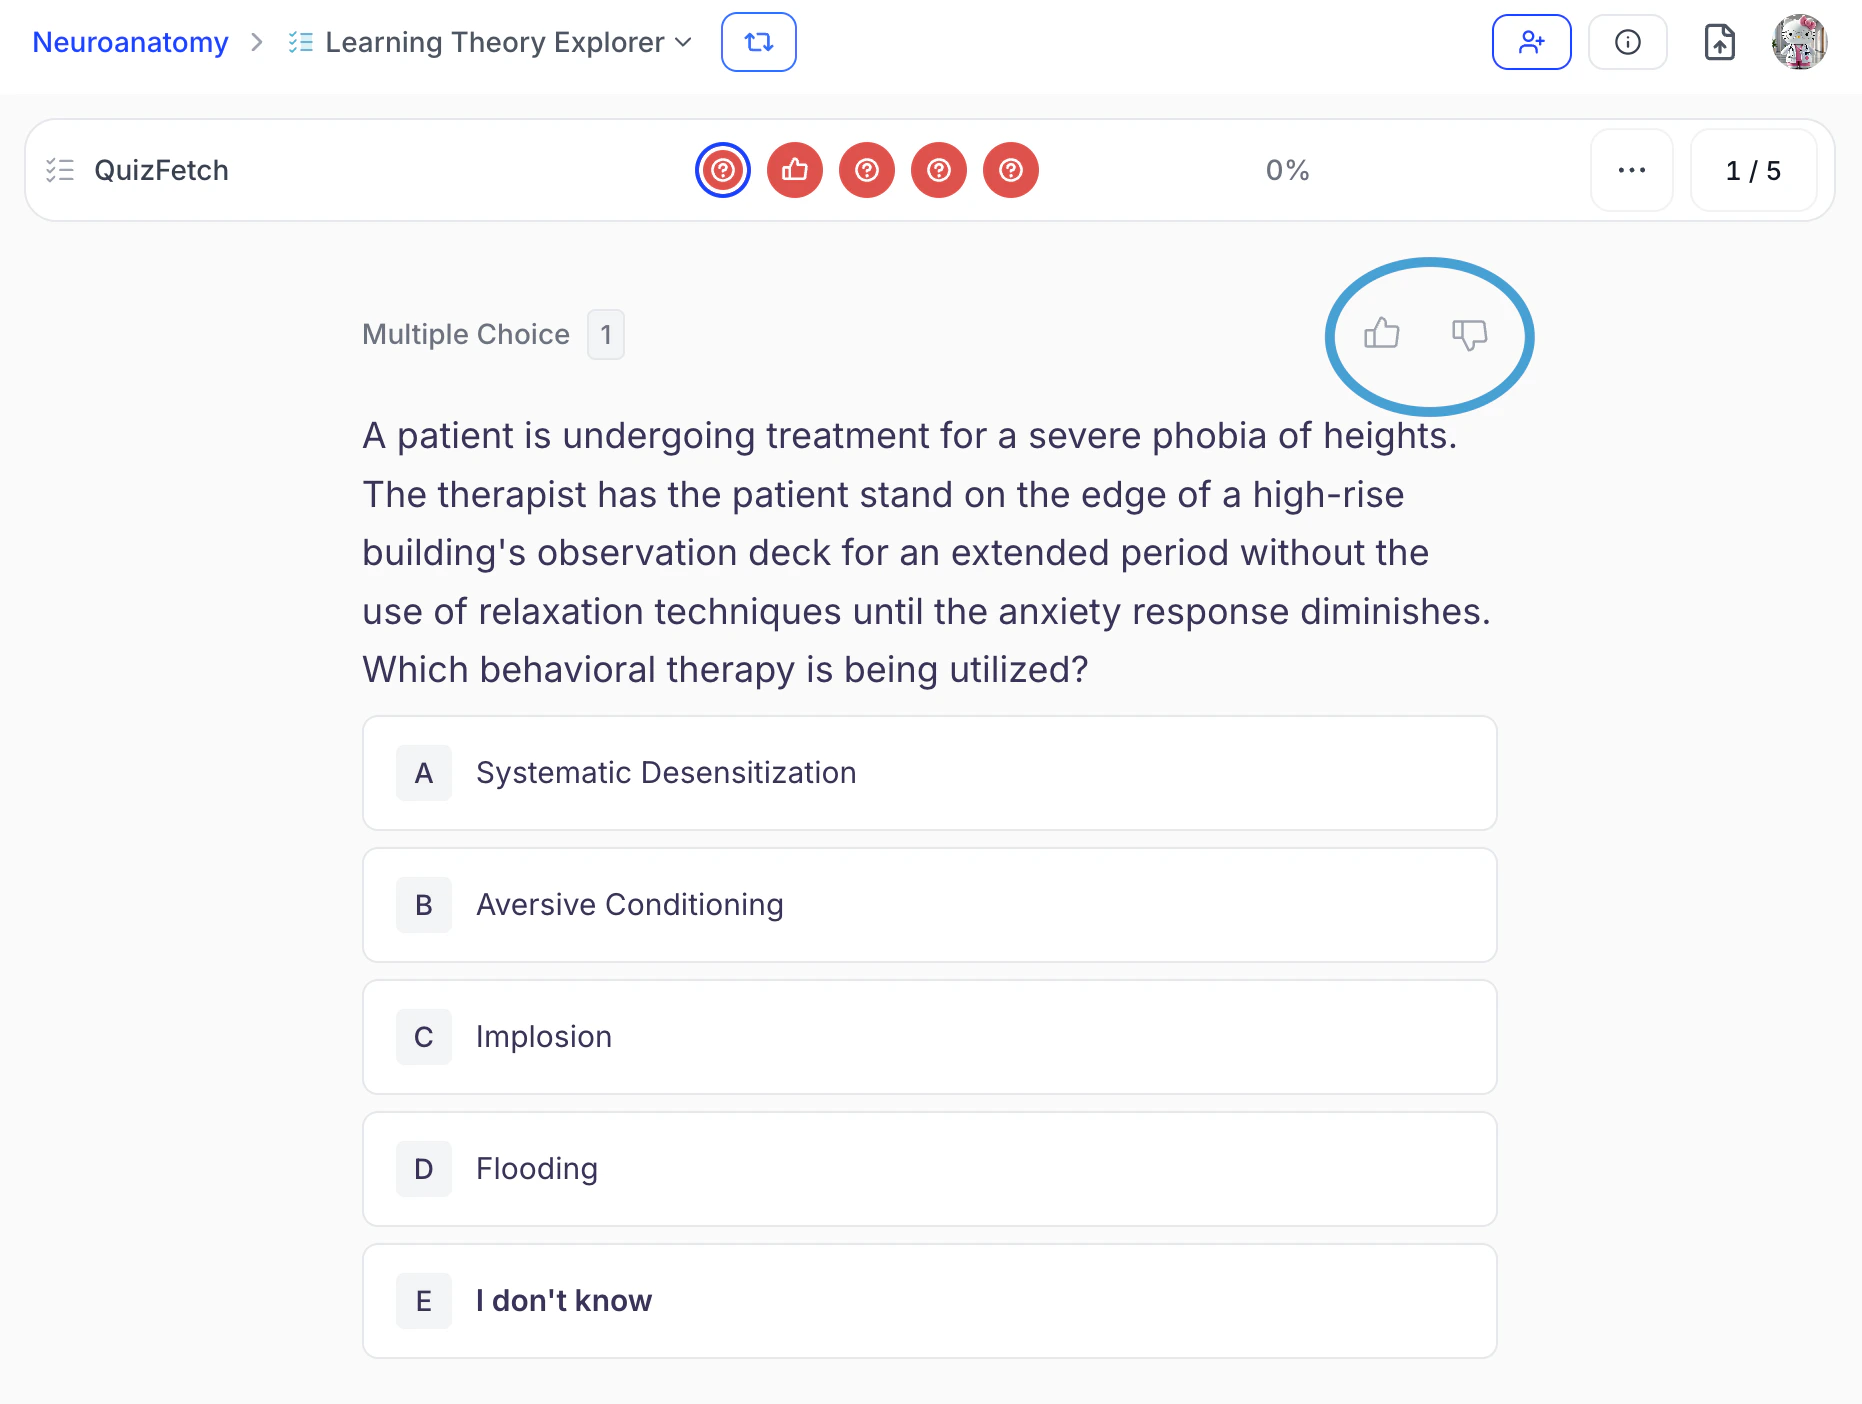
Choose your answer by selecting an option or typing your response in the answer field when indicated.
- For faster navigation on multiple-choice questions, you can either click the desired option or press the corresponding letter key on your keyboard (for example, press C to select option C).
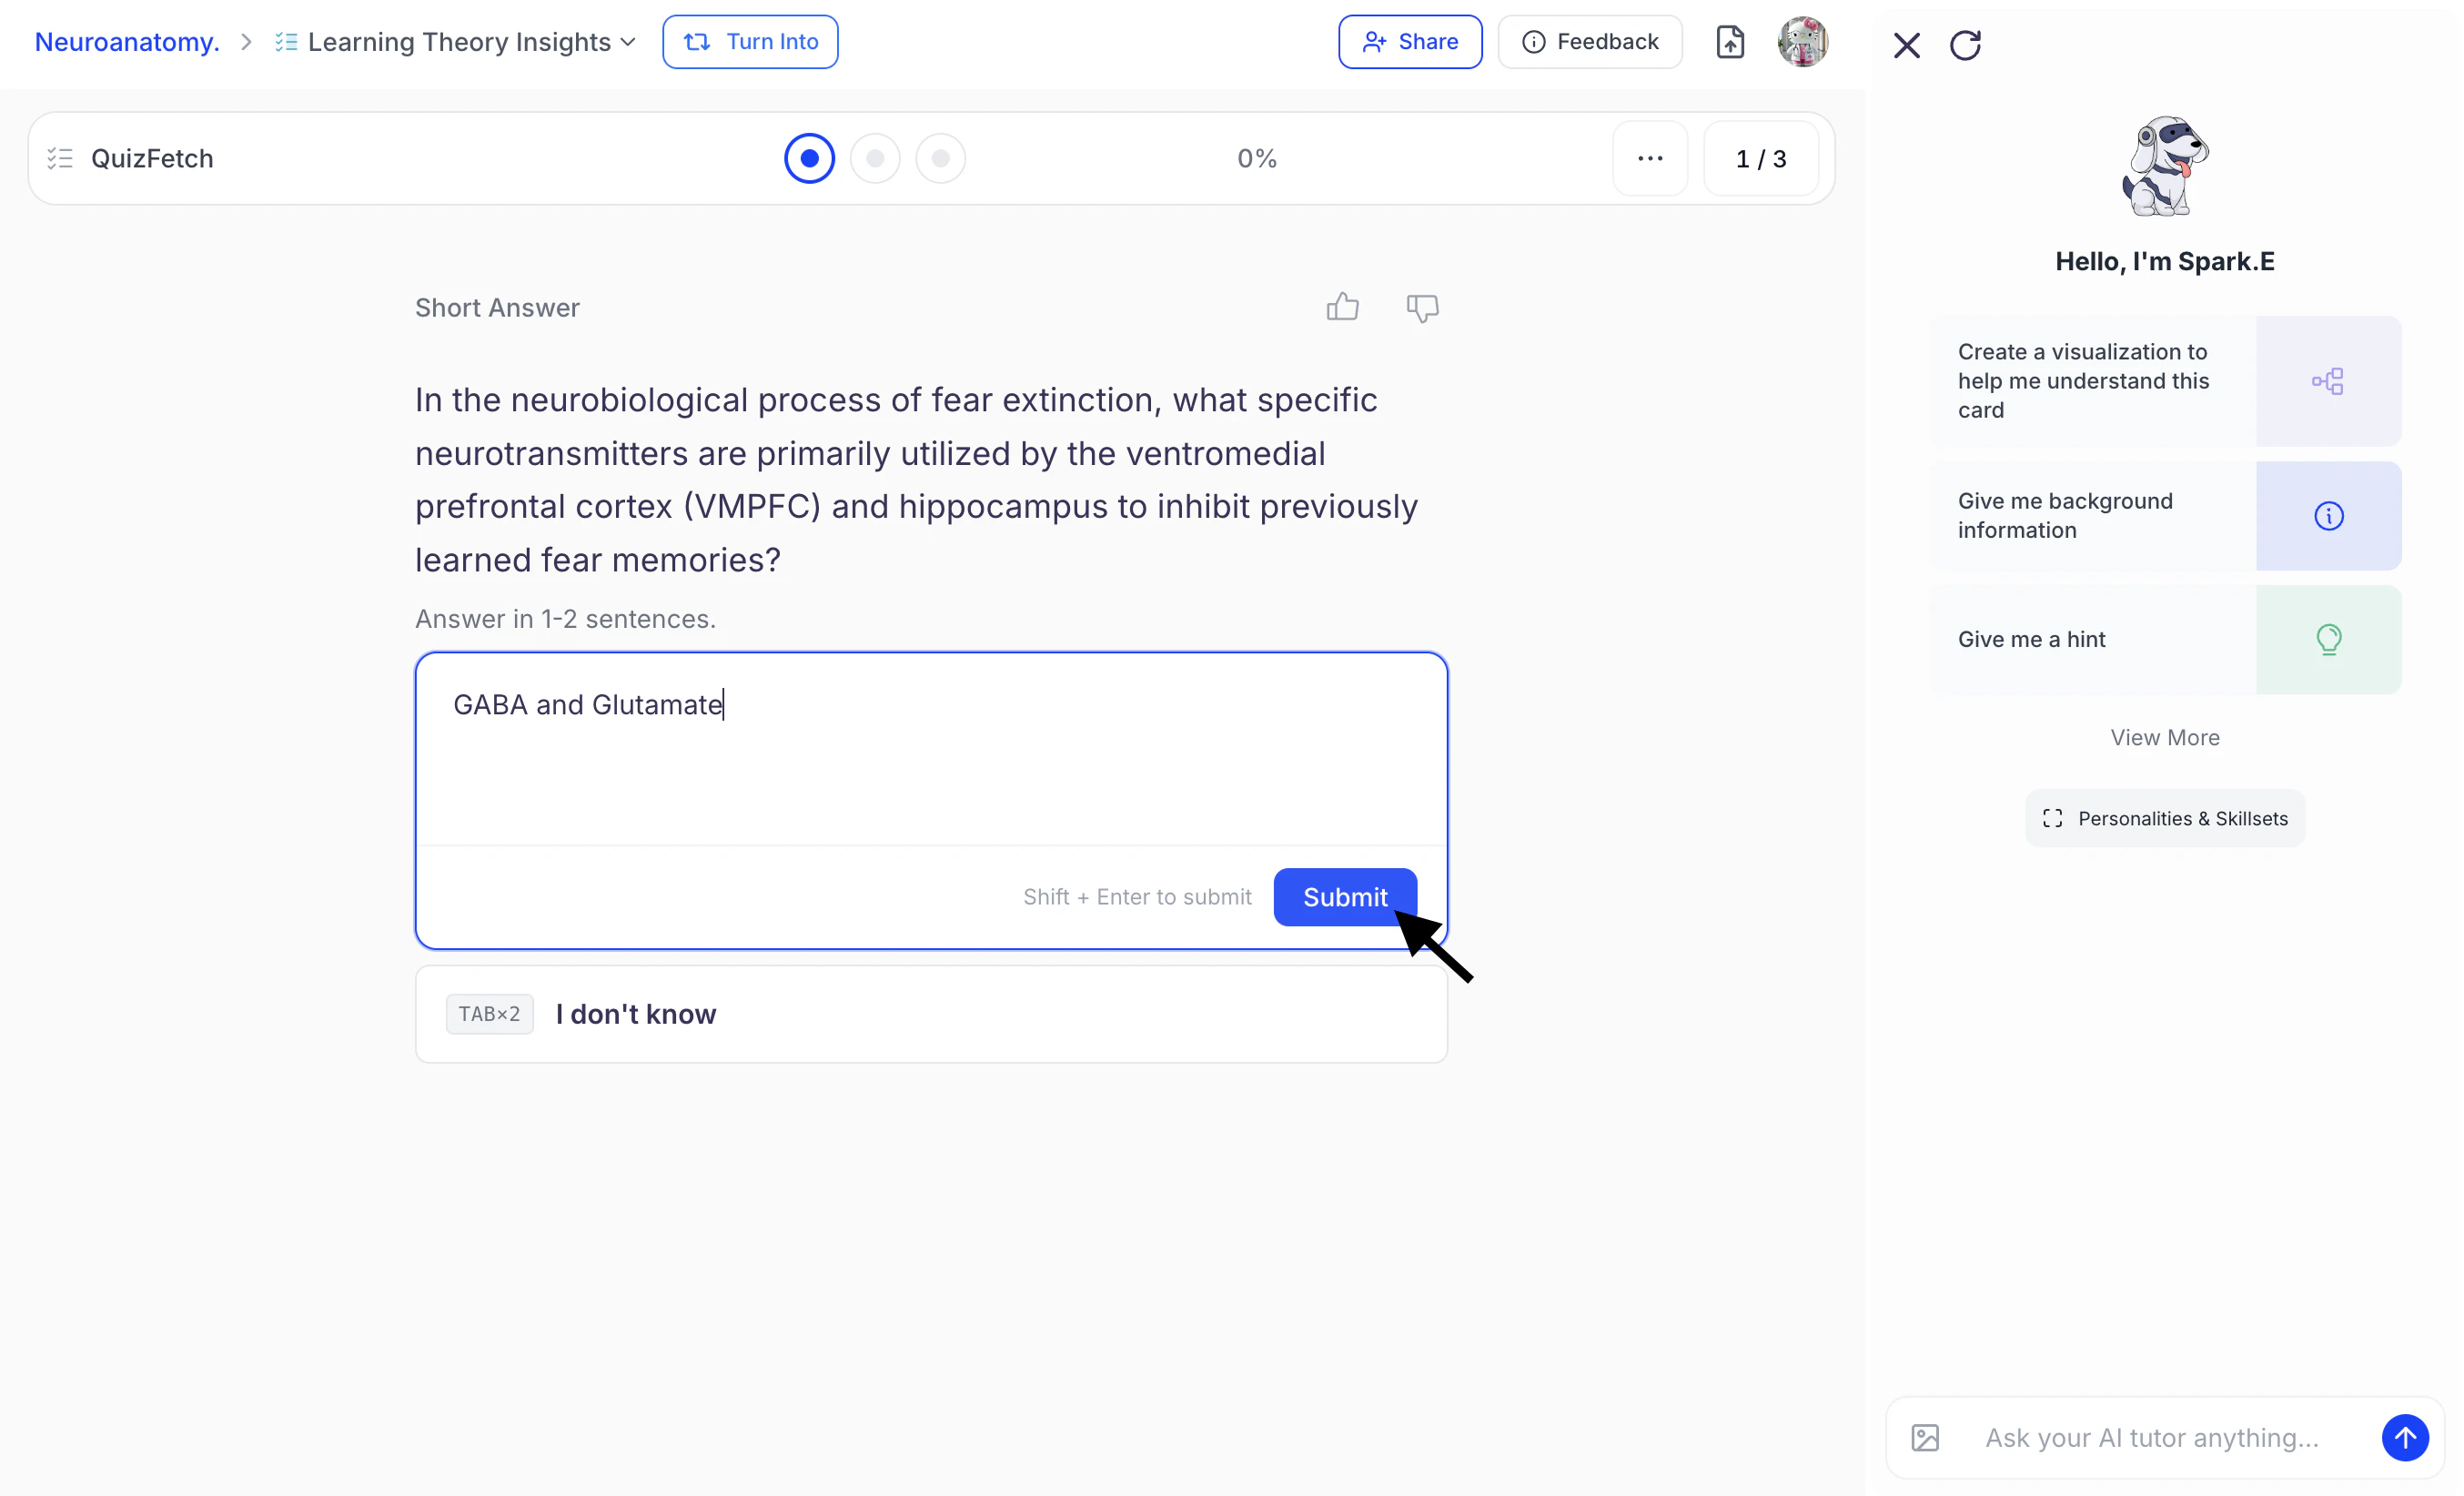
- When entering a typed response into a designated text field, click Submit or press Shift + Enter on your keyboard to submit your answer. For questions you don’t know the answer to, select I don’t know or press the Tab key twice.
- If you’re having trouble answering a question, you can ask Spark.E for help in the Spark.E Chat on the right-hand side.
Step 2: Confirm Answer Selection
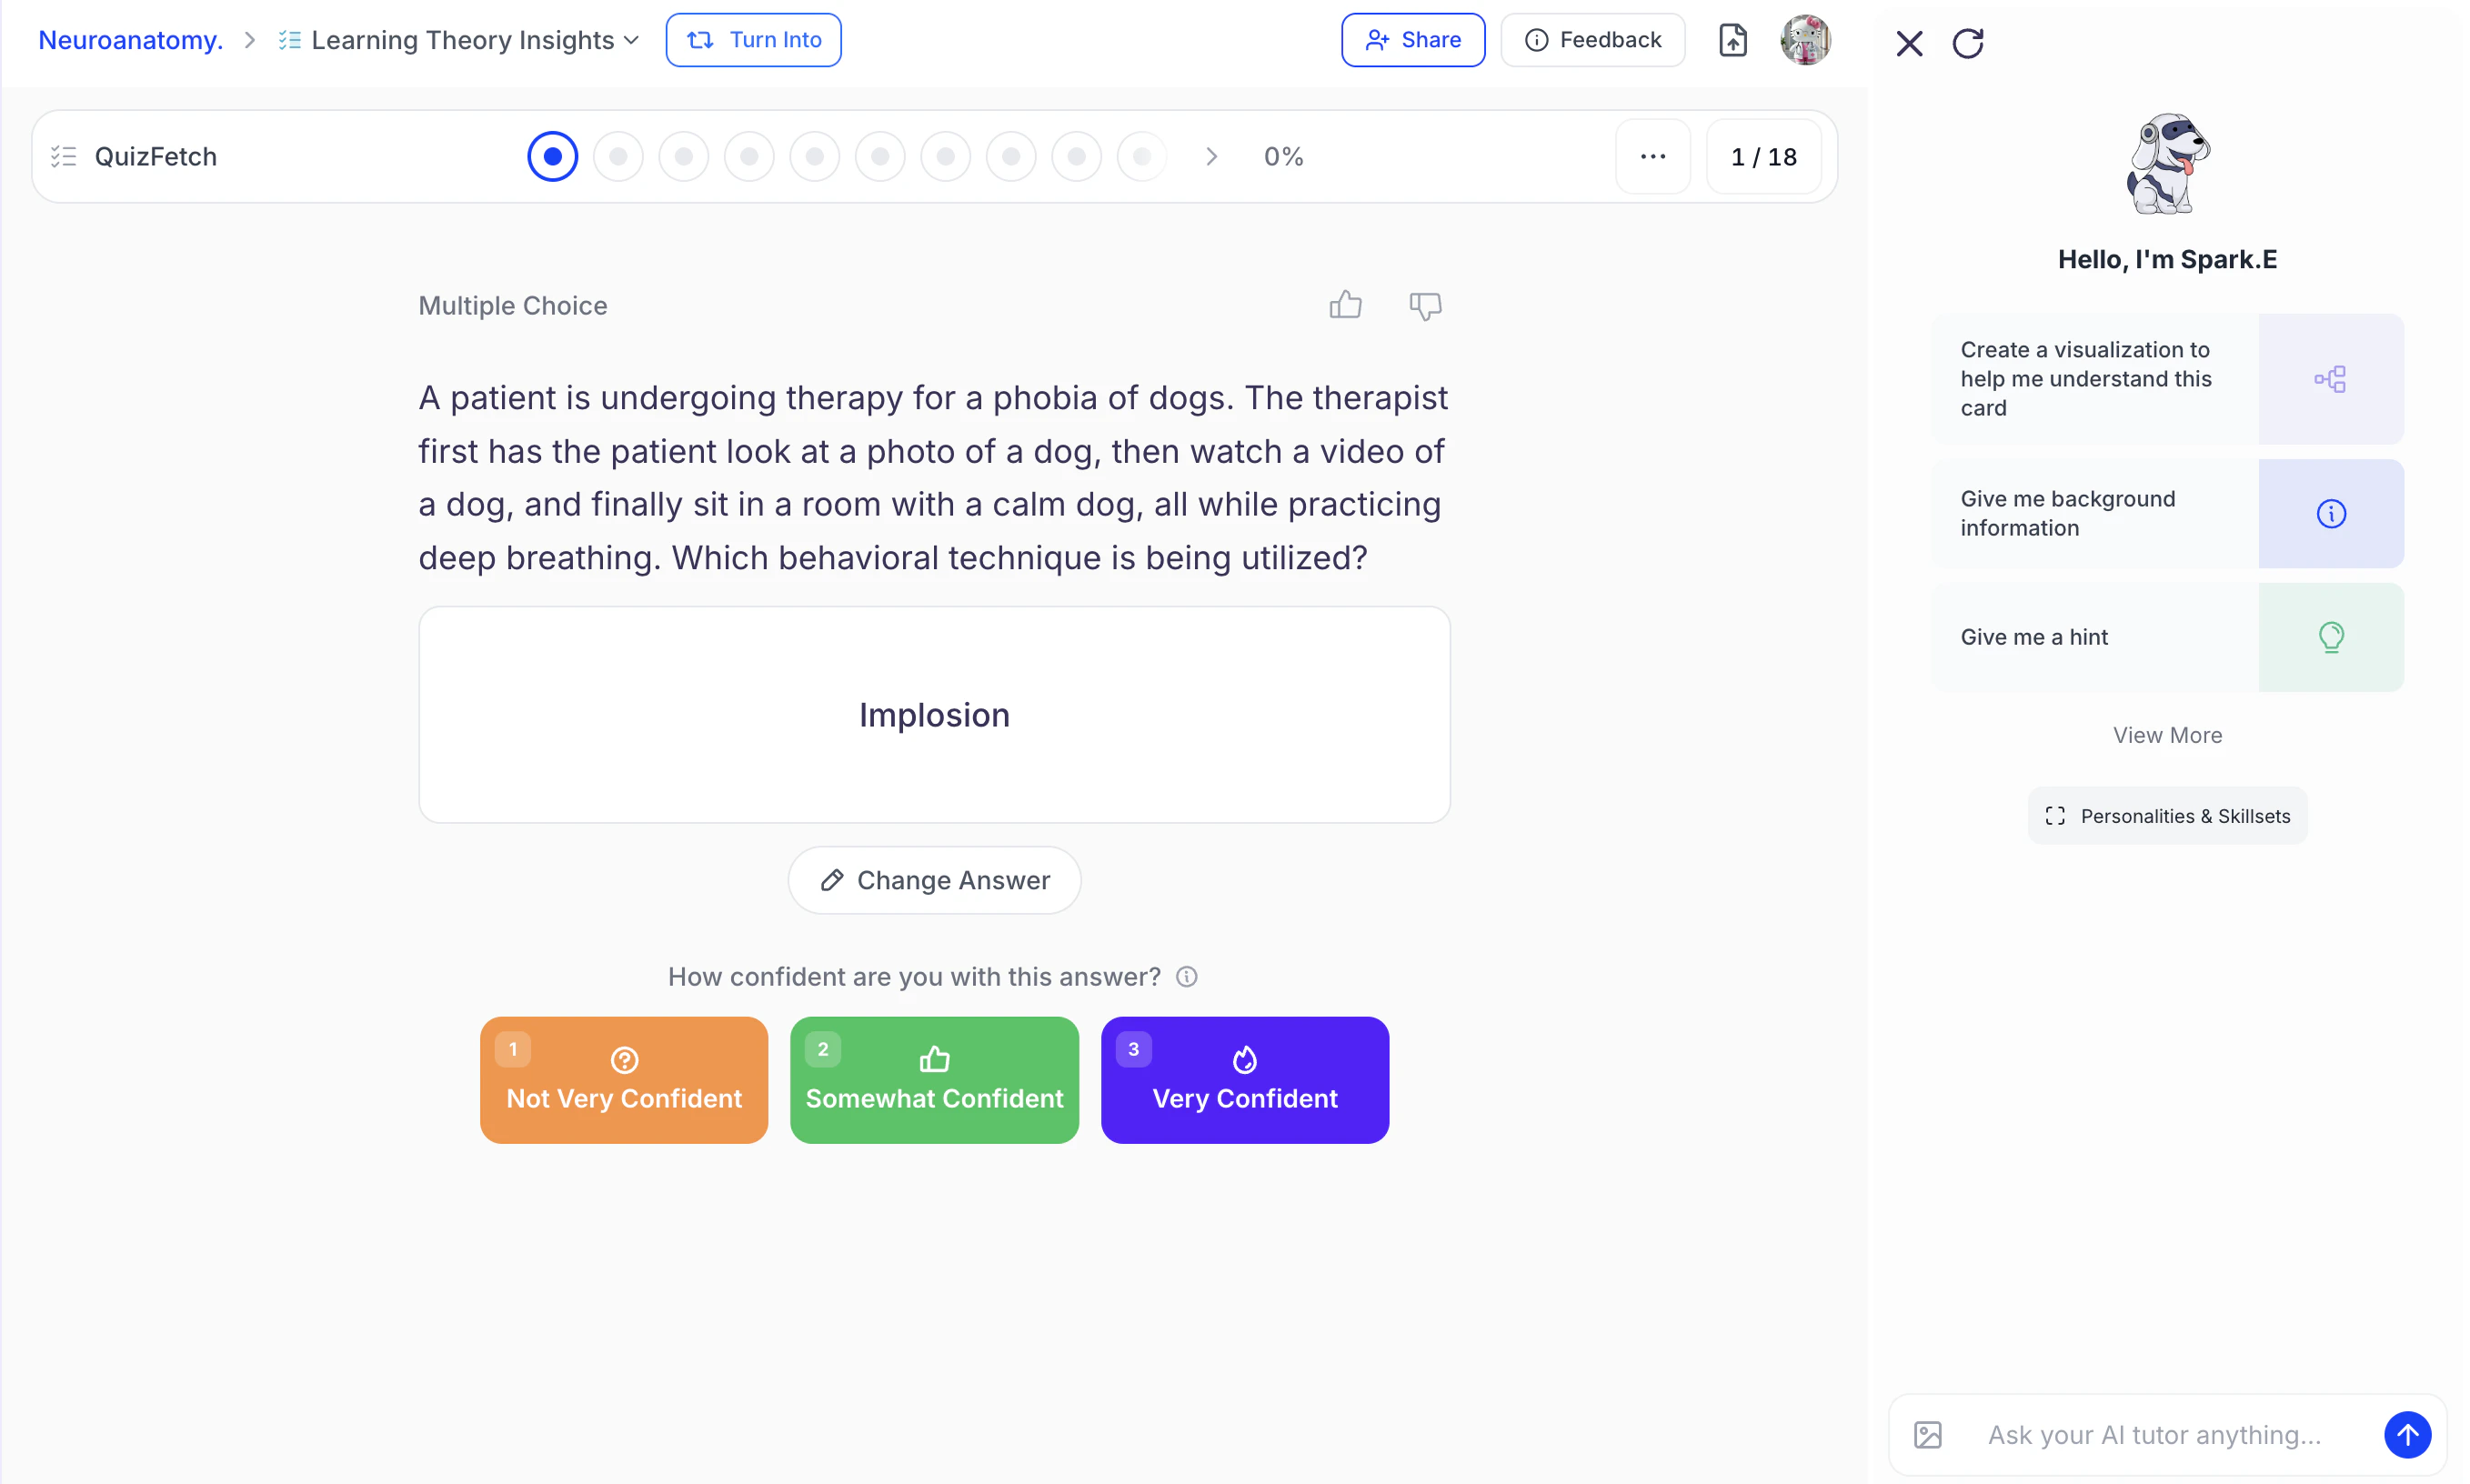
- After making your answer selection, review your response found in the box underneath the question.
- If you need to modify your response, select Change Answer to return to the previous screen, where you can reselect or edit your answer.
- Once you have finalized your answer selection proceed to the next step.
Step 3: Rate Your Confidence
QuizFetch enhances spaced repetition by incorporating learner confidence ratings to create an adaptive review experience. After each question, learners rate their confidence and receive immediate feedback. Based on both accuracy and confidence level, the system intelligently determines when the question will reappear to strengthen retention and address knowledge gaps.
- Choose how confident you are with your answer by selecting Not Very Confident (1), Somewhat Confident (2), or Very Confident (3).
- Rate each question using the buttons below your answer choice or by pressing the 1, 2, or 3 keys on your keyboard.
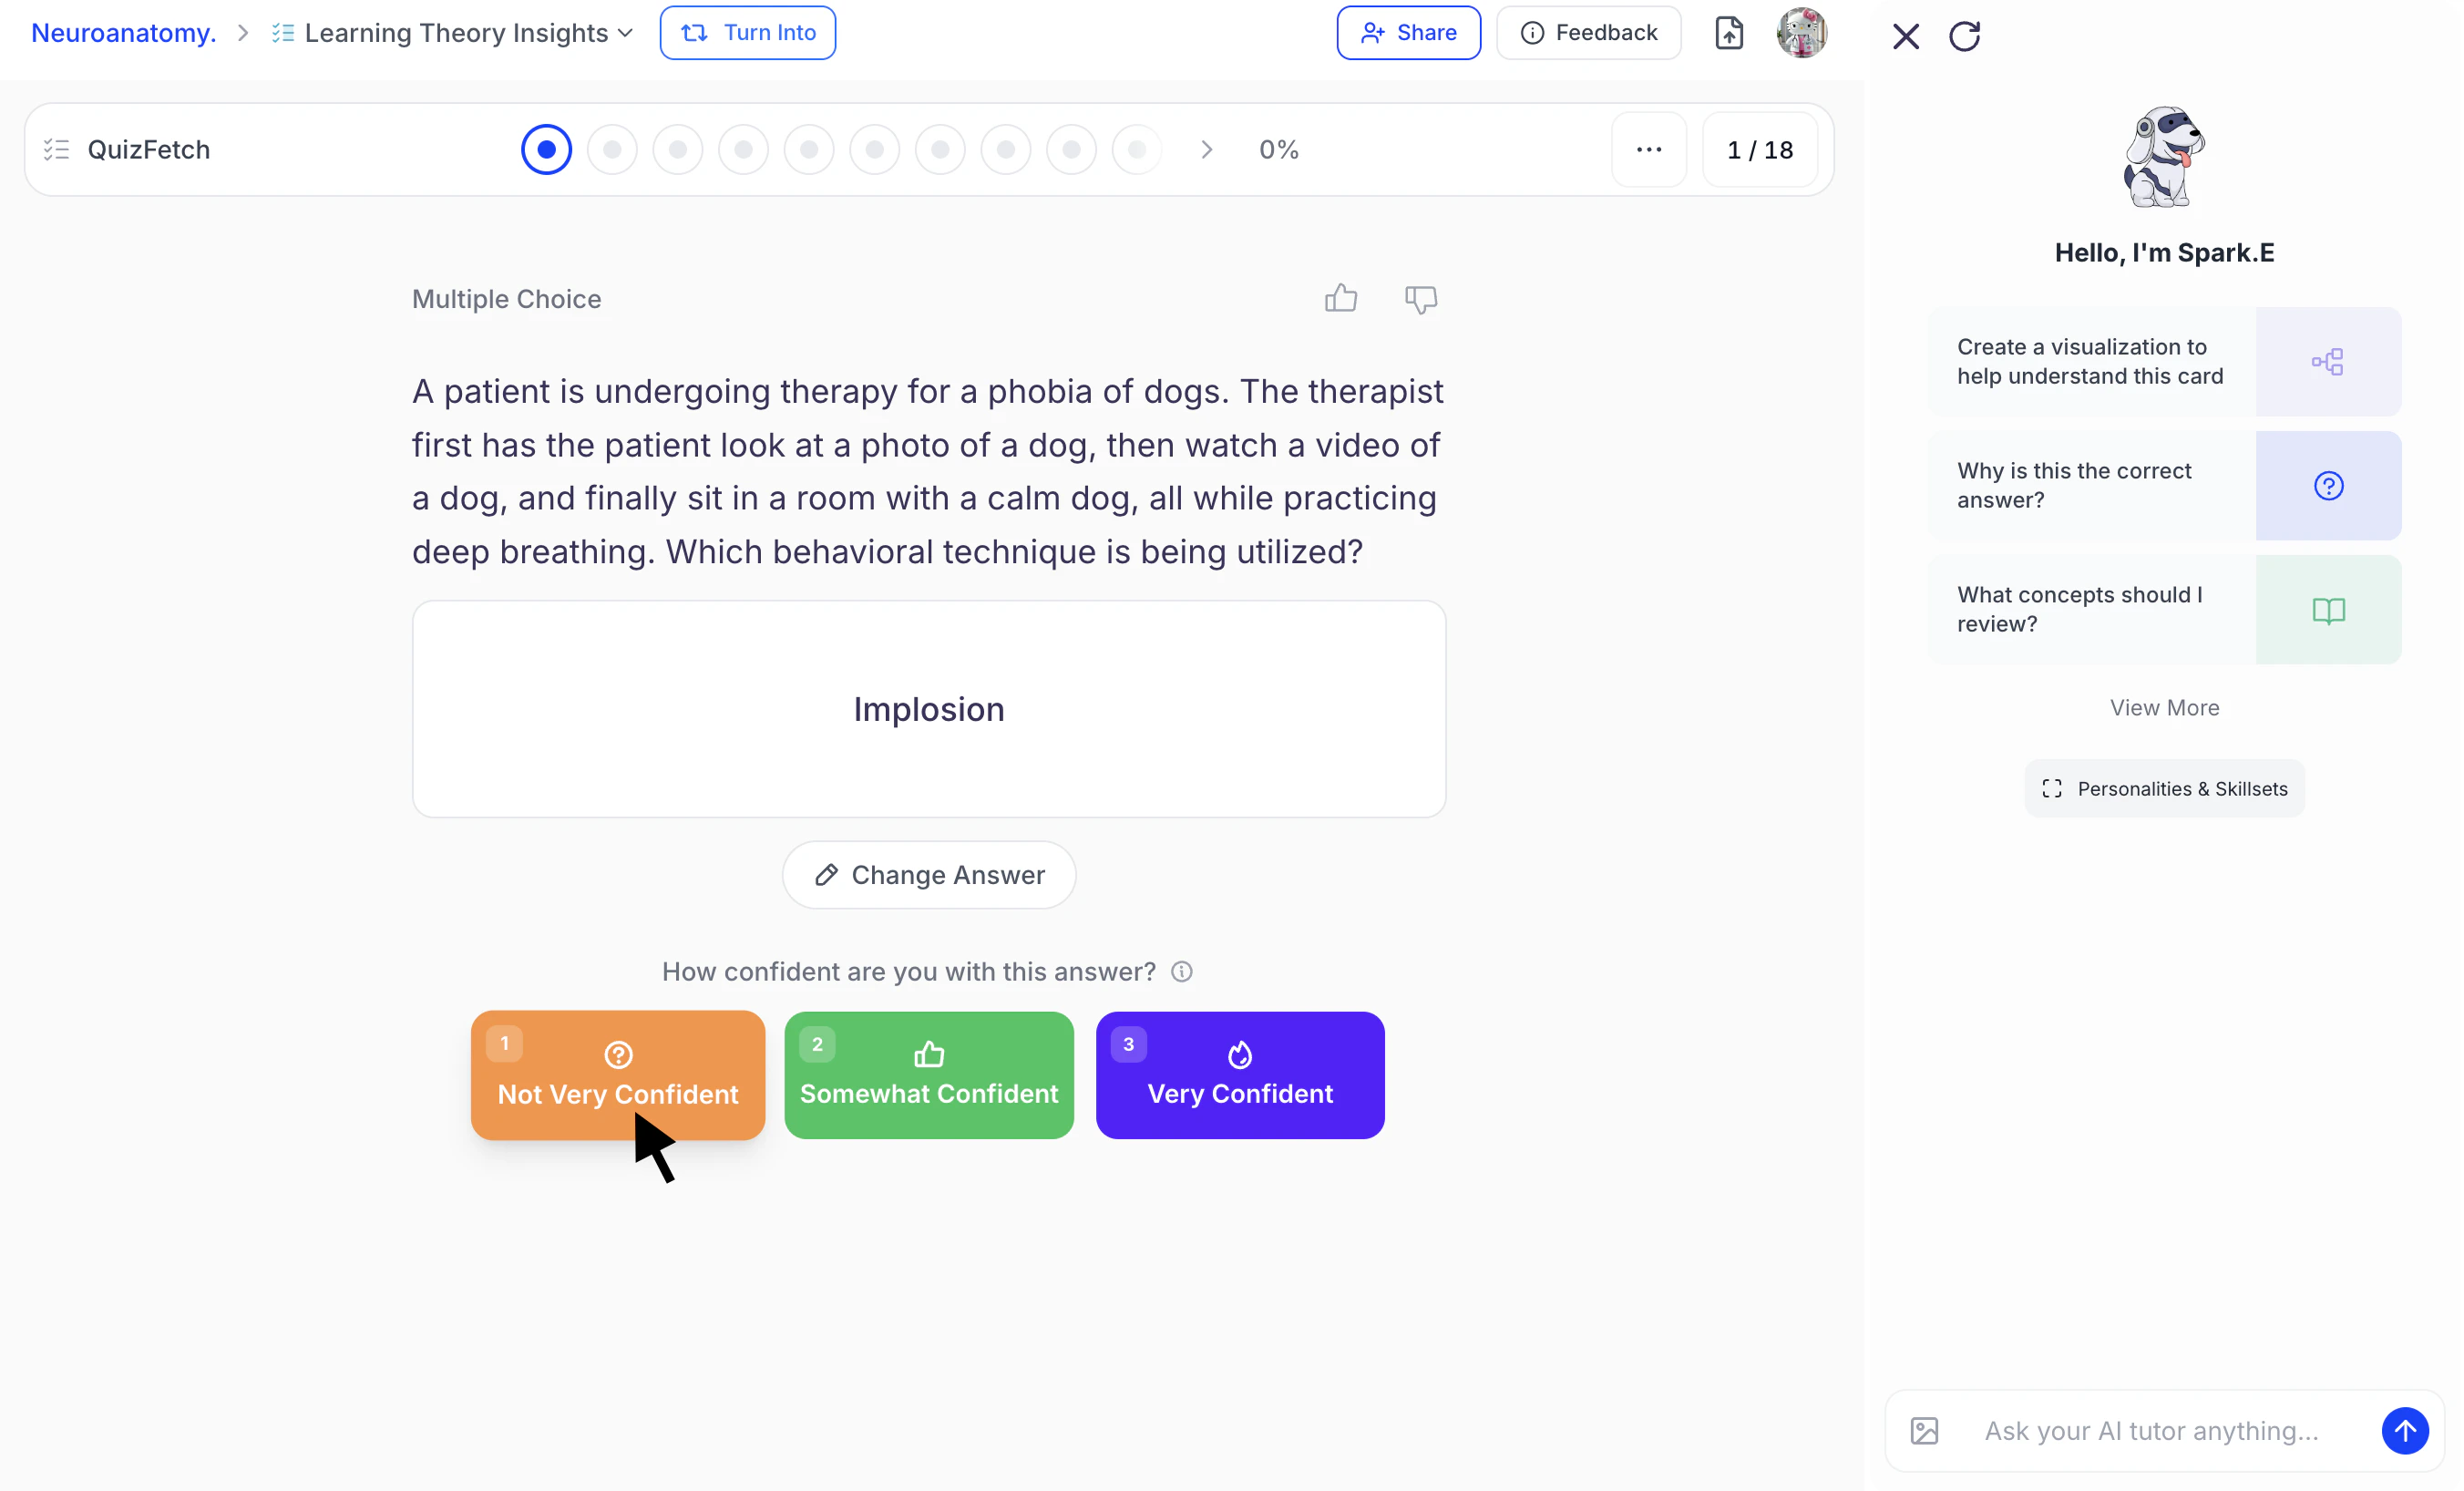
- Your selection determines when the question will appear again. High confidence + correct answer = faster mastery.
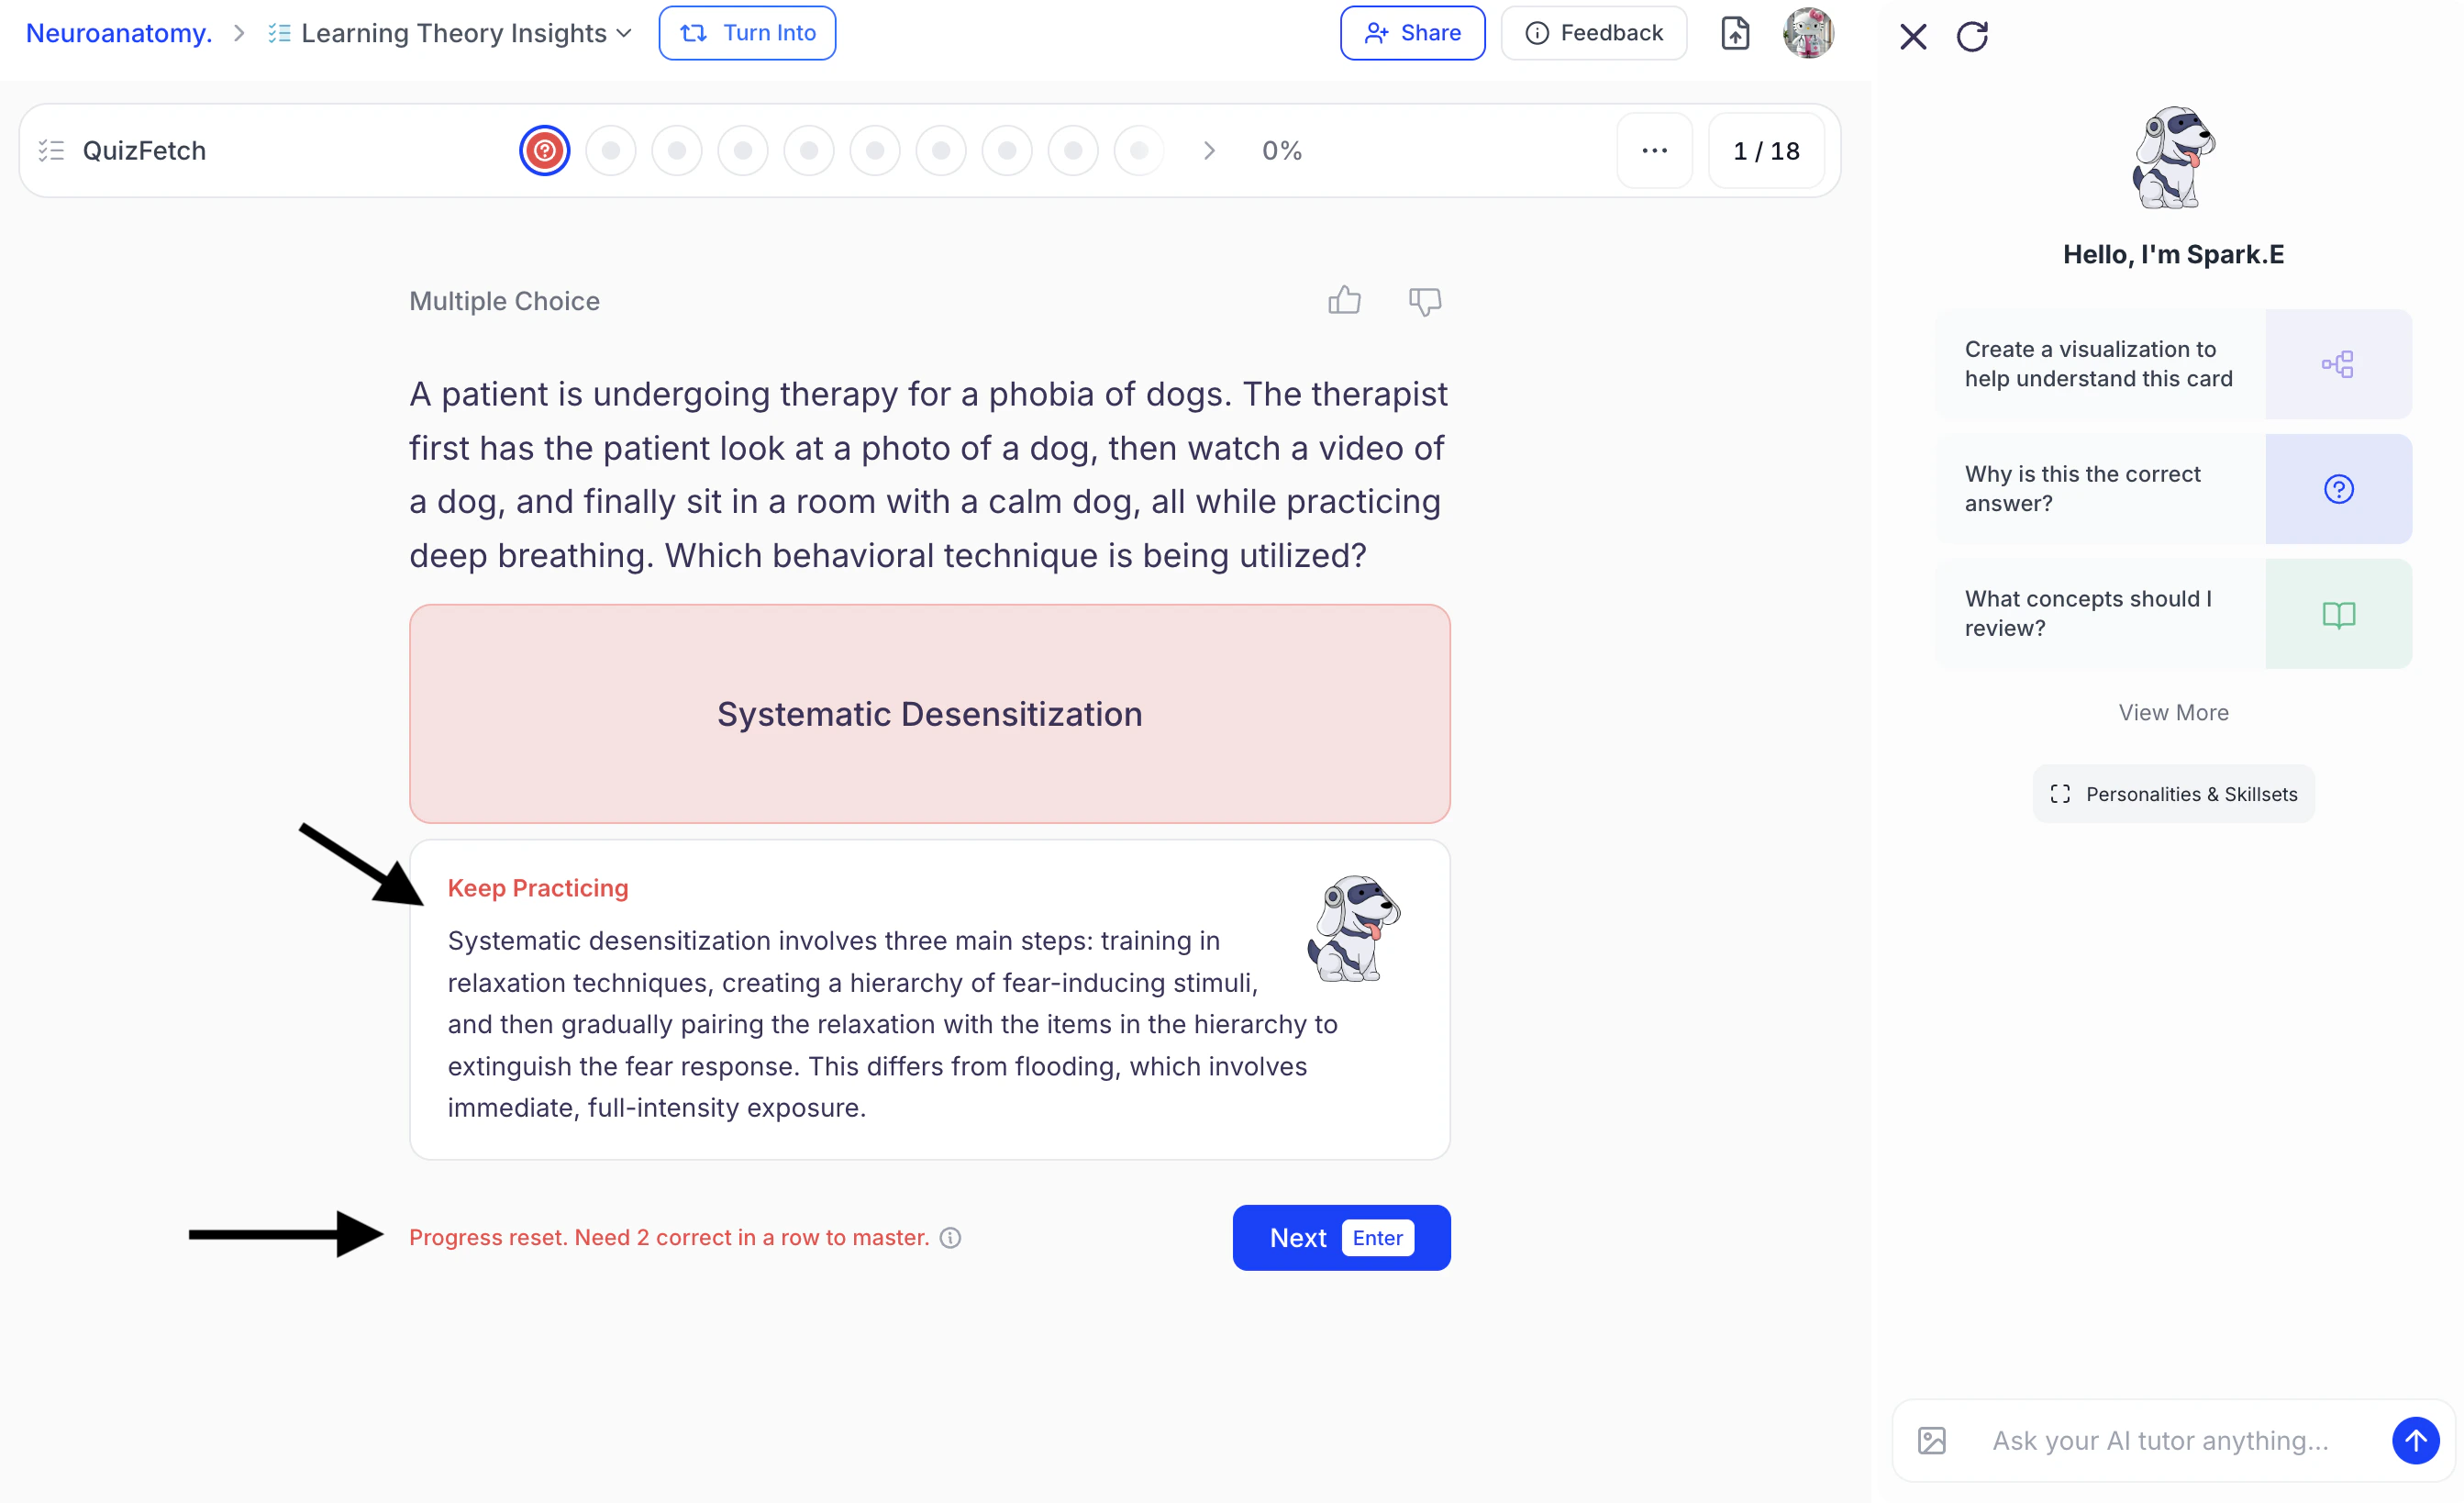
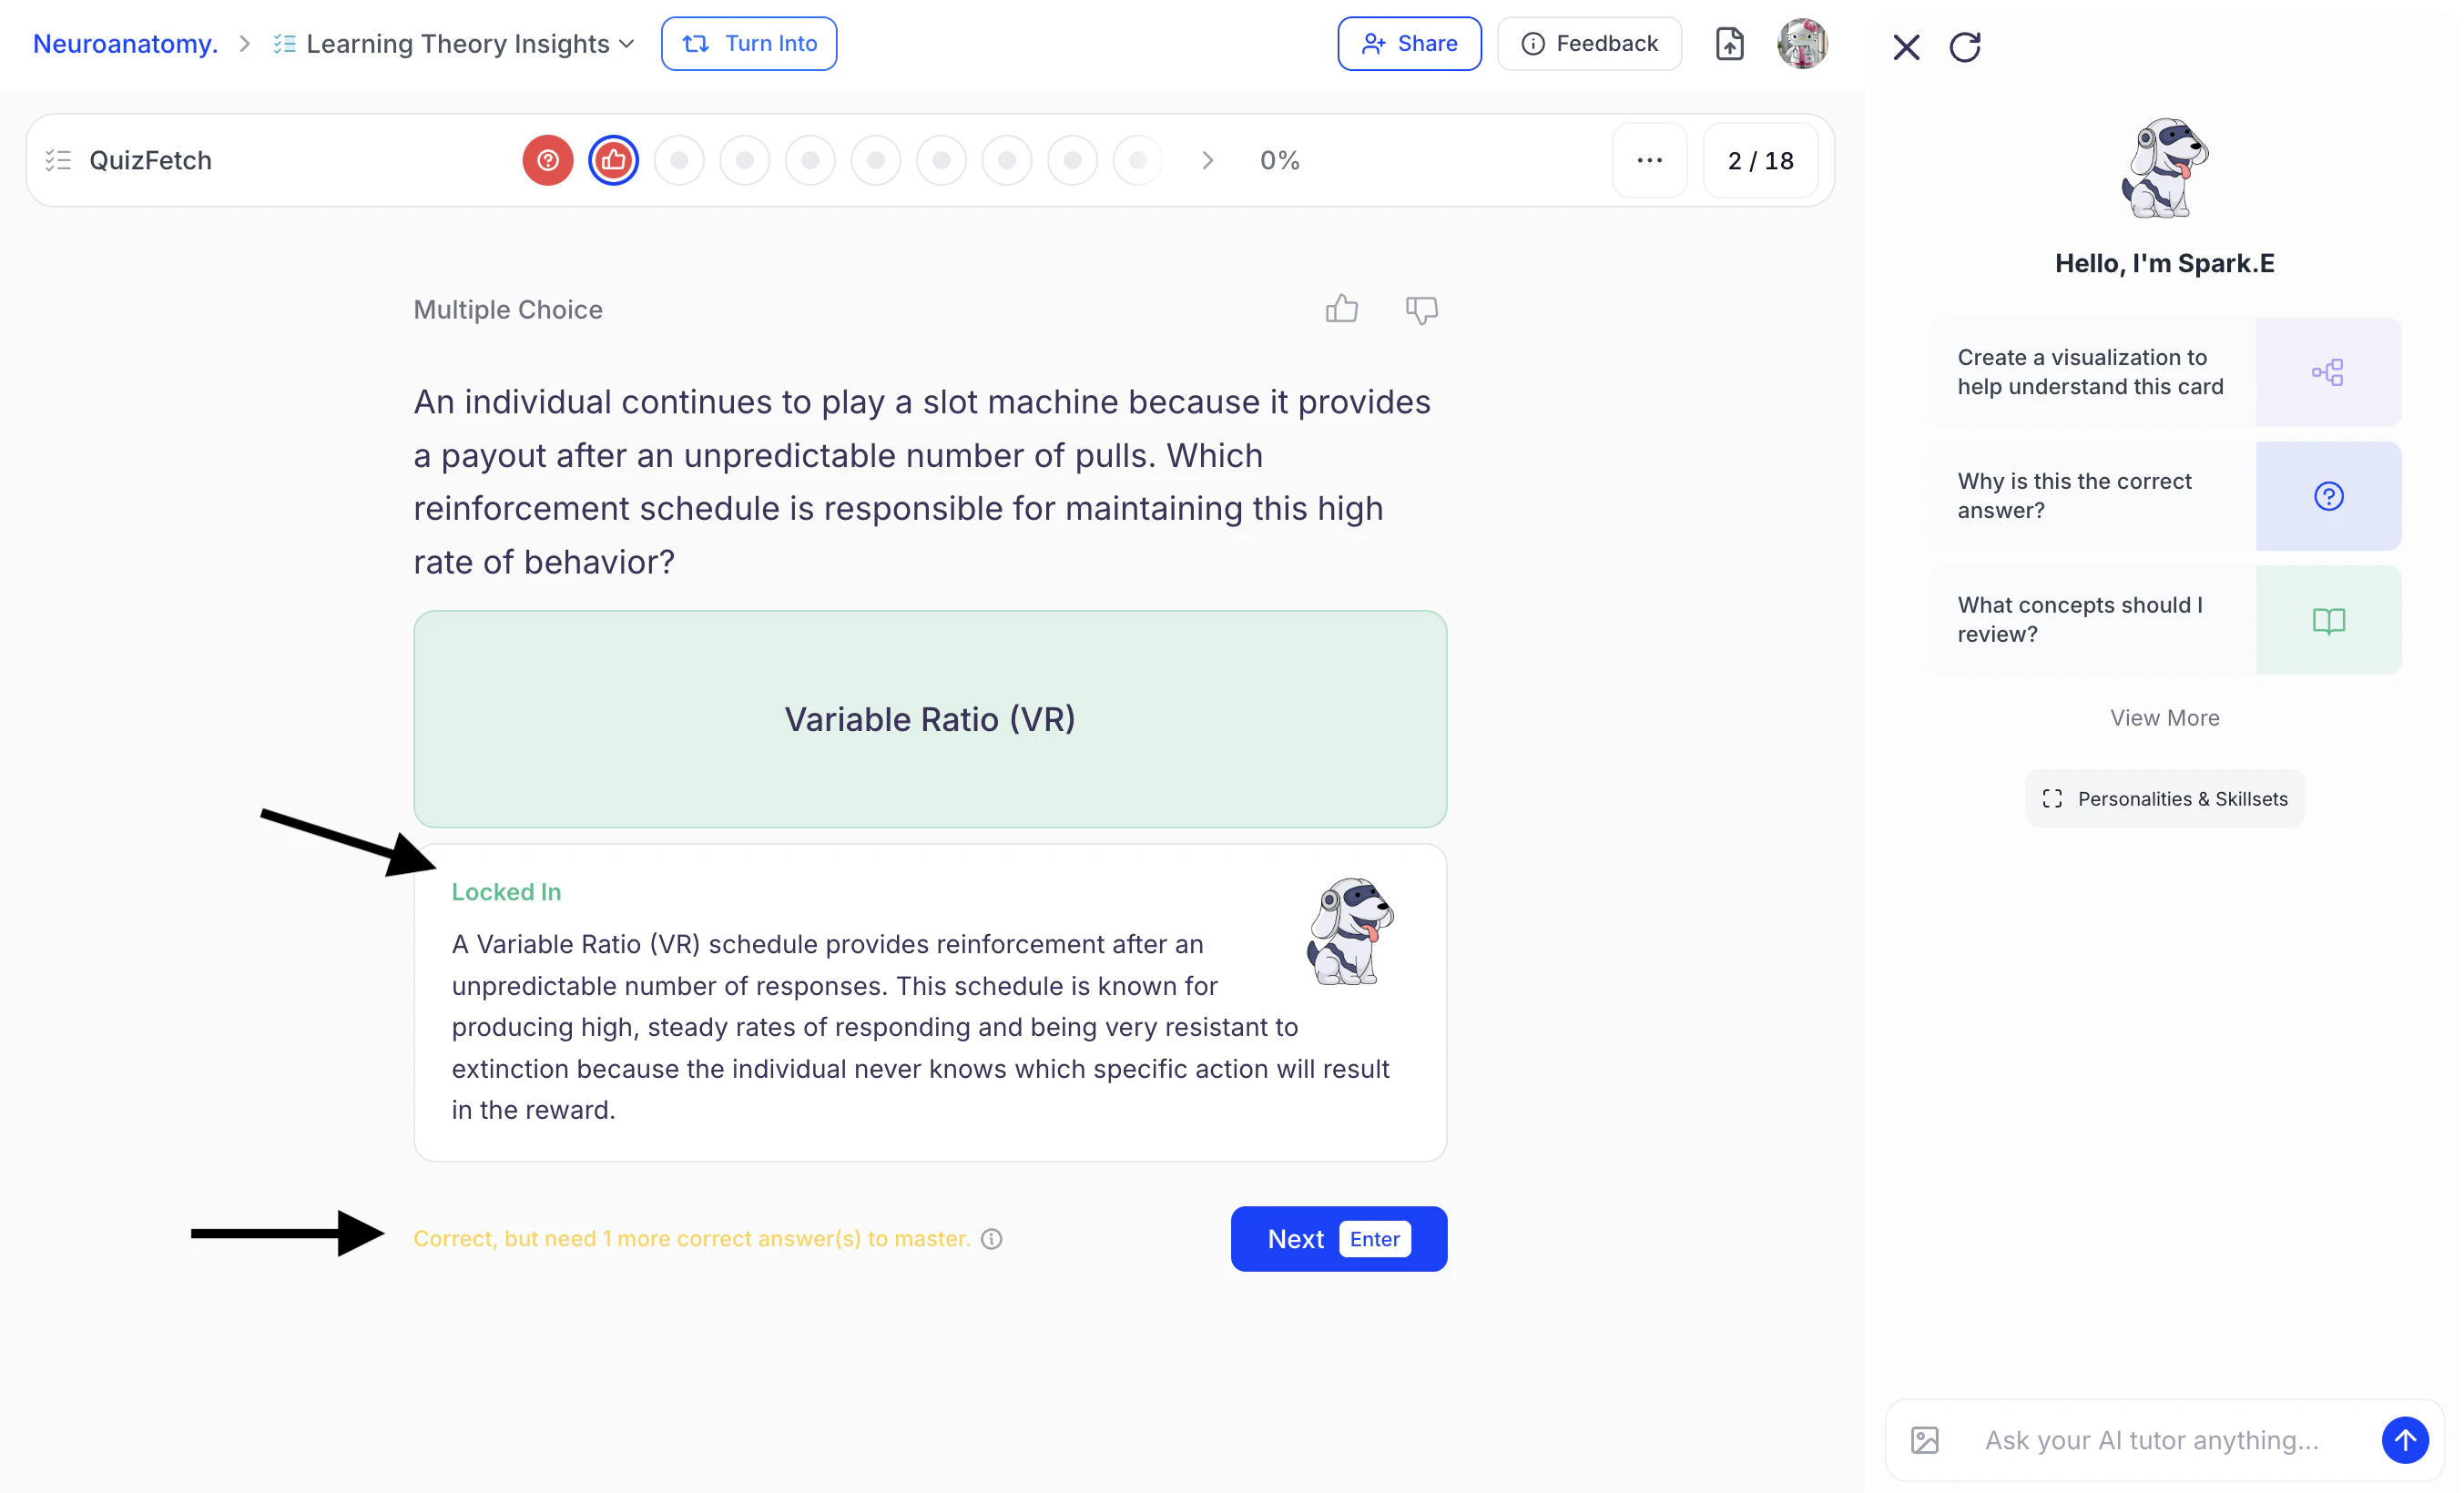
Step 4: Receive Personalized Feedback
- After selecting your confidence level, each dot within the progress bar updates based on your accuracy and confidence rating to reflect your learning progress.
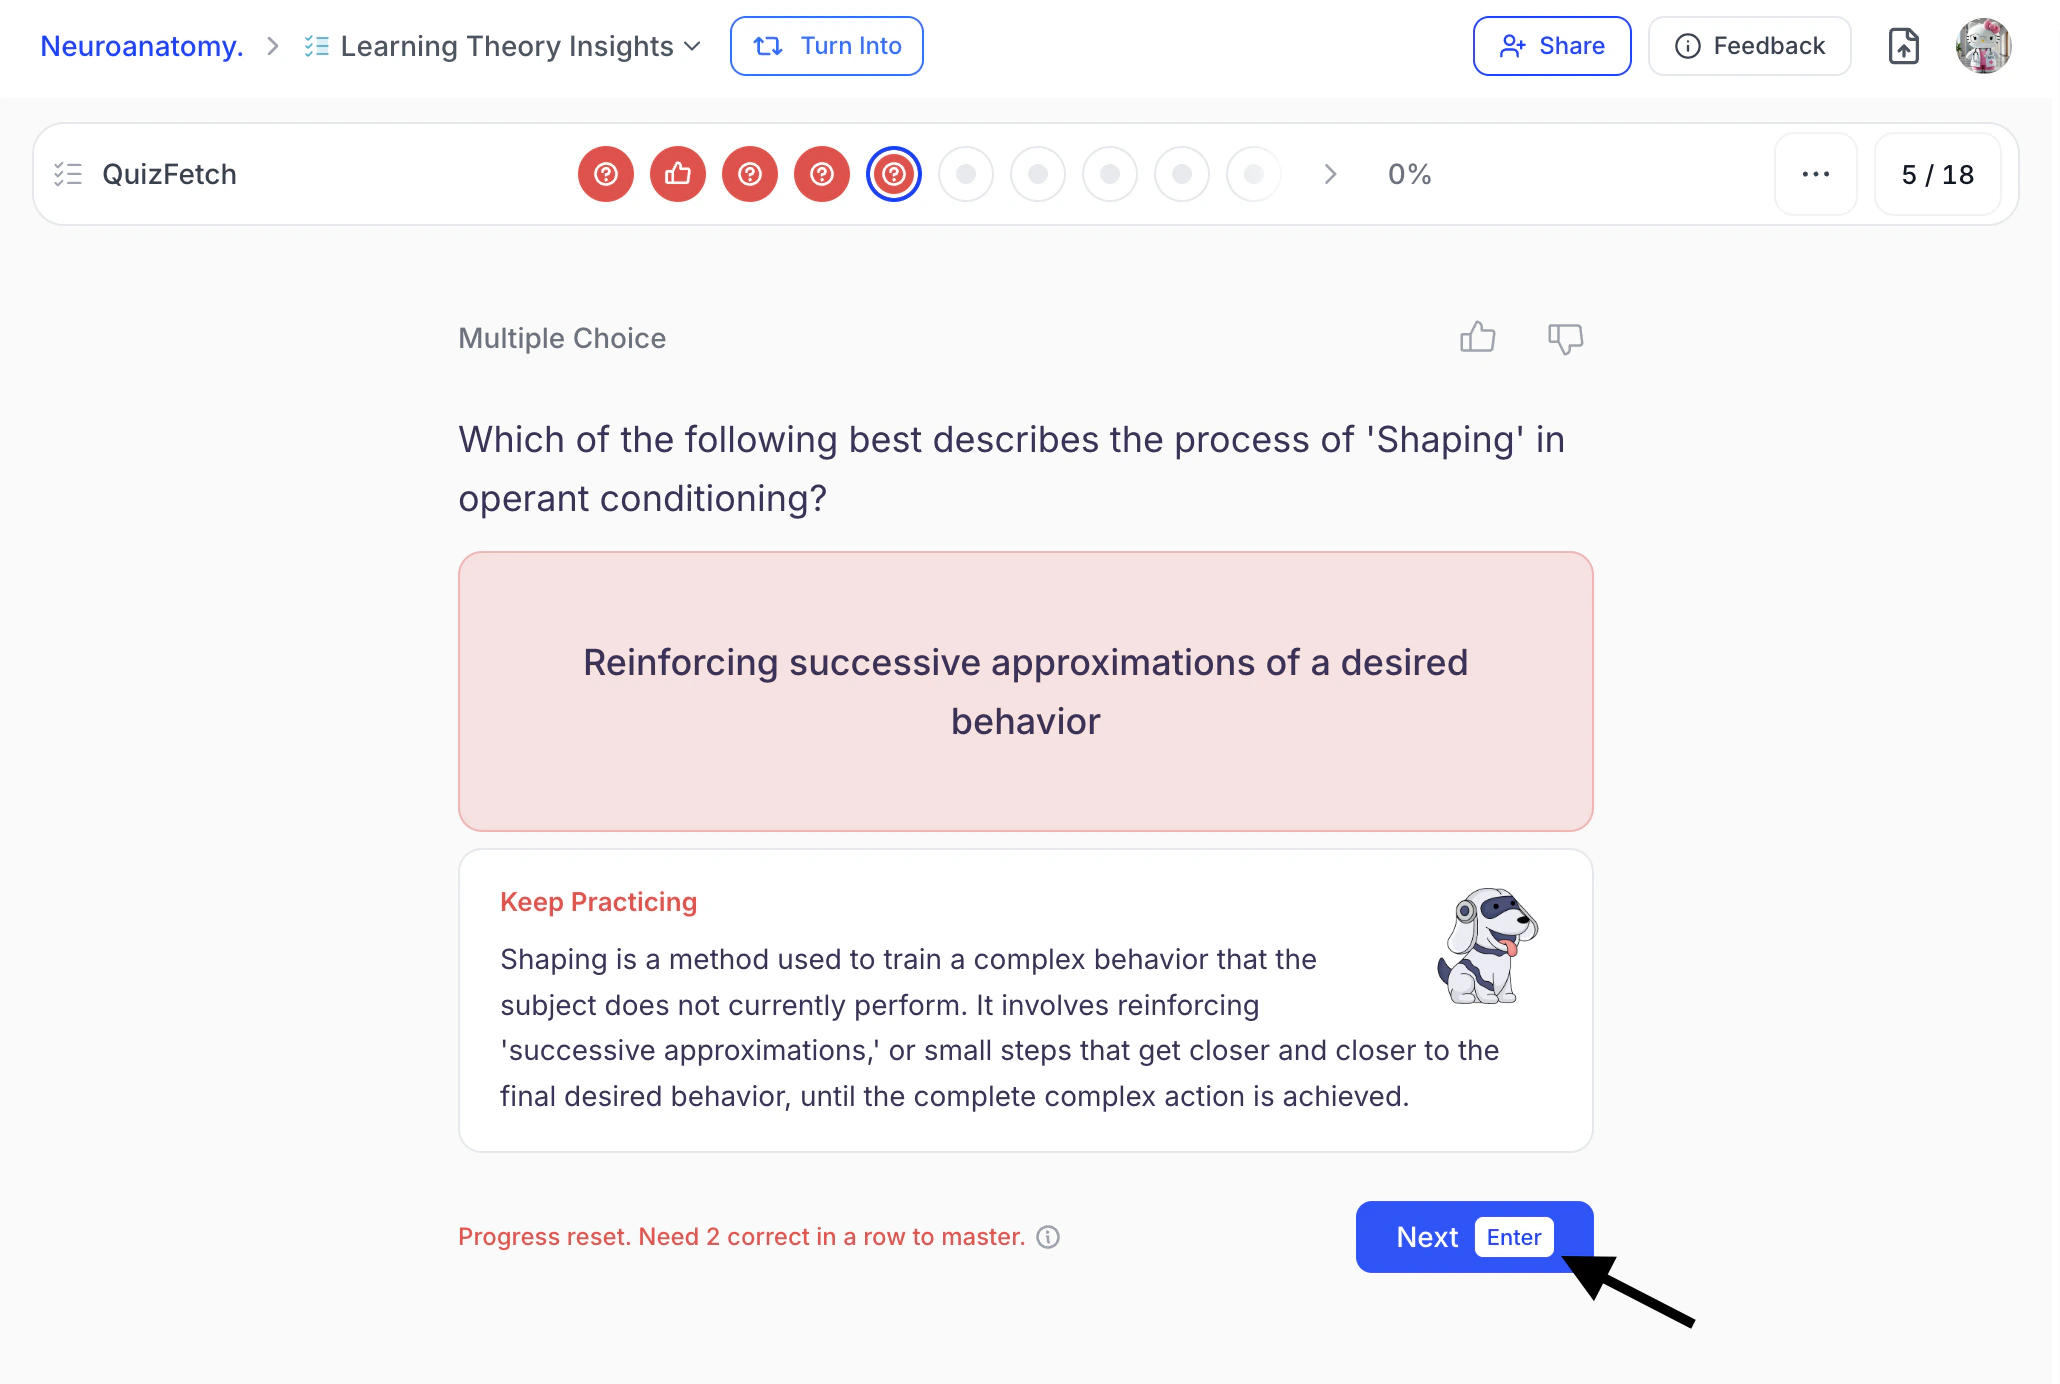
- If your answer is incorrect: Spark.E will provide an explanation of the correct answer along with a customizable response tailored to your confidence rating. Your mastery progress for that specific question may reset or require consecutive correct responses to regain progress. The number of correct responses needed on this same question to achieve mastery will be displayed below the Spark.E feedback field.
- If your answer is correct: The question will be marked accordingly, and Spark.E will provide a deeper explanation of the concept. Based on your accuracy and confidence level, your mastery progress for that specific question will increase. The system will indicate how many additional correct responses to this same question are needed to fully achieve mastery below the Spark.E feedback field.
- To proceed to the next question, select Next or click Enter.
- Or if you want to get further help reviewing a question and your response, proceed to Step 5.
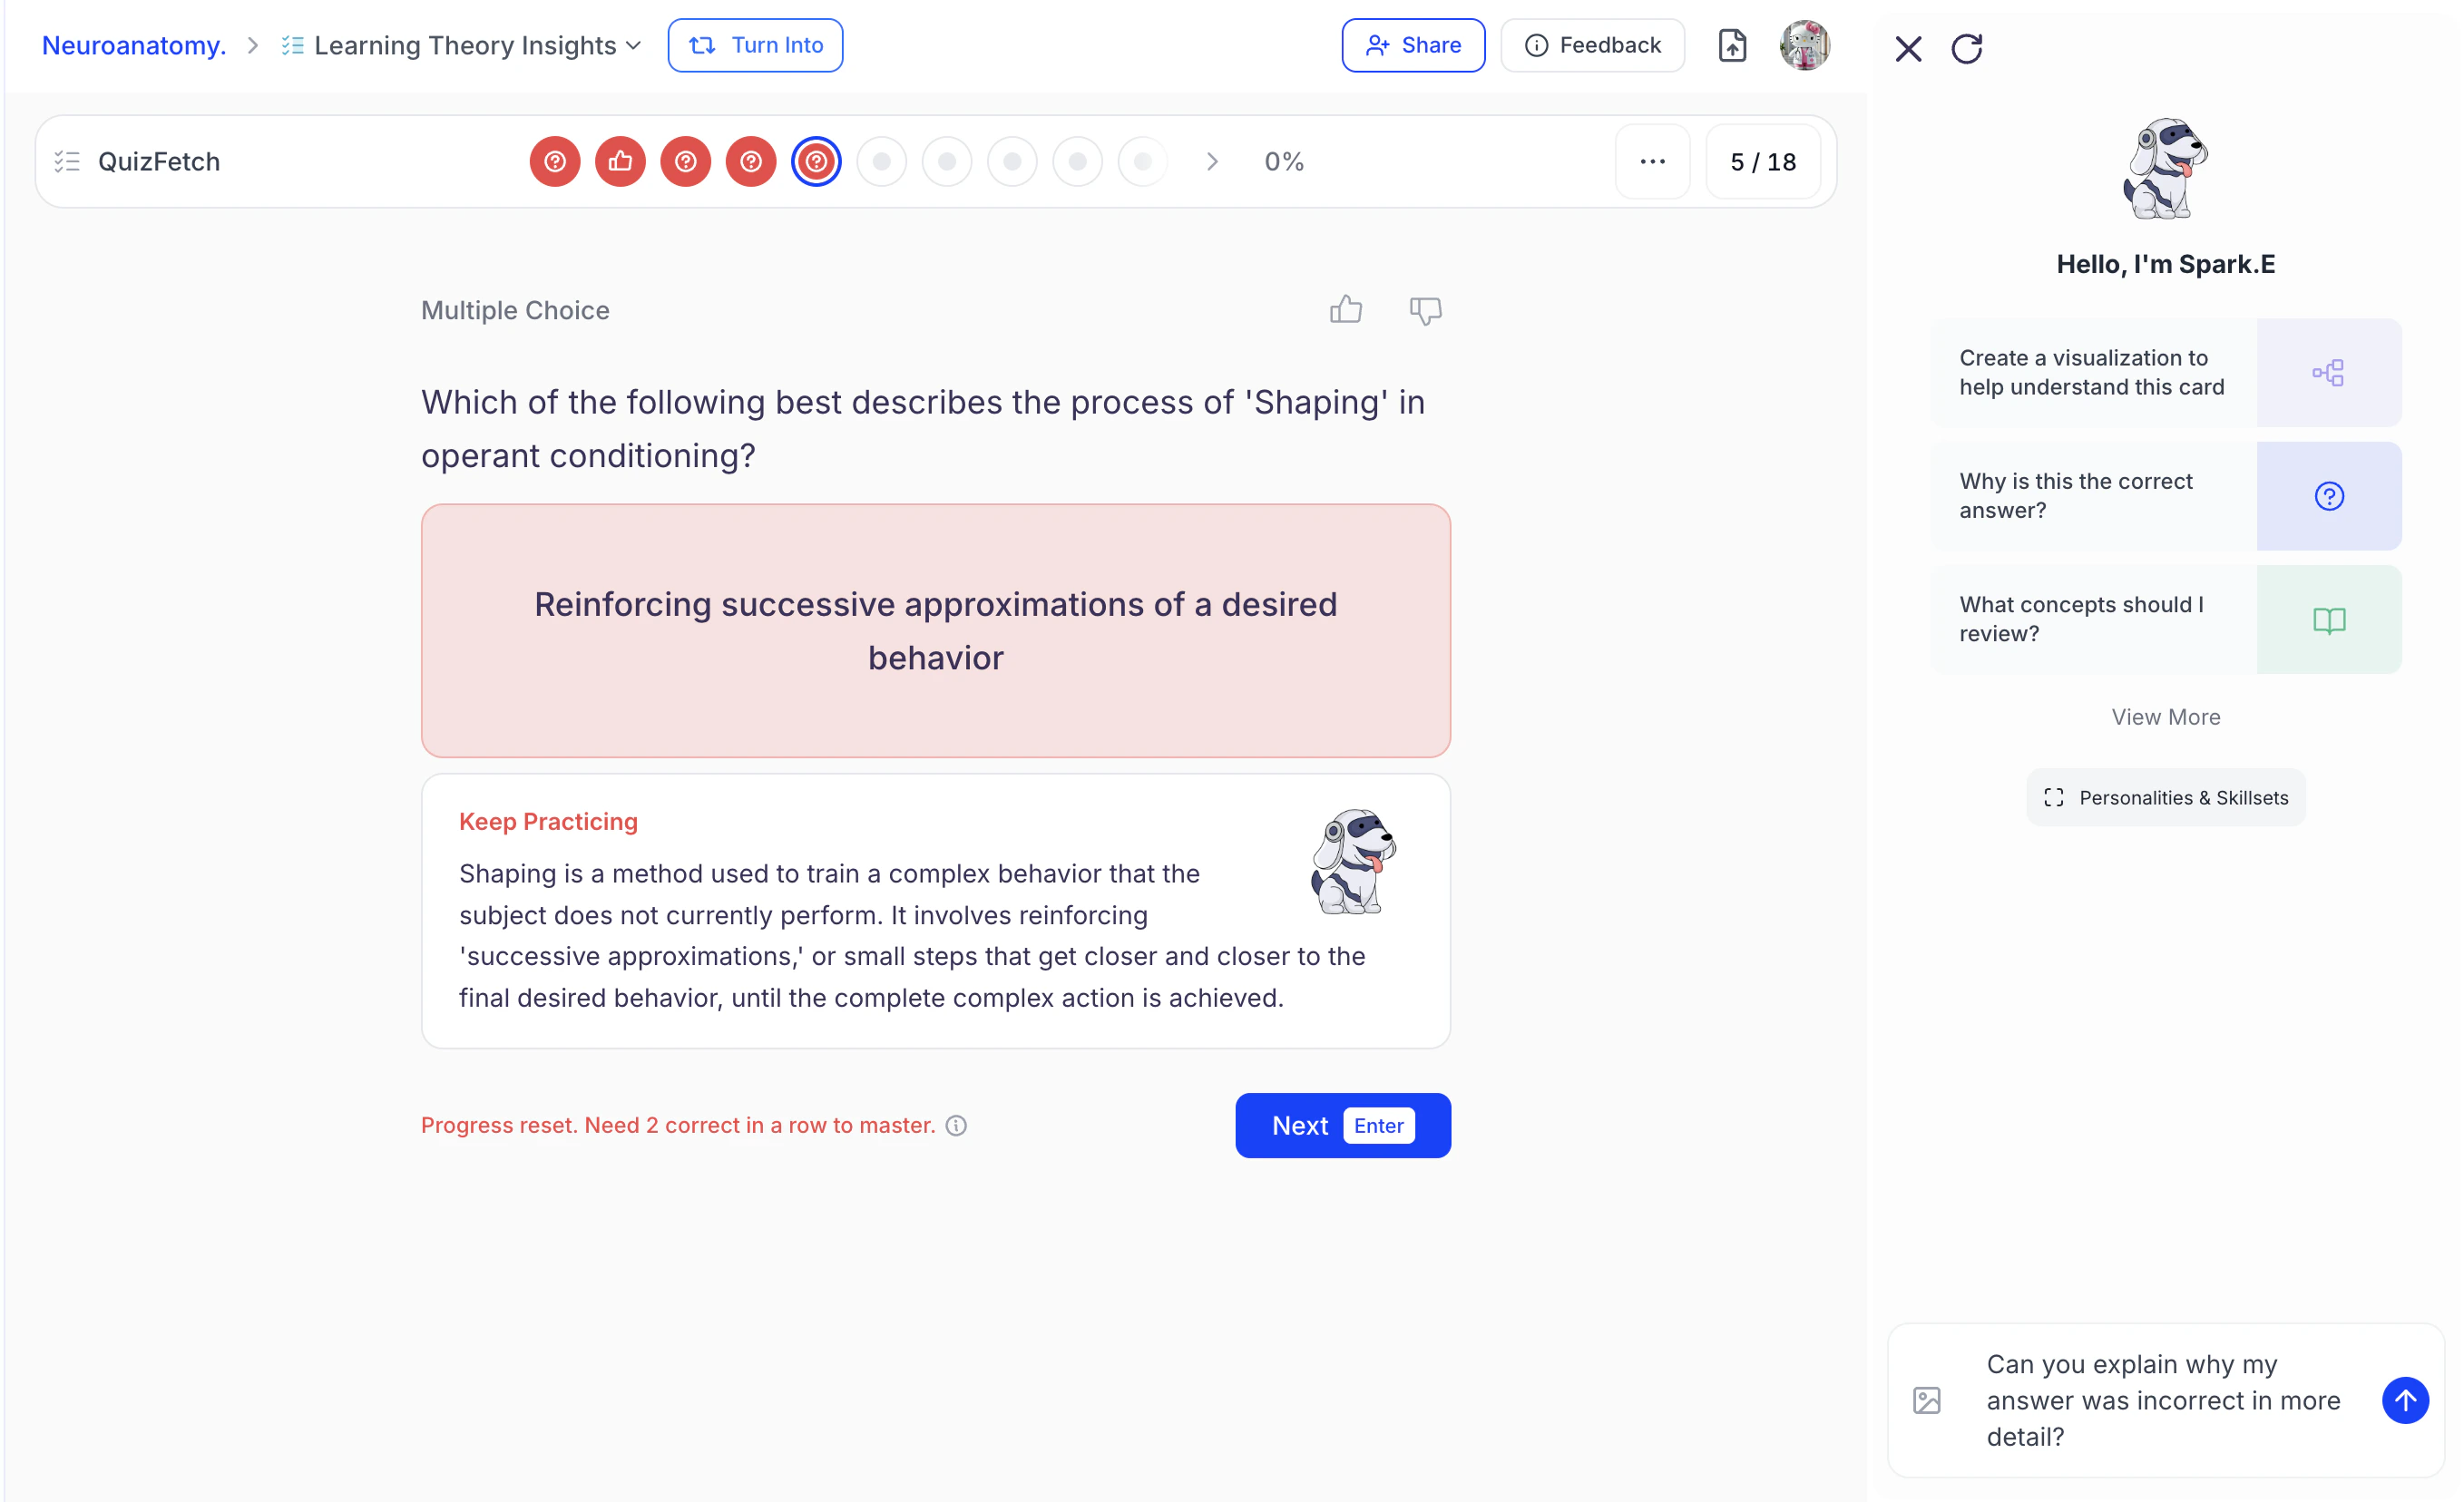
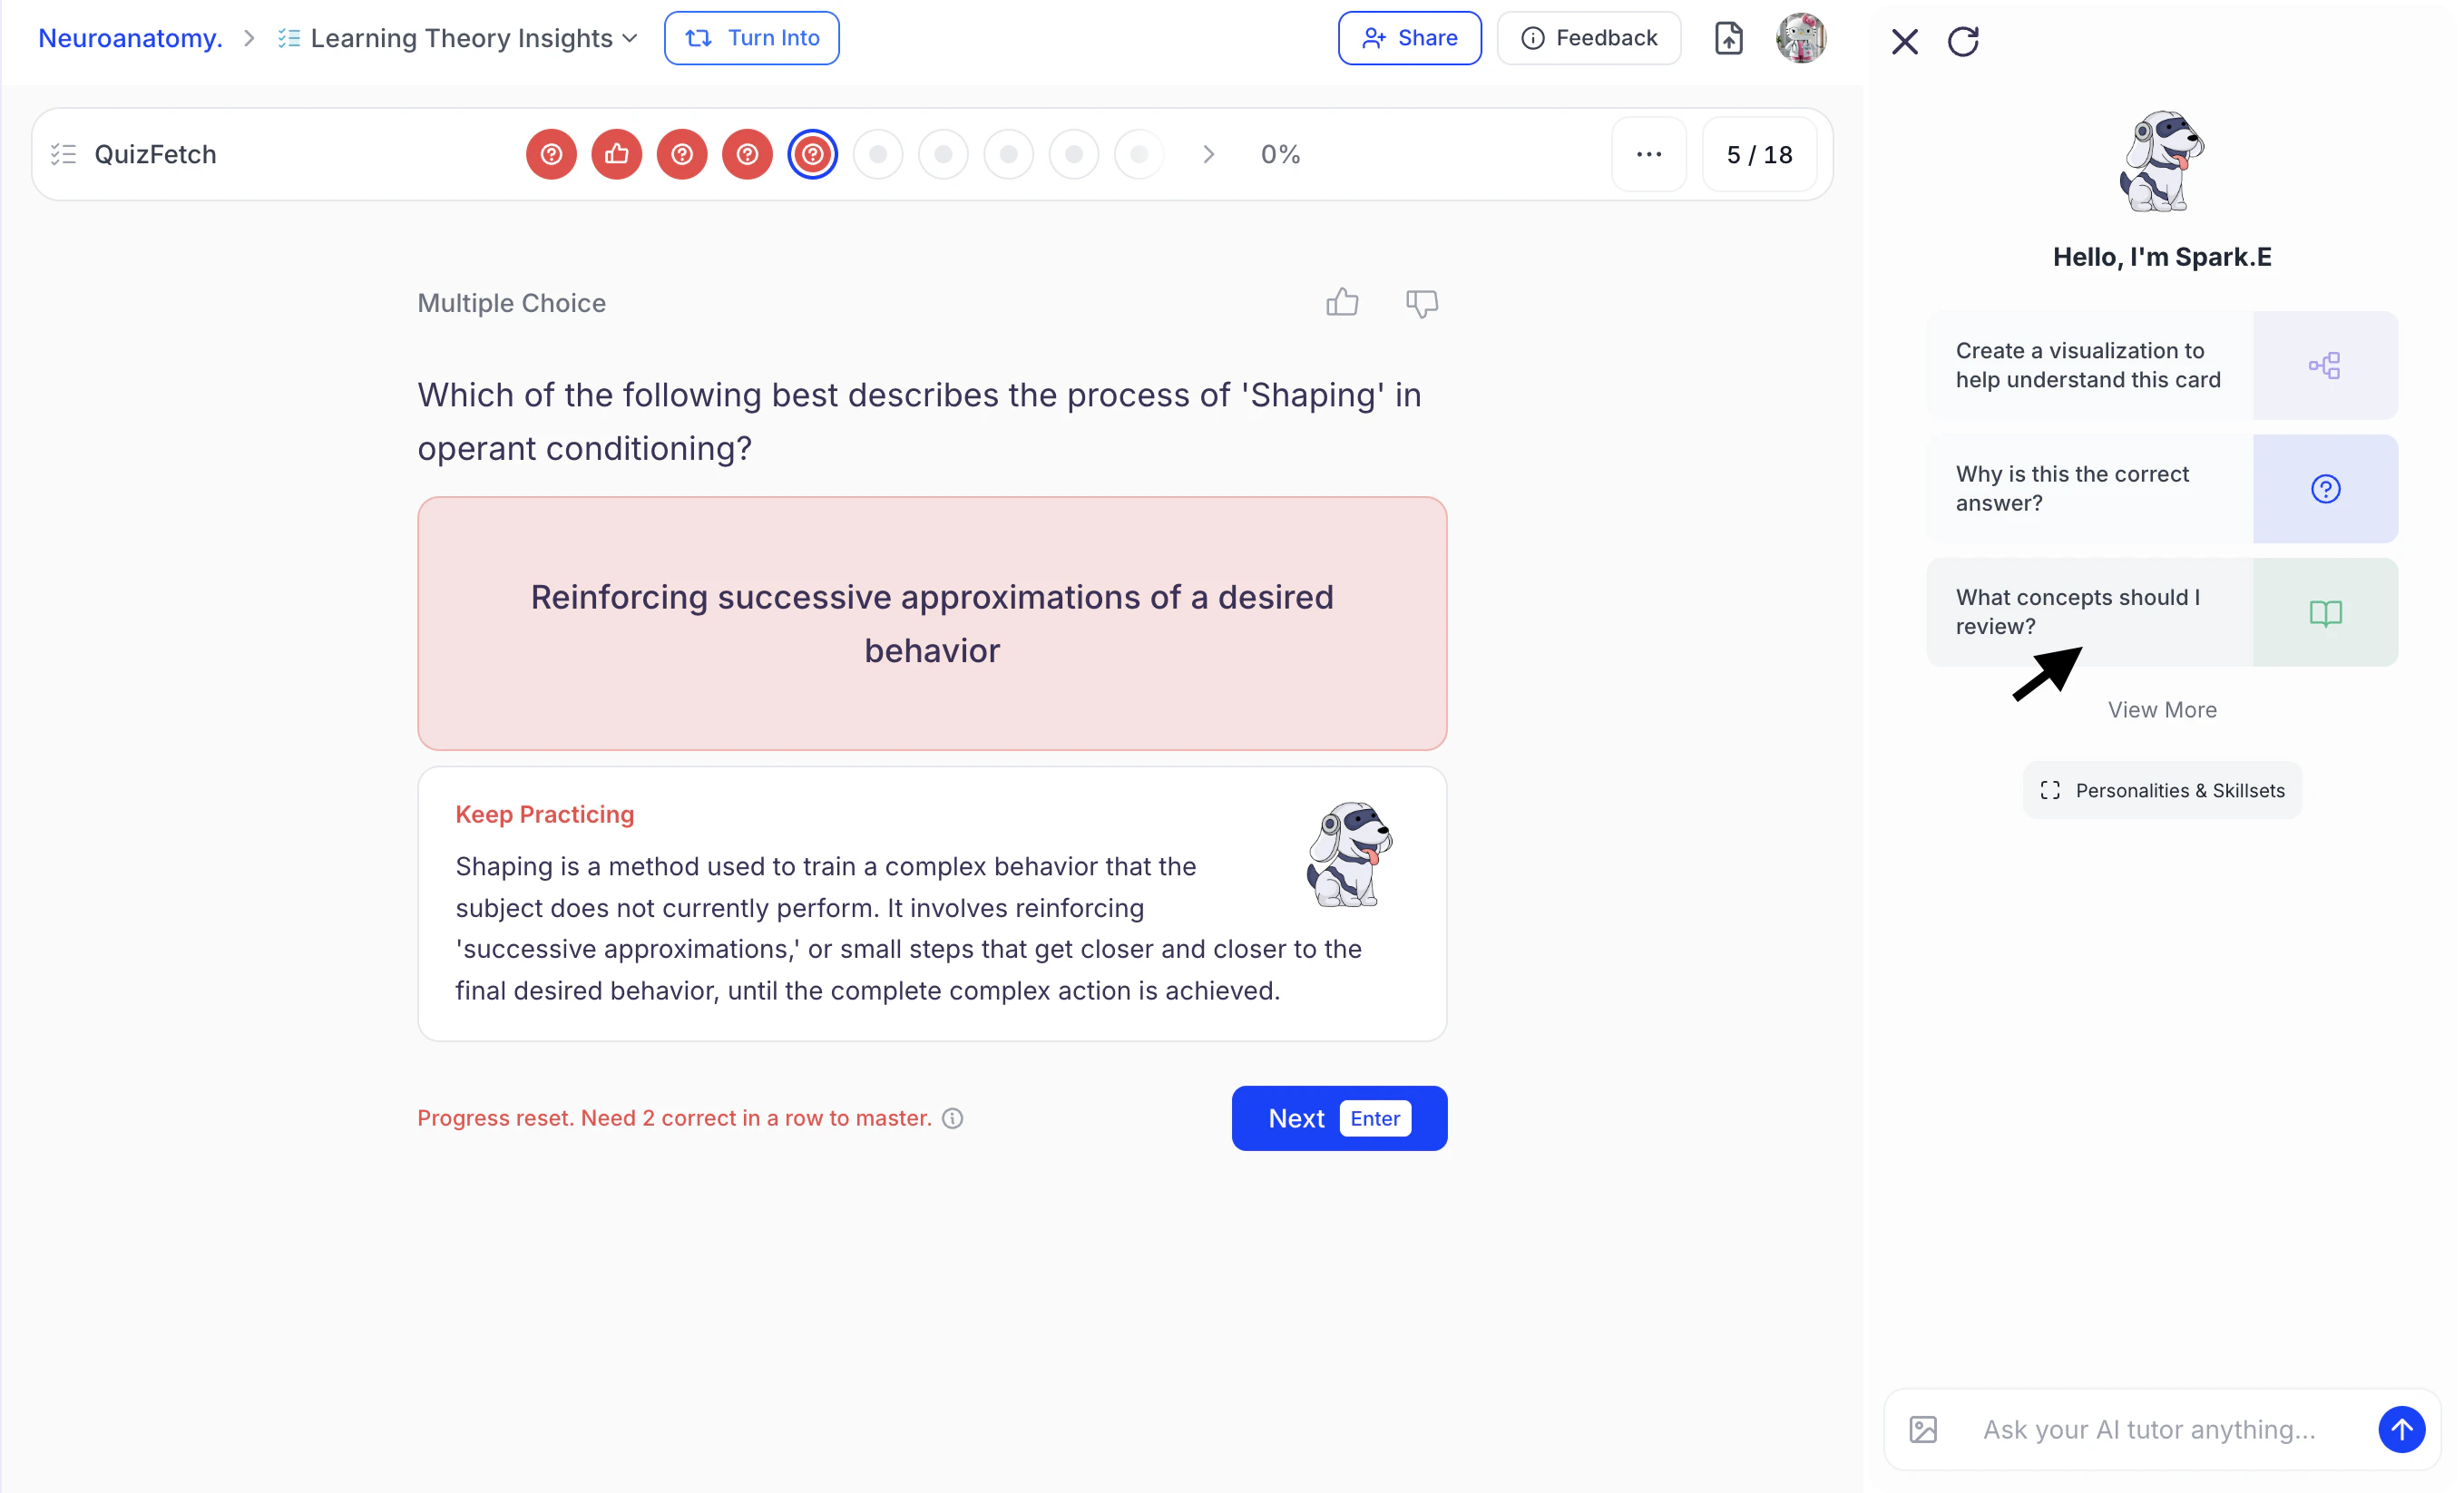
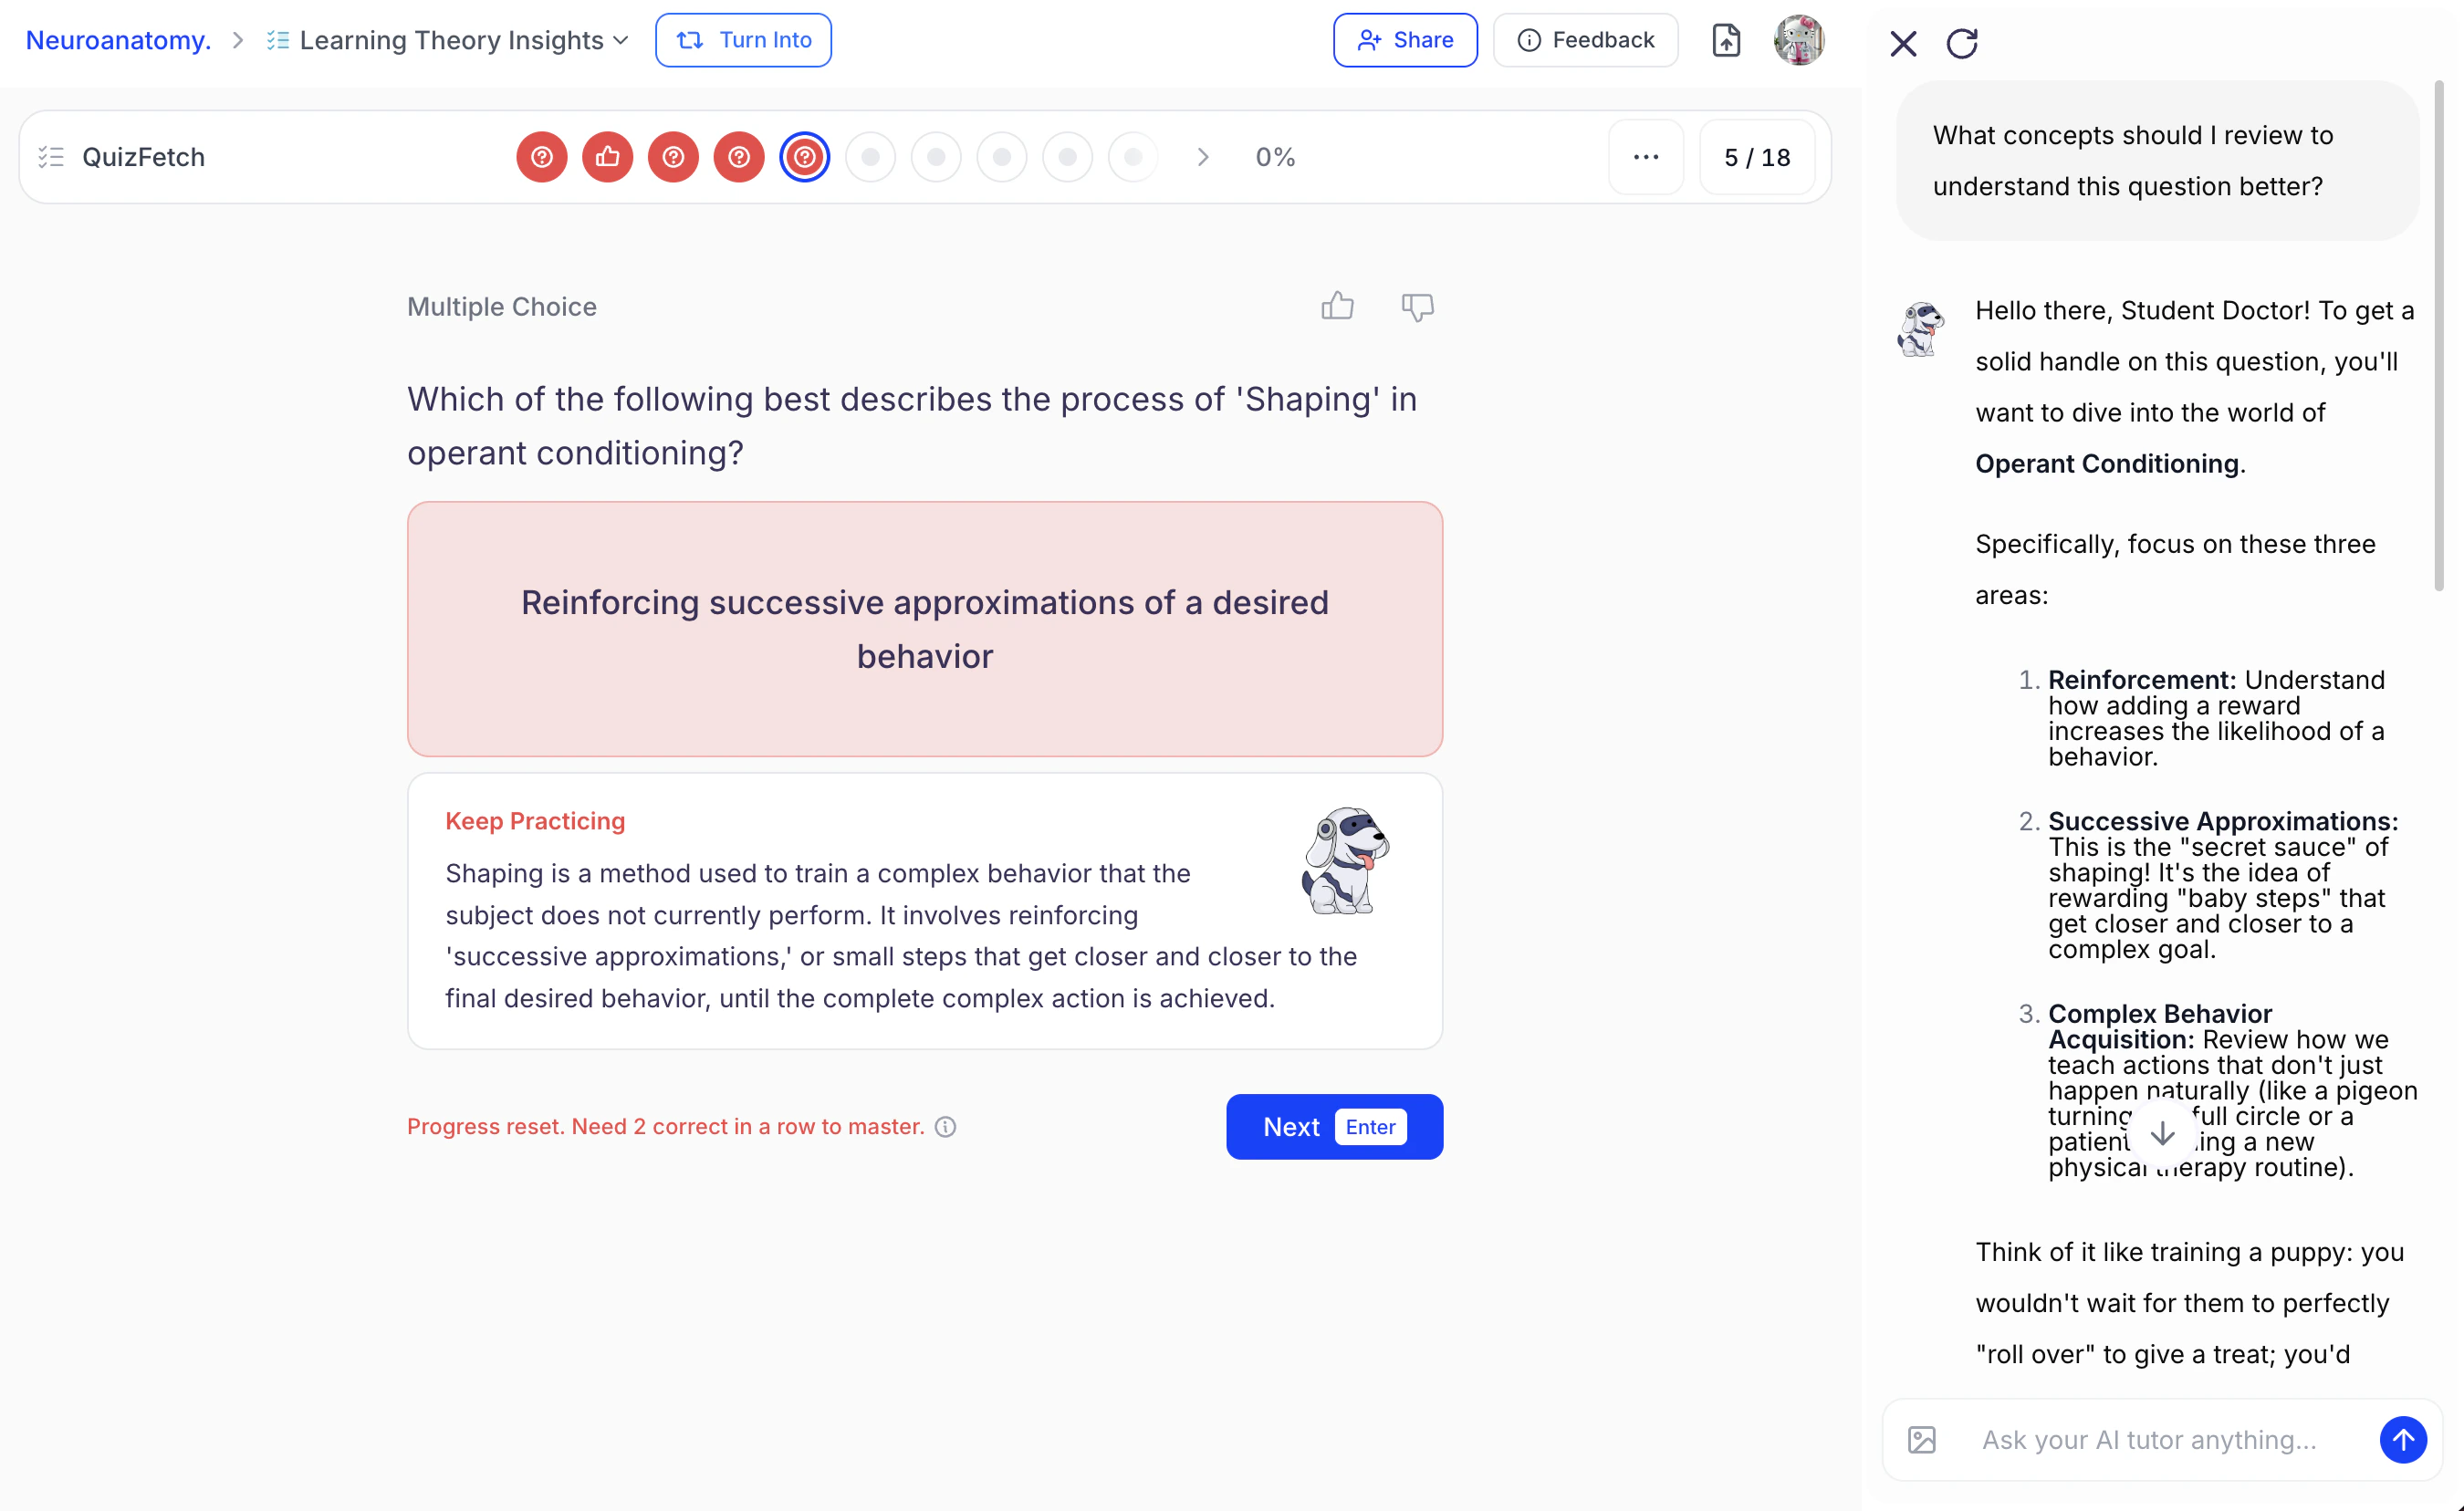
Step 5: Get Help From Spark.E
The Spark.E Chat is available throughout the quiz experience, allowing you to ask questions, request clarification, or explore concepts in more depth while answering questions and when reviewing feedback after rating your confidence. Using Spark.E during feedback review helps reinforce understanding, clarify misconceptions, and transform mistakes or uncertainty into targeted learning opportunities.
- Use the Spark.E Chat on the right side to receive deeper explanations for incorrect answers or to explore concepts related to a quiz question in greater detail by typing directly into the chat box and pressing Enter,
or select from the suggested prompts listed under Hello, I’m Spark.E.
- Spark.E will provide detailed, personalized responses tailored to your learning style.
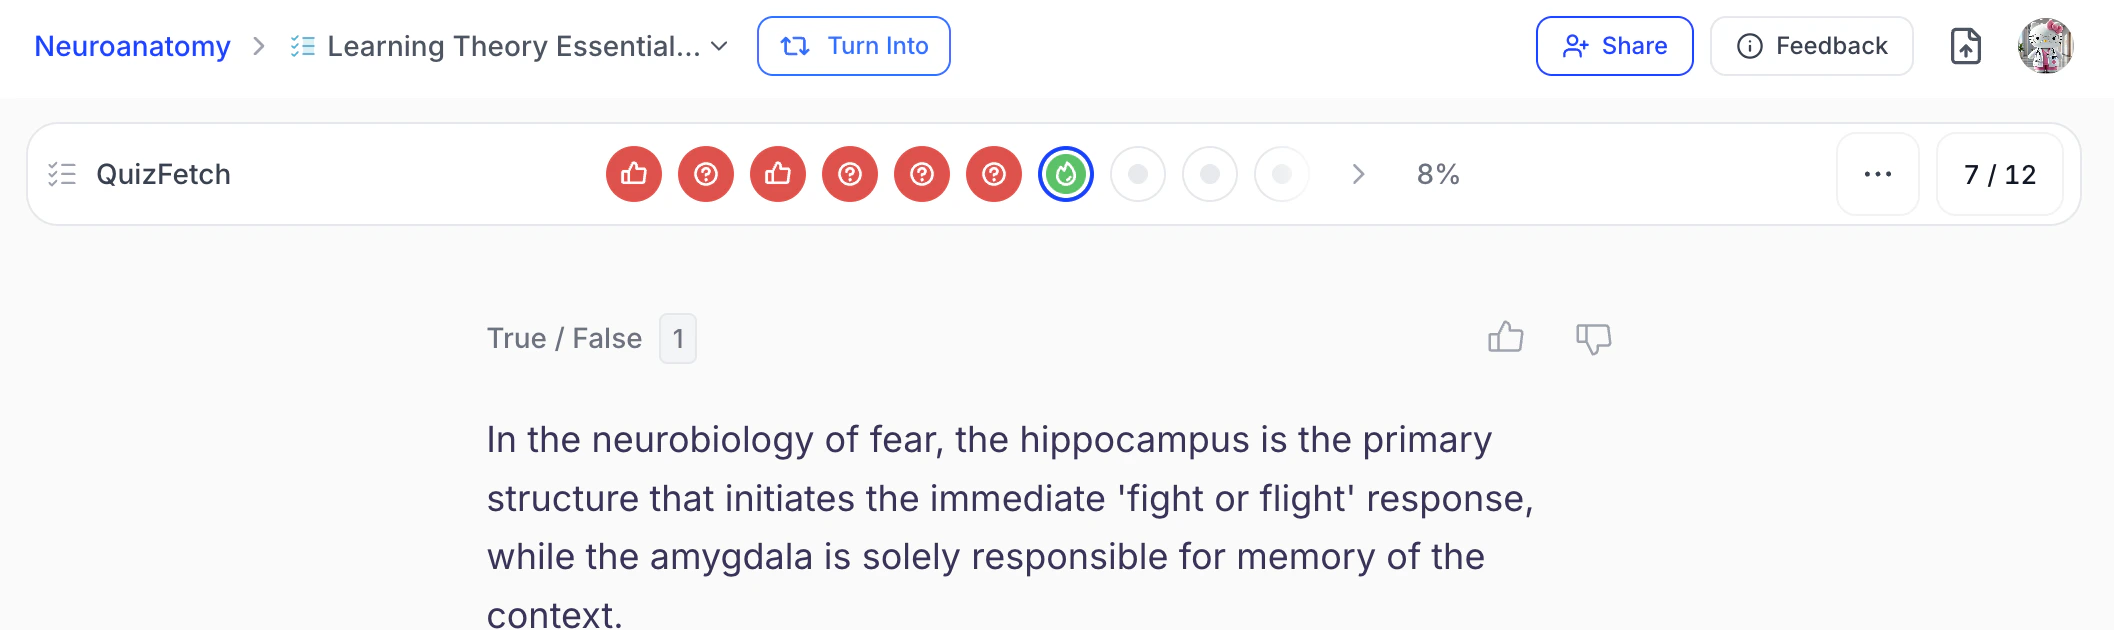
Navigating Your Quiz
- At the top of your quiz, you’ll see a progress bar made up of dots. Each dot represents an individual question and fills in as you move through the quiz. After selecting your confidence level, each dot updates based on your accuracy and confidence rating to reflect your learning progress. Your overall mastery percentage is displayed on the right side of the progress bar.
To view detailed information about your confidence rating and mastery requirements, hover over the dot corresponding to the question.
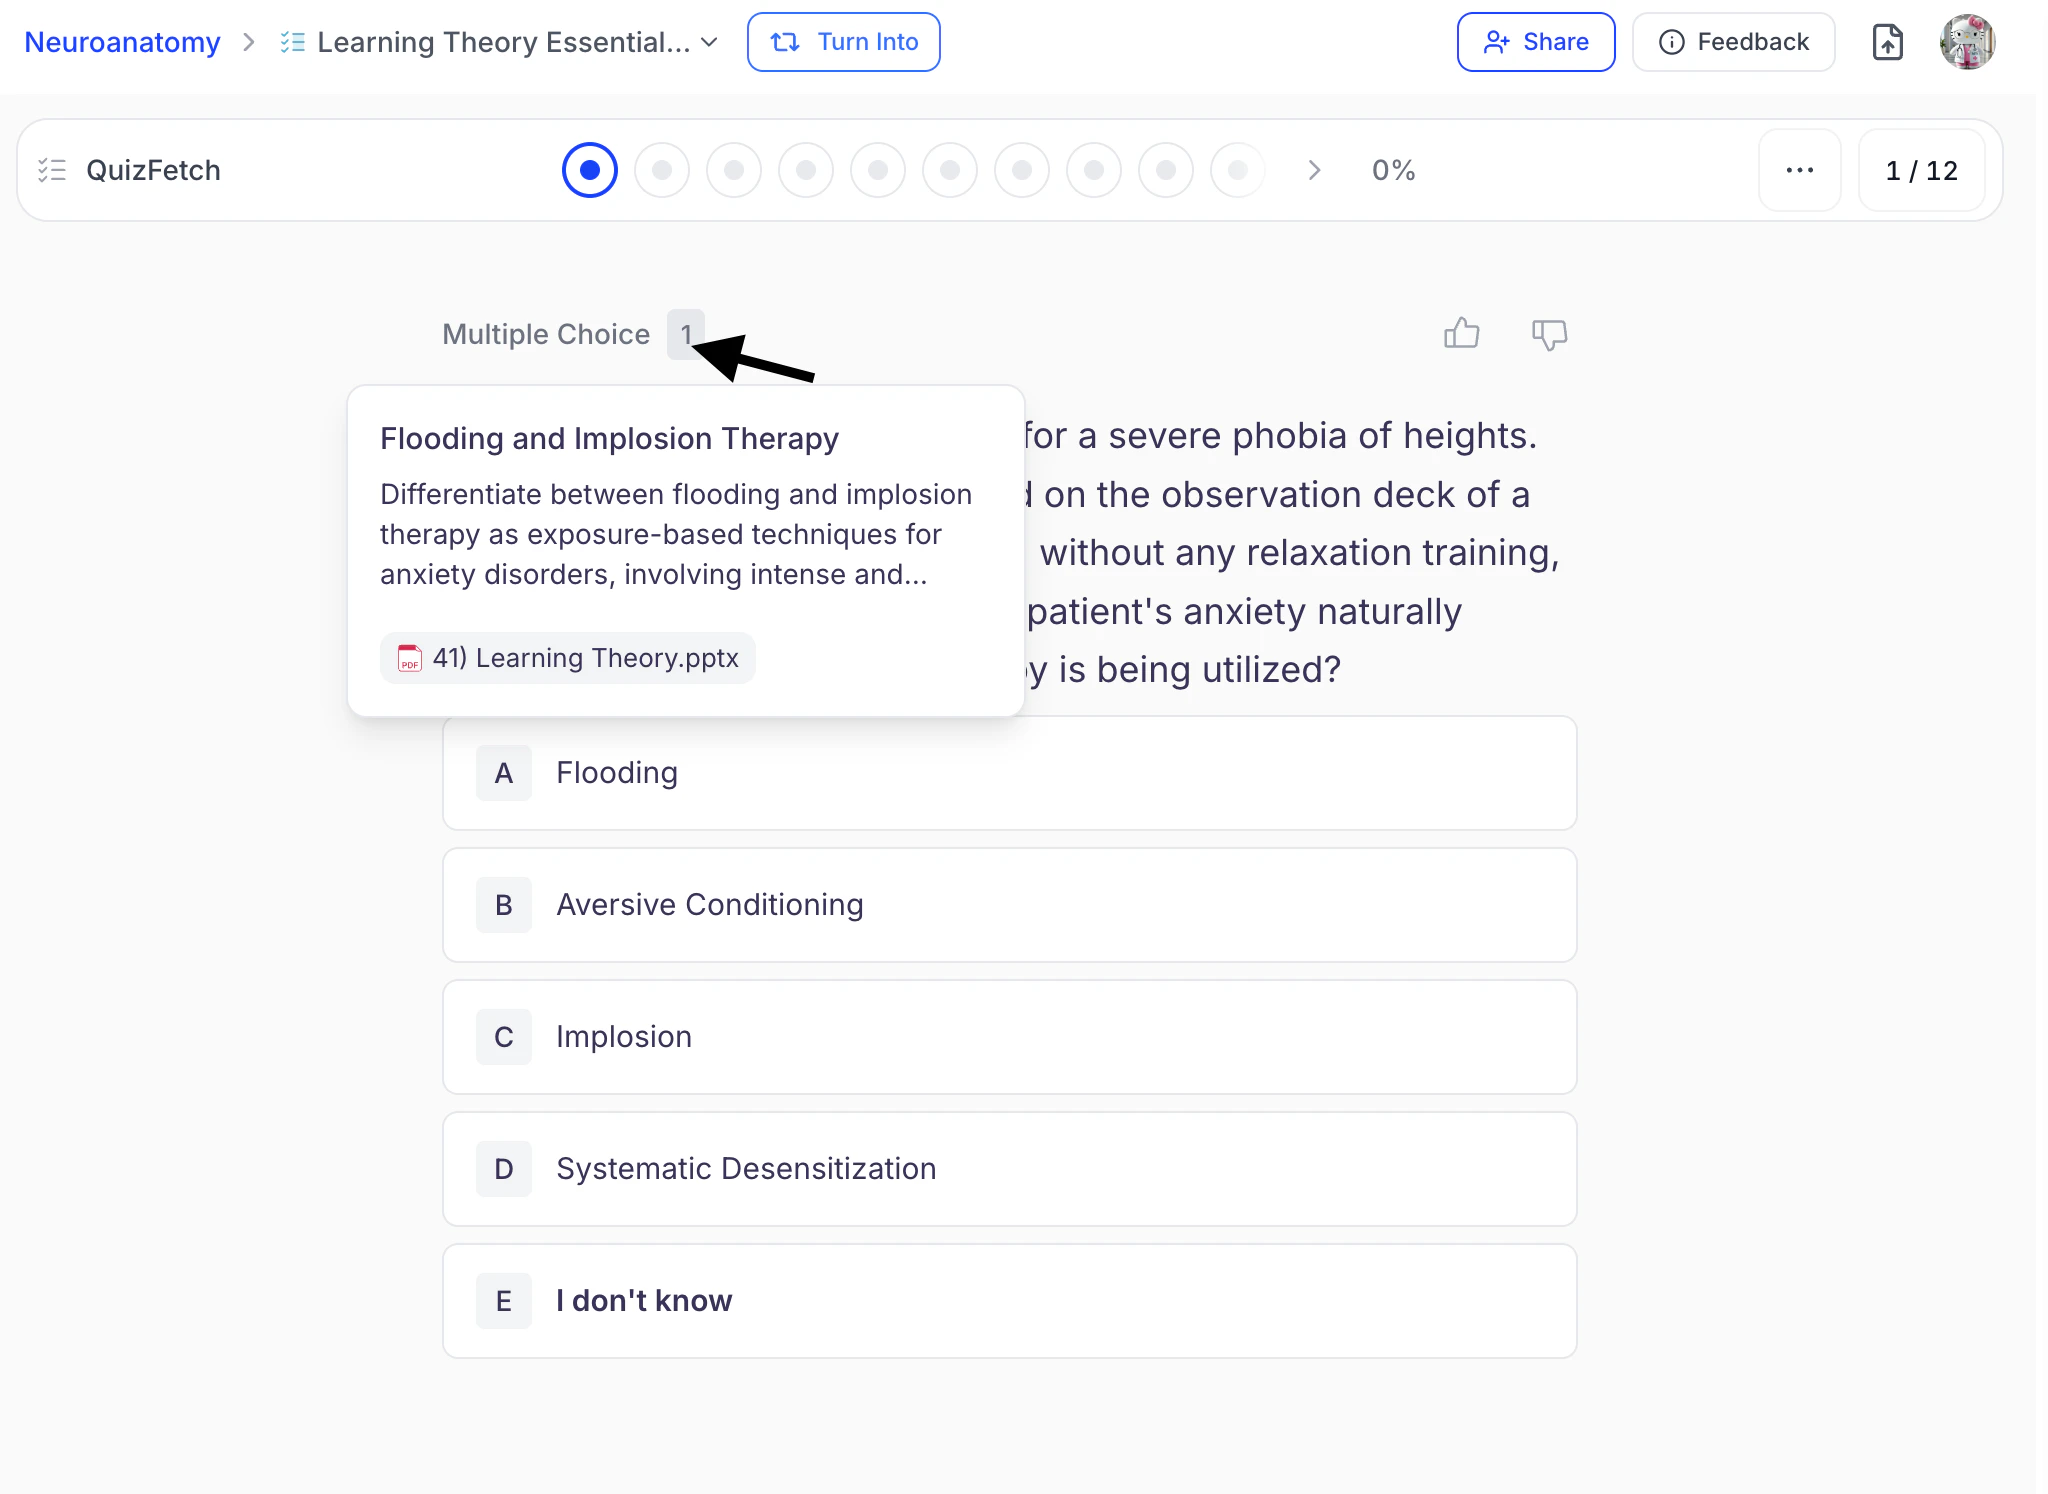
- Curious about the source? Click the number in the top left above your question to see exactly where the information comes from in your study material.
- QuizFetch presents questions in an adaptive order based on confidence ratings and spaced repetition settings. Rather than navigating freely, learners move forward by selecting Next or pressing Enter after reviewing feedback,
allowing the system to guide review timing for optimal mastery.
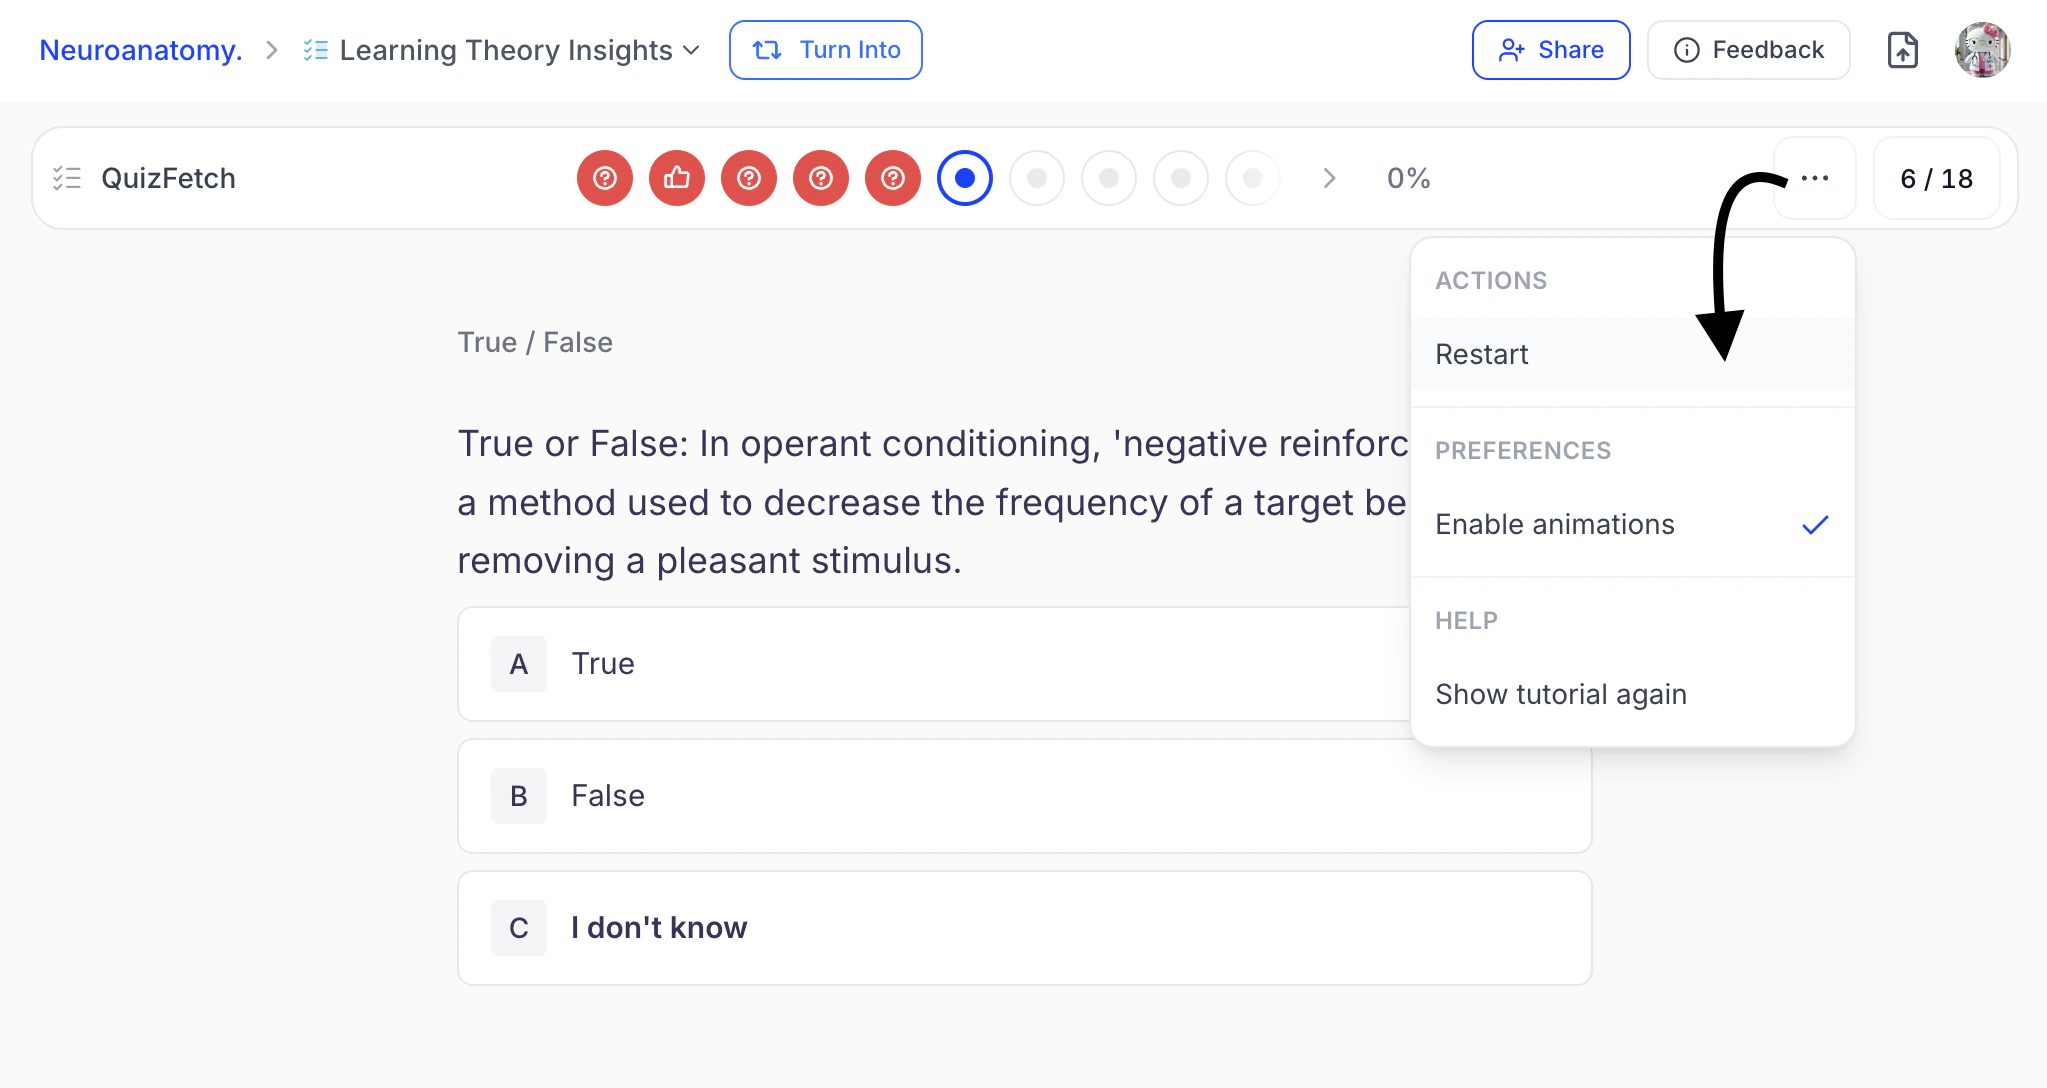
- If you want to restart your quiz, select the … settings button from the top toolbar and click Restart.
- If you are sure you want to restart your quiz, select Restart.
 Your progress will reset and you will be taken to question 1.
Completing Your Quiz
- QuizFetch quizzes are self-paced and do not require completion in a single session.
- Your responses and confidence ratings are saved automatically, enabling you to pause, return later, and continue progressing toward mastery over time.
- The dot icons and your overall mastery percentage updates as you progress through the quiz. Overall mastery percentage can be tracked on the right side of the progress bar.
- Once mastery is reached you will be taken to the results page where you can get a full breakdown of your performance with study recommendations.
For more information refer to the Interpreting Your Results Page section below.
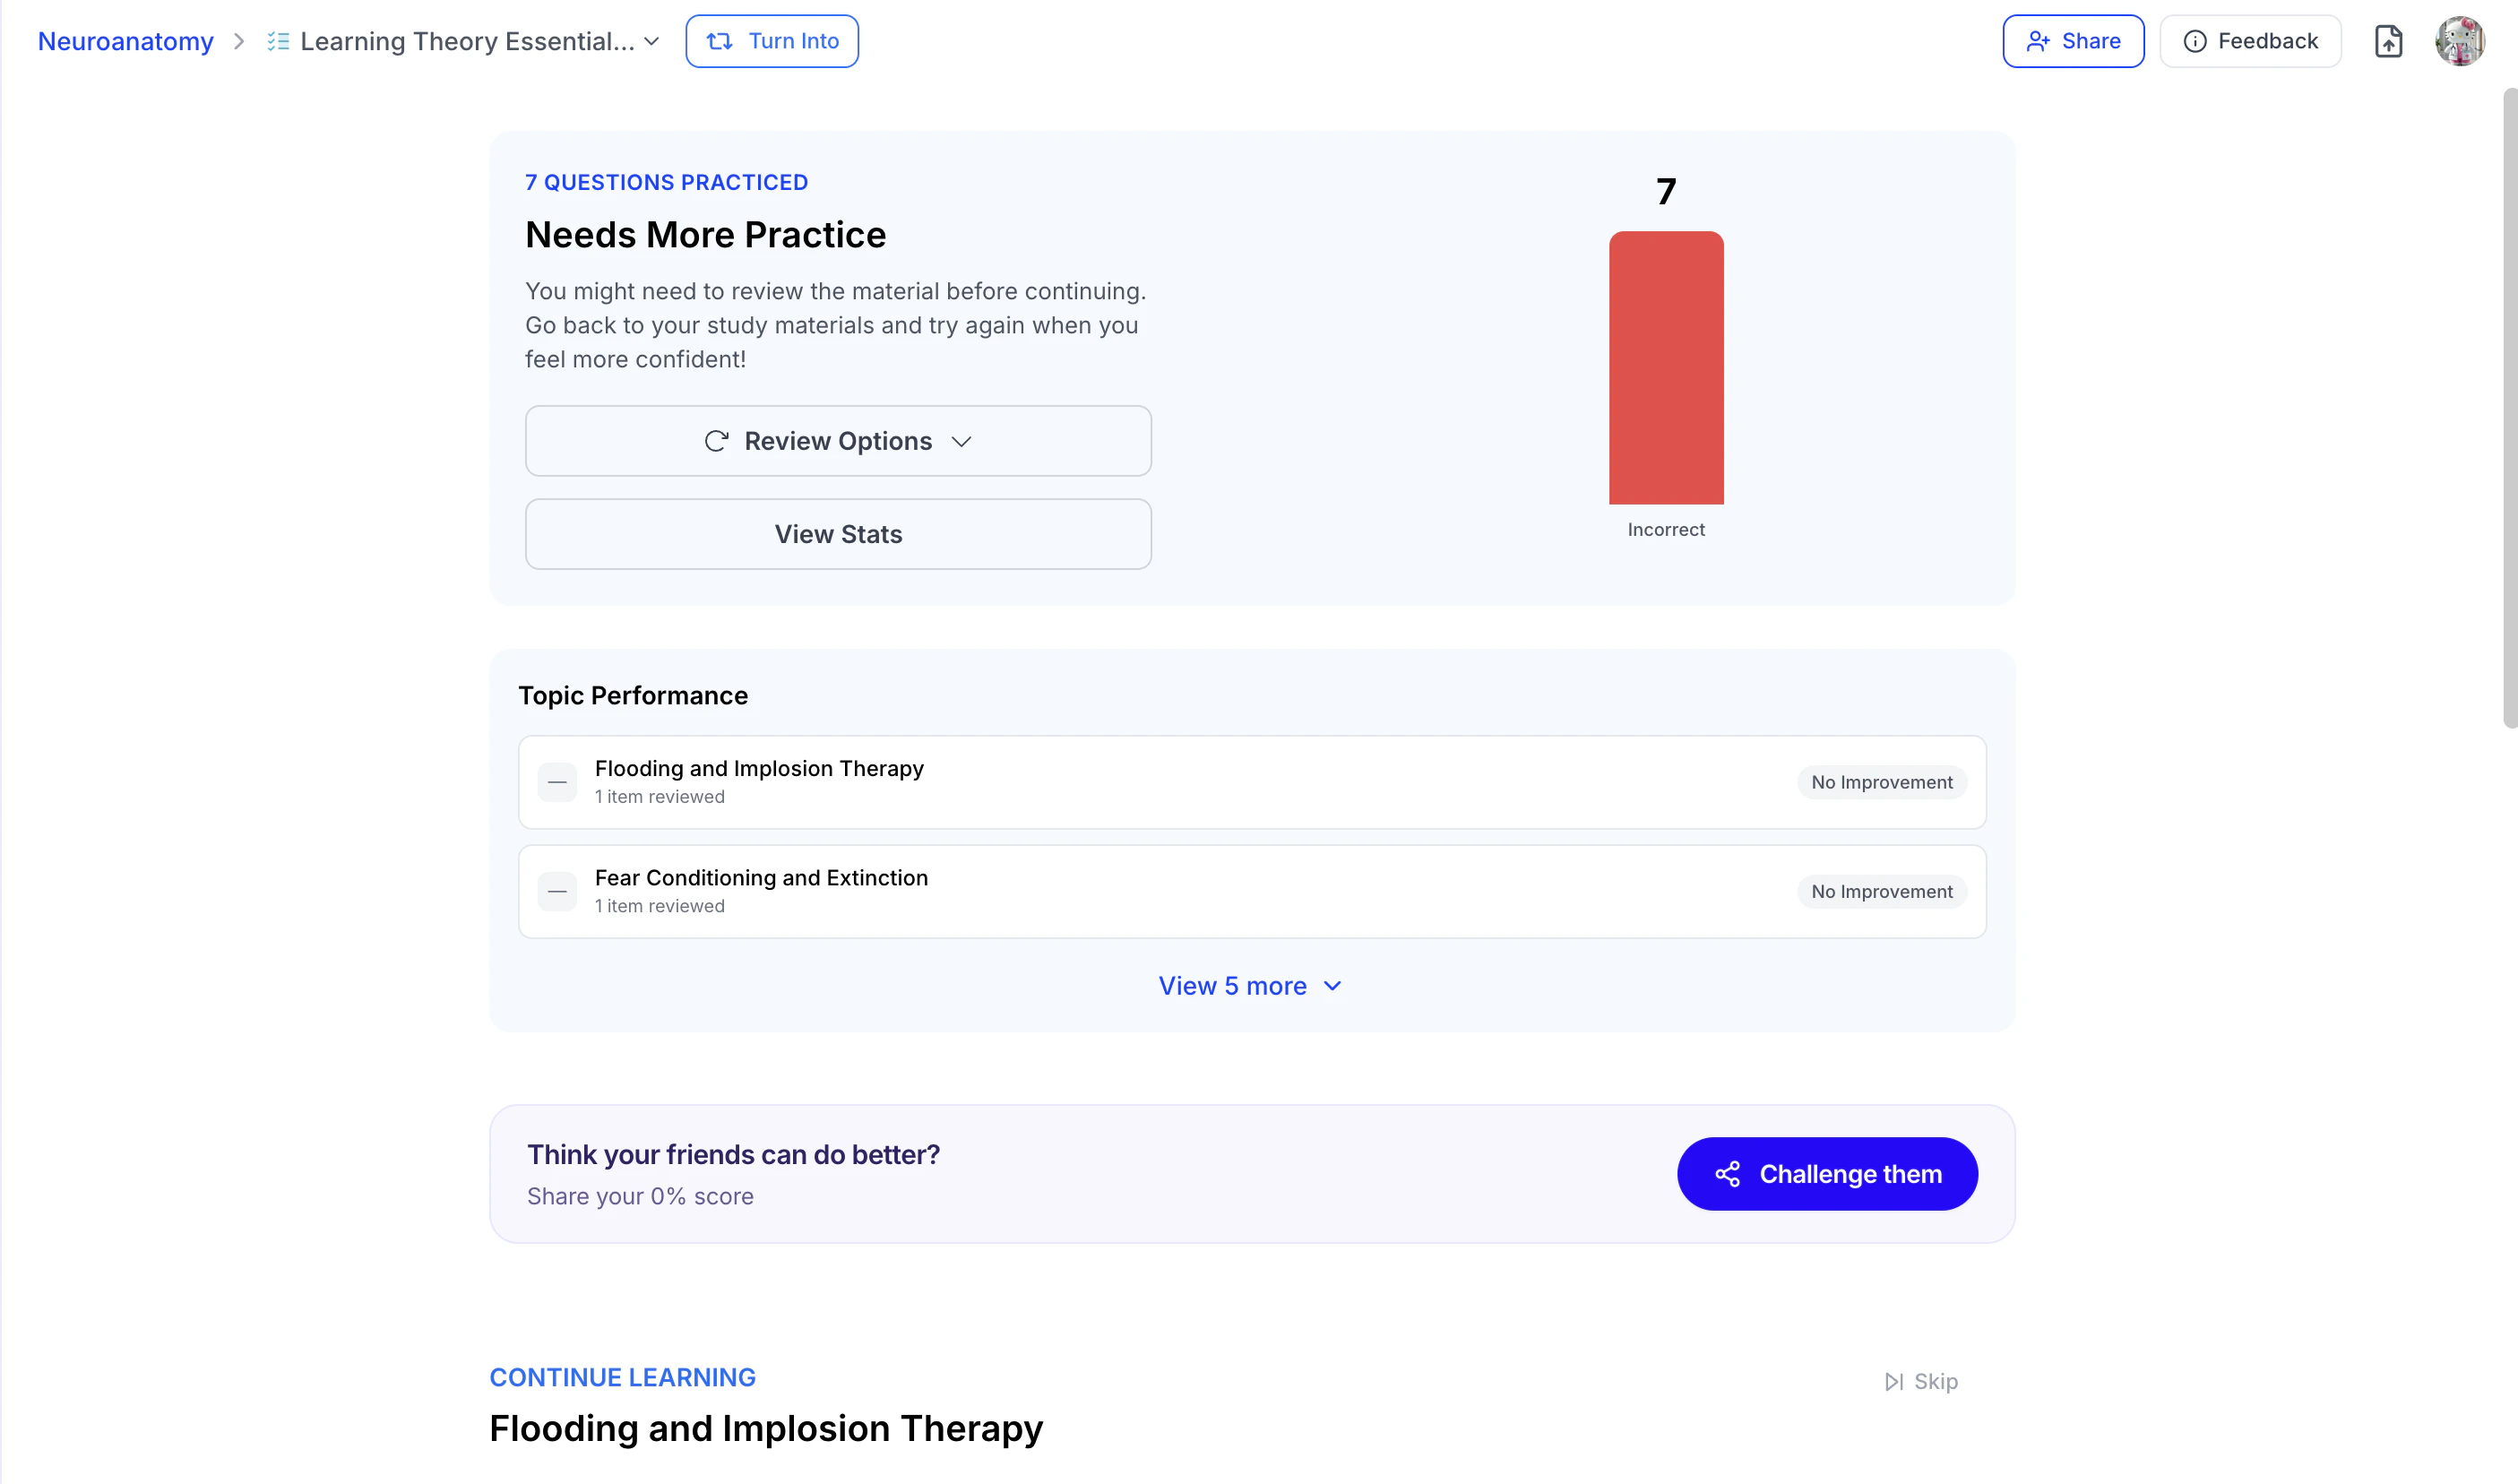
Too Many Questions Wrong?
- If too many questions are answered incorrectly, the system will temporarily pause progression and recommend reviewing the material before continuing.
- This adaptive safeguard helps prevent reinforcement of misunderstandings, supports targeted review, and ensures a stronger foundation before moving forward.
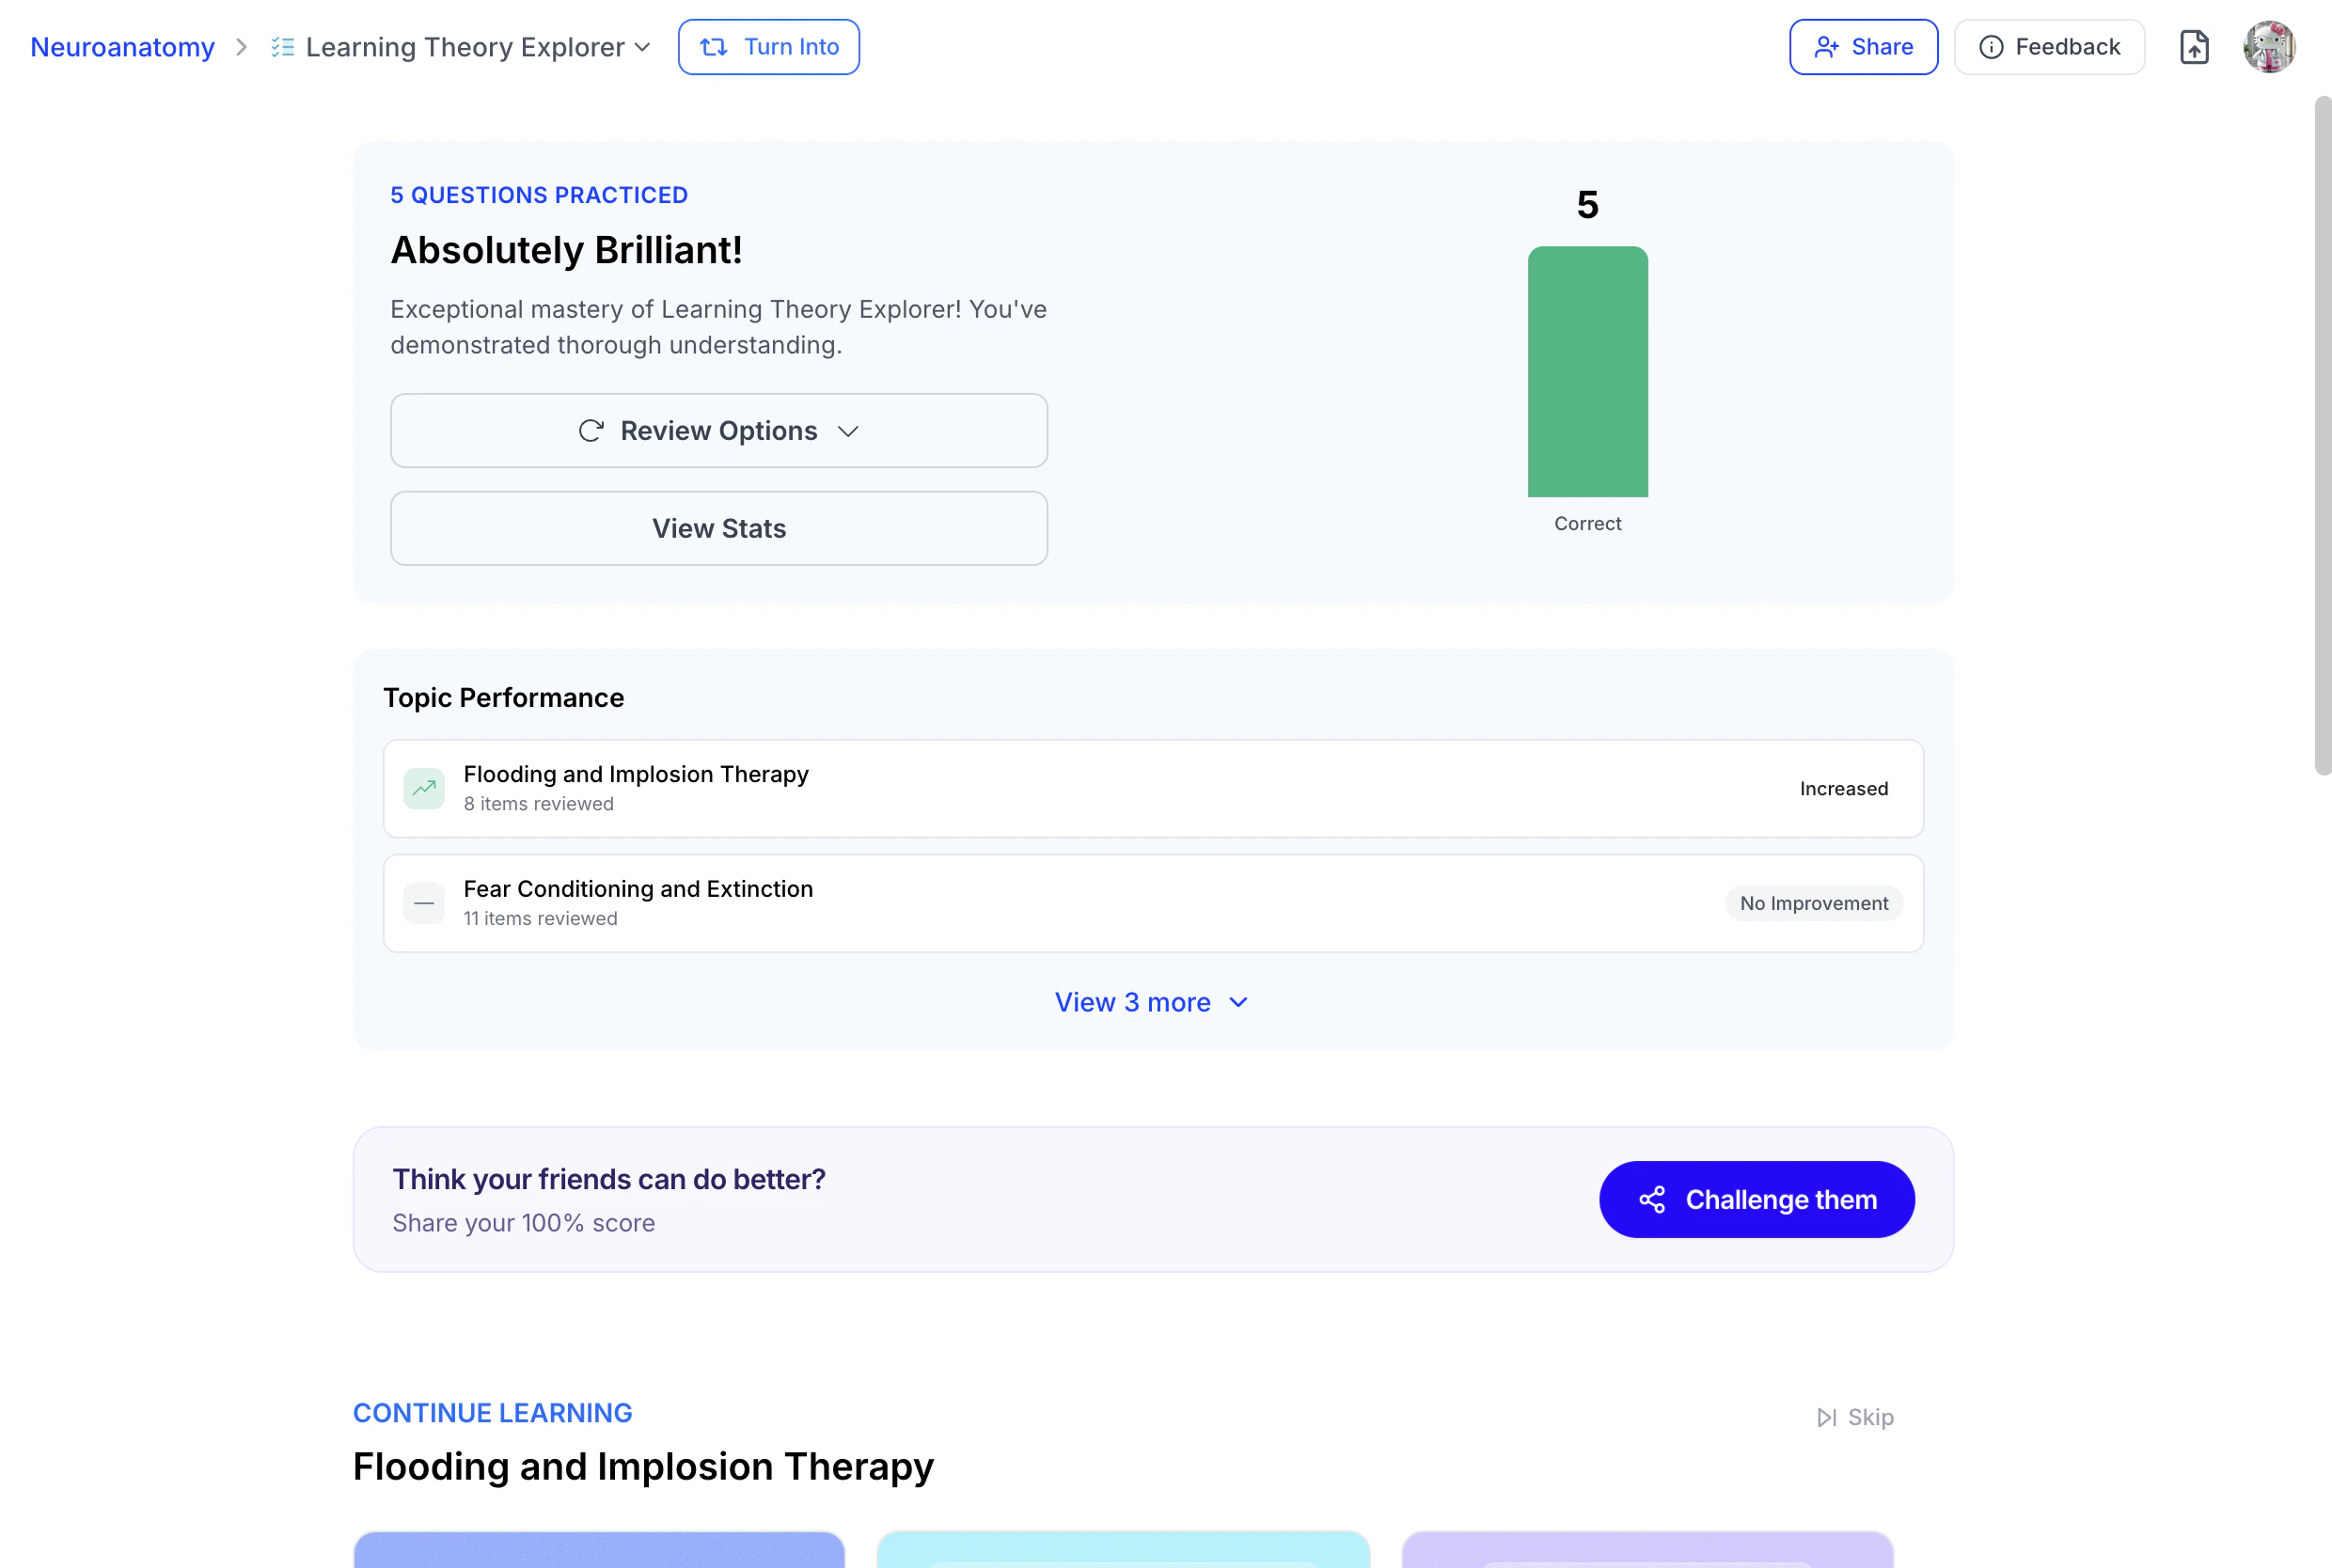
Interpreting Your Results Page
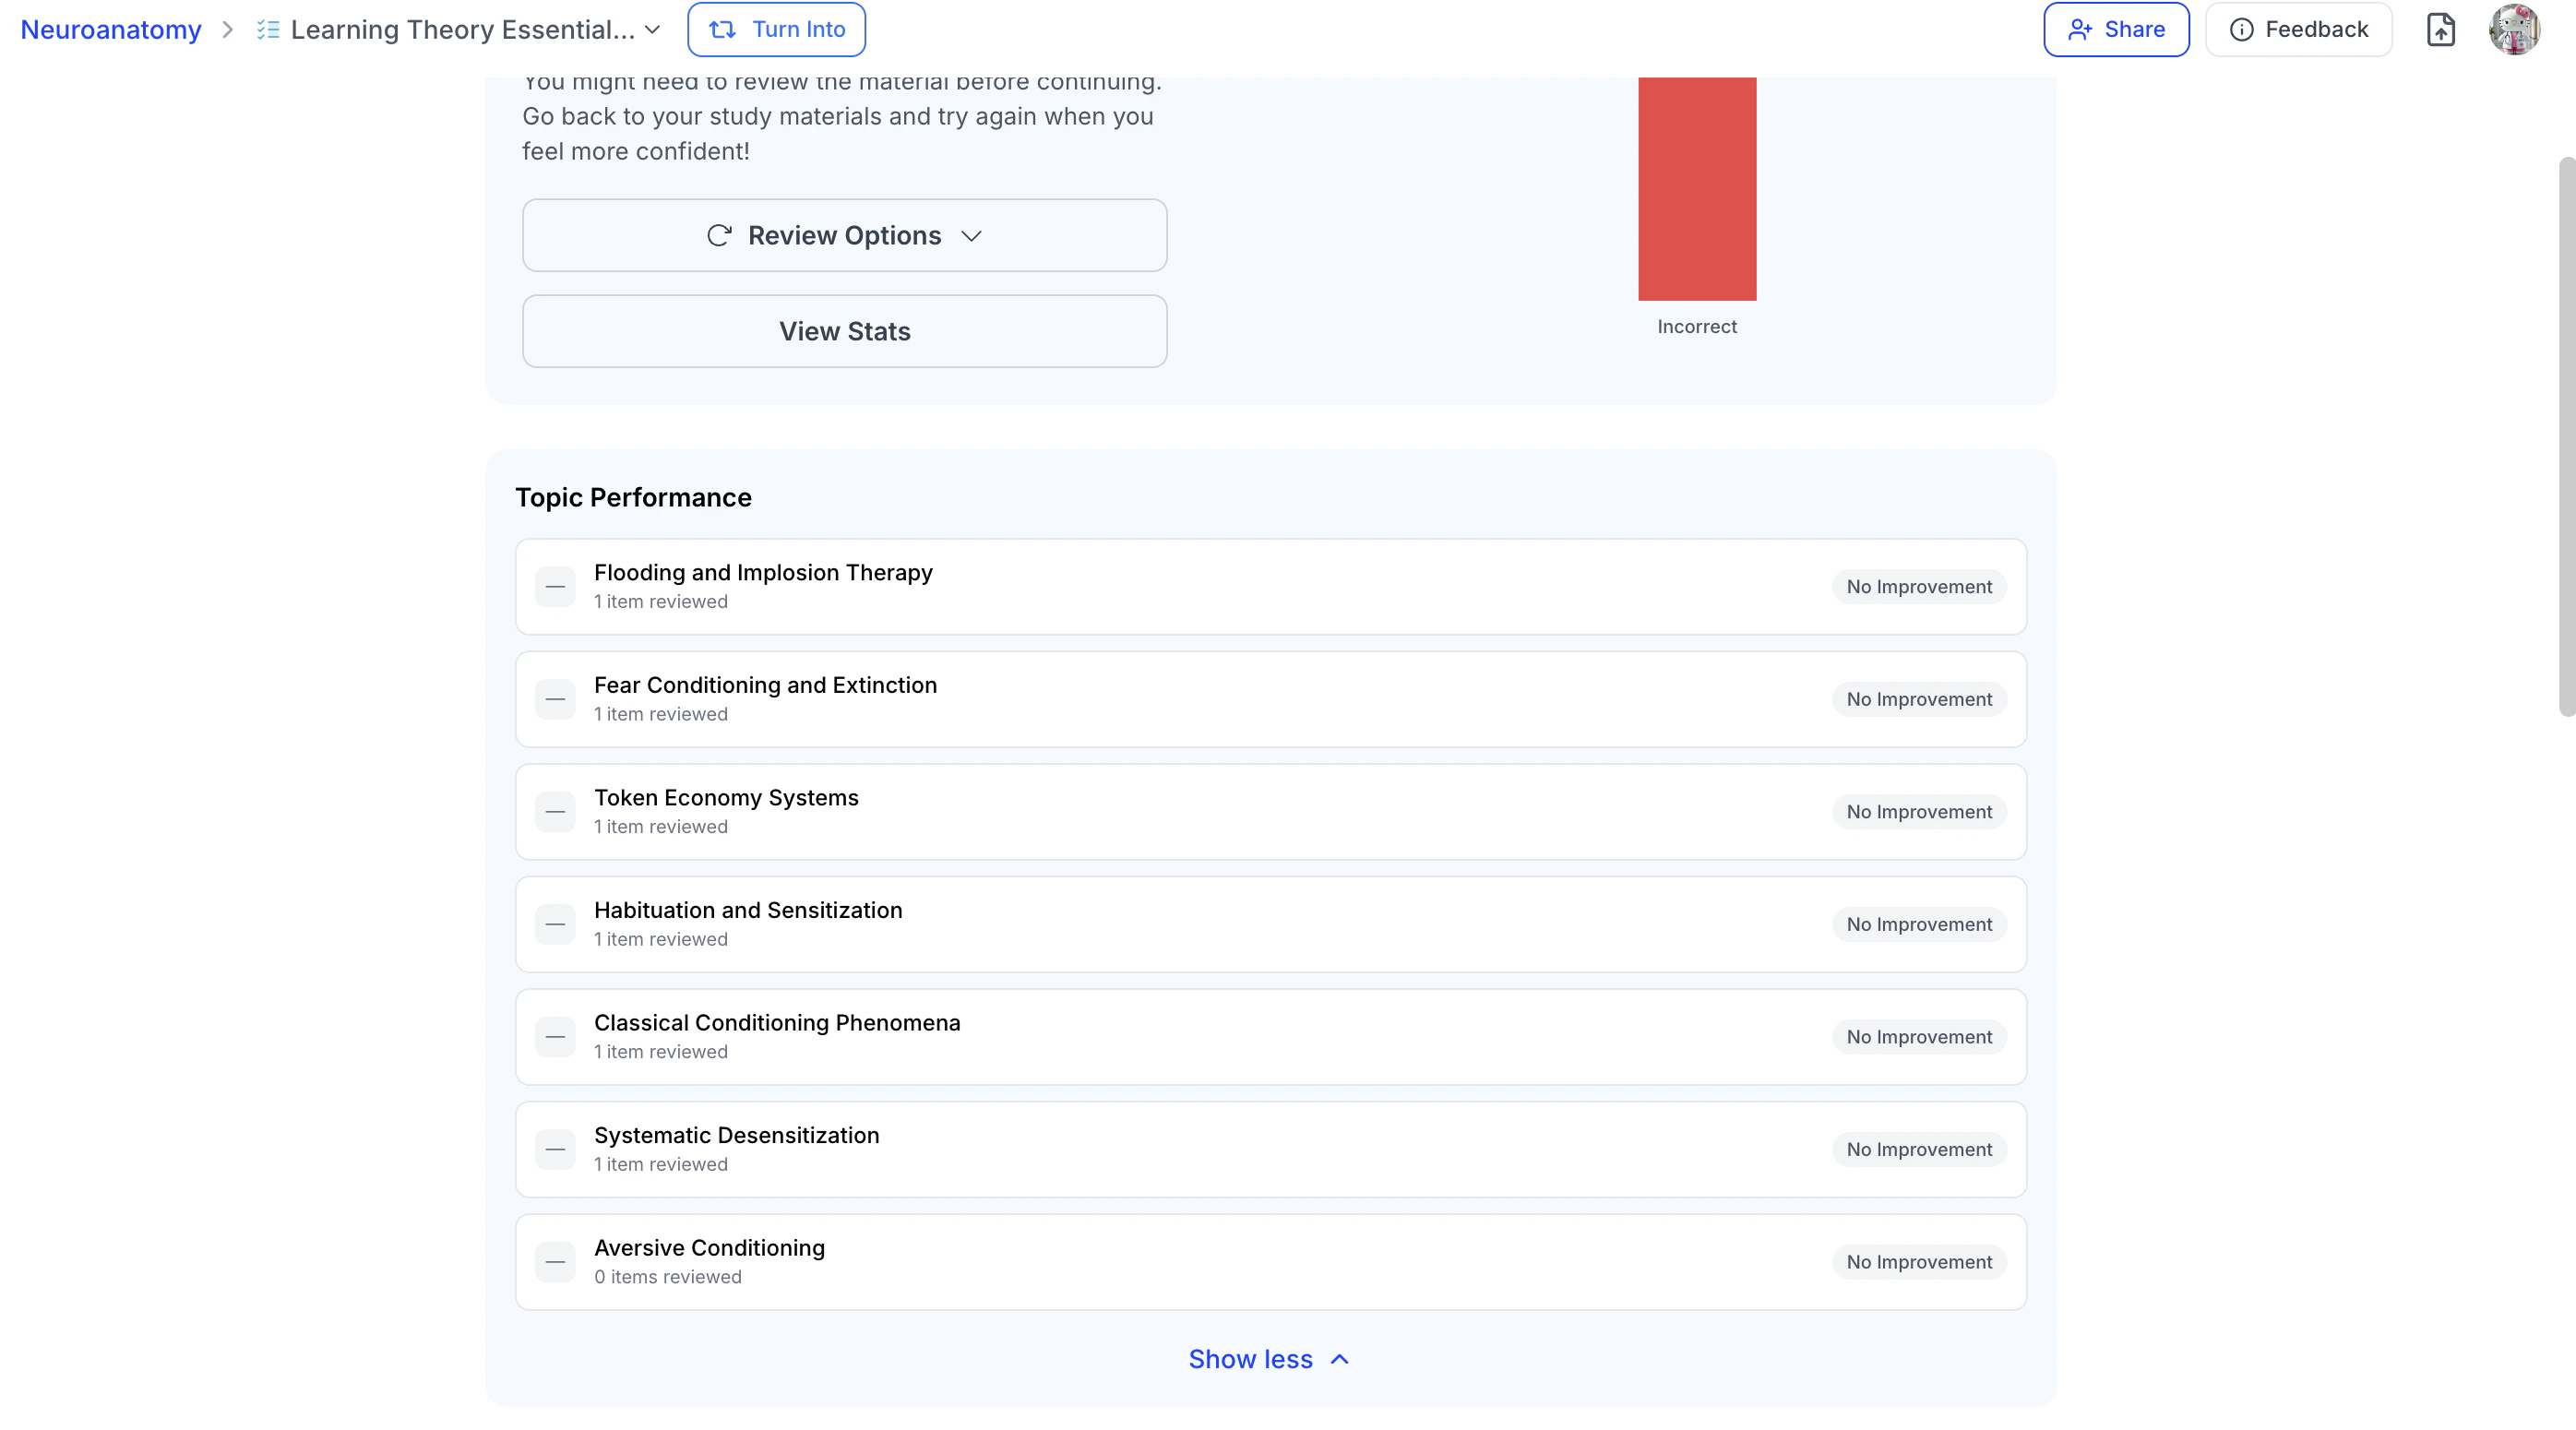
Whether you successfully reach mastery or are paused due to repeated incorrect responses, the QuizFetch Results page provides a detailed breakdown of your performance along with personalized recommendations to help you confidently strengthen your understanding.
The Topic Performance section provides detailed insights into your progress, highlighting topics where you are excelling, improving, or need further review.
- This section displays how many questions (items) were reviewed for each topic and shows your progress status alongside each category.
- Select View More to expand and see the full topic breakdown. To collapse the expanded view, select Show Less.
- The Topic Performance section updates as you complete your quiz until mastery is reached.
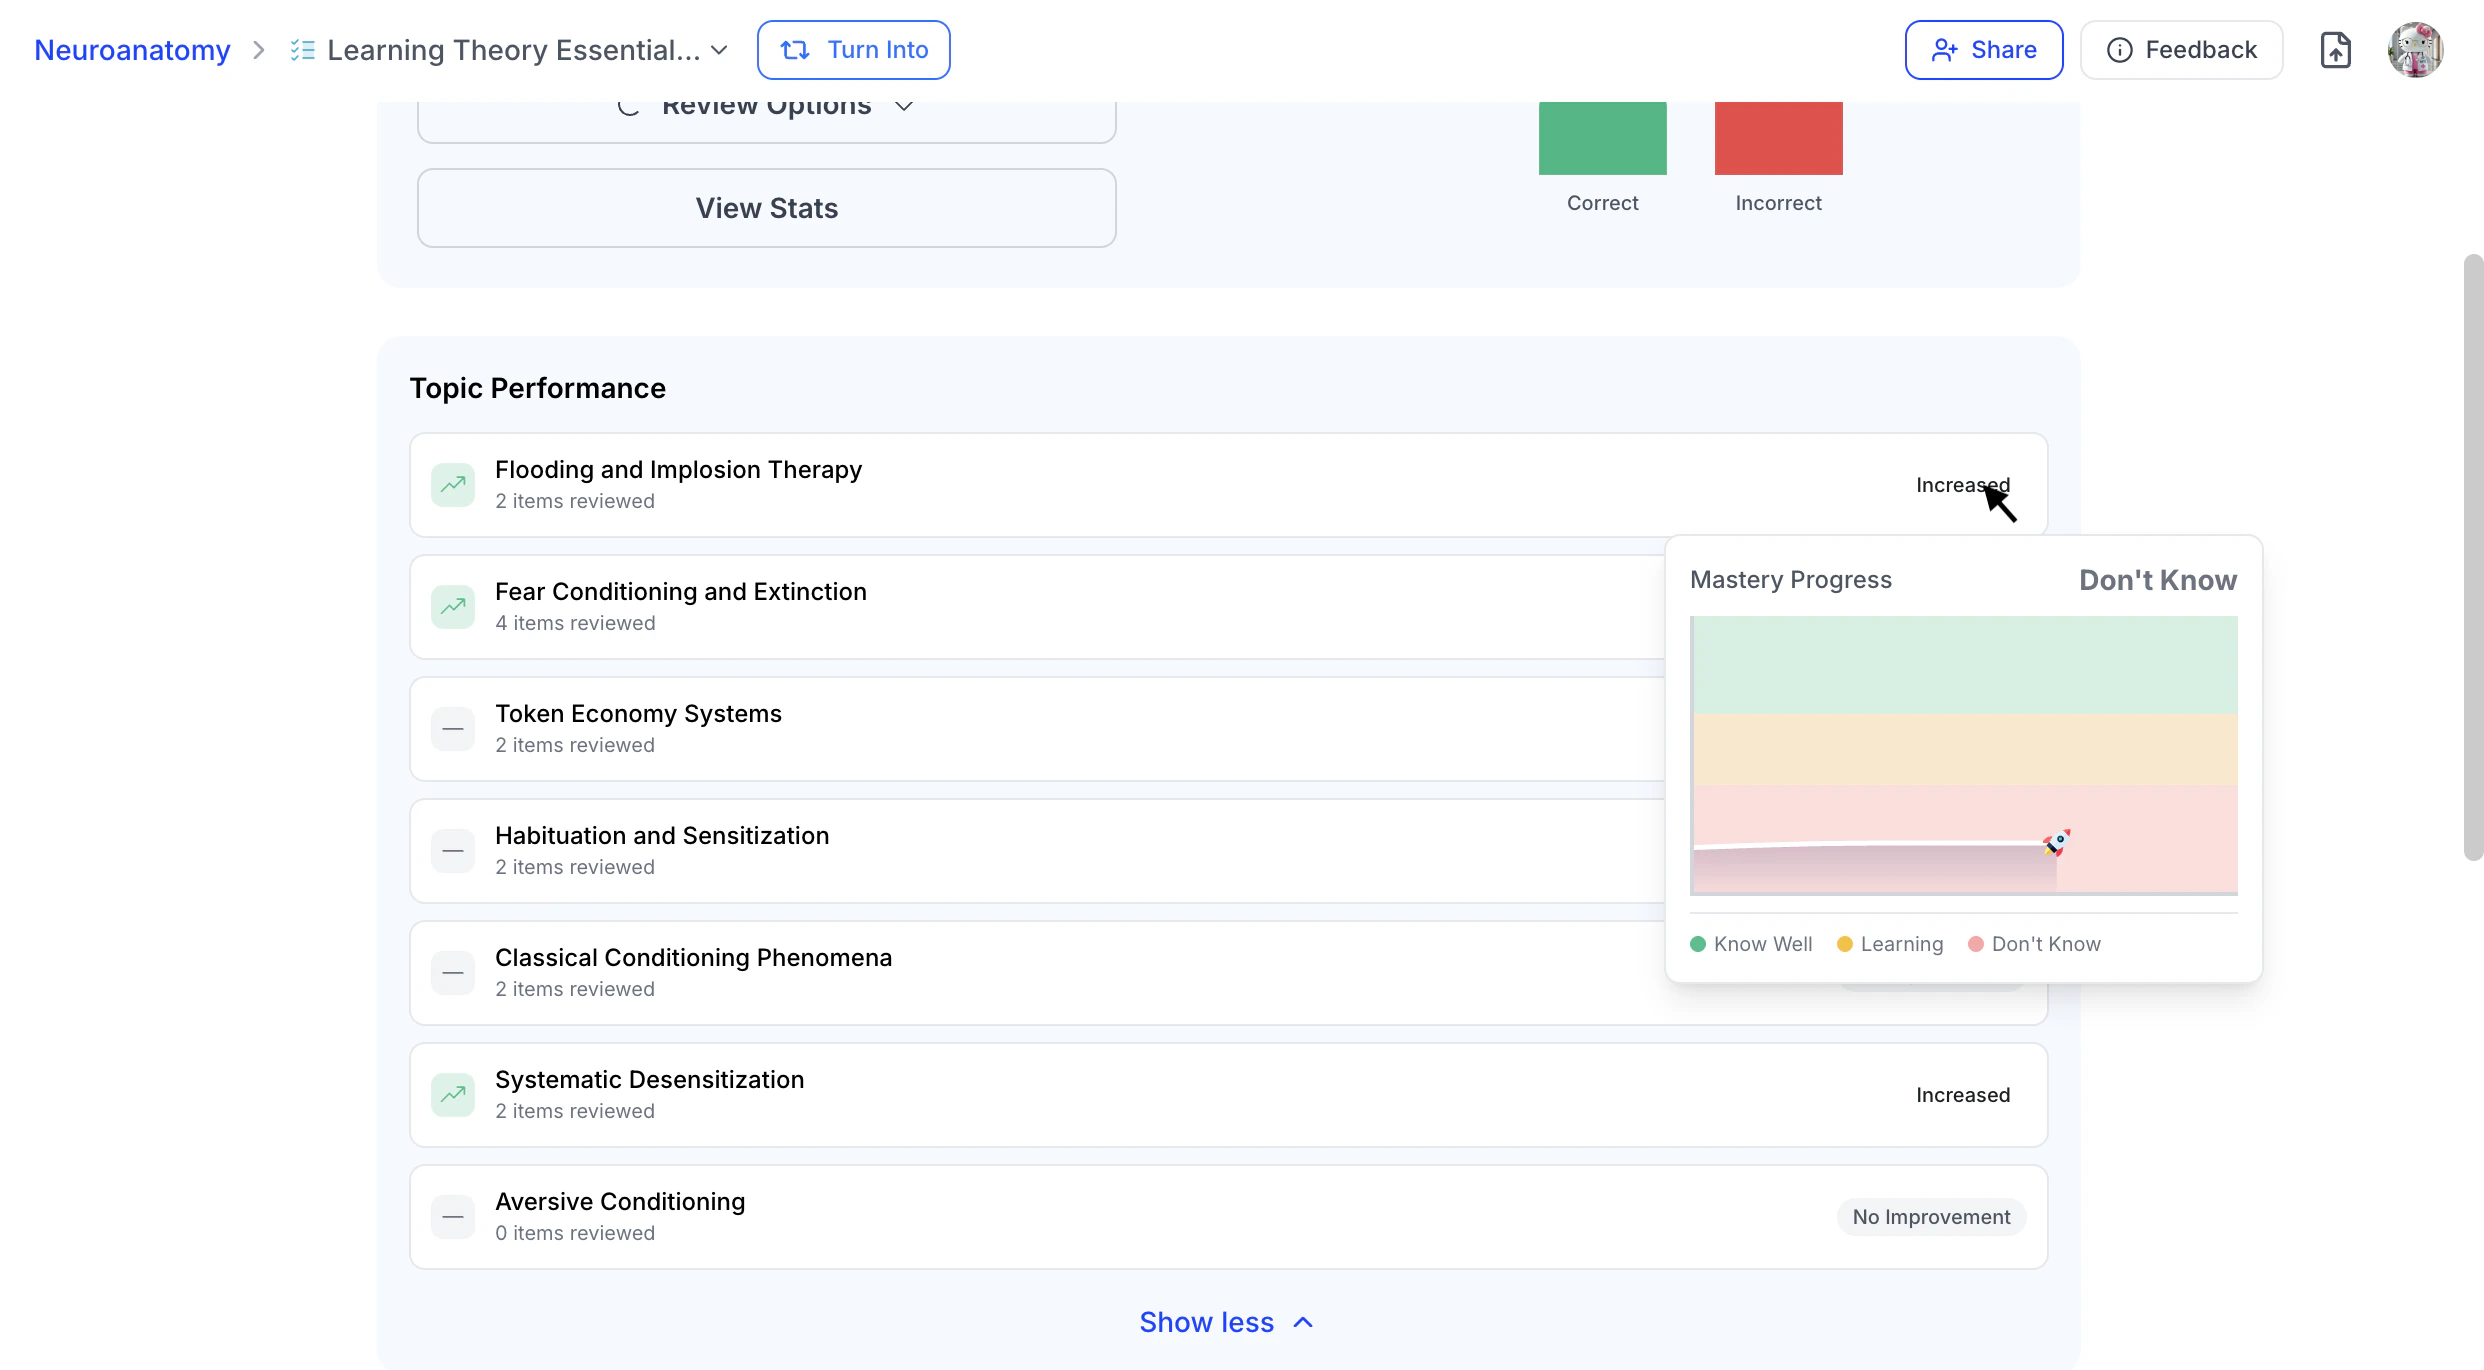
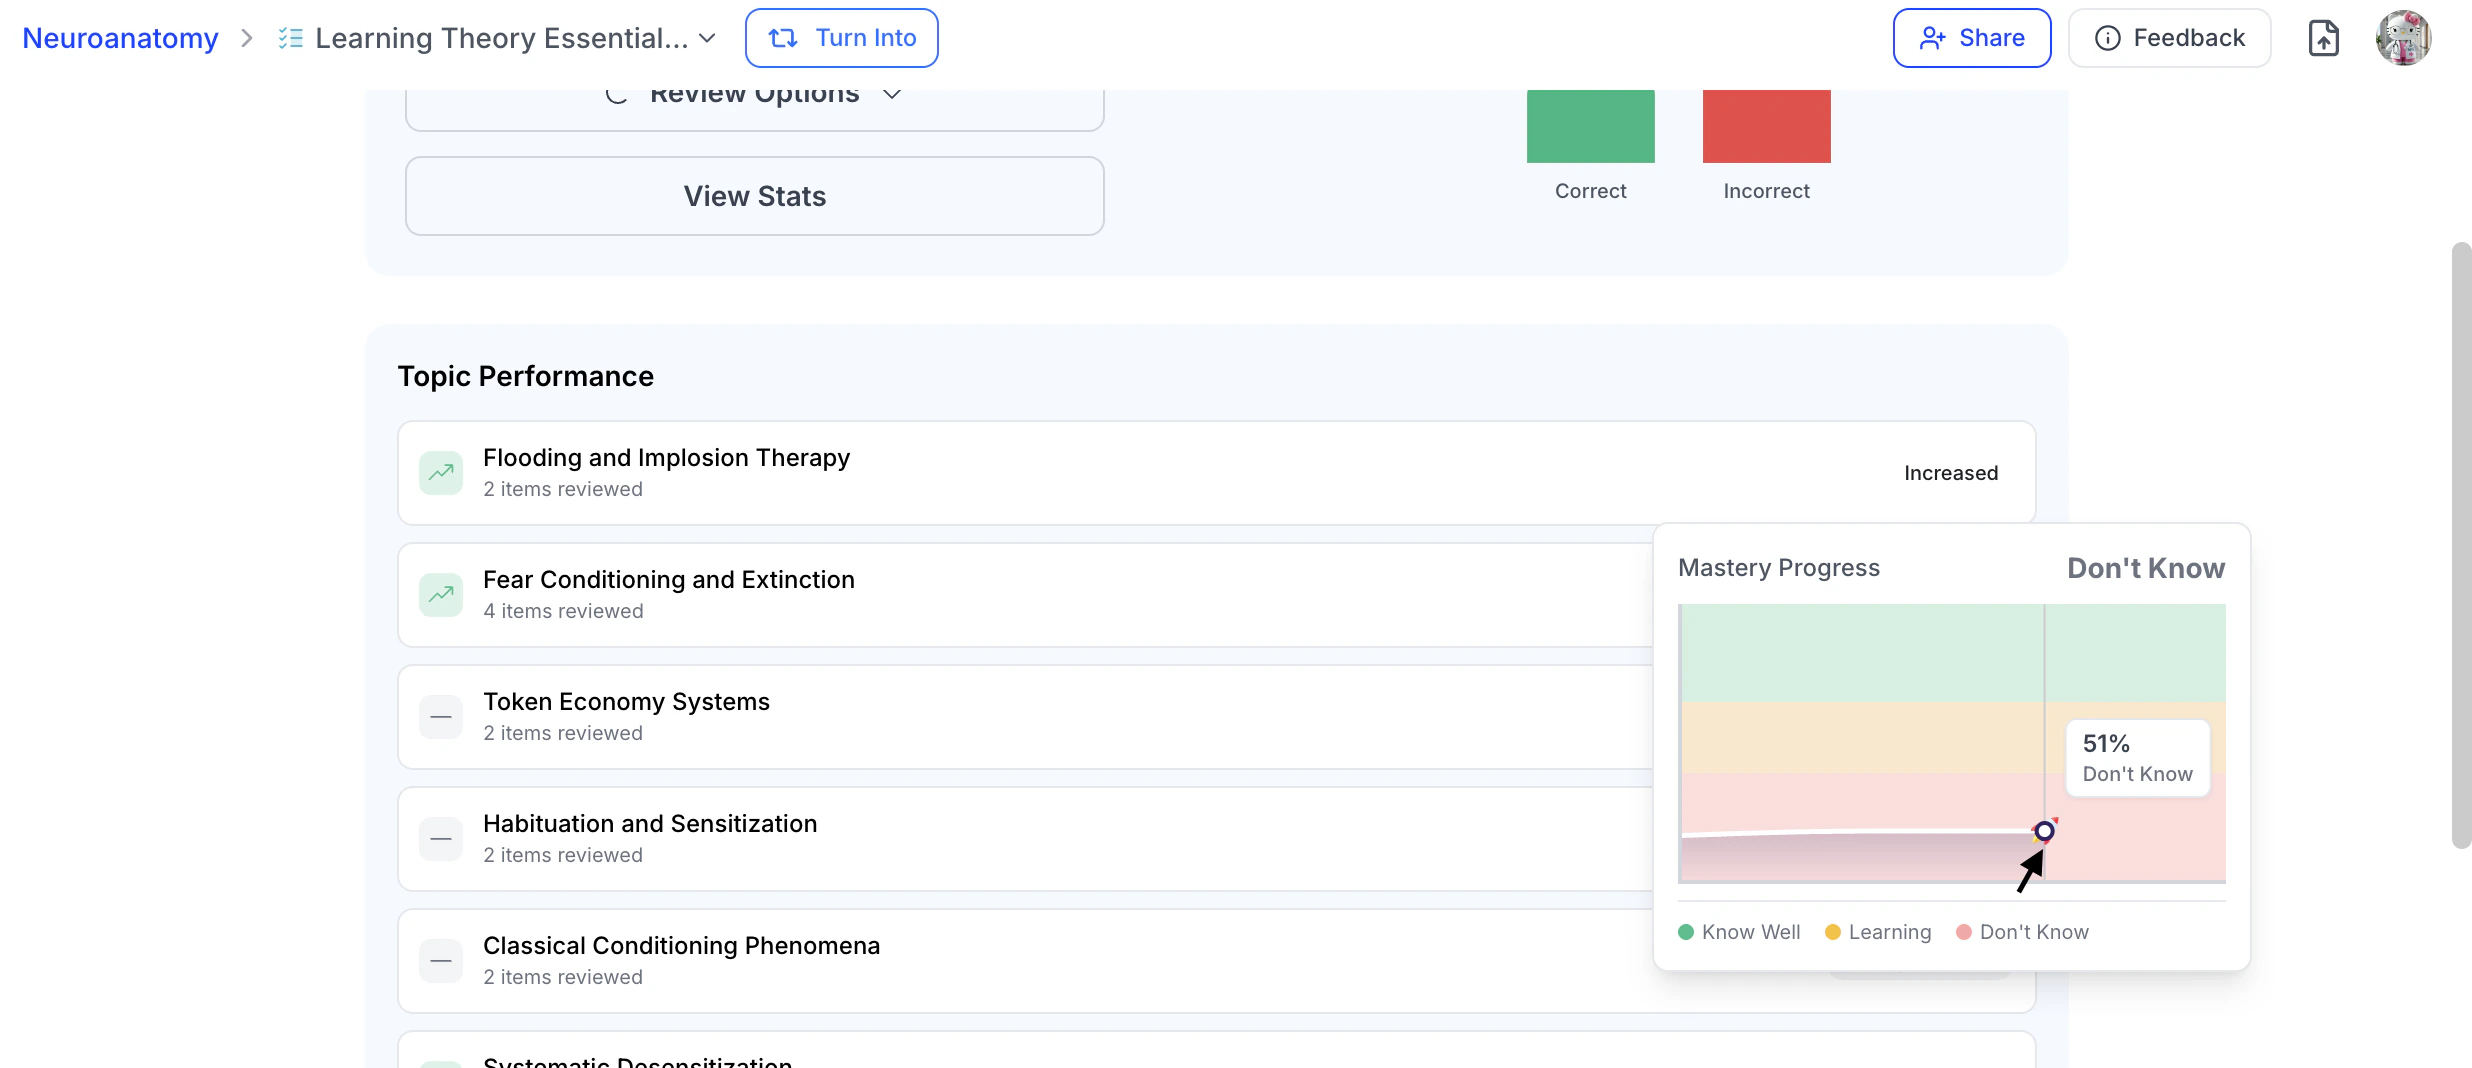
- To view a detailed graph of your mastery progress for each topic, hover over the progress status on the far right.
You can then move along the graph to see how your mastery percentage has changed over time for that topic.
- To review detailed statistics about your responses, select View Stats. For more information on interpreting your statistics, see Analyze Your Performance Statistics below.
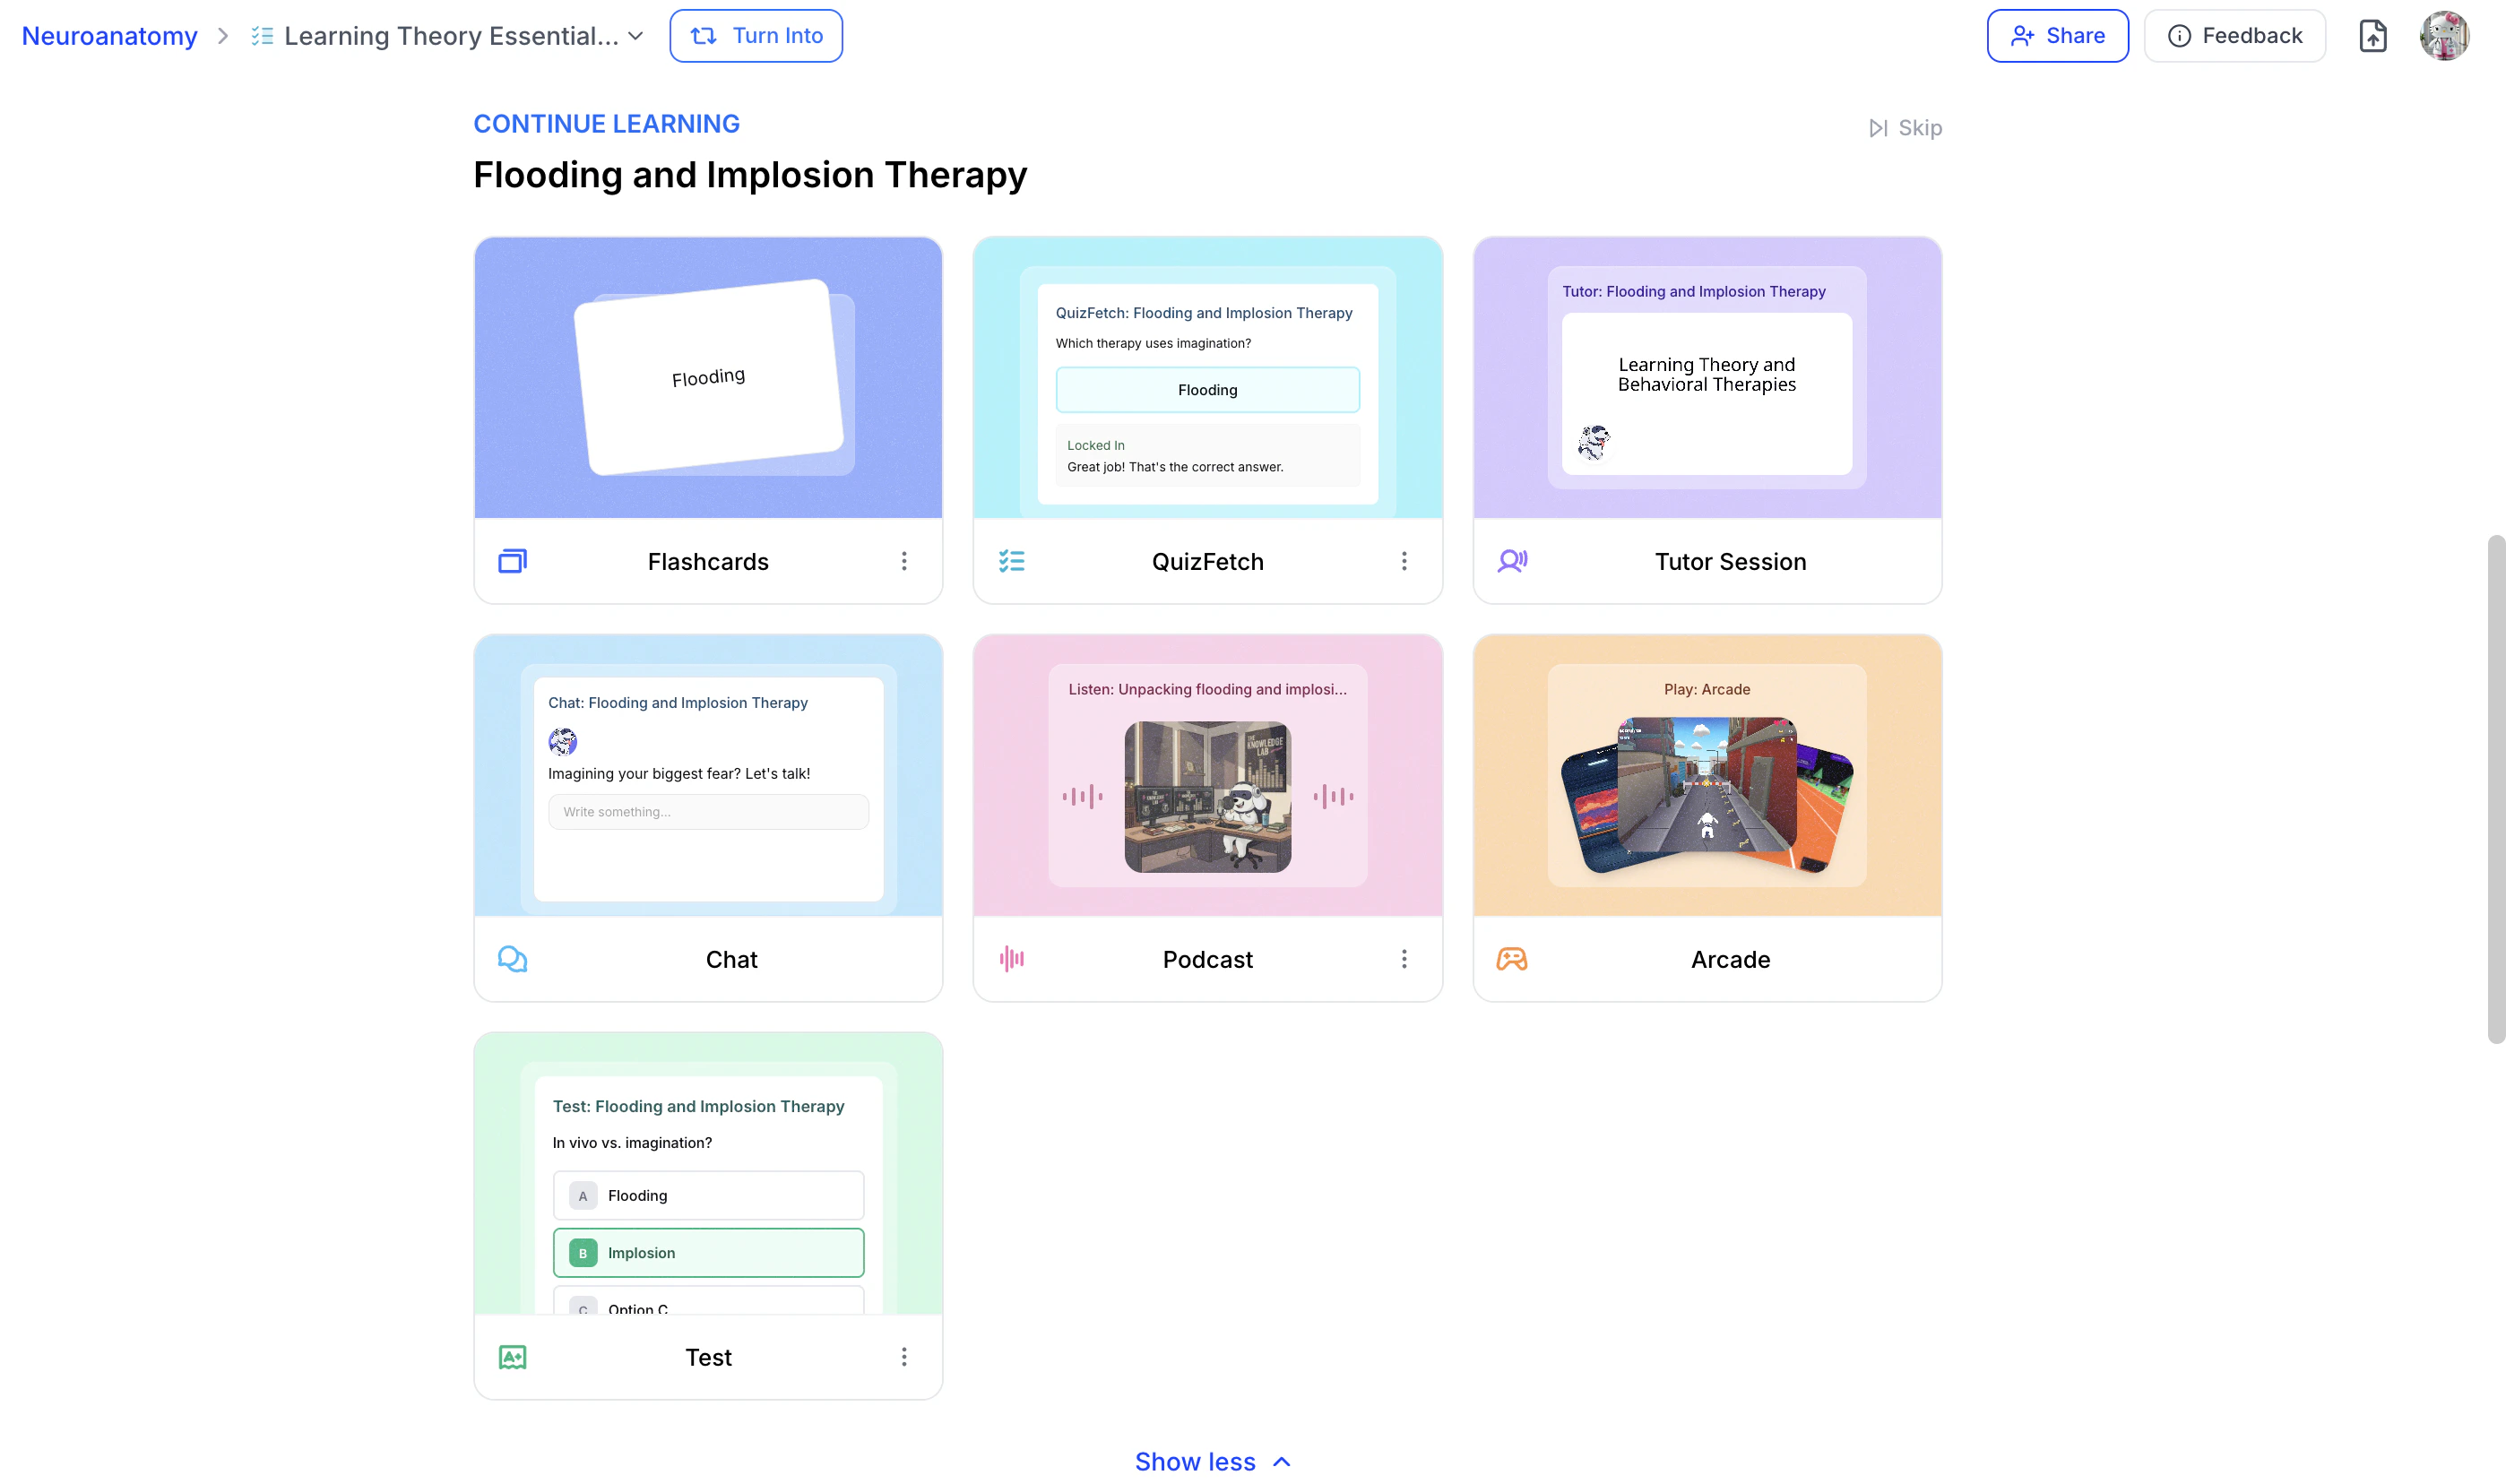
Get Study Recommendations
Under Continue Learning, StudyFetch will suggest additional features to help reinforce topics that need further review. Select any recommended feature,
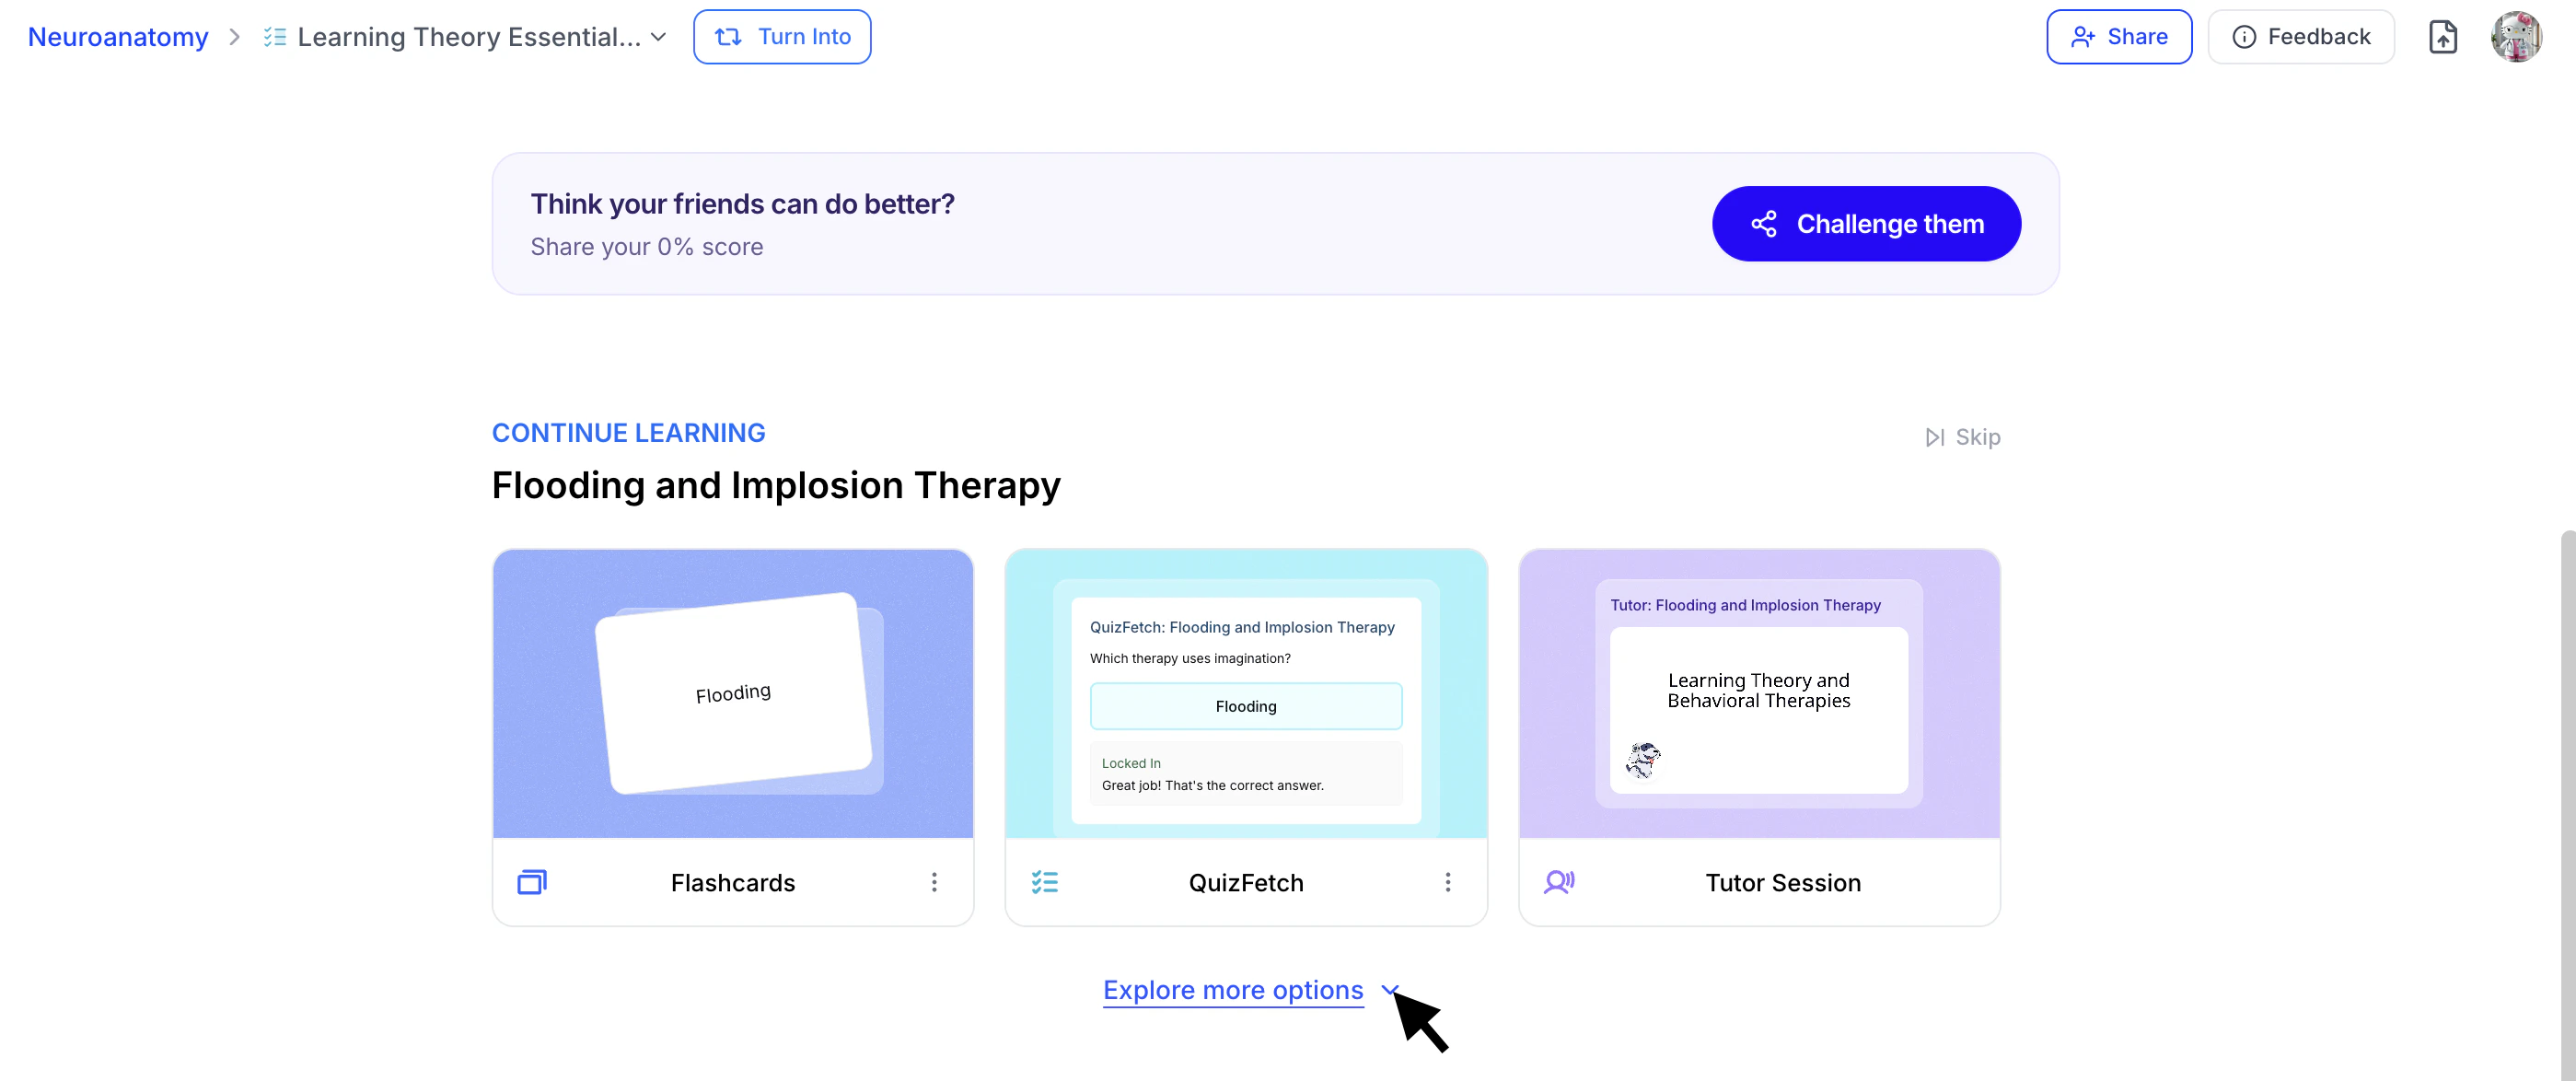 or click Explore More Options to browse additional study tools. To collapse the expanded view, select Show Less.
Continuing Your Quiz
Once you feel more confident after reviewing your materials, you can return to any unmastered quiz and continue your progress.
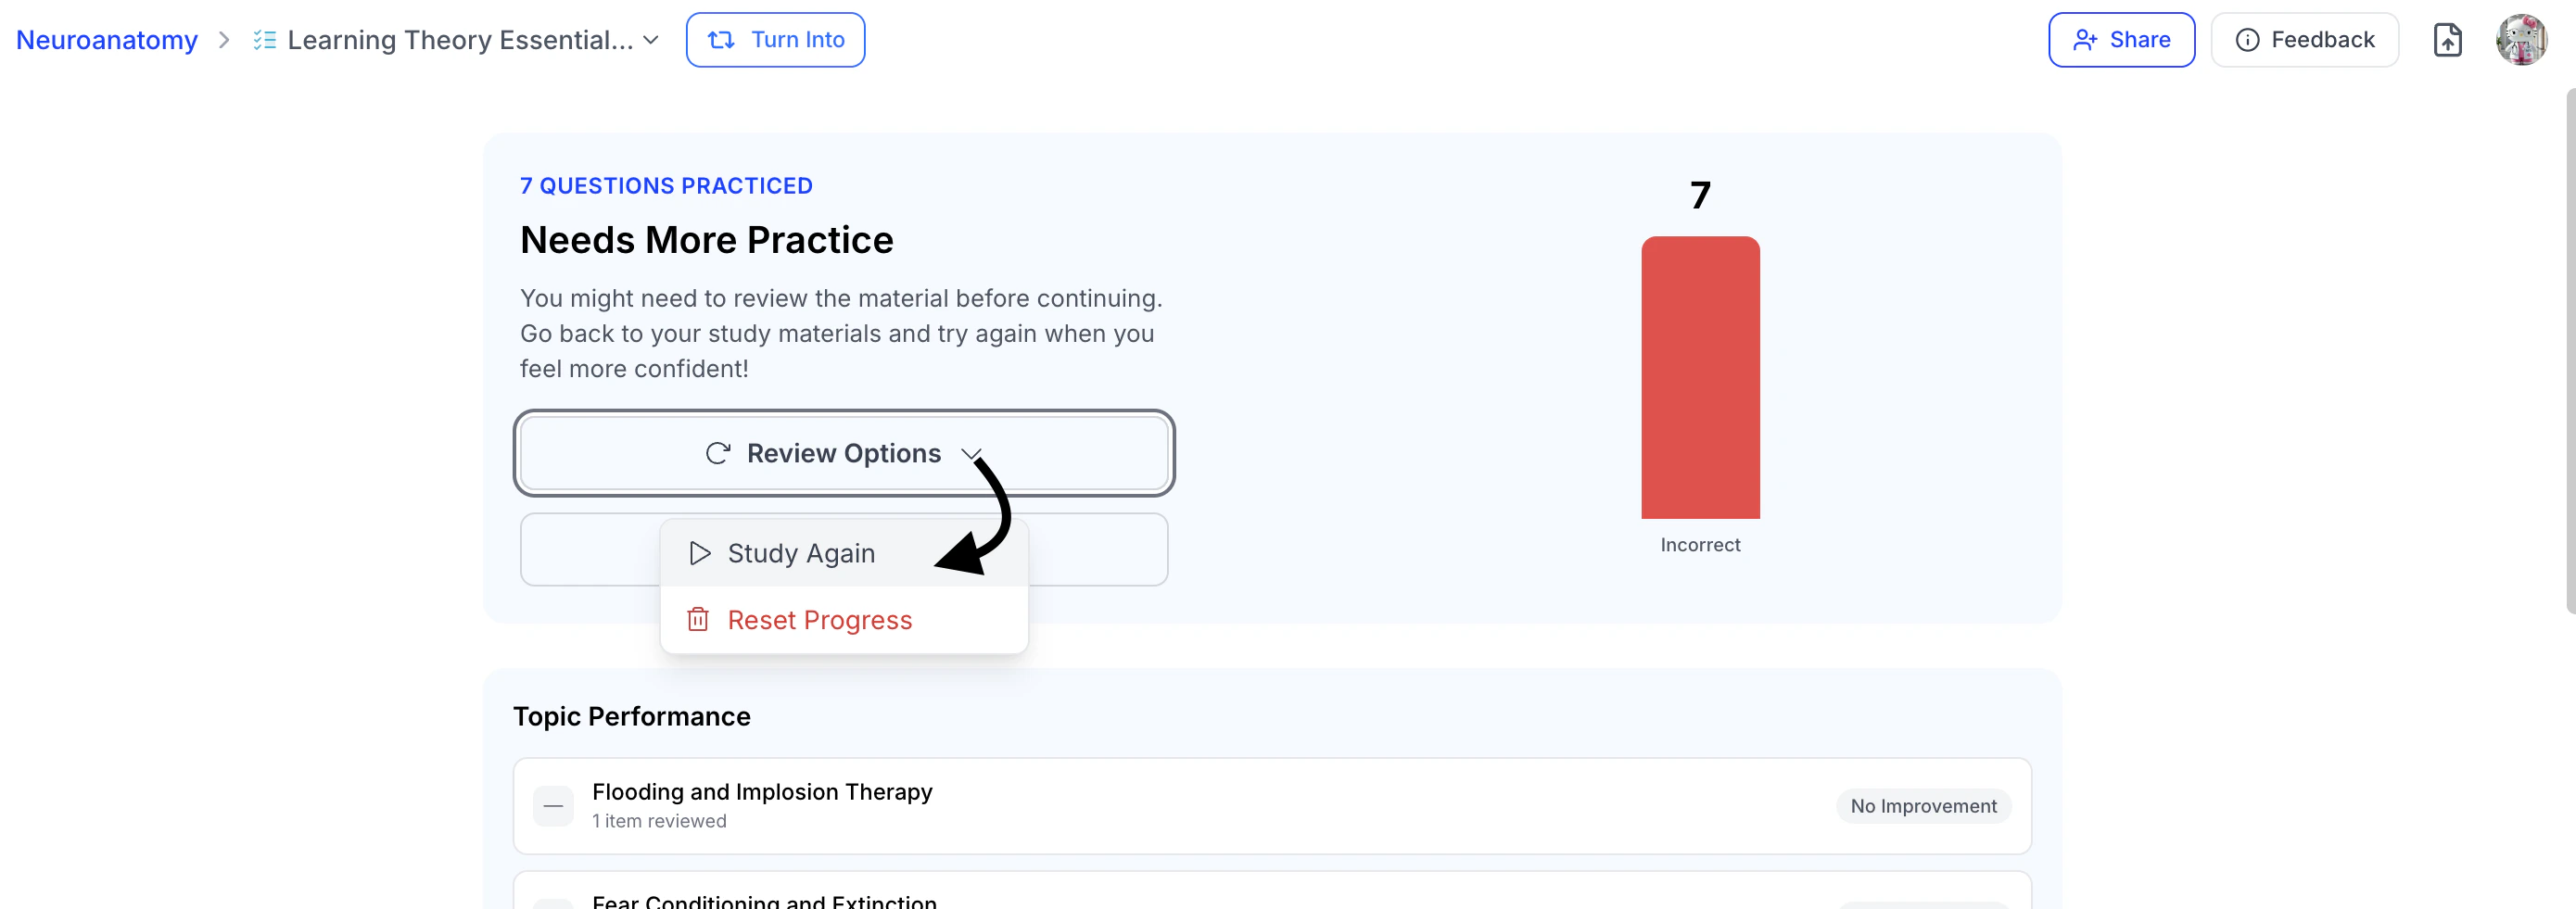
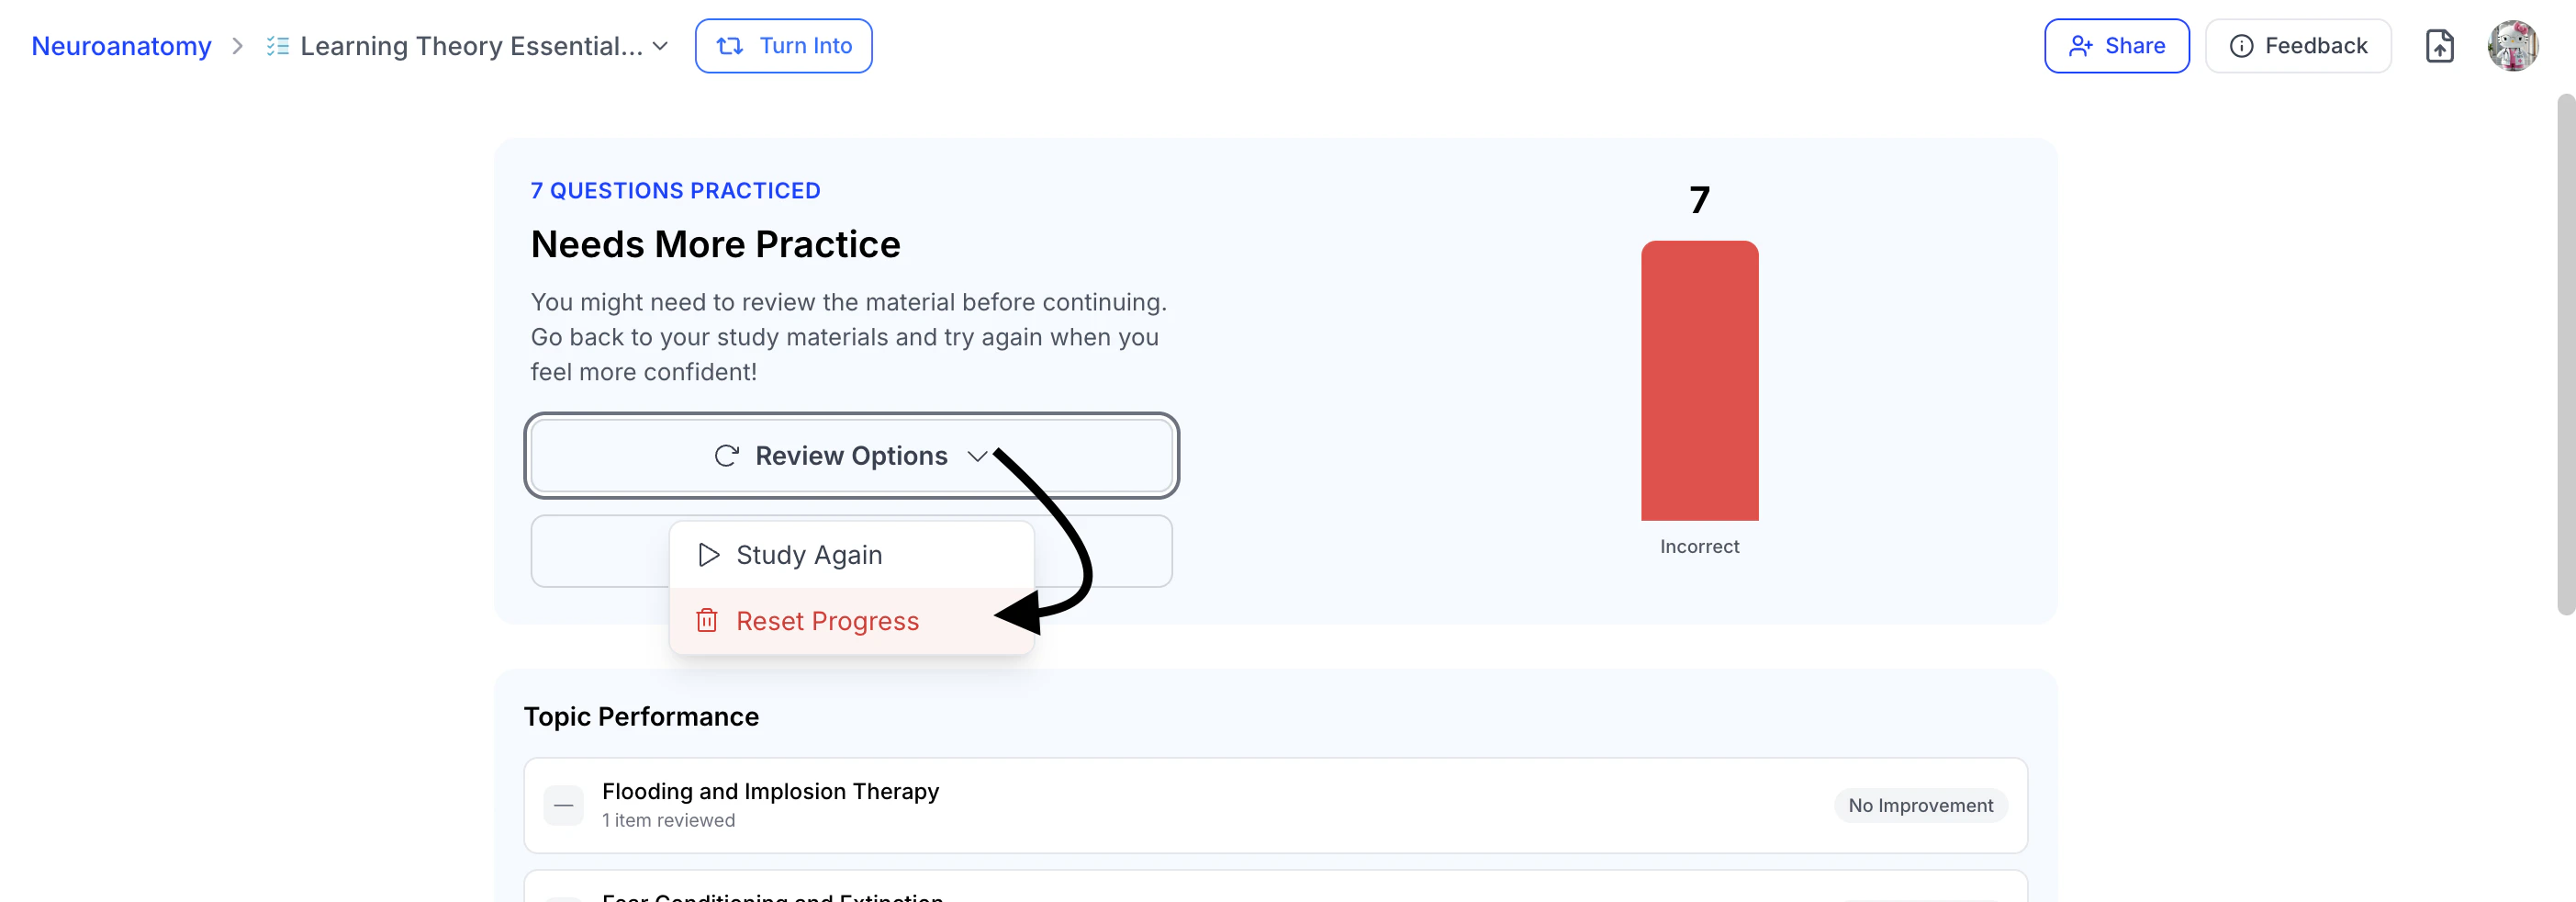
- To retain your statistics and continue where you left off, select Review Options, then click Study Again.
- To reset your statistics and begin a fresh attempt, select Review Options and choose Restart.
Tracking Your Progress
A key feature of QuizFetch is the ability to review your performance statistics at any time—while taking the quiz, if the system pauses progression due to repeated incorrect answers, or after completing the quiz.
Step 1: Review Your Stats
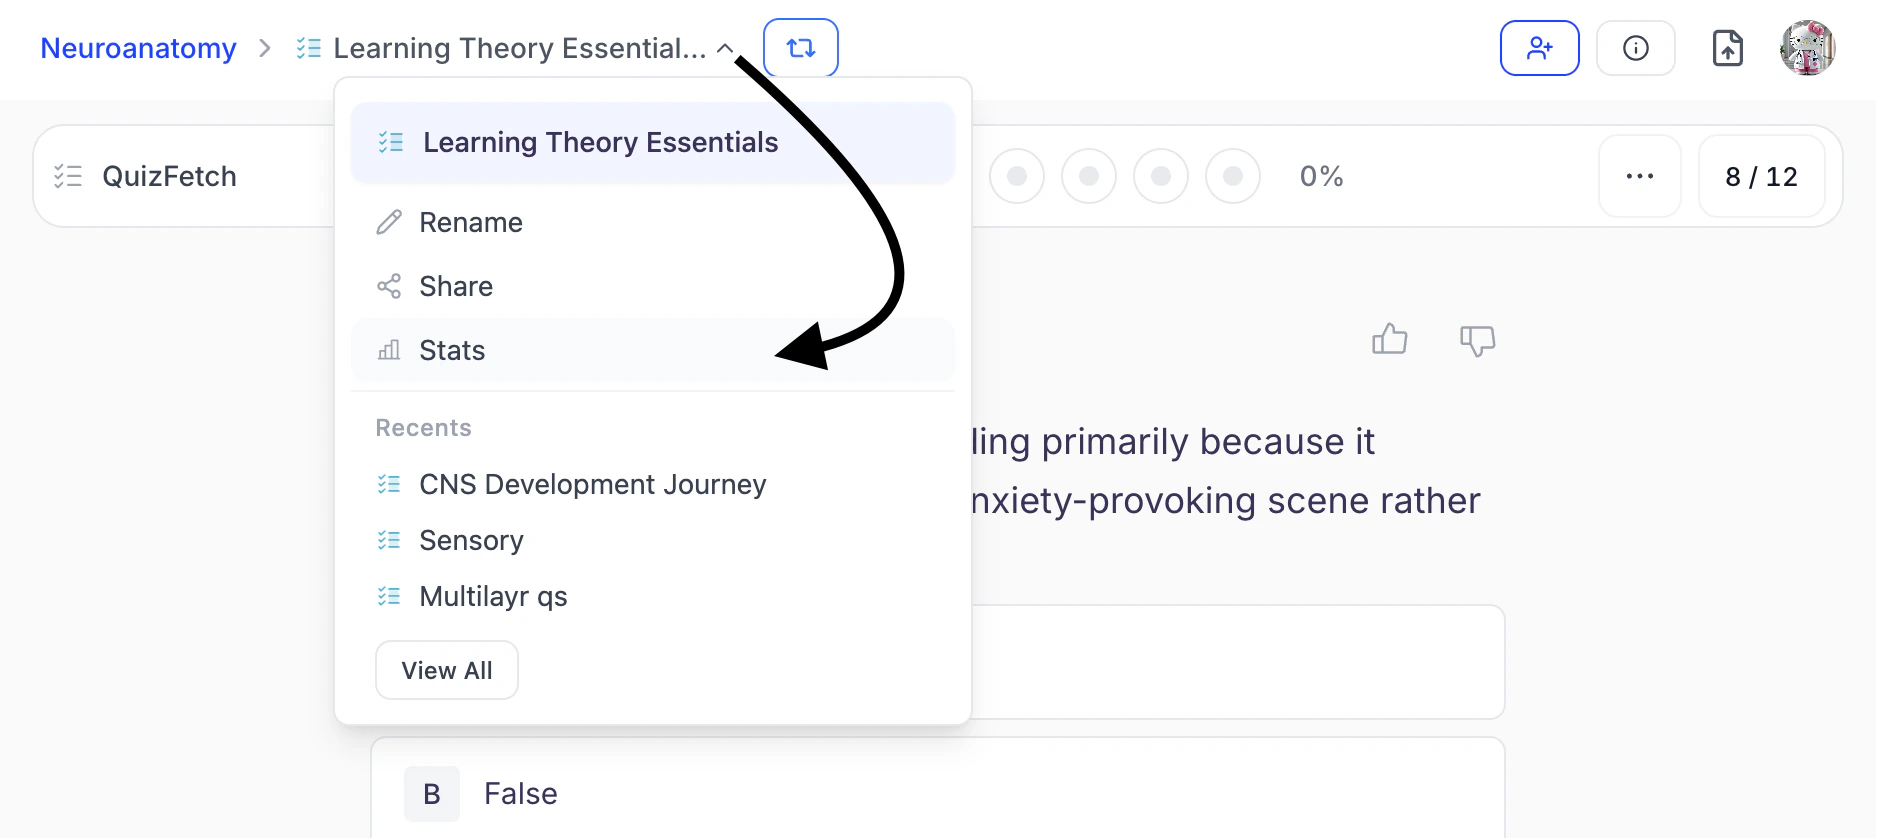
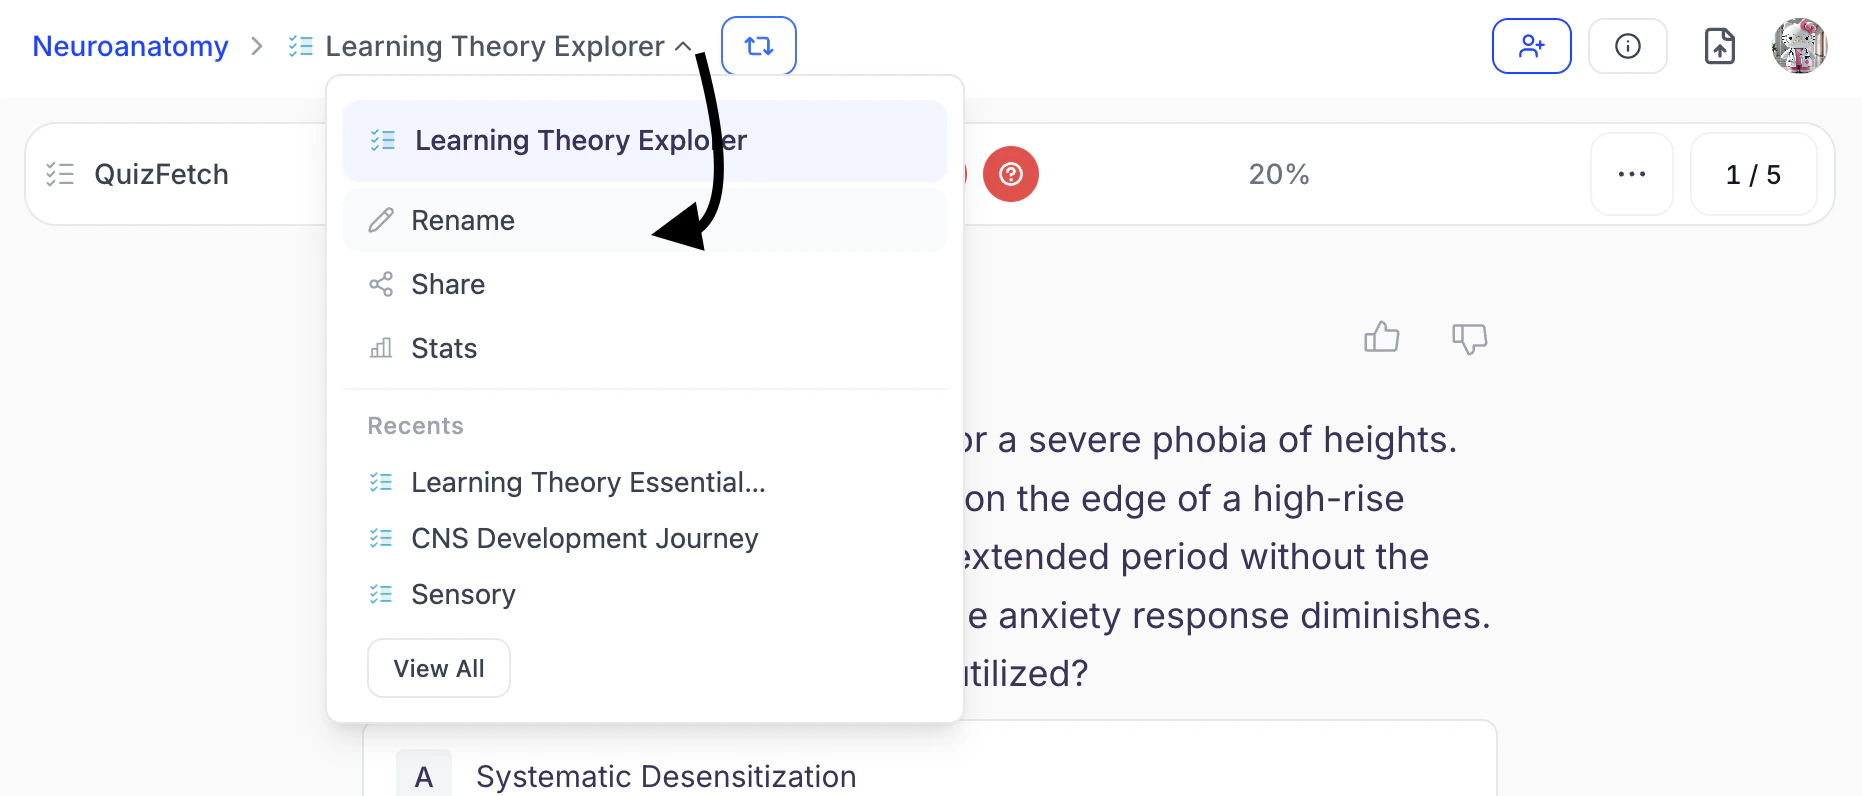
- To review your performance statistics while taking the quiz, click the downward arrow to the right of your quiz name, and then select Stats.
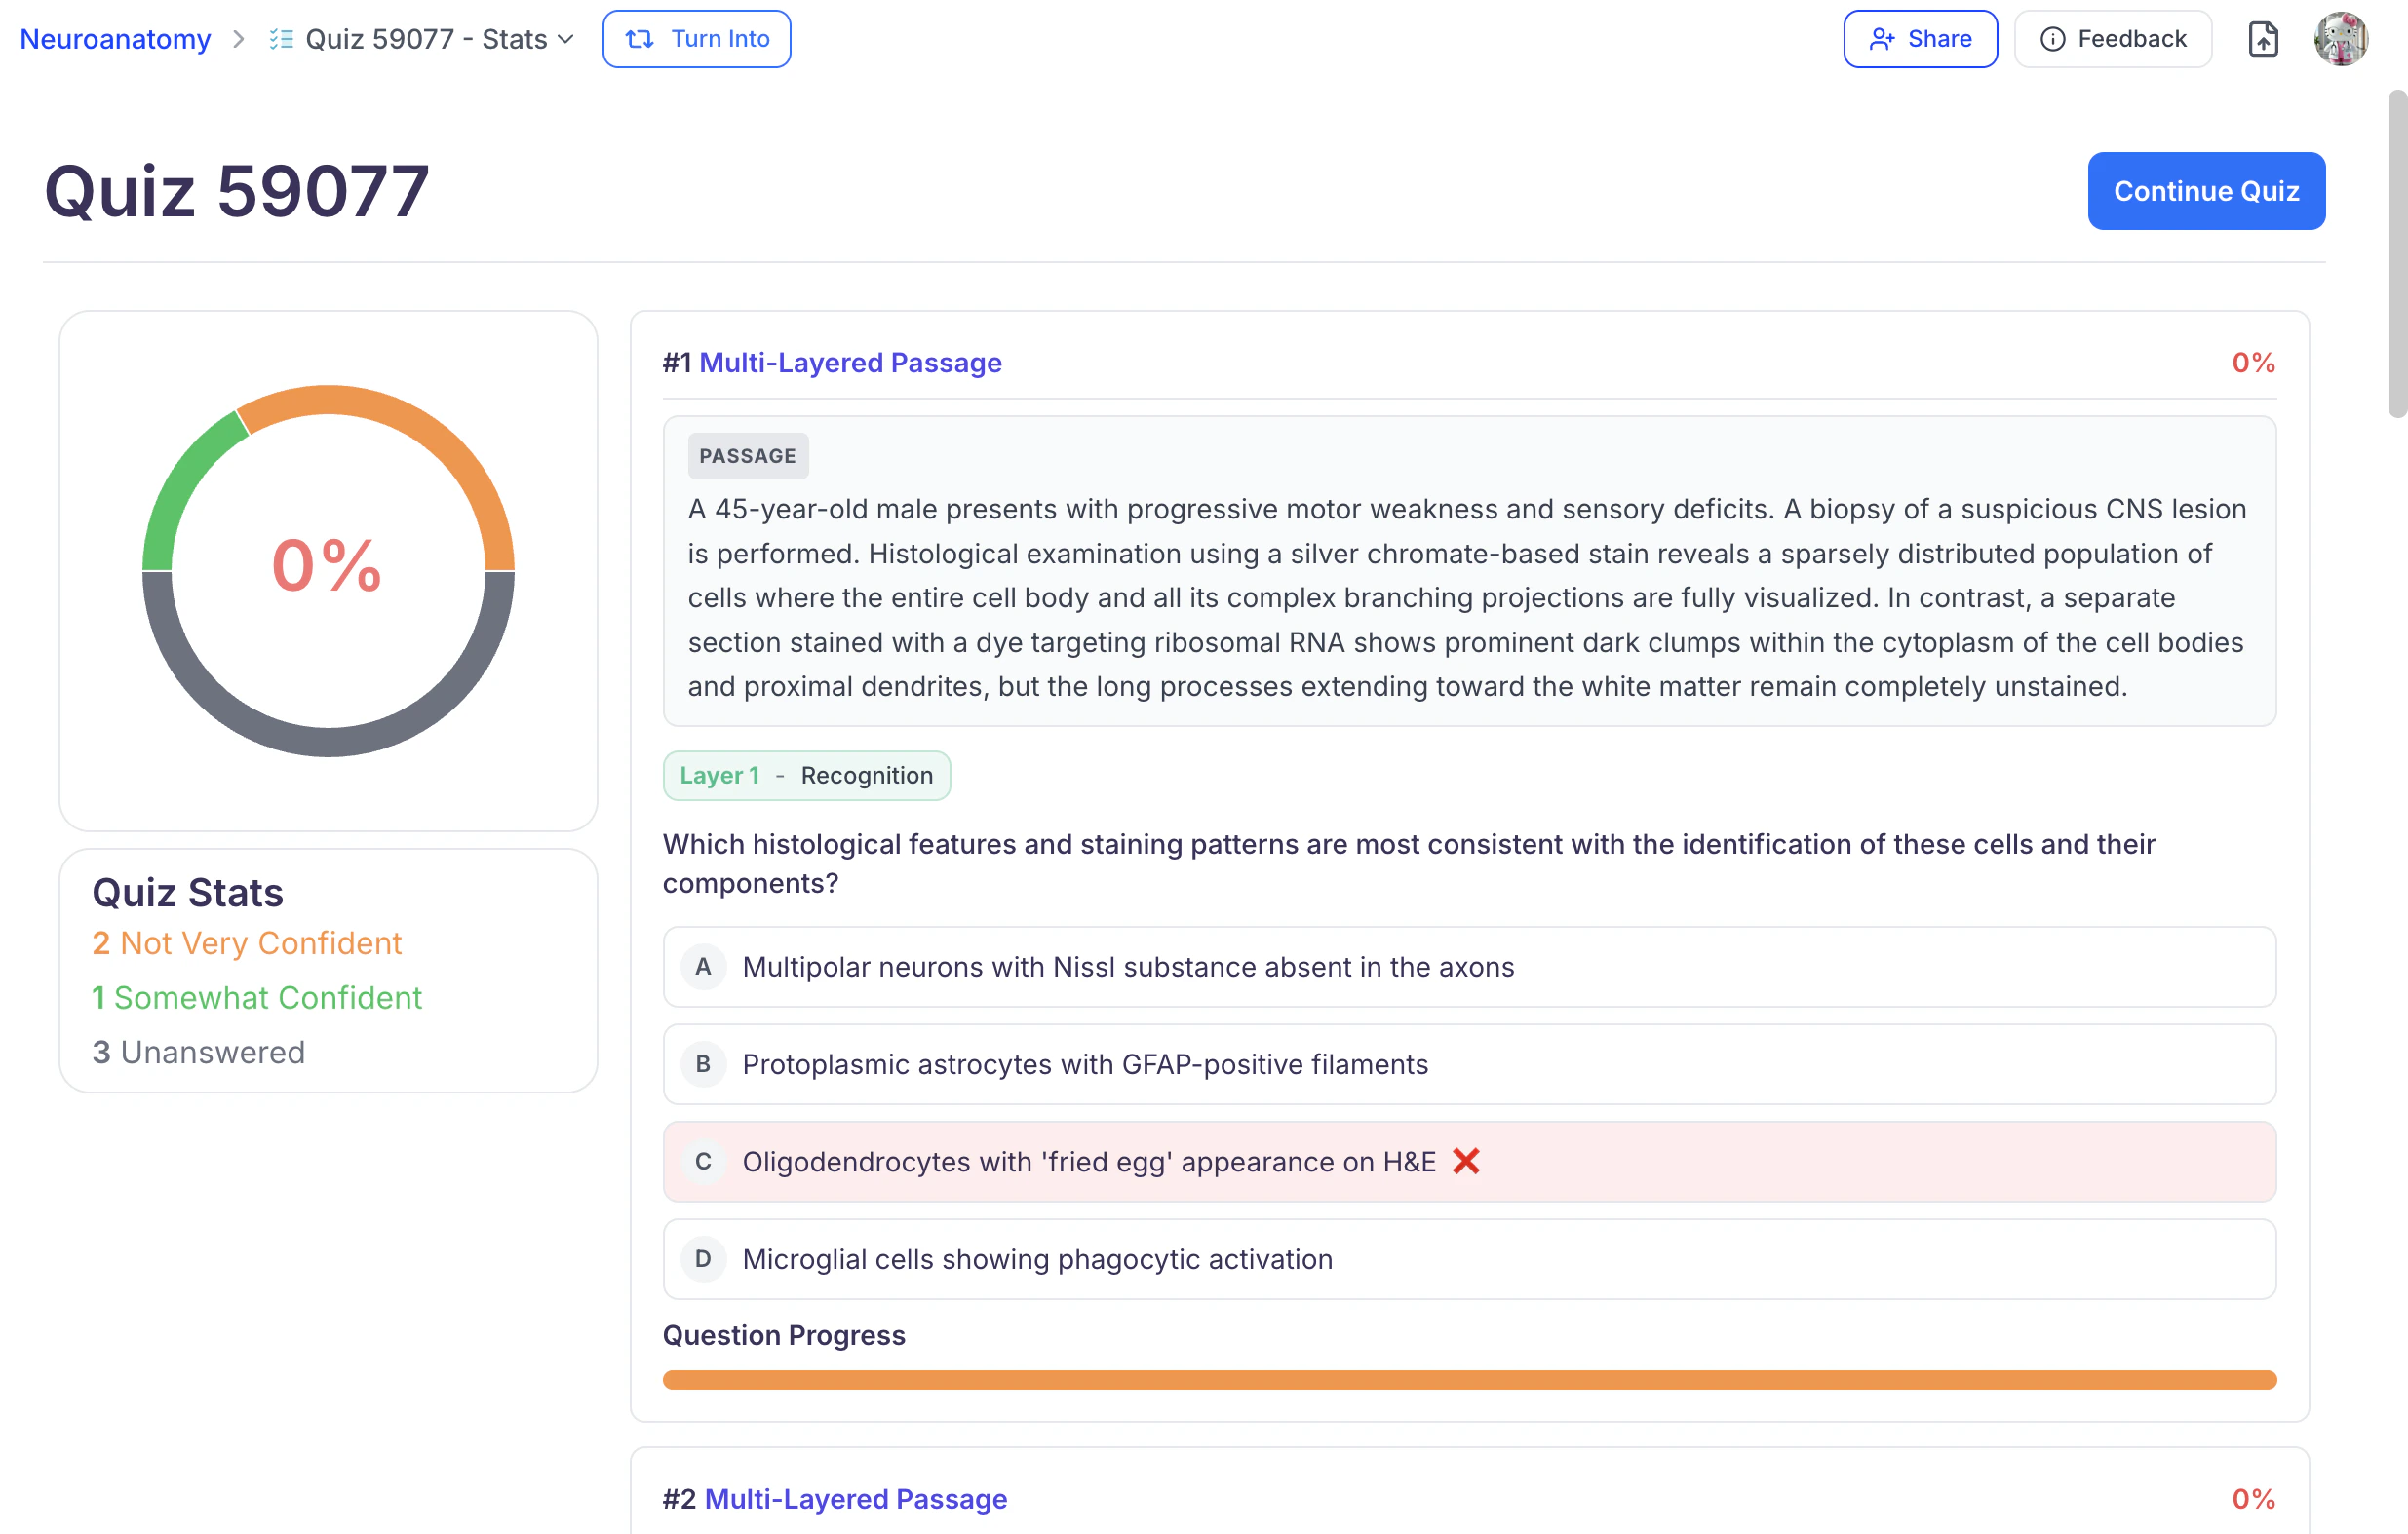
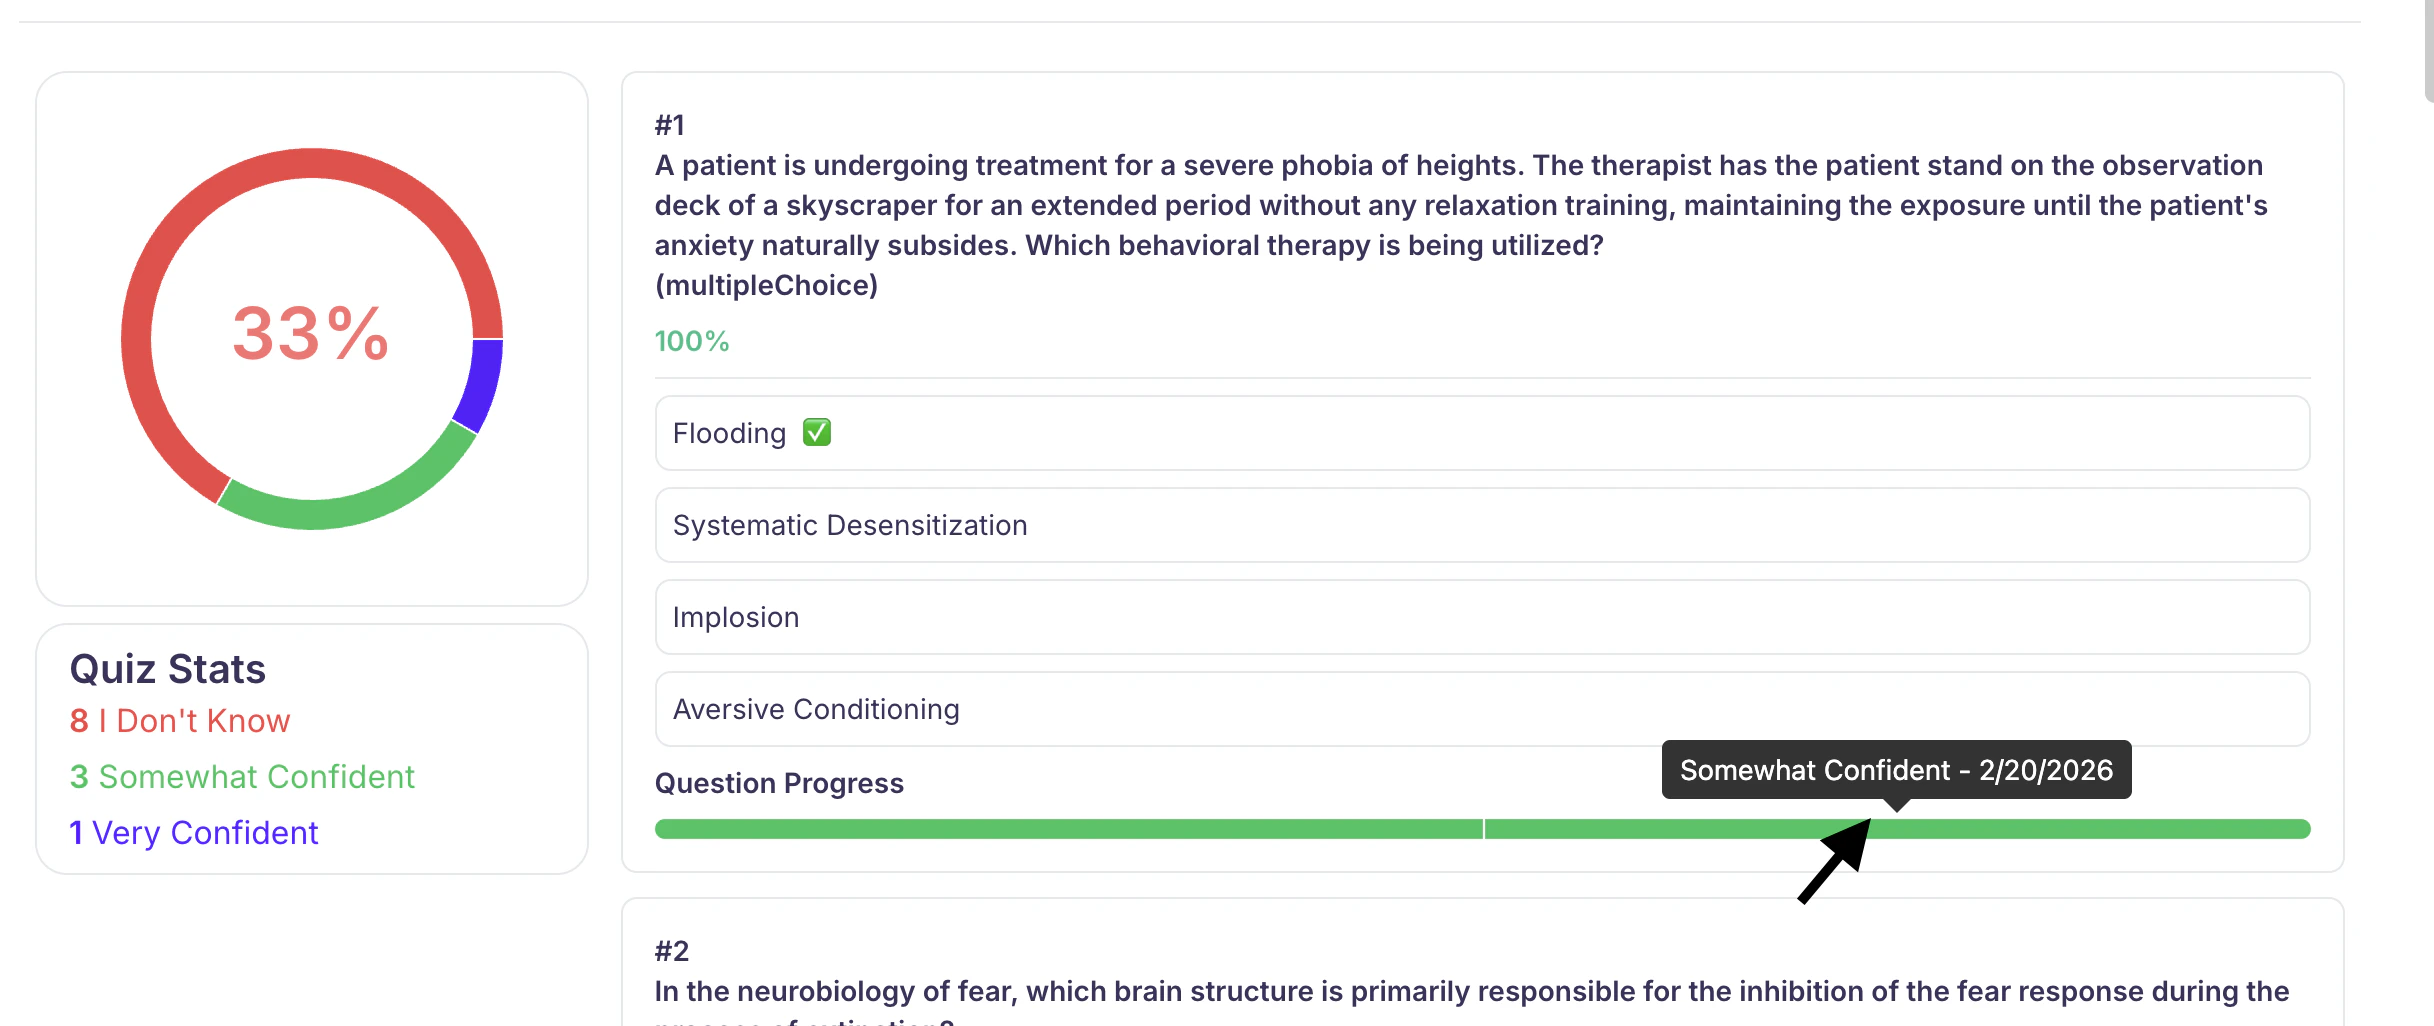
- Once you have navigated to the Stats page of your quiz, scroll to review your question performance, including which questions have been answered, which remain unanswered, and whether each response was correct or incorrect.
- This view displays all of your responses, along with a confidence scale and an overall percentage shown at the top left.
- Each question includes a Question Progress bar with shaded segments representing each confidence rating selection. Hover over a shaded segment to view the associated confidence rating and the date it was recorded.
Step 3: Continue Your Quiz
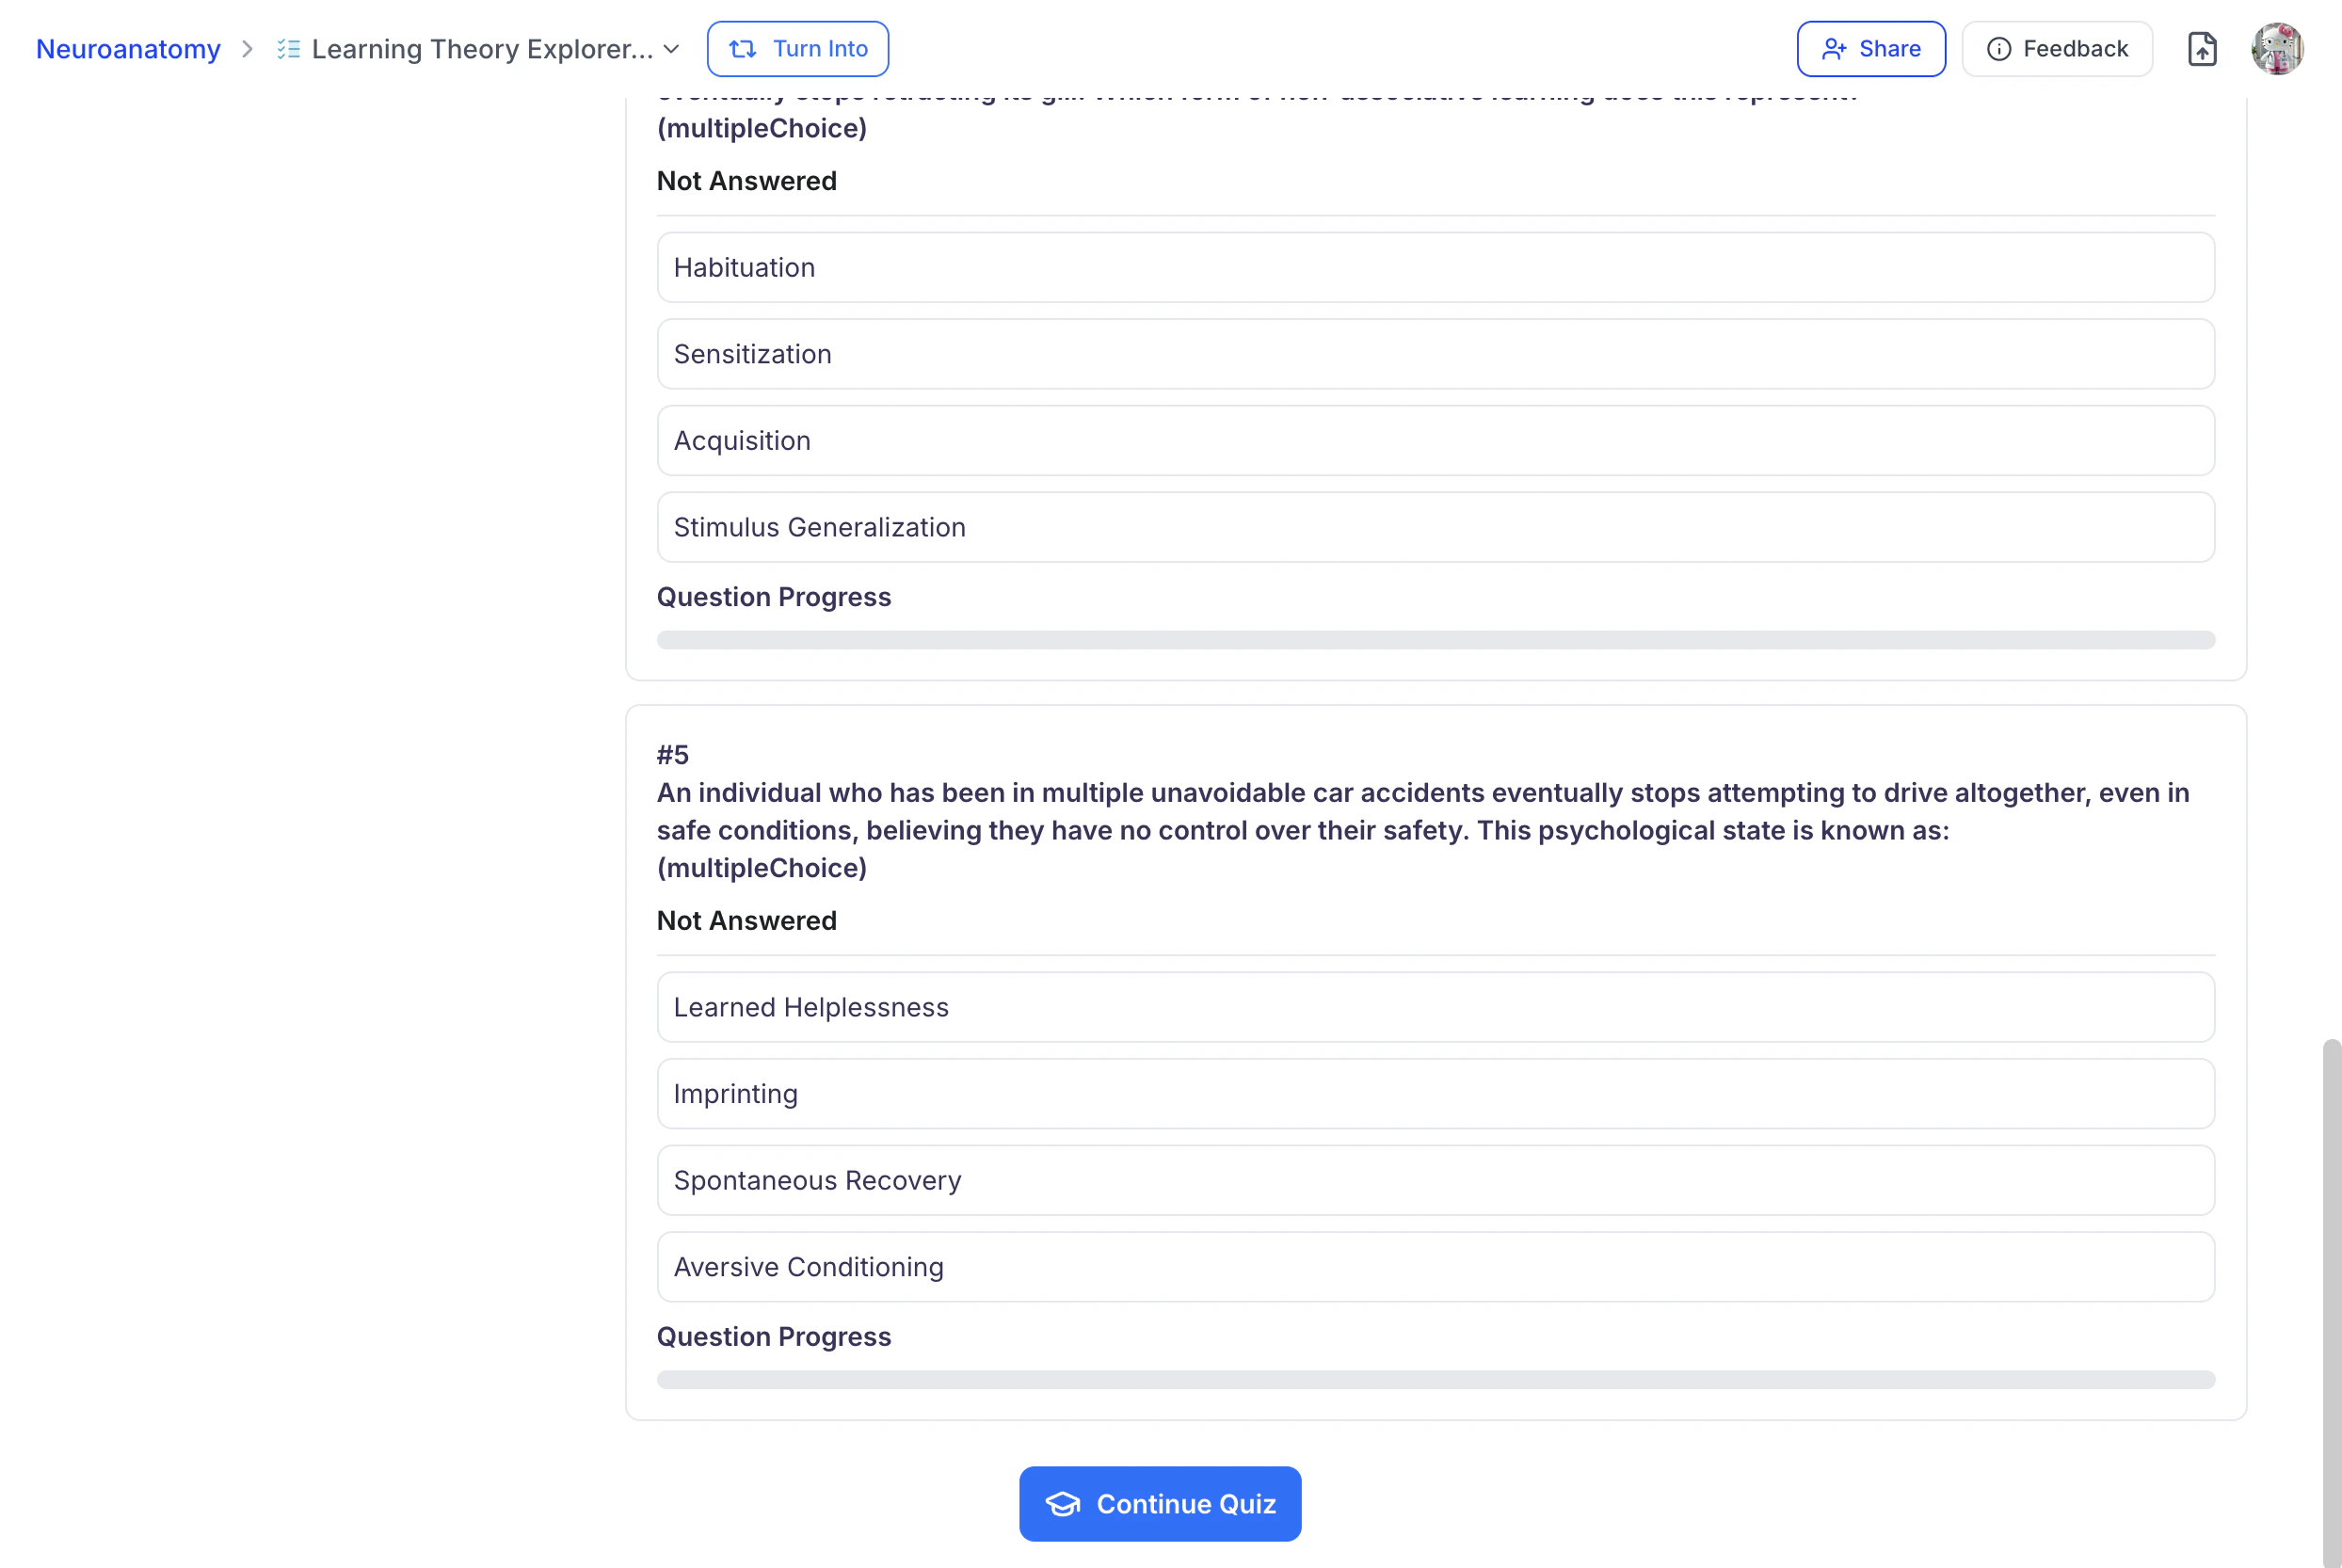
- To return to your quiz from the stats page, click Continue Quiz from the top right or bottom of the page.
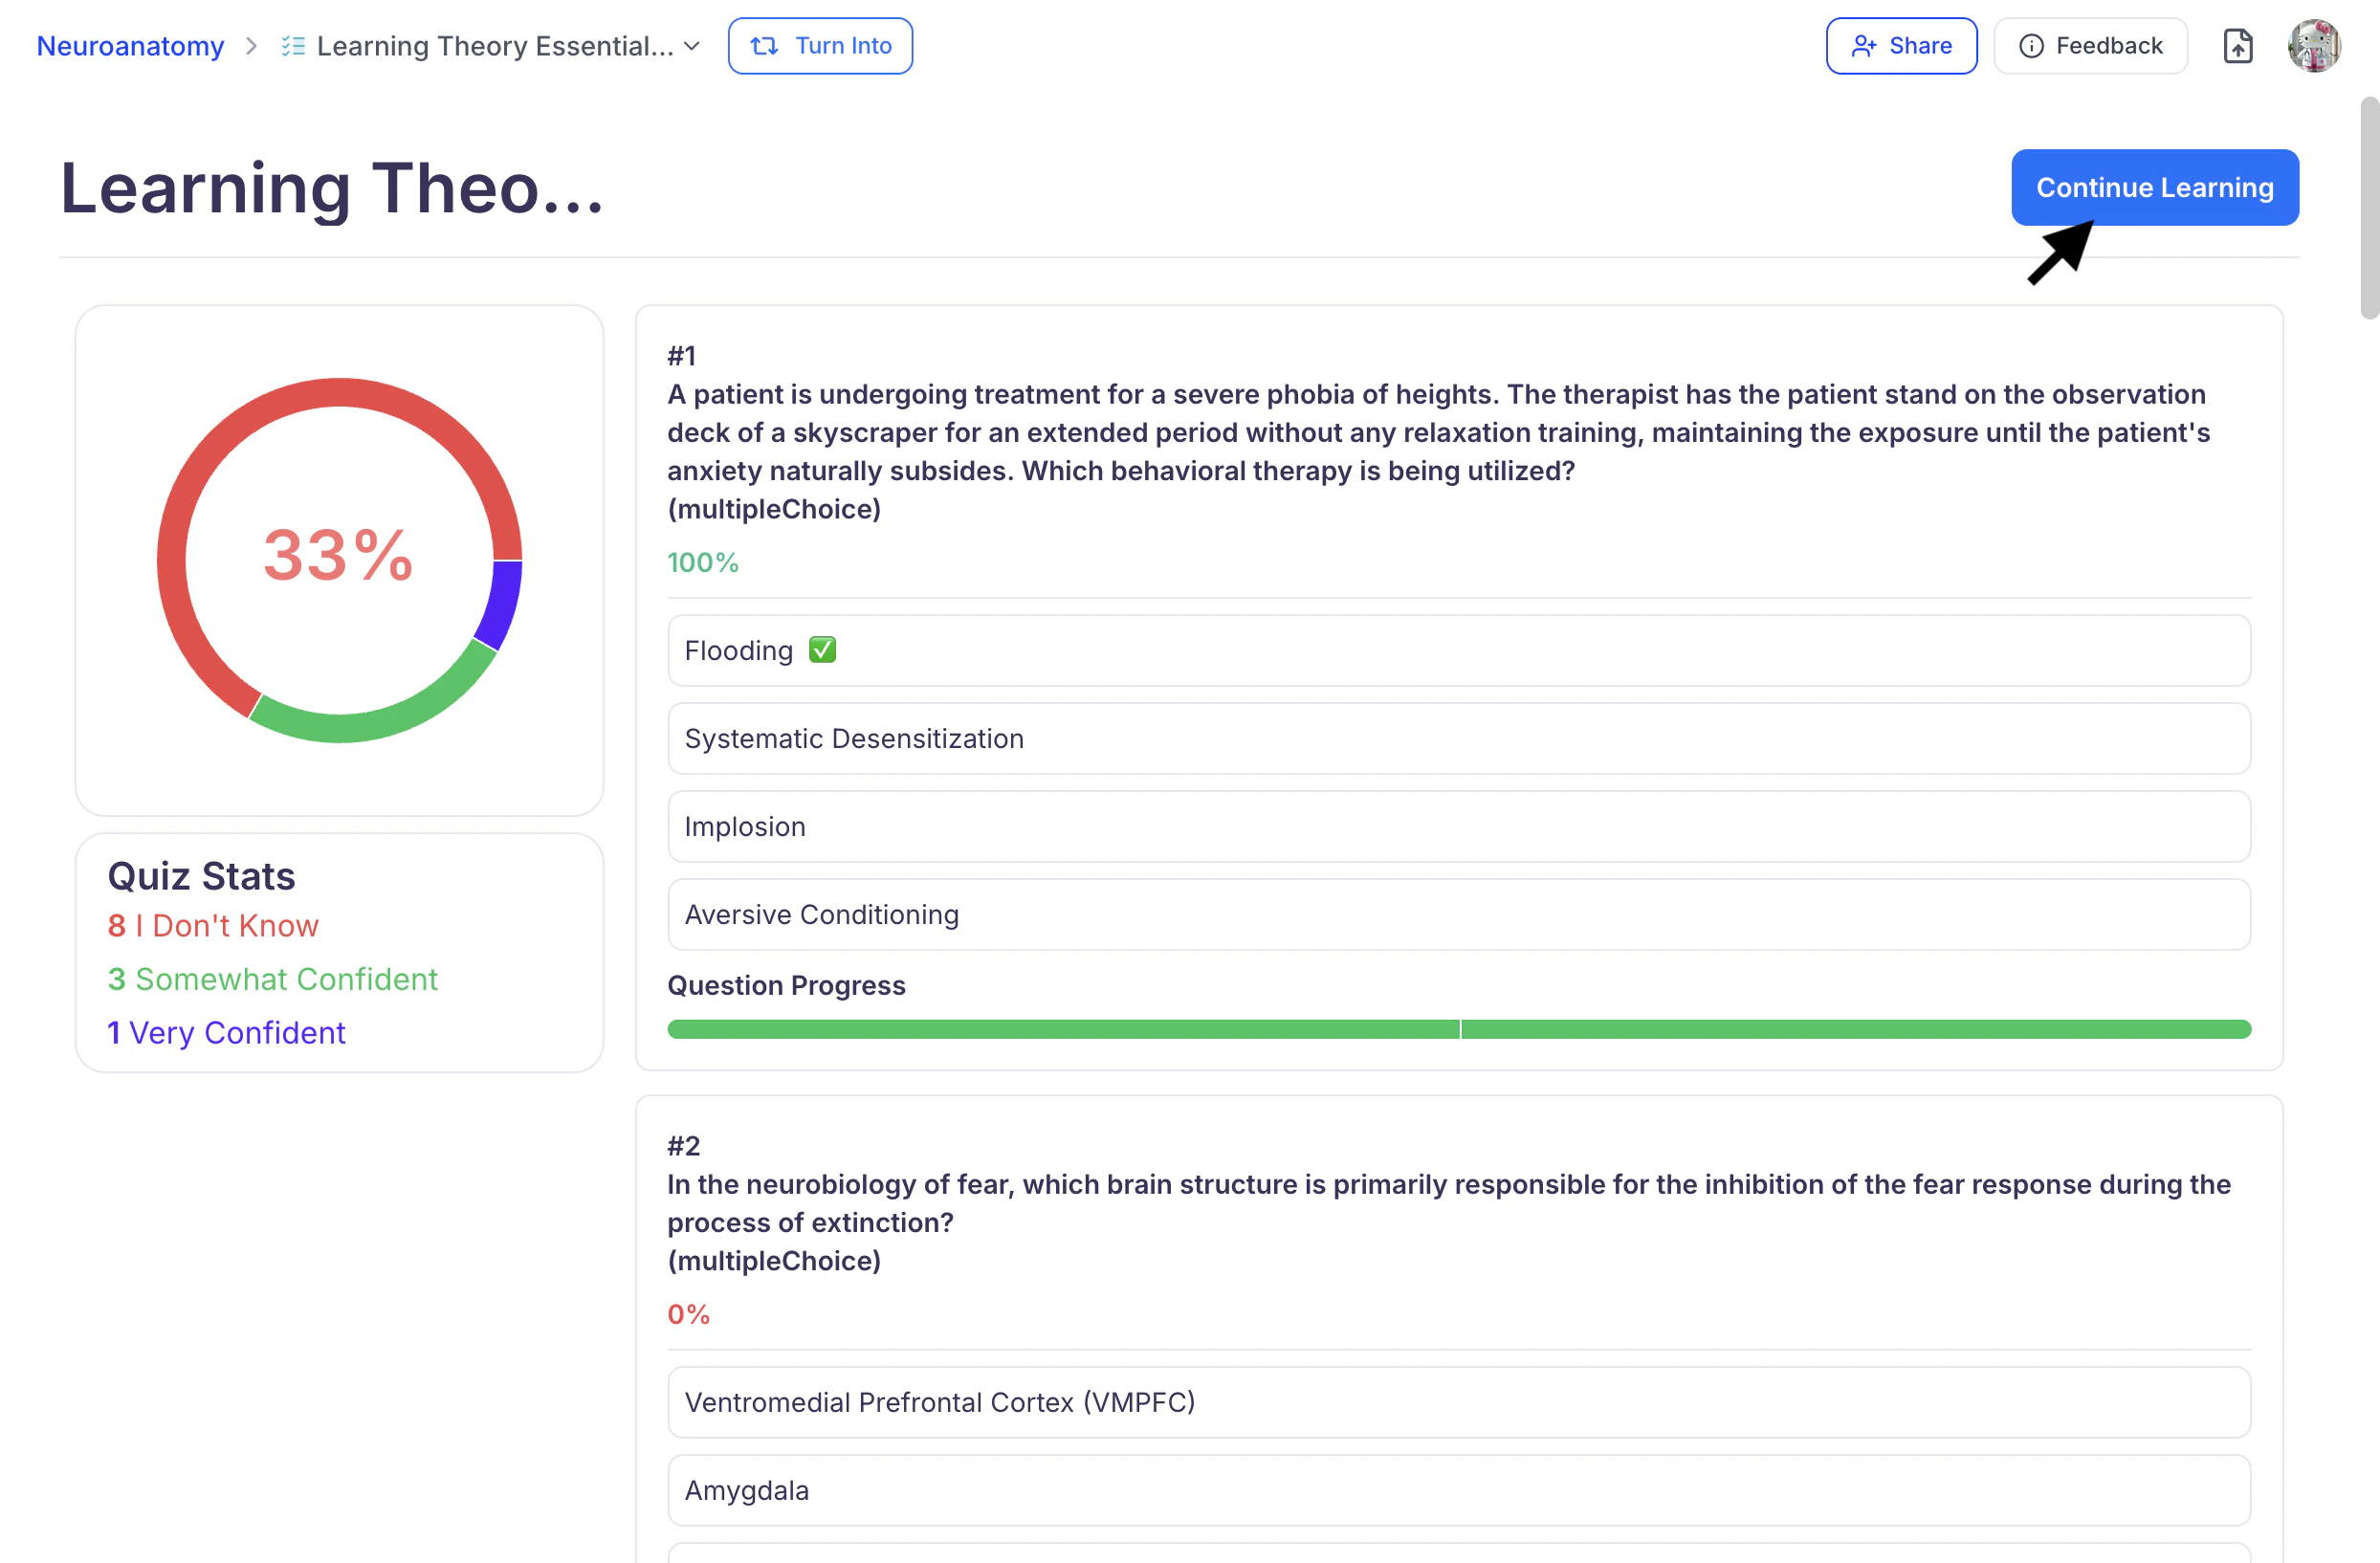
- After you have completed all quiz questions at least once, the Continue Quiz button on the Stats page will update to Continue Learning,
guiding you back to your Study Set dashboard.
- If you prefer to continue working toward full mastery, navigate to Practice, select QuizFetch, and then choose the quiz you want to resume.
Managing Your Quiz
Rate Your Questions
How do you like your quiz questions? Let us know what is working and what isn’t. The more feedback provided, the better future questions become over time.
- Use the thumbs up or thumbs down buttons located in the top right above each question to provide feedback on your AI-generated quiz questions.
- A thumbs up indicates the question contains helpful content, while a thumbs down indicates the content needs improvement.
Changing the Name of Your Quiz
Quiz names can be updated While Taking a Quiz/Within the Stats Page or from the QuizFetch Feature Page. Choose the method that works best for you:
While Taking a Quiz or Within the Stats Page:
- Click the downward arrow to the right of your quiz name and then click Rename.
- You can edit the existing name or enter a new name for your quiz in the Name field. When done click Save.
From QuizFetch feature page:
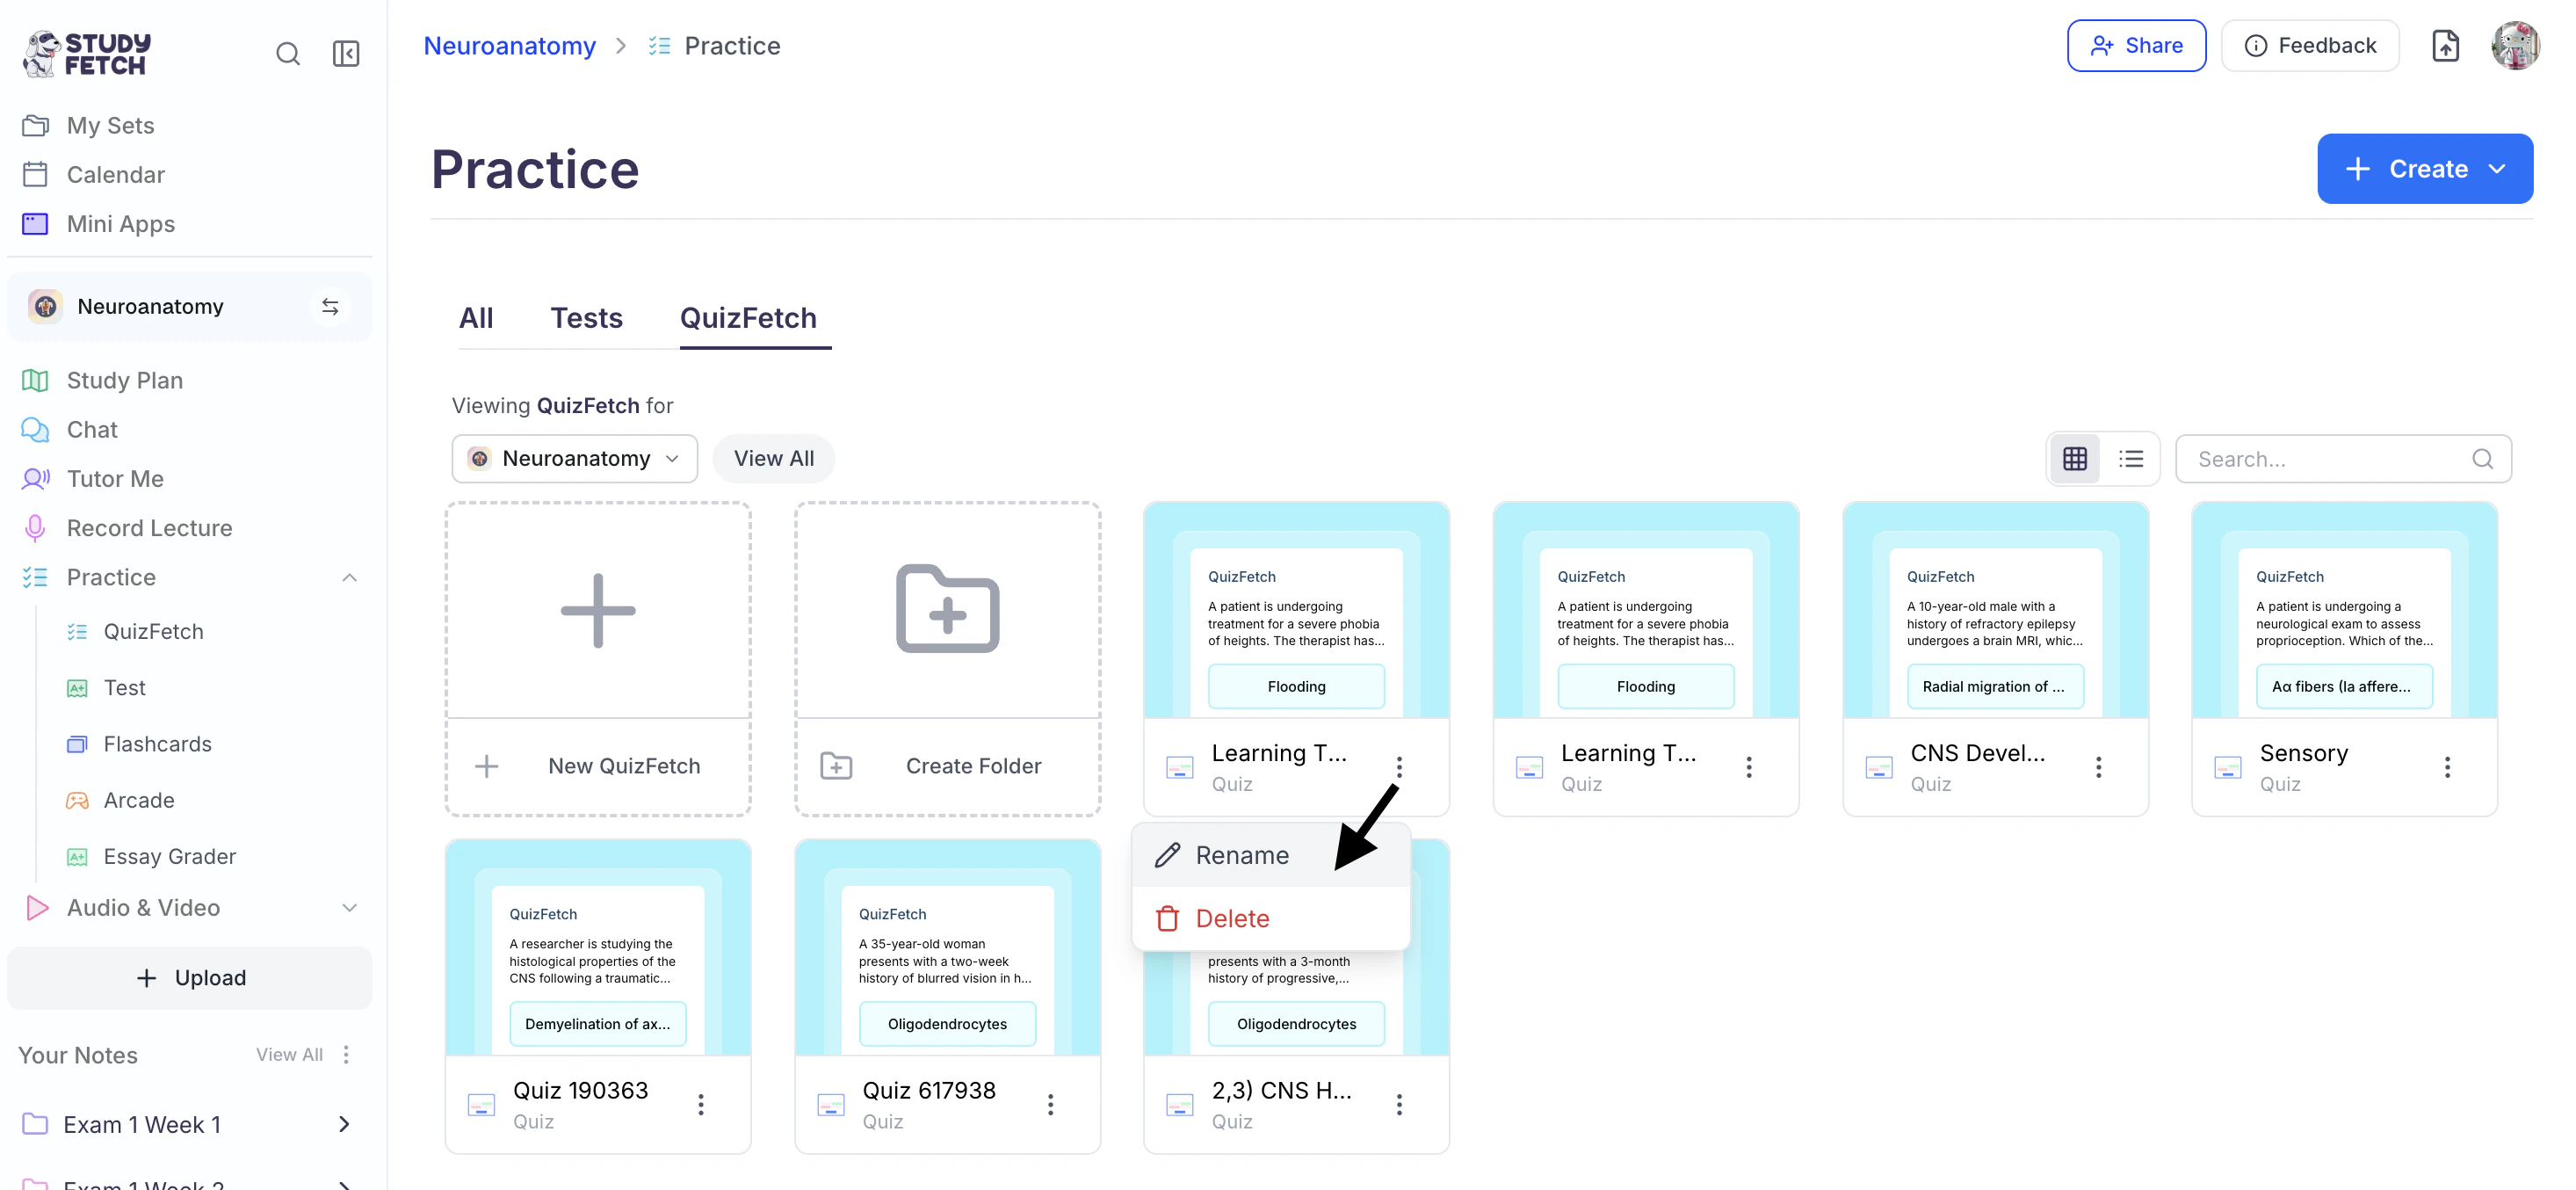
- First navigate to the QuizFetch feature page. From the left-hand side of your dashboard, click Practice, then select QuizFetch.
- Select the ⋮ button to the right of the desired quiz name and choose Rename.
- You can edit the existing name or enter a new name for your quiz in the Title field. When done click Update.

Share Your Quiz
Found your quiz helpful? Share it during the quiz/stats page or from the Quiz Results page, and optionally include your score to challenge friends or highlight your achievement.
During a Quiz or Quiz Stats Page:
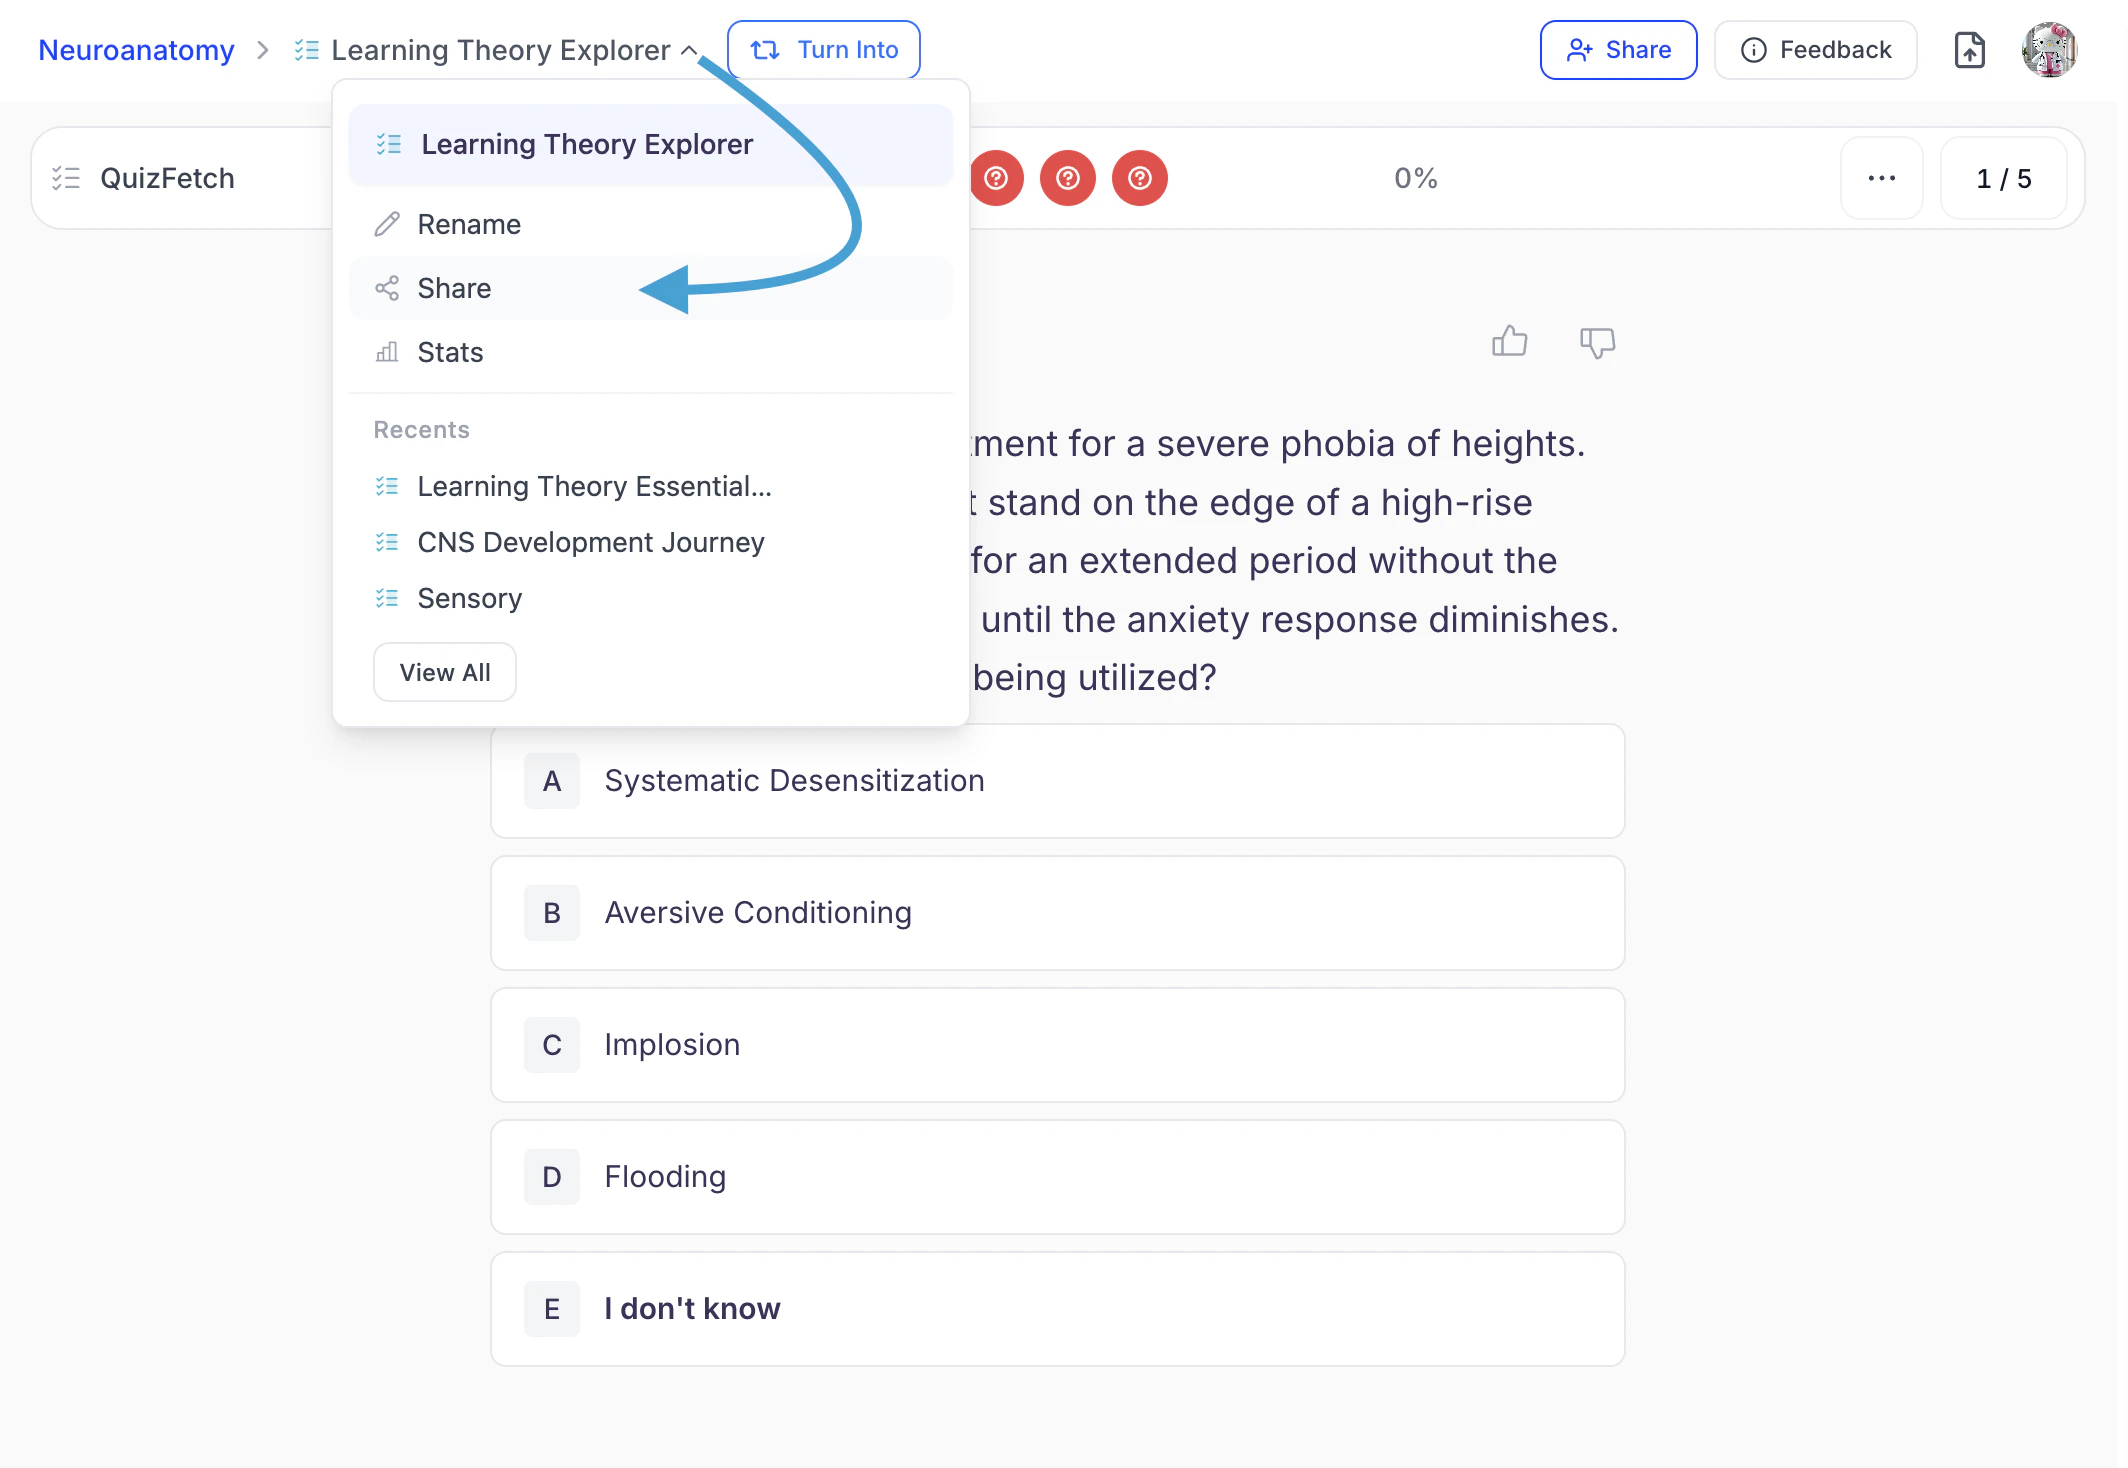
- Click the downward arrow next to your quiz name, then select Share.
- Copy the link by clicking directly on the URL under Share link, or select Copy Link from the bottom left corner. You can now share the copied link.

- To share directly through supported apps:

- Select the WhatsApp icon to share via WhatsApp.
- Select the Telegram icon to share via Telegram.
- Select the Text icon to share through your preferred messaging app.
From the Quiz Results Page:
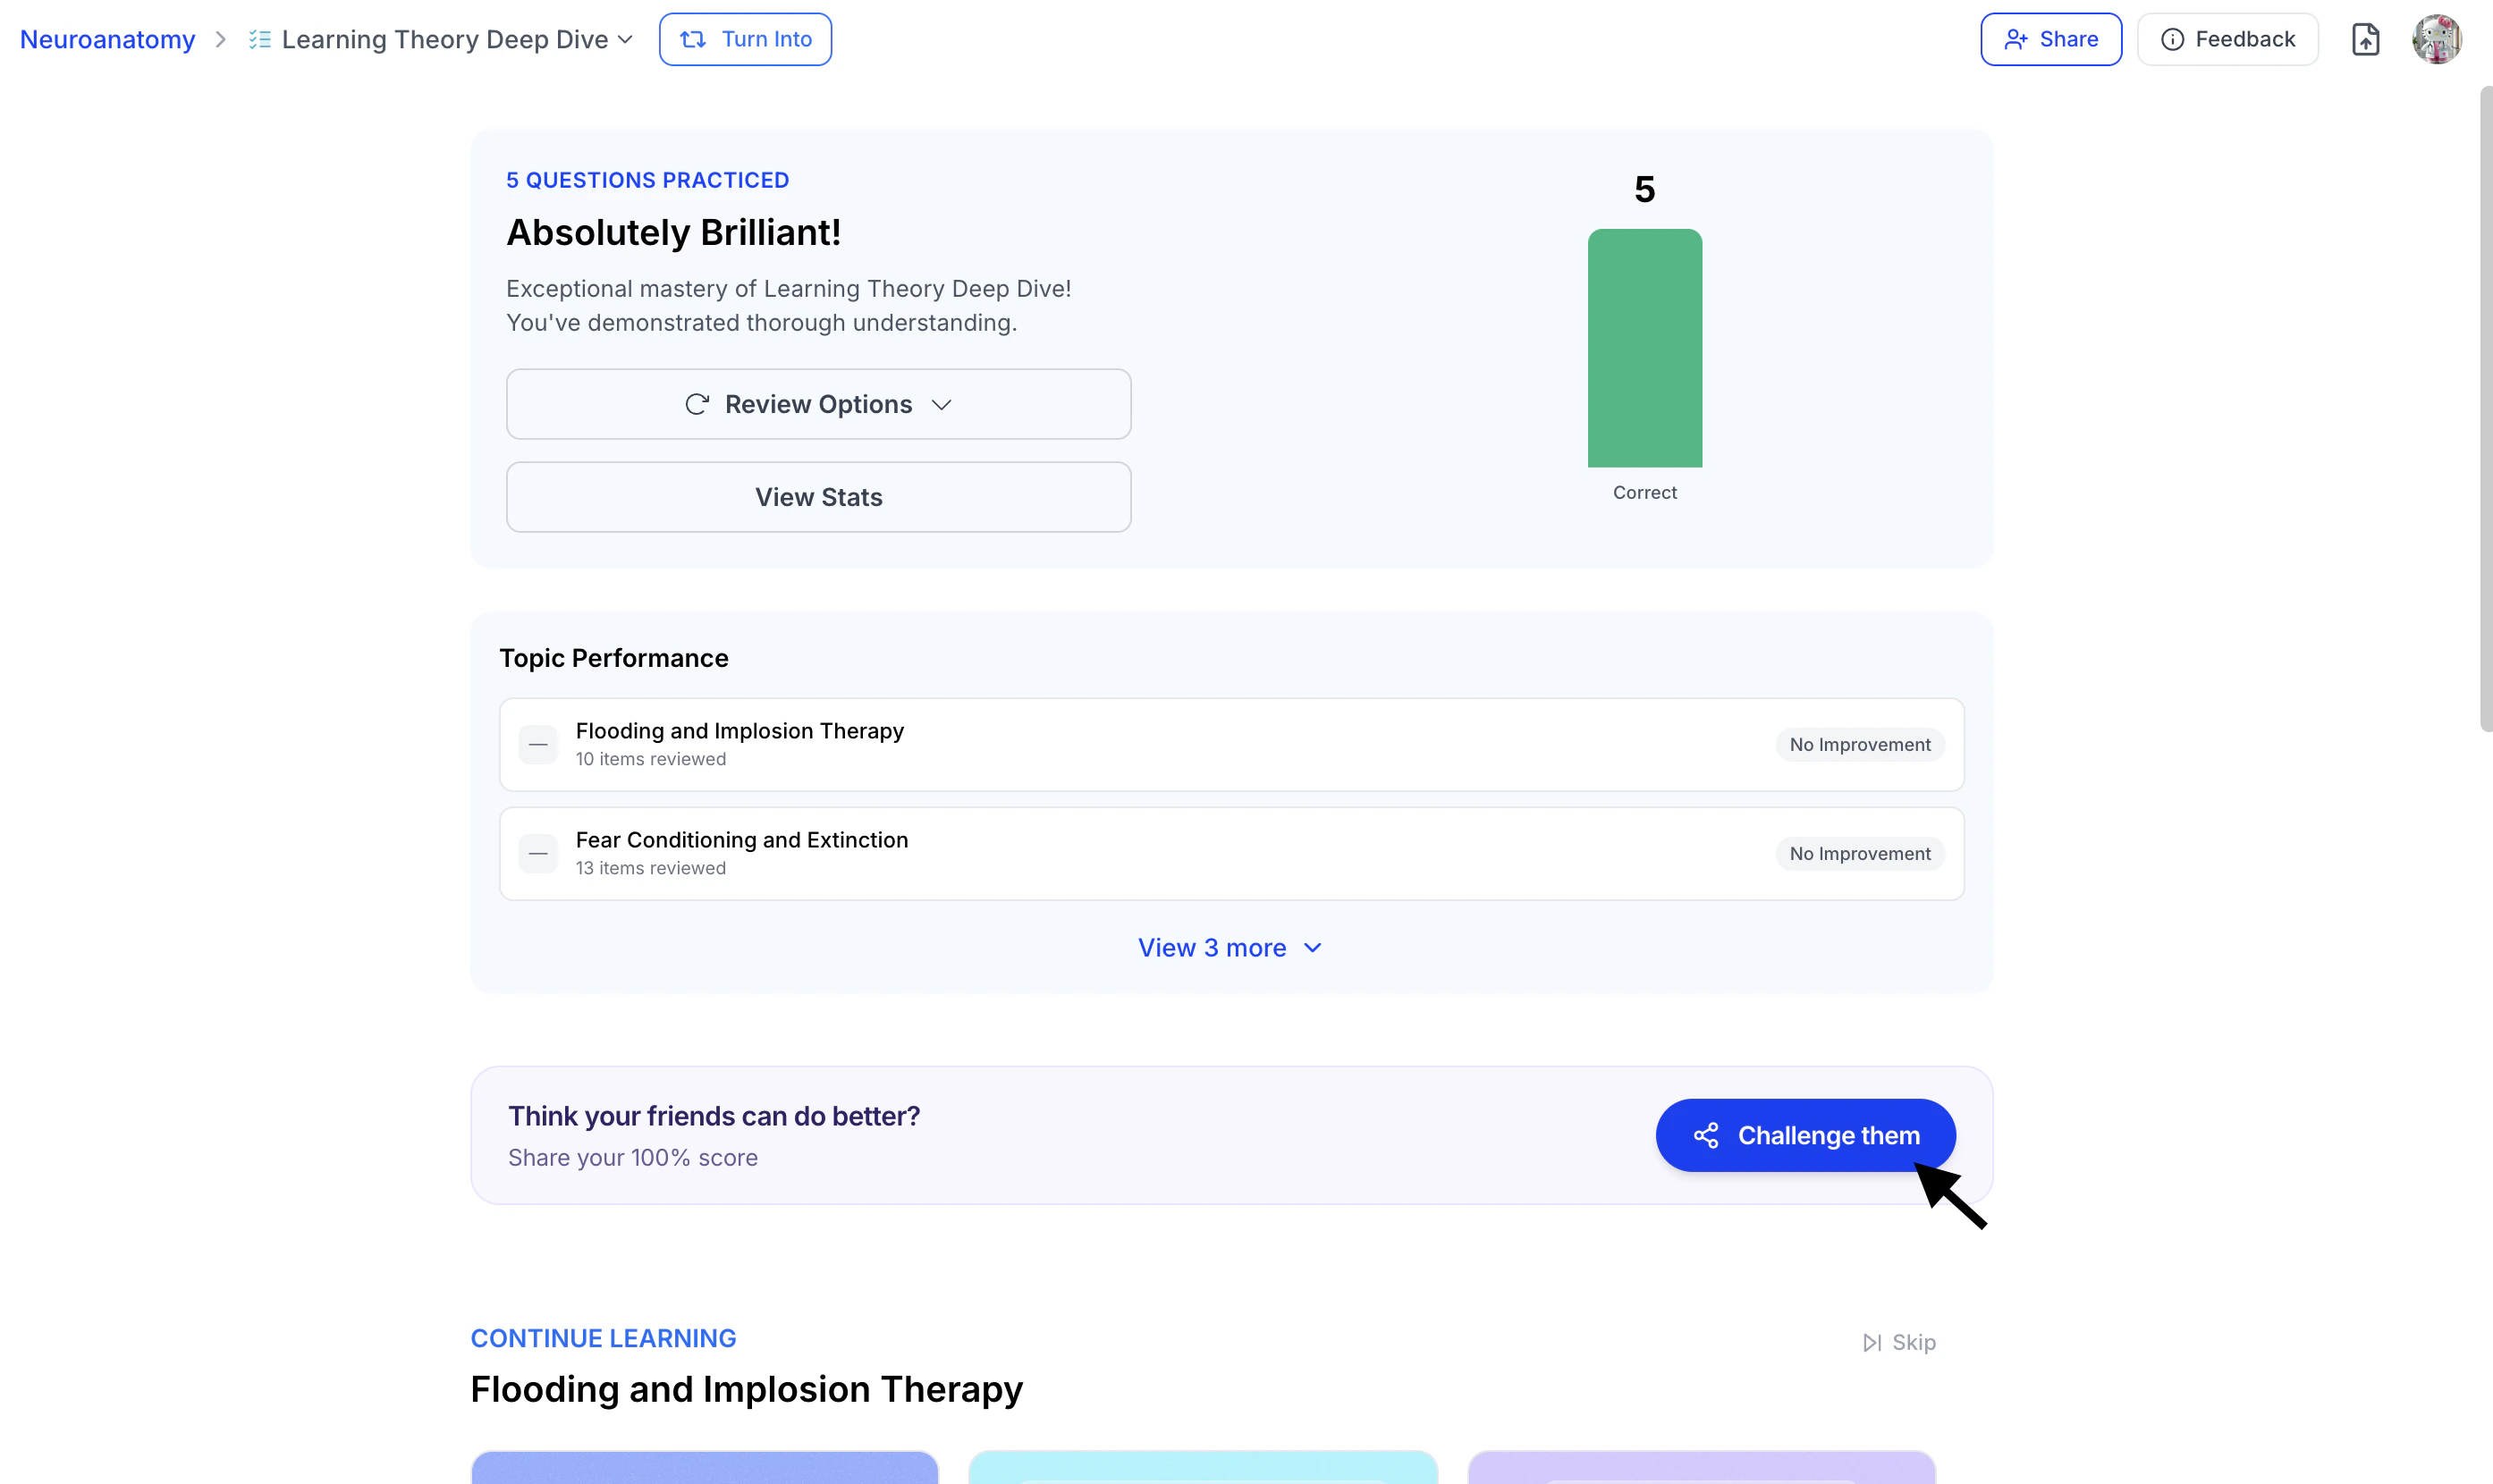
- Want to share your quiz with results, click Challenge them within the Think your friends can do better? field.
- Next, choose how you would like to share:
- Select Help a Friend to share your quiz without your result information.

- Select Challenge to share your quiz with your score and see if a friend can beat it.

- Select Celebrate to share your quiz result and highlight your achievement.

- Finally, select Copy Link or share directly through supported apps:
- Select the WhatsApp icon to share via WhatsApp.
- Select the Telegram icon to share via Telegram.
- Select the Text icon to share through your preferred messaging app.
Delete Your Quiz
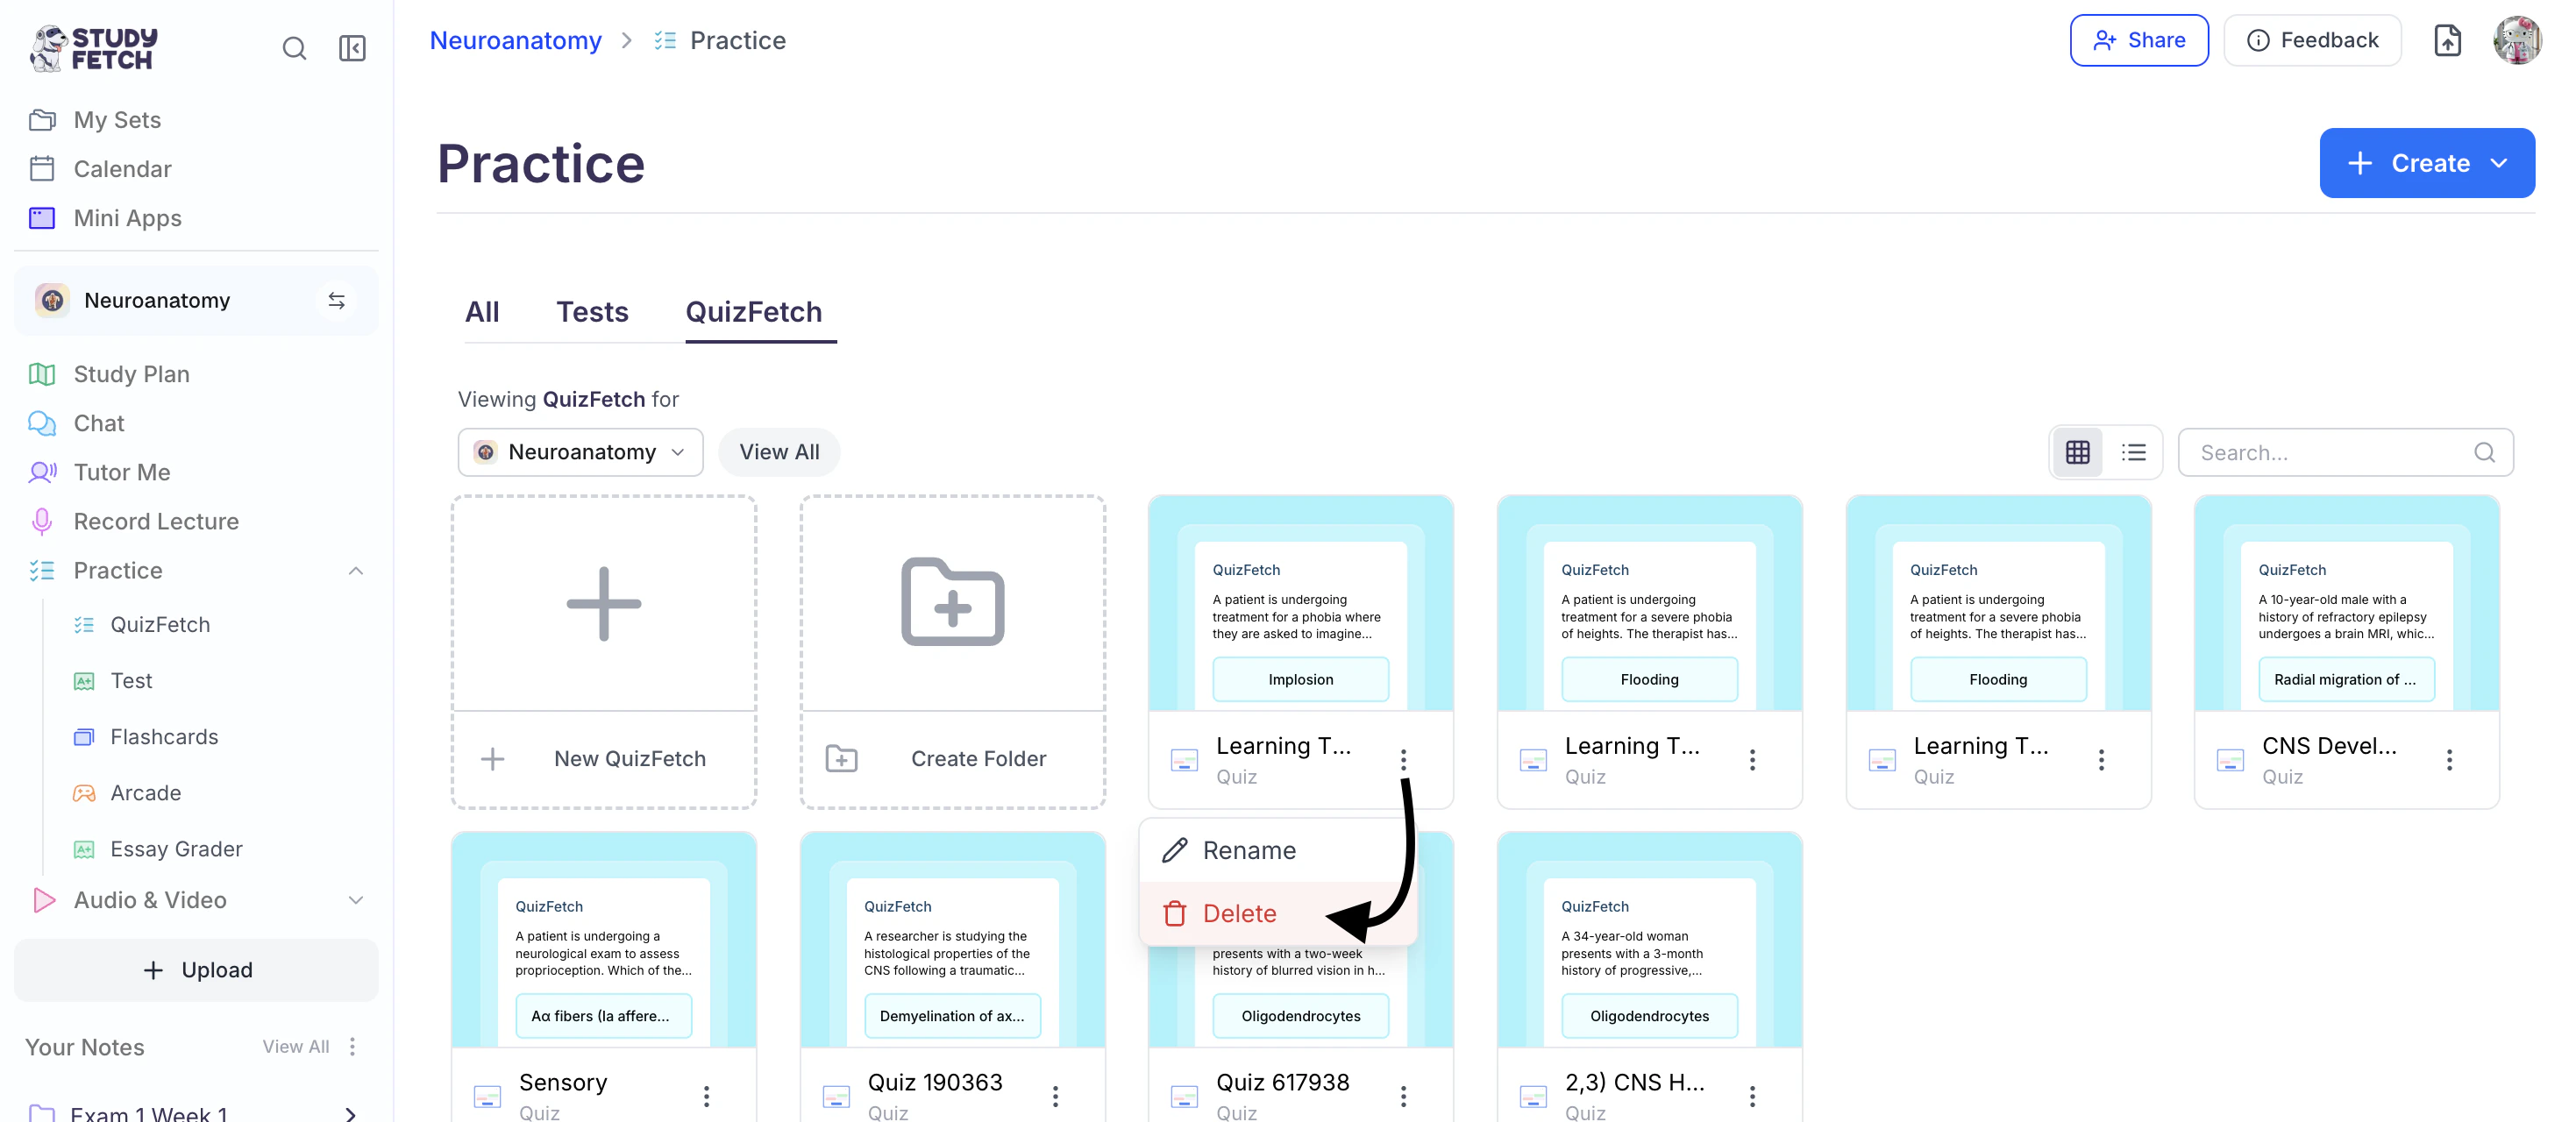
- First navigate to the QuizFetch feature page. From the left-hand side of your dashboard, click Practice, then select QuizFetch.
- Select the ⋮ button to the right of the desired quiz name and choose Delete.
- If you are sure you want to delete this quiz, select OK.

Be cautious as this cannot be undone!
Benefits of QuizFetch
QuizFetch offers several unique advantages for your study routine:
- Confidence Rating: Helps you identify which topics you’re truly comfortable with
- Interactive Feedback: Get immediate explanations for incorrect answers
- Progress Tracking: Monitor your learning improvements over time
- AI-Powered Assistance: Get help from Spark.E whenever you’re stuck
- Customized Learning Path: Recommendations based on your performance
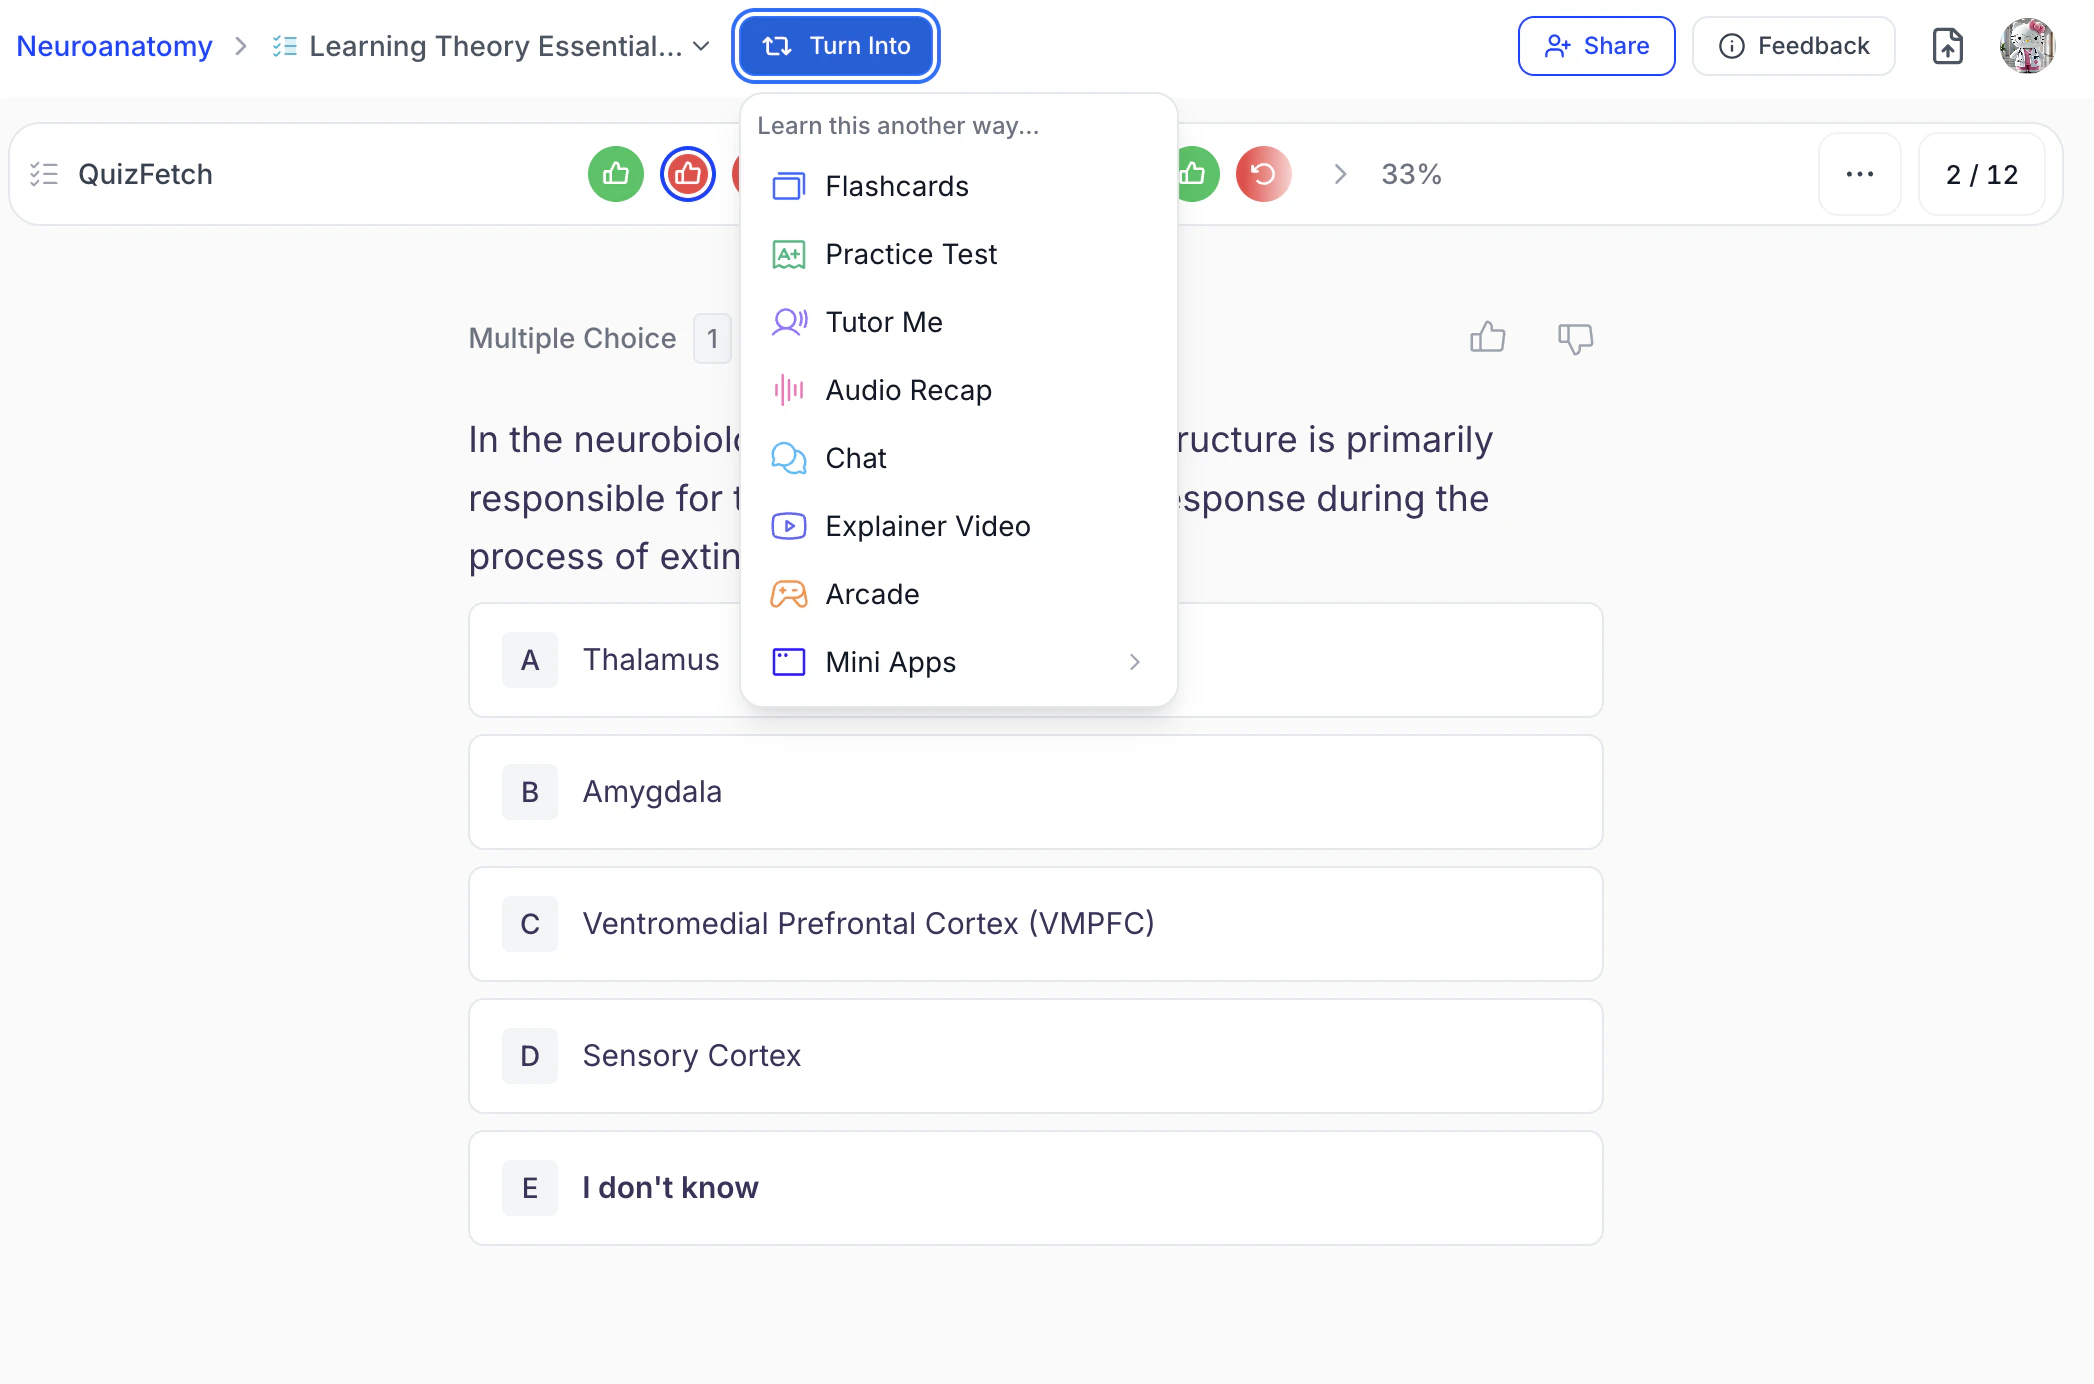
- Integration with Other Tools: Your quiz can be used to generate flashcards, tests, and other study materials. You can create new study resources directly from your quiz by selecting Turn Into at the top of the Quiz Results page
or from the top toolbar while taking a quiz or reviewing quiz statistics, then choosing your desired study tool.
You can also generate study materials from within each feature’s respective section.
After using QuizFetch, you might want to try:
- Practice Tests for a more formal assessment experience
- Flashcards to reinforce concepts you struggled with
- Tutor Me for personalized instruction on difficult topics


 Creating a quiz from flashcards automatically generates a 20-question multiple choice quiz. For more advanced customization options, use the Create from Materials method.
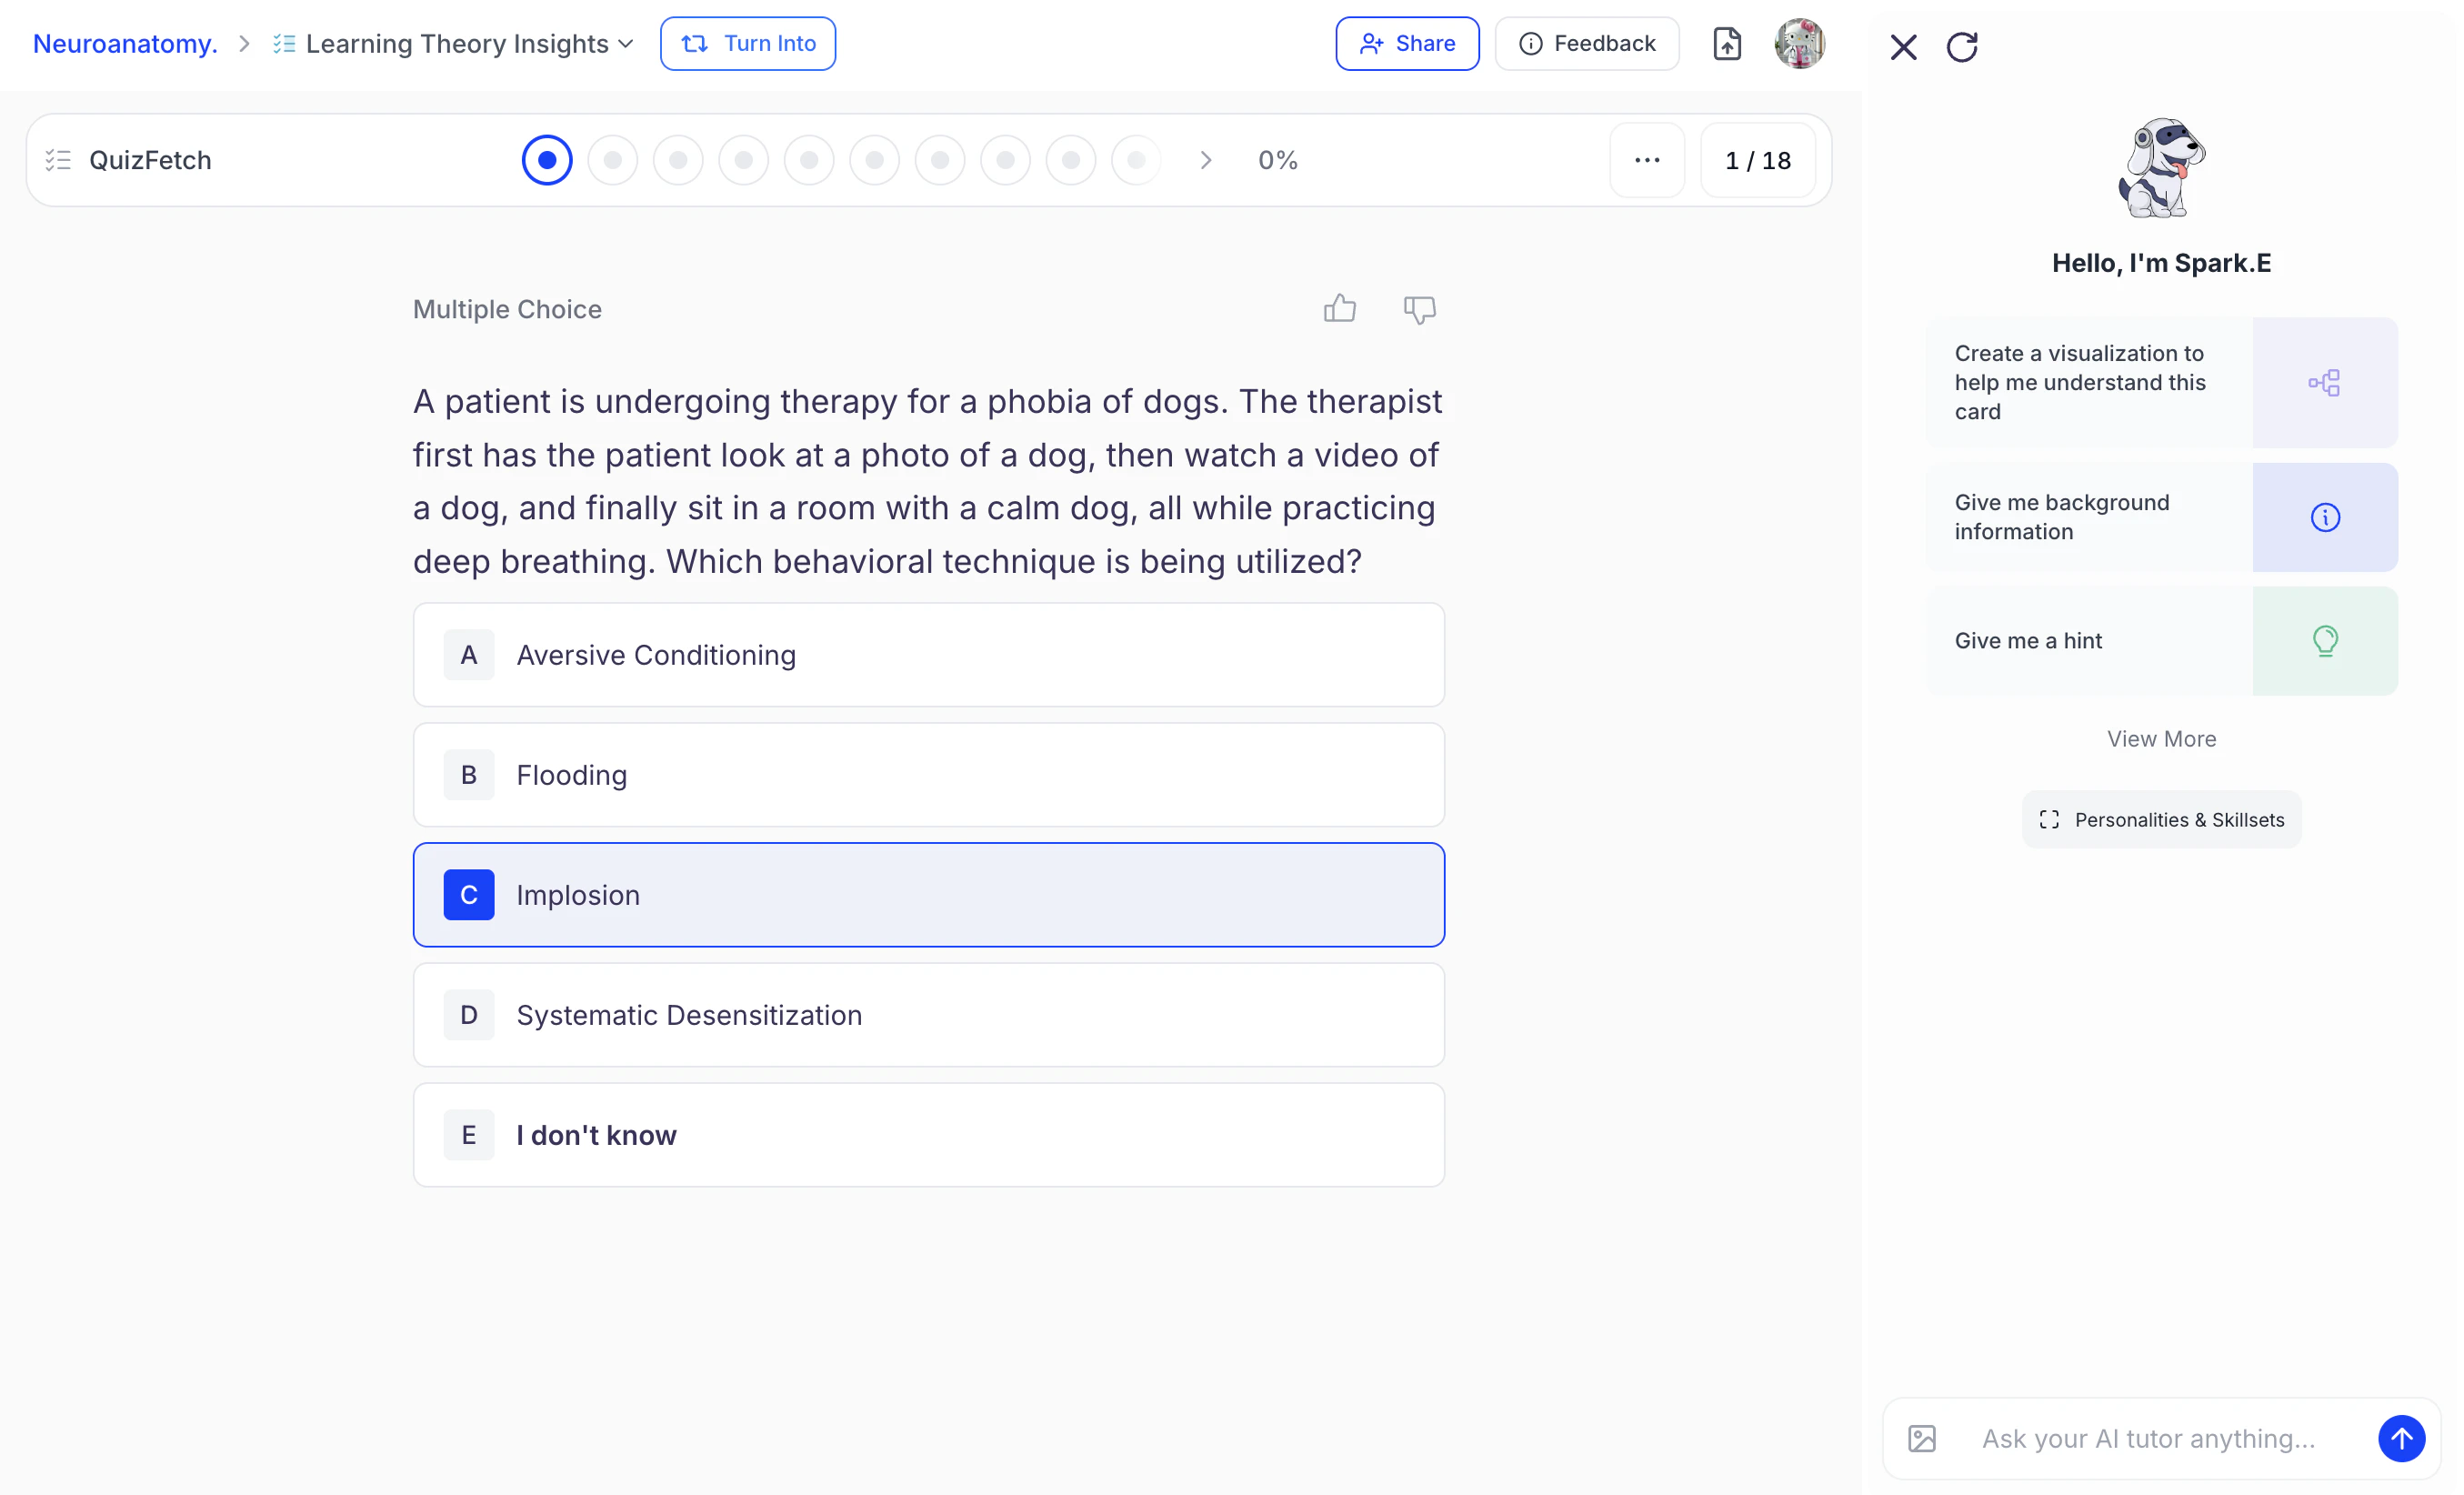


 You can also generate study materials from within each feature’s respective section.