Introduction
The Test feature allows you to create customized practice tests based on your study materials. These tests help you assess your knowledge, identify areas that need improvement, and prepare for upcoming exams with personalized questions.Accessing the Test Feature
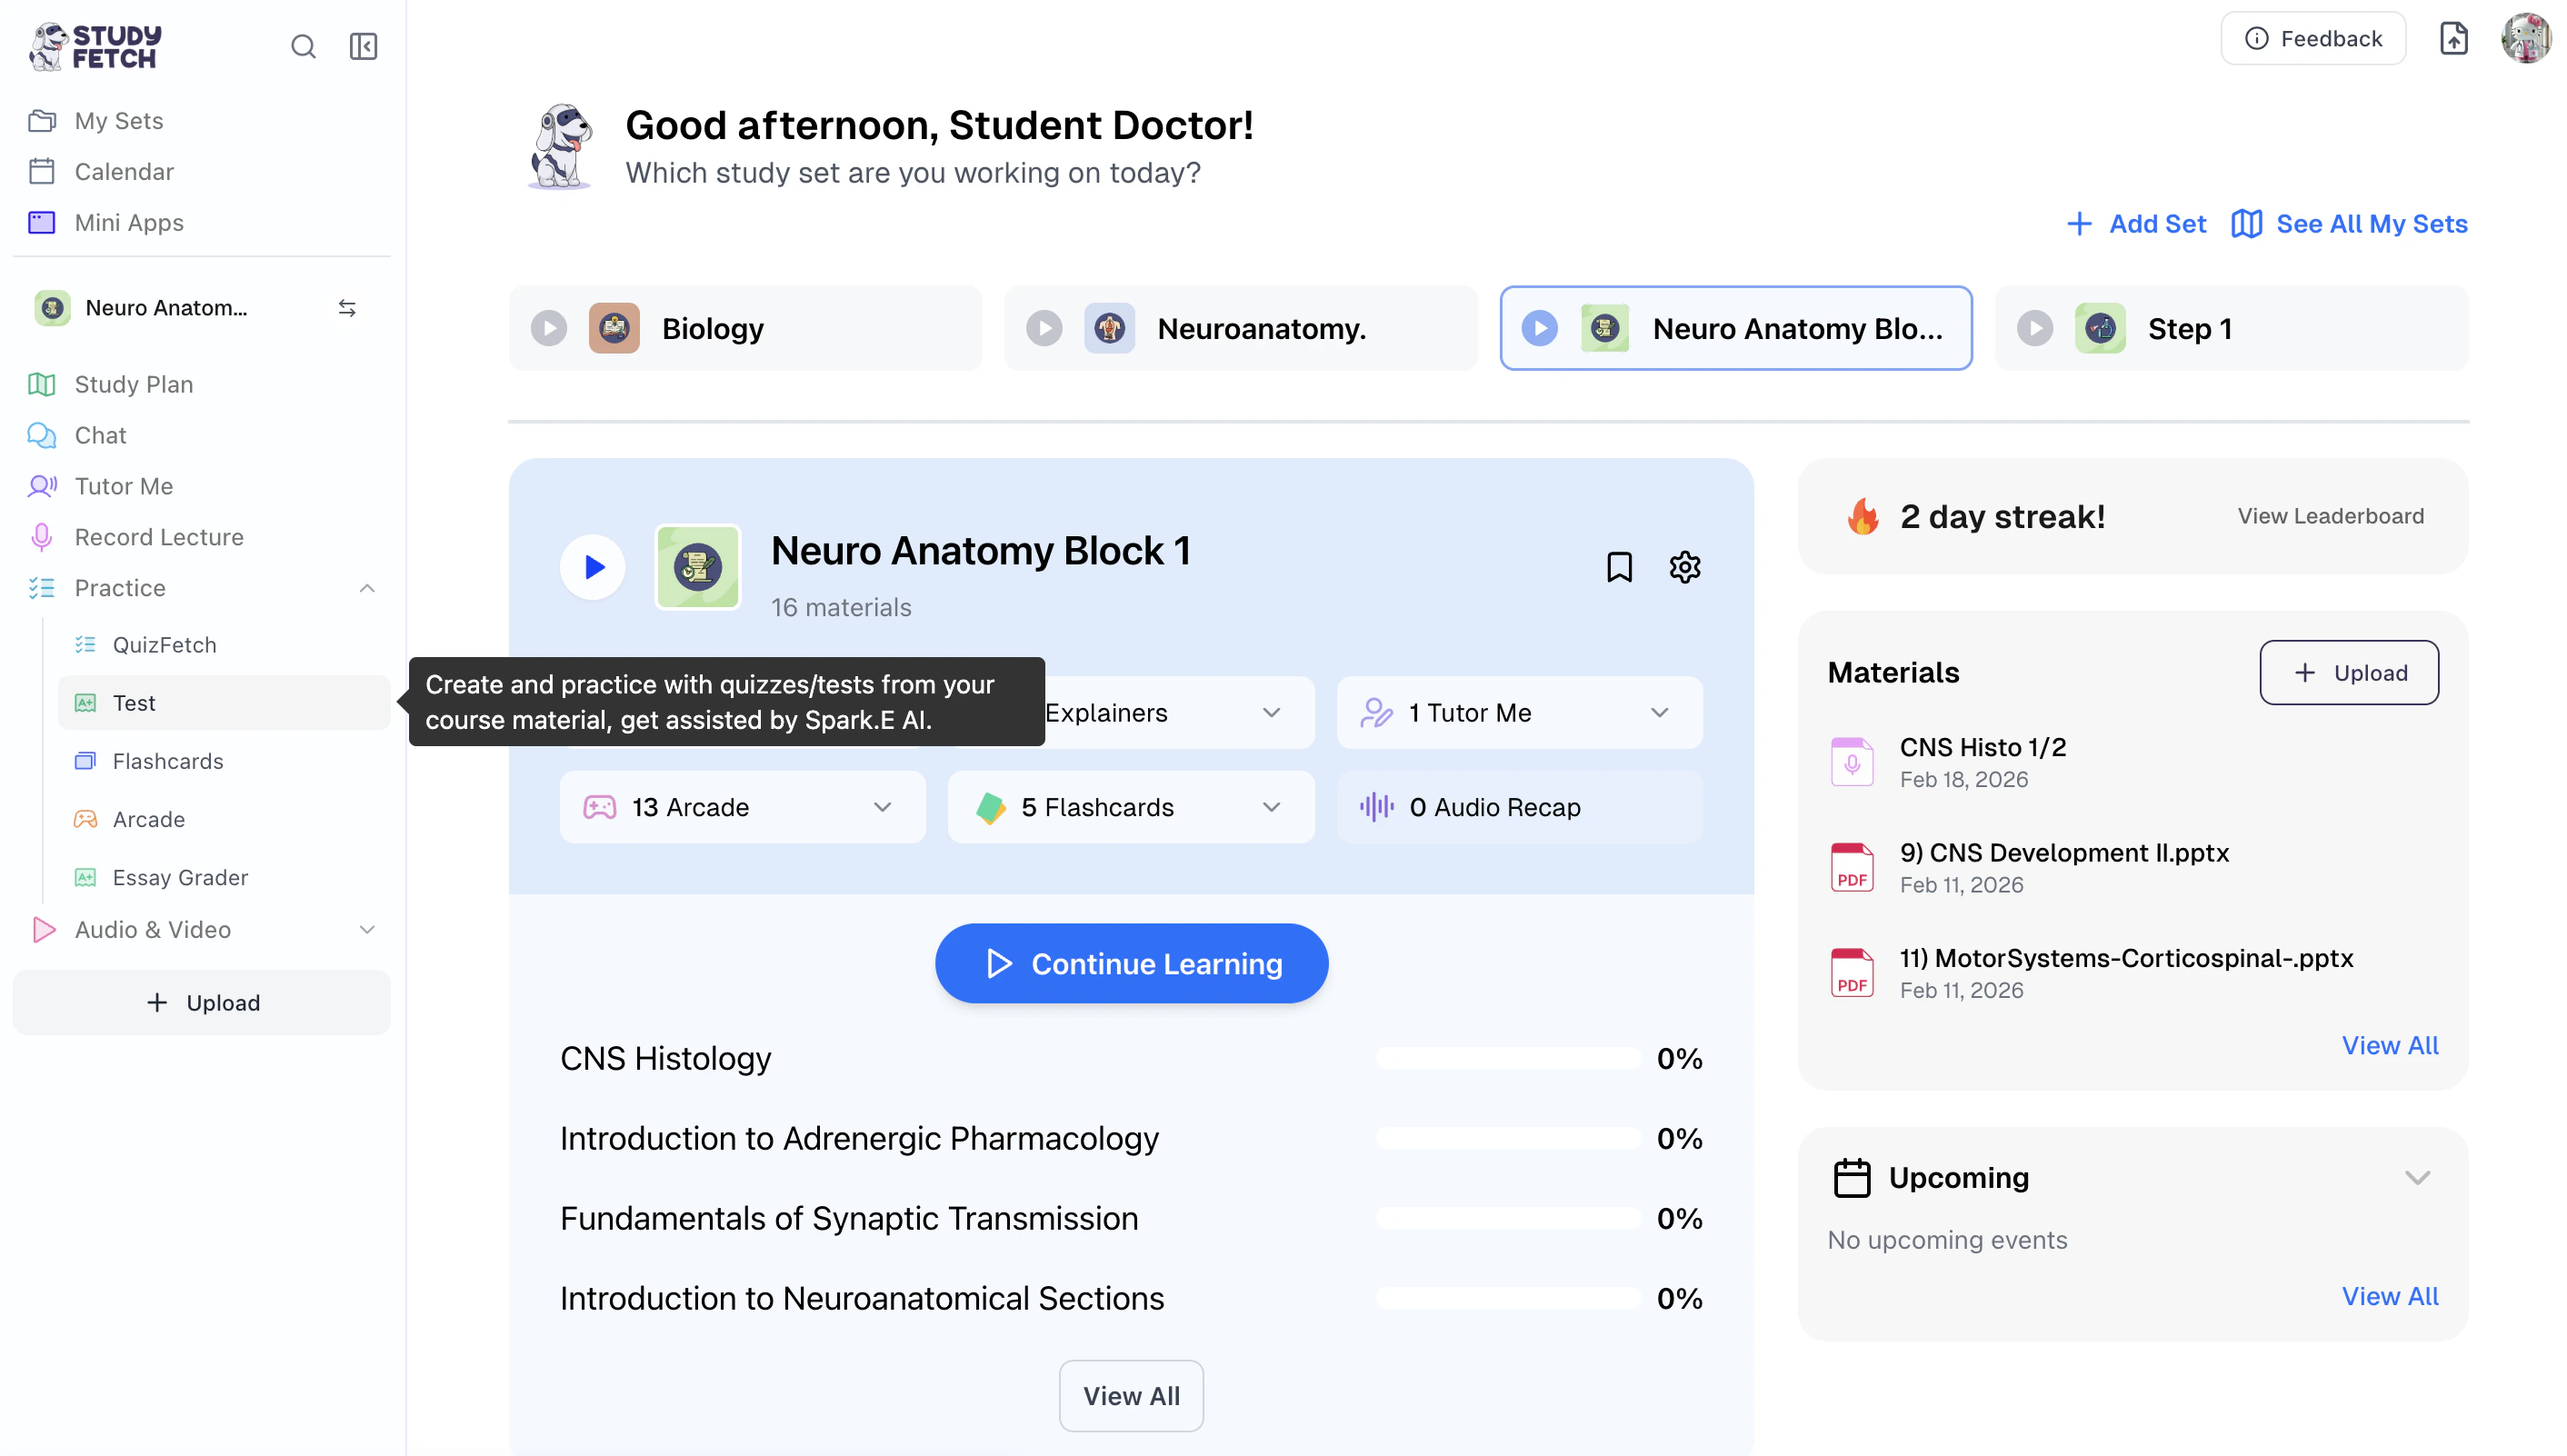
- On the left-hand side of your Dashboard click Practice and then select Test
- All existing practice tests associated with your Study Set can be found on this page.
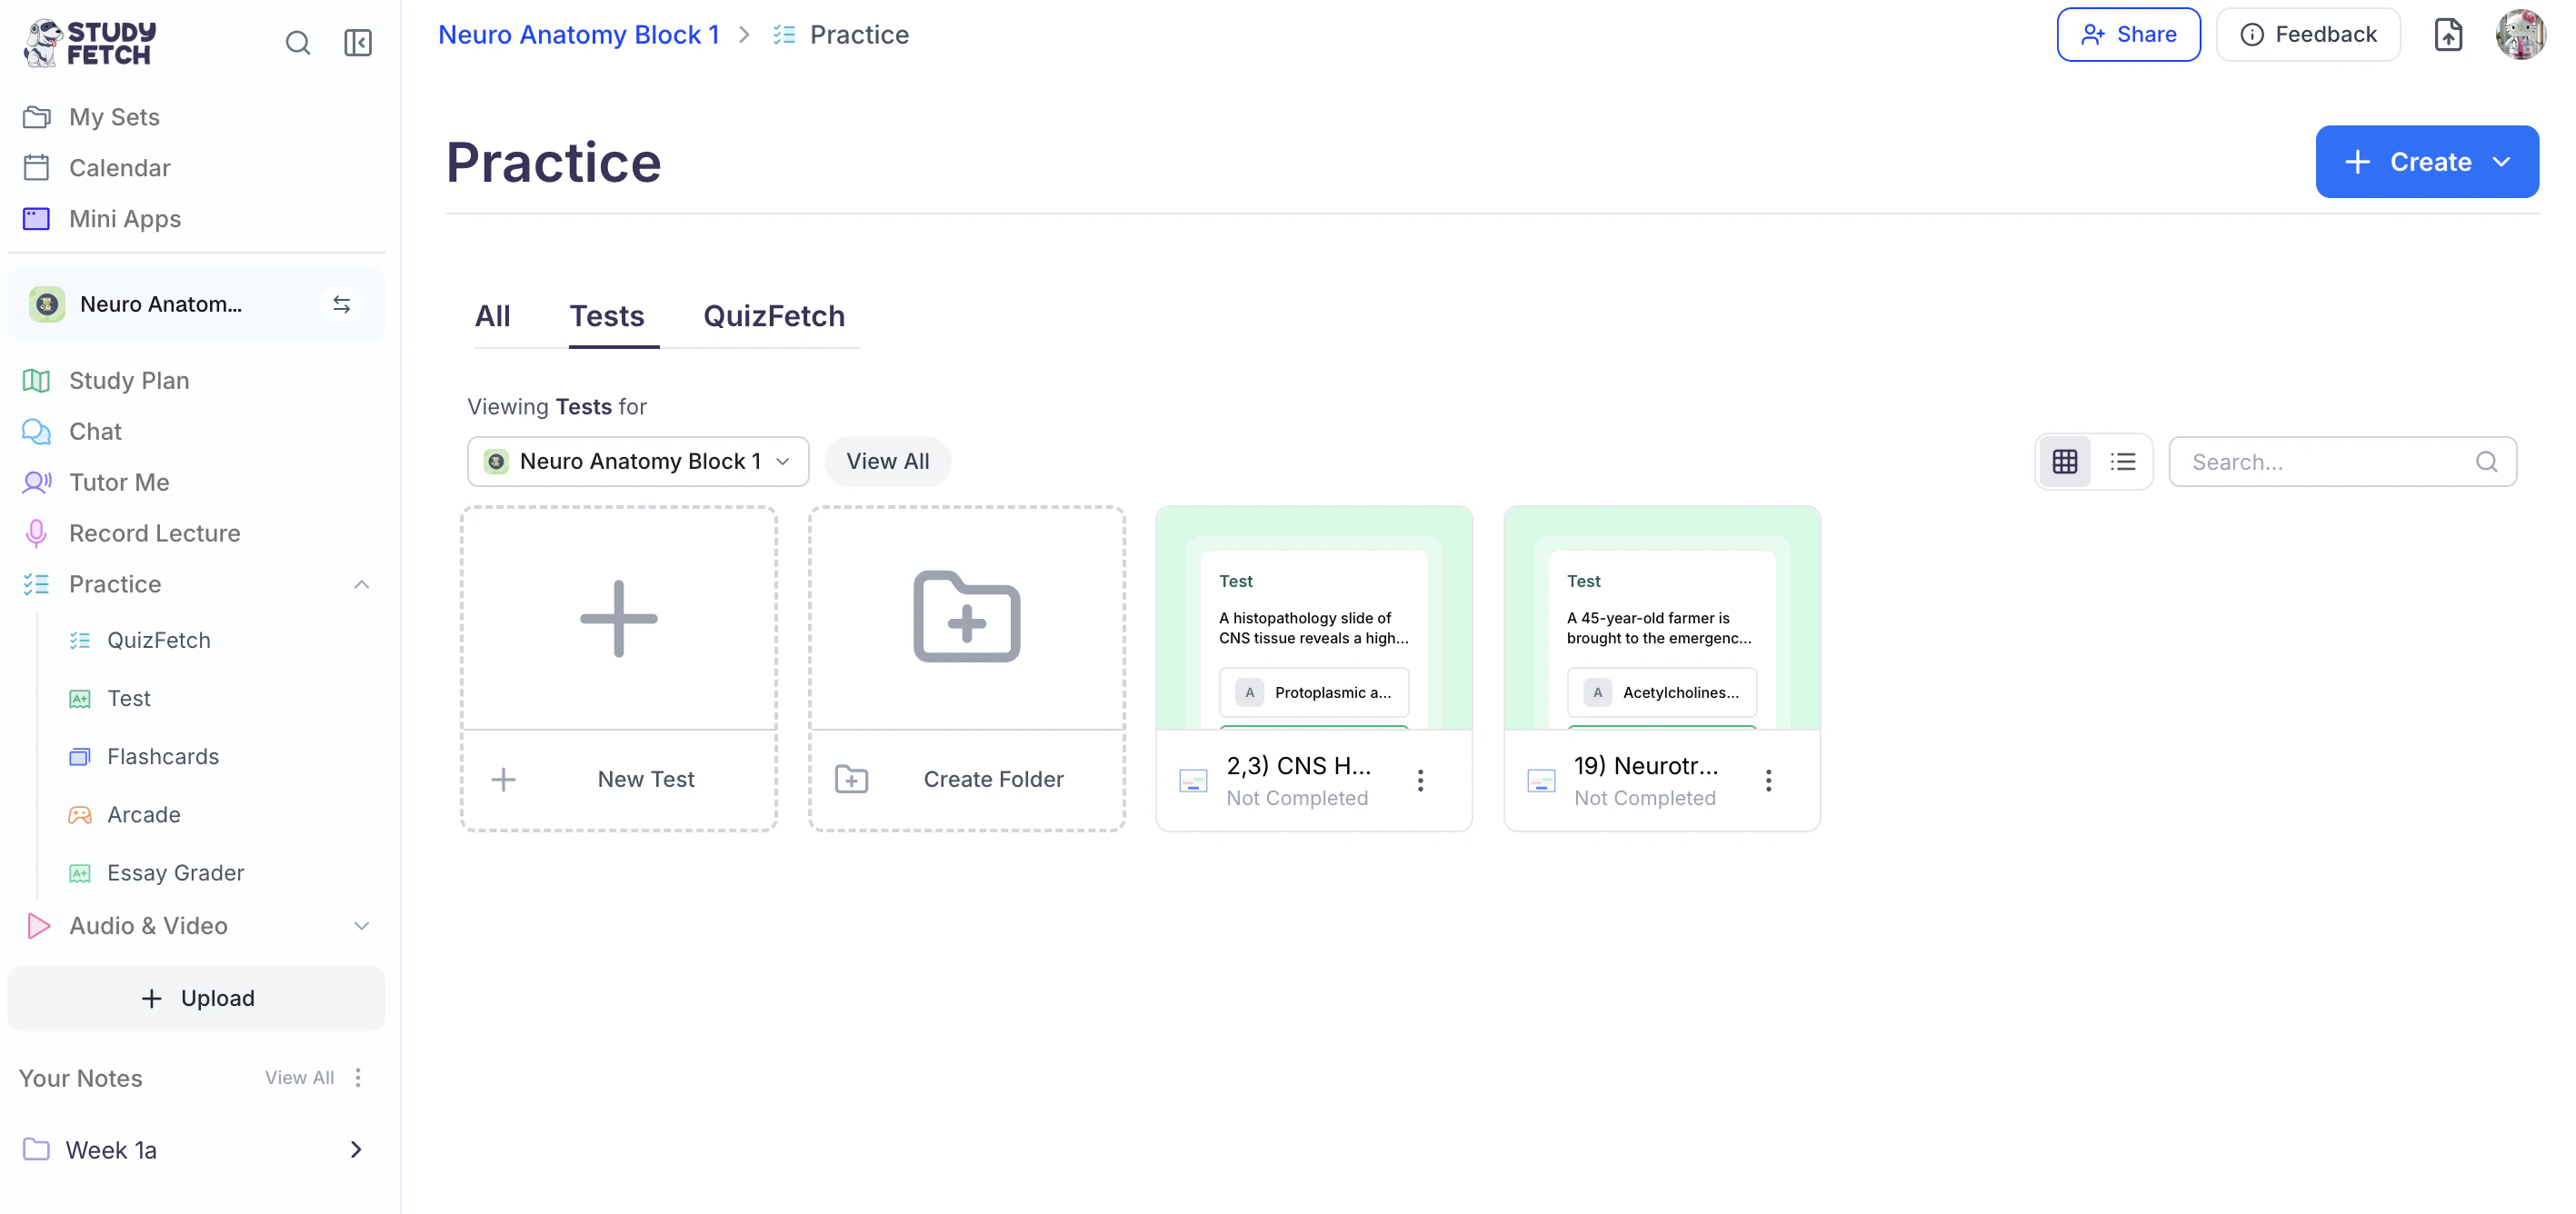
- To open a specific test, simply click on the name of the practice test you would like to view.
- To generate a new practice test, follow the steps outlined below.
Creating Your Test
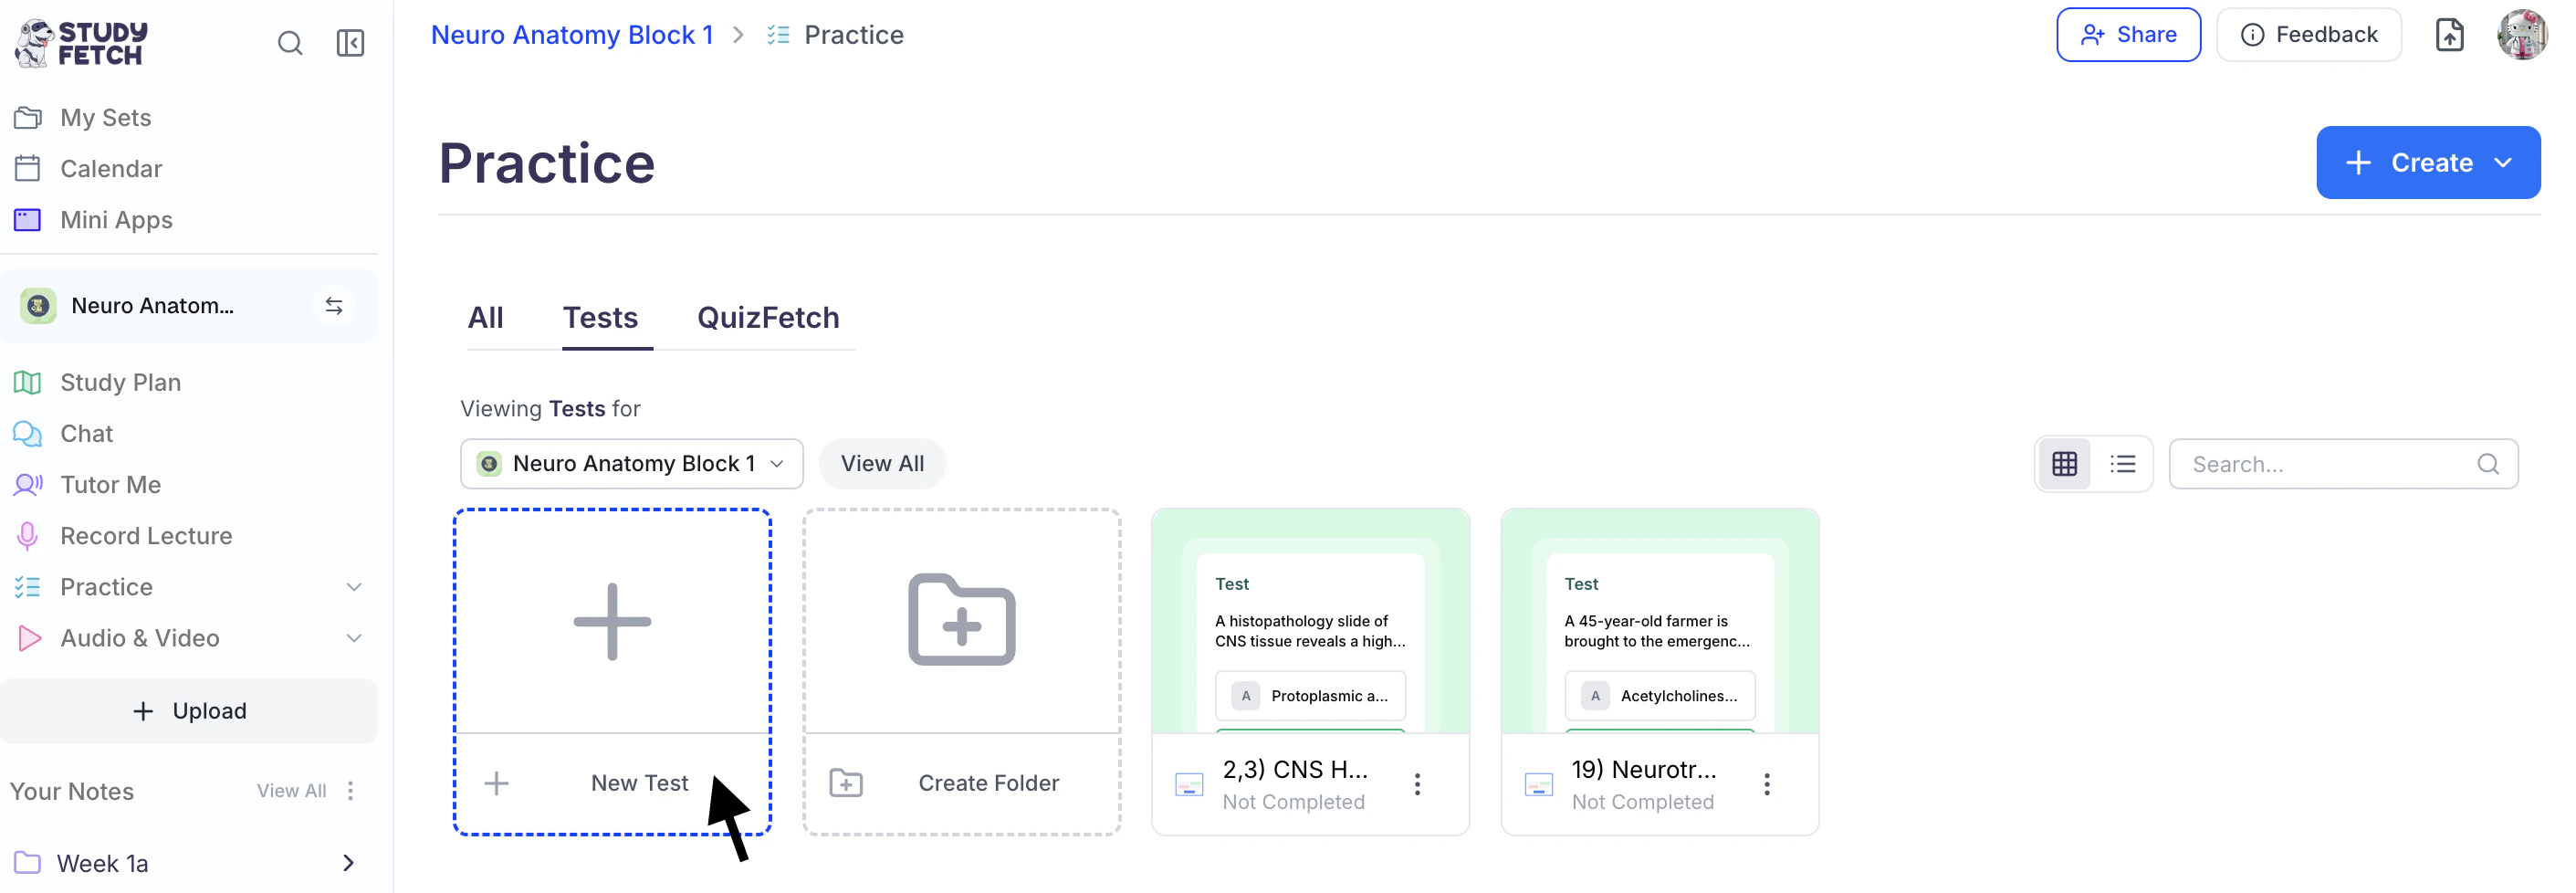
Step 1: Create a New Test
- To generate a new practice test:
- Select + New Test, or
- Click the downward arrow next to the + Create button in the top-right corner.
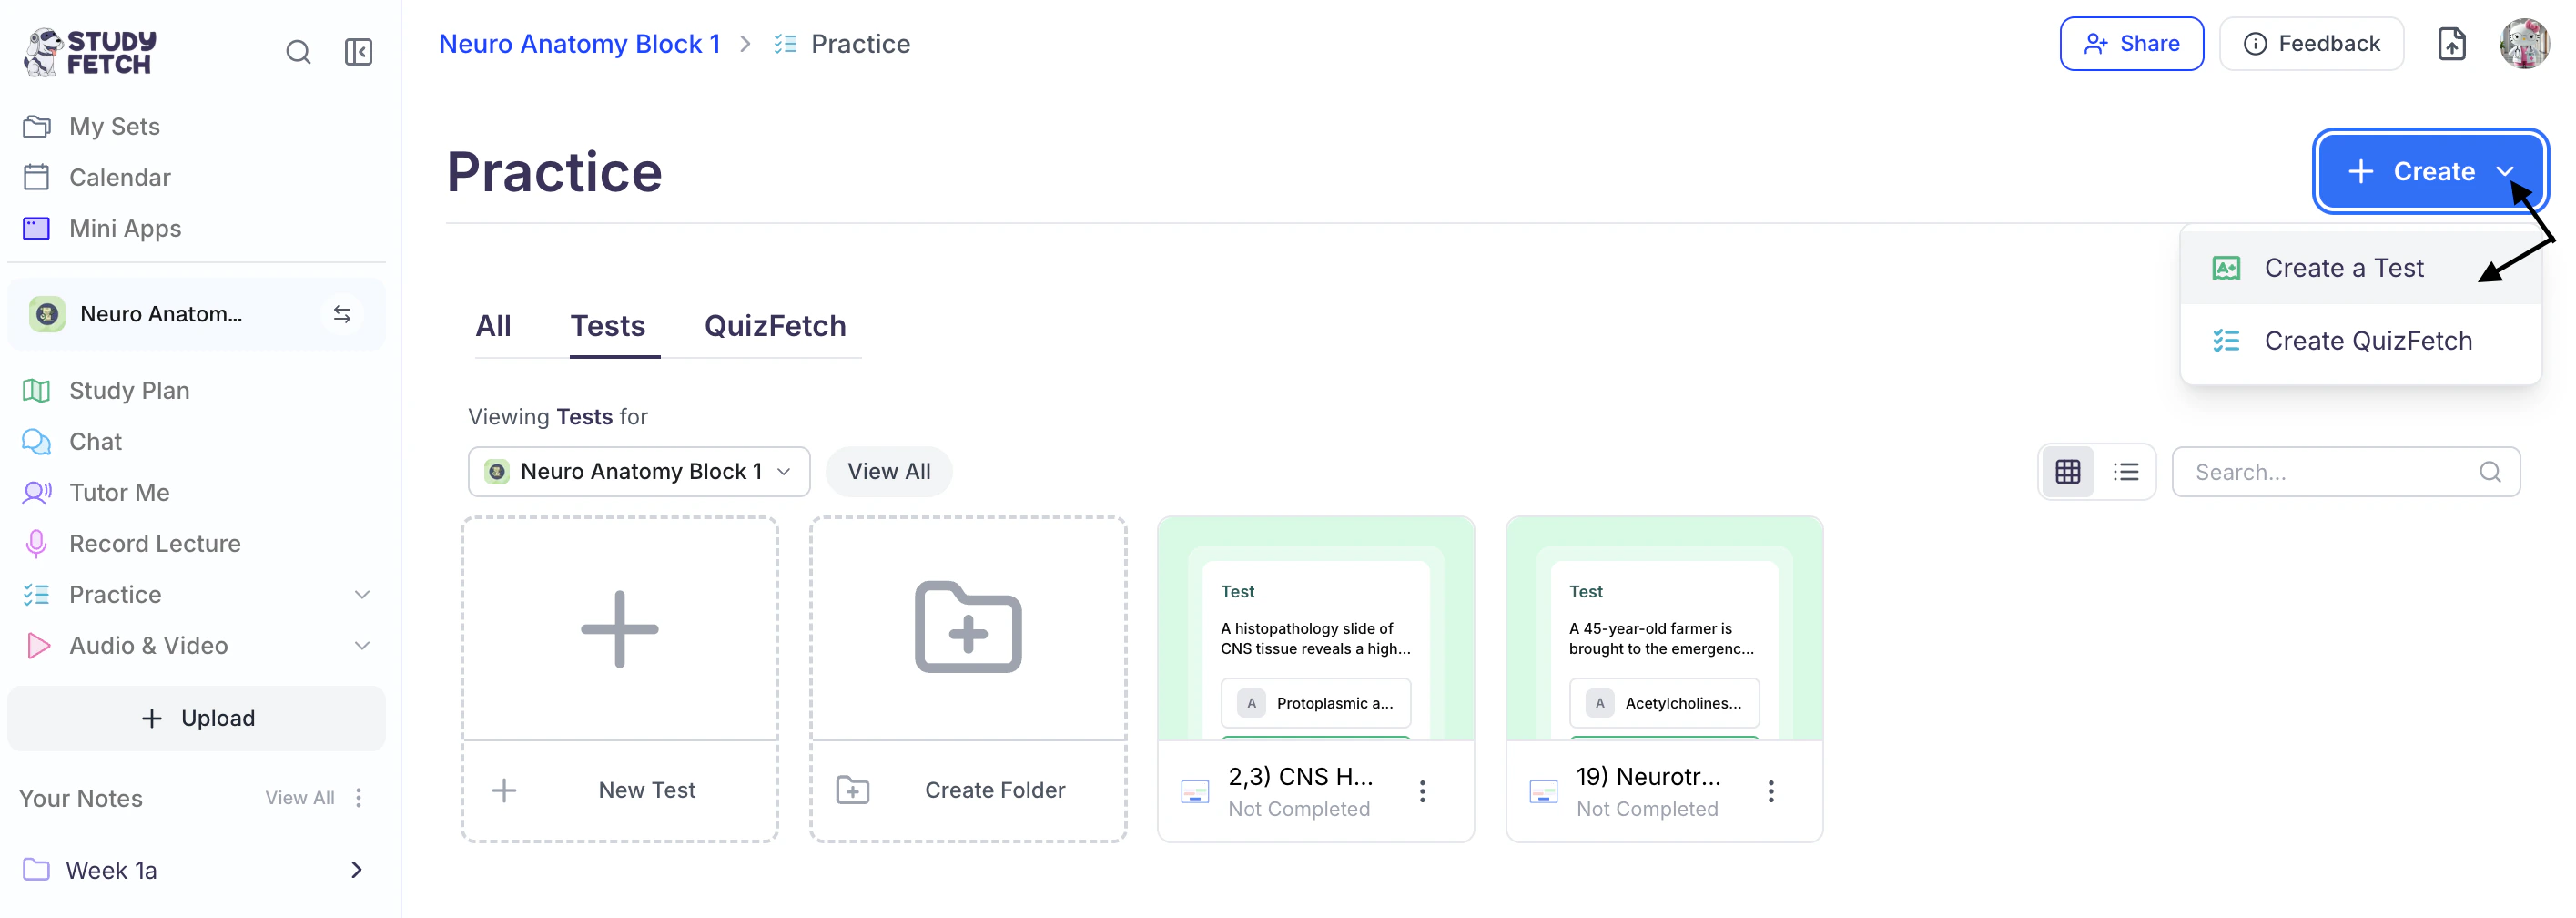
- From the dropdown menu, select Create a Test.
- Select + New Test, or
Step 2: Choose the Source
- Next, select how you would like to generate your test. Choose Create from Materials to build a practice test from your study materials, or select Create from Flashcards to generate a test from your flashcards.
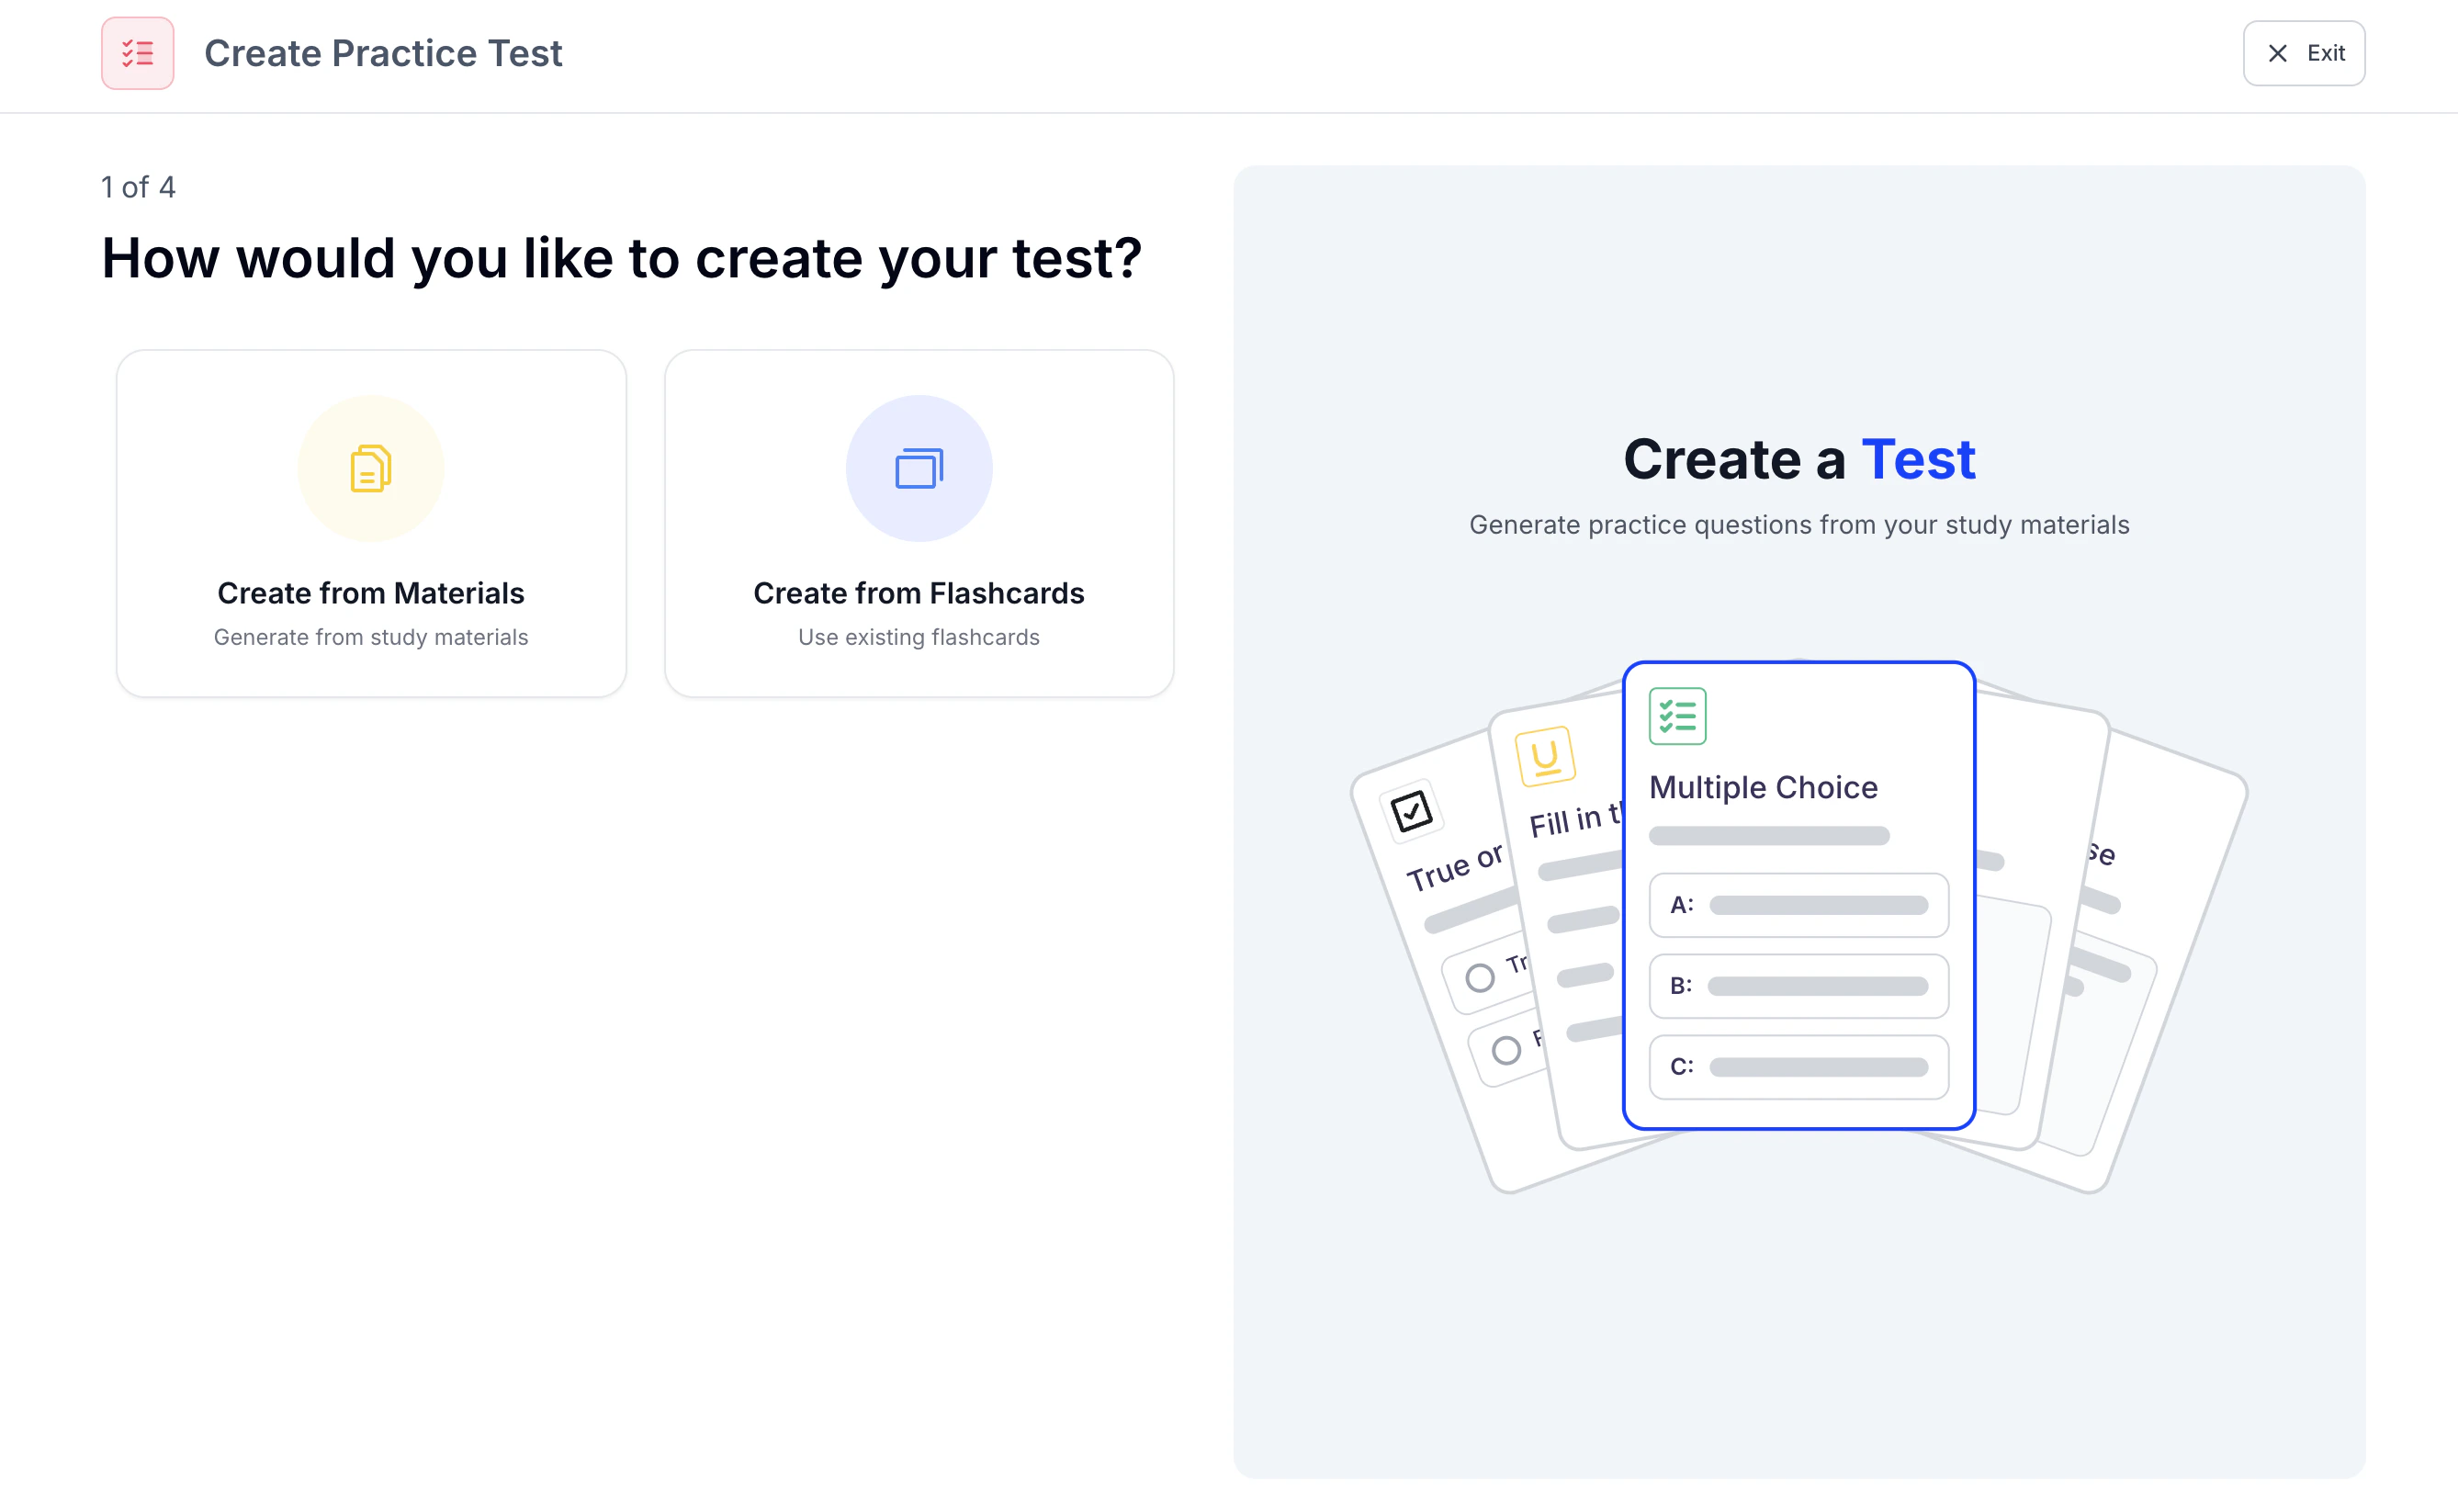
- Then follow the steps for your selected method below.
Method 1: Create from Materials
- Select Create from Materials if you want to create a practice test from your materials
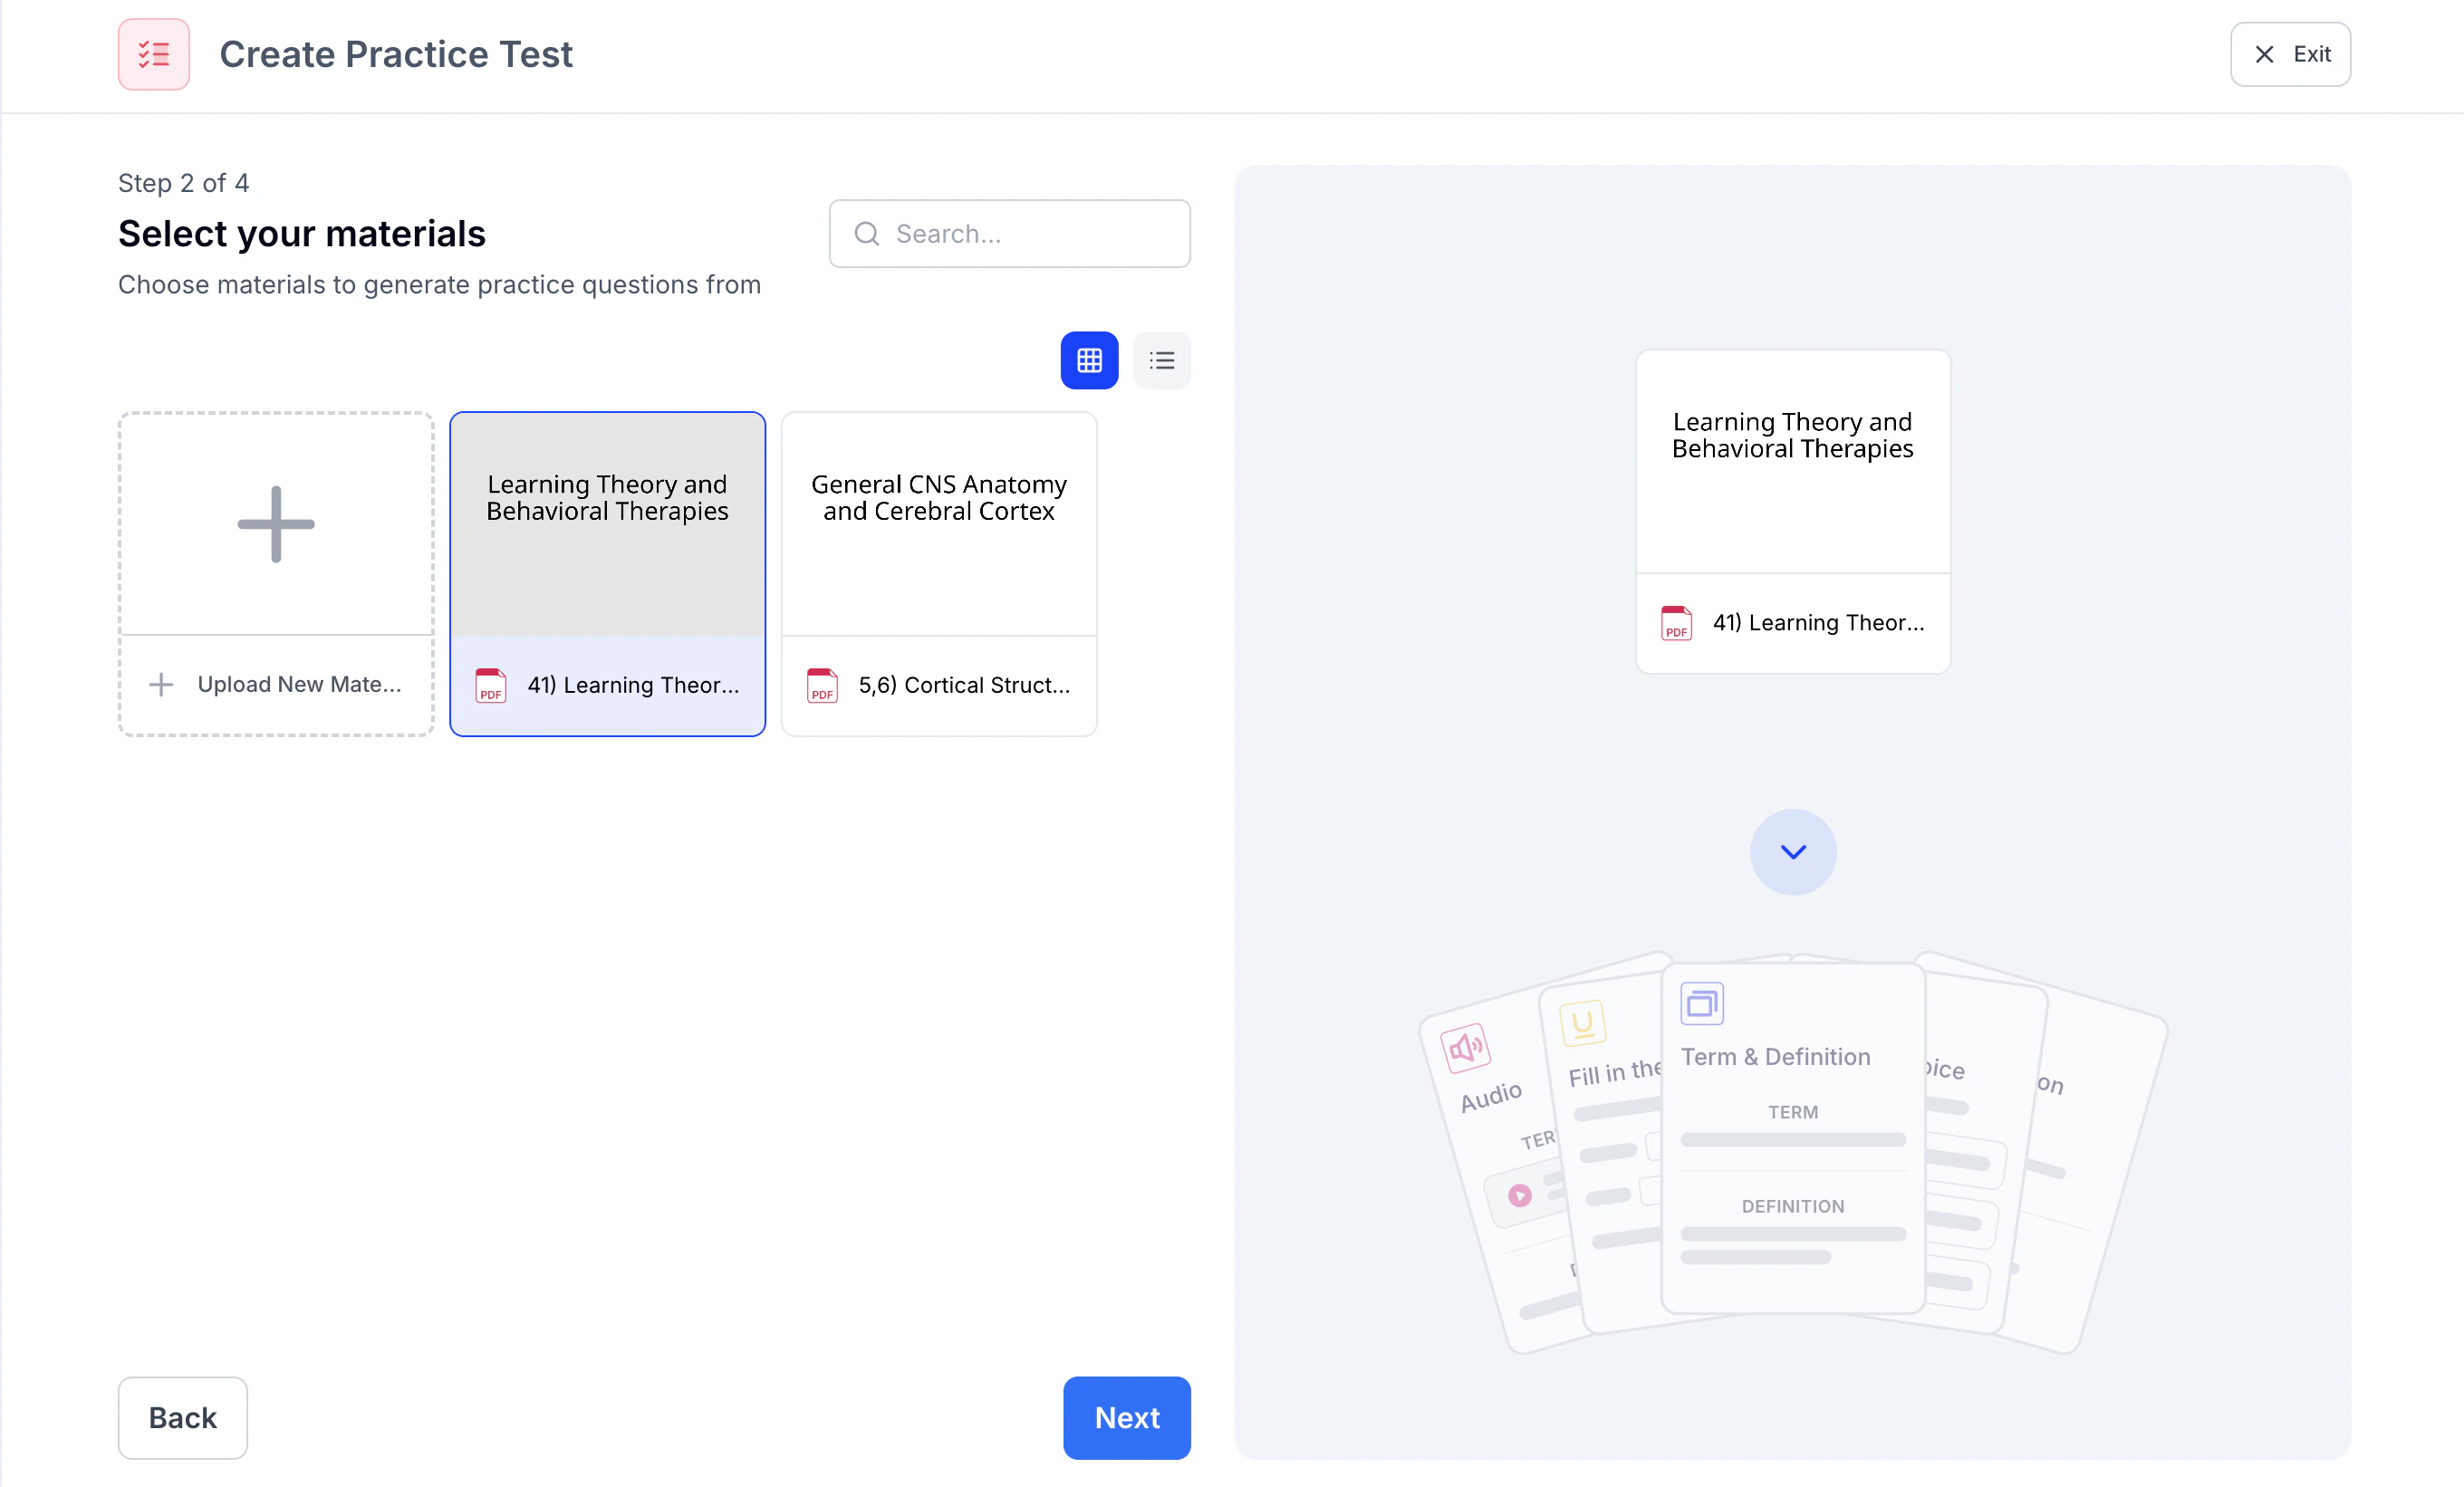
- Choose which previously uploaded materials you would like to create a practice test from or select + Upload New Material to import material you haven’t uploaded, and click Next
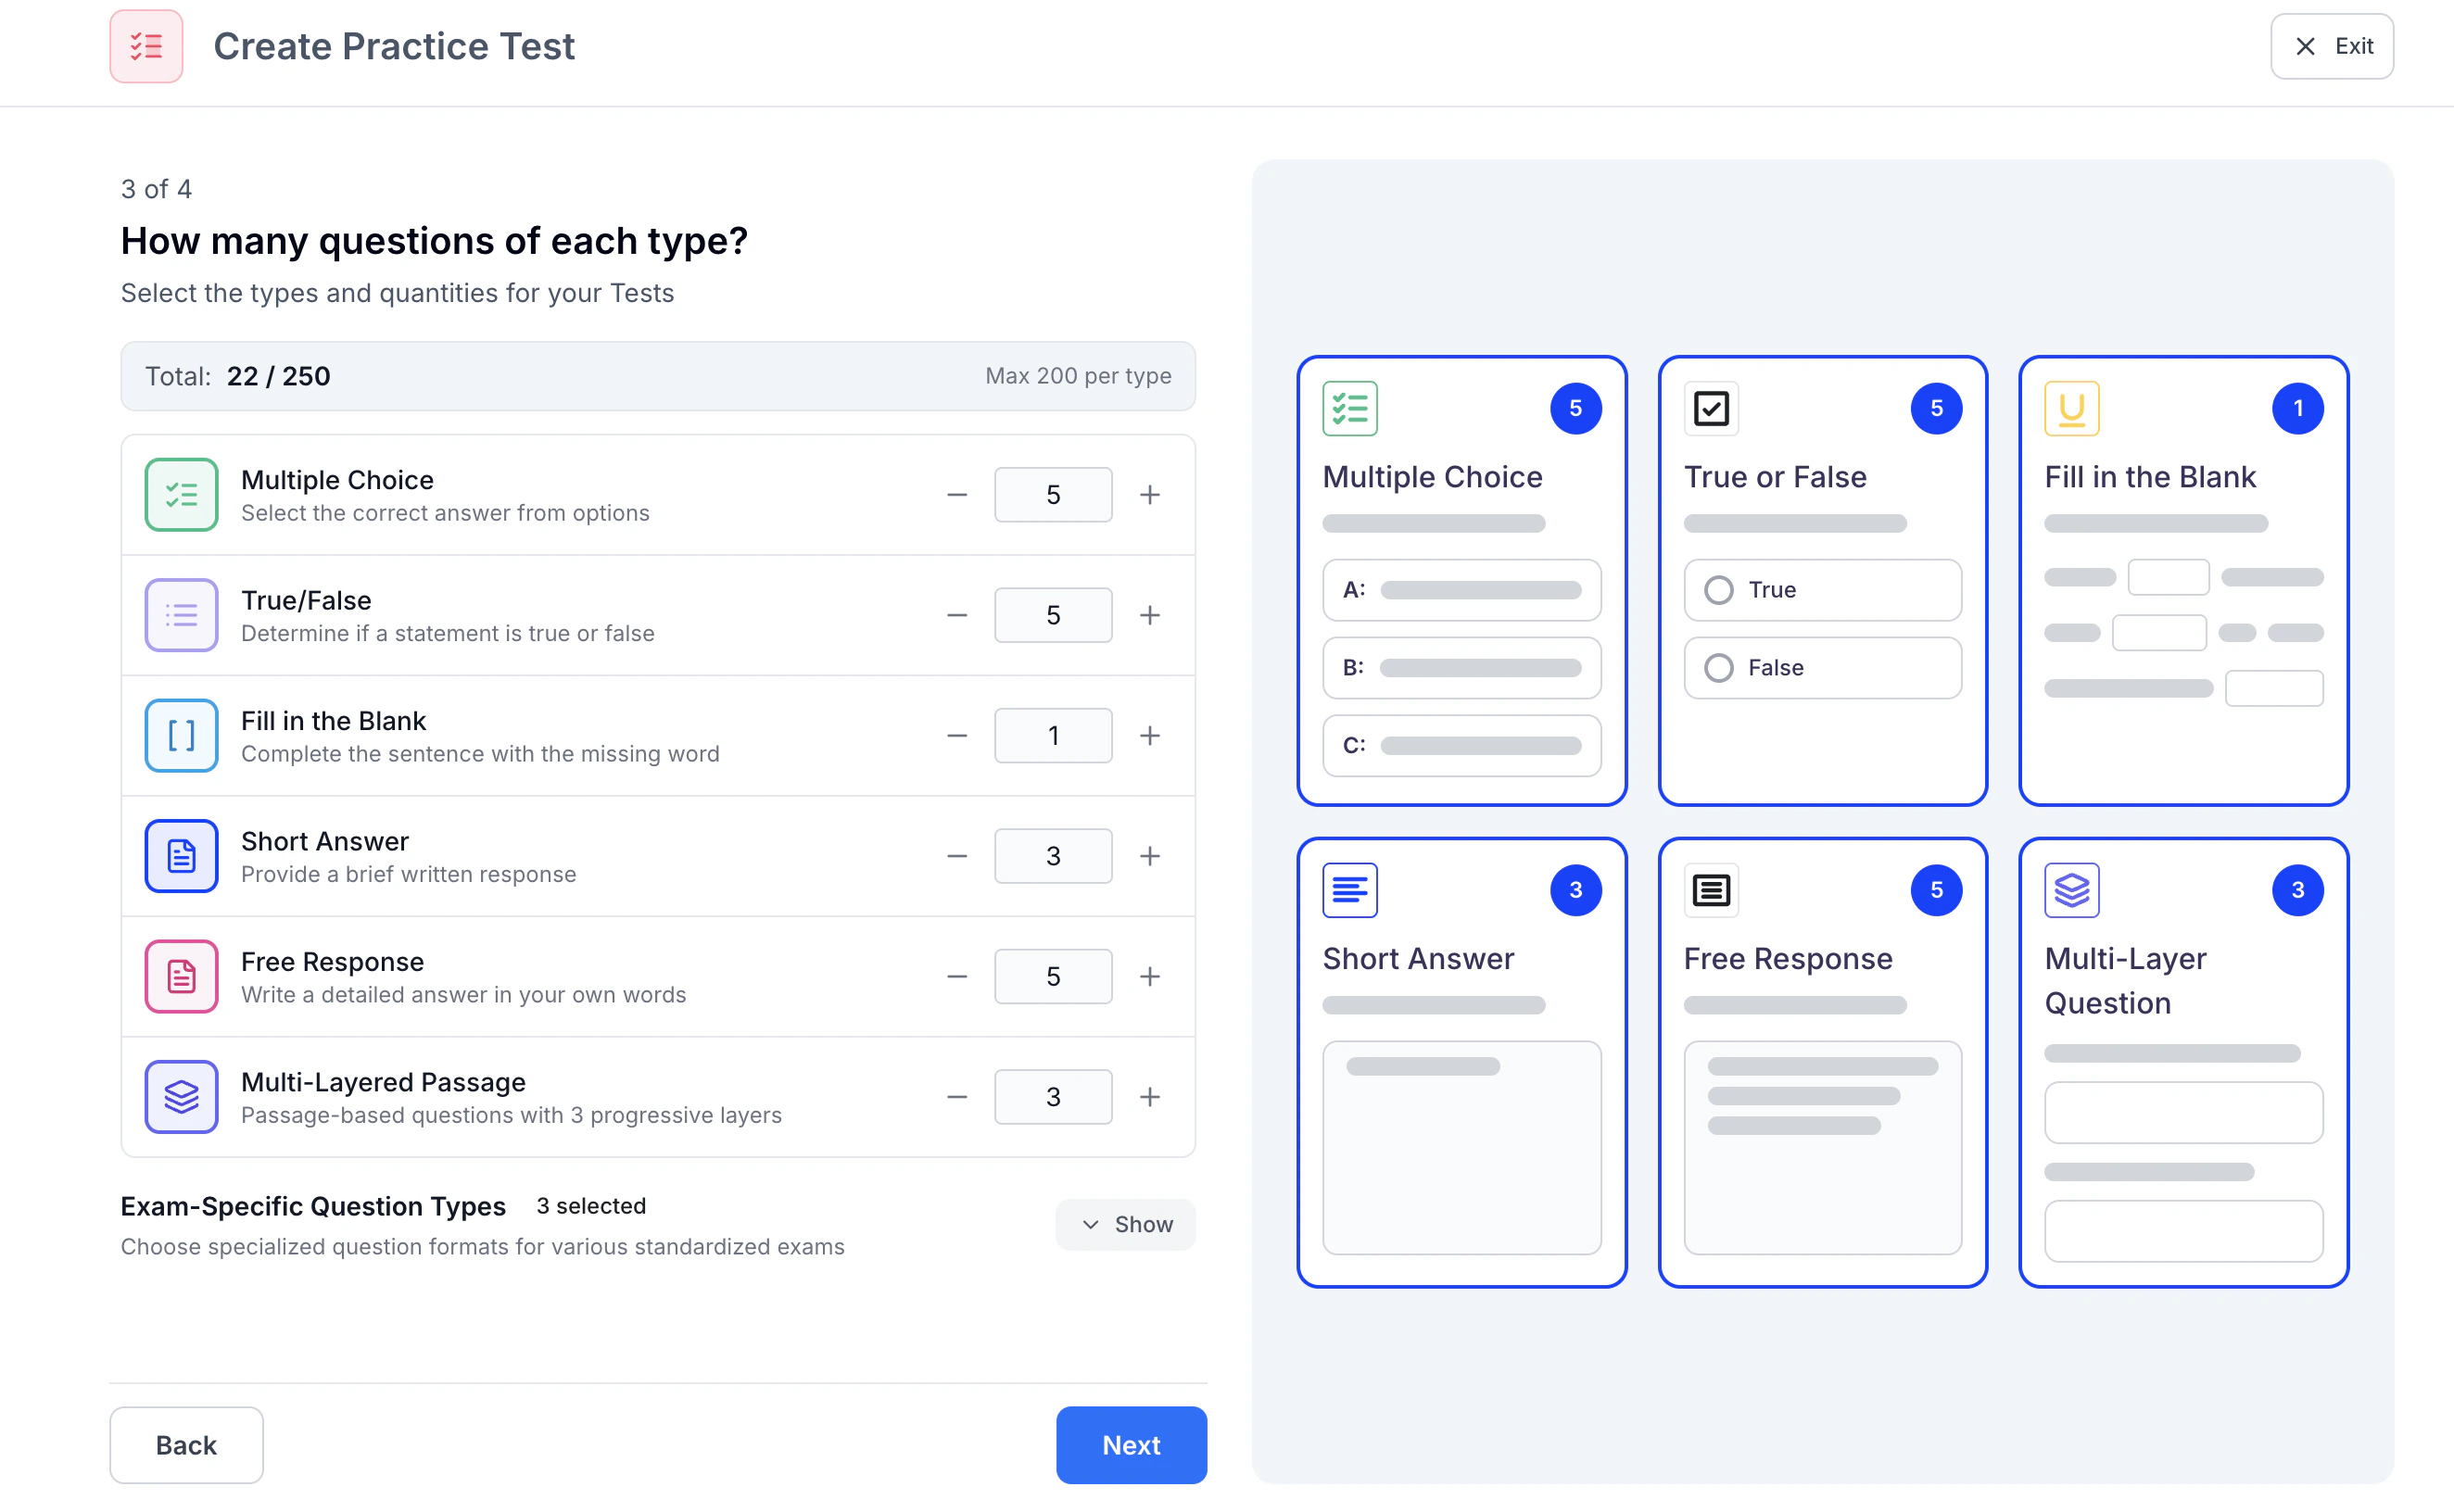
- Next, customize your test by selecting the desired number of questions for each format, including Multiple Choice, True/False, Fill in the Blank, Short Answer, Free Response, and Multi-Layered Passage. To adjust the number of questions, use the – and + buttons within each question type. For faster adjustments, select one of the preset options to add or remove multiple questions at once.
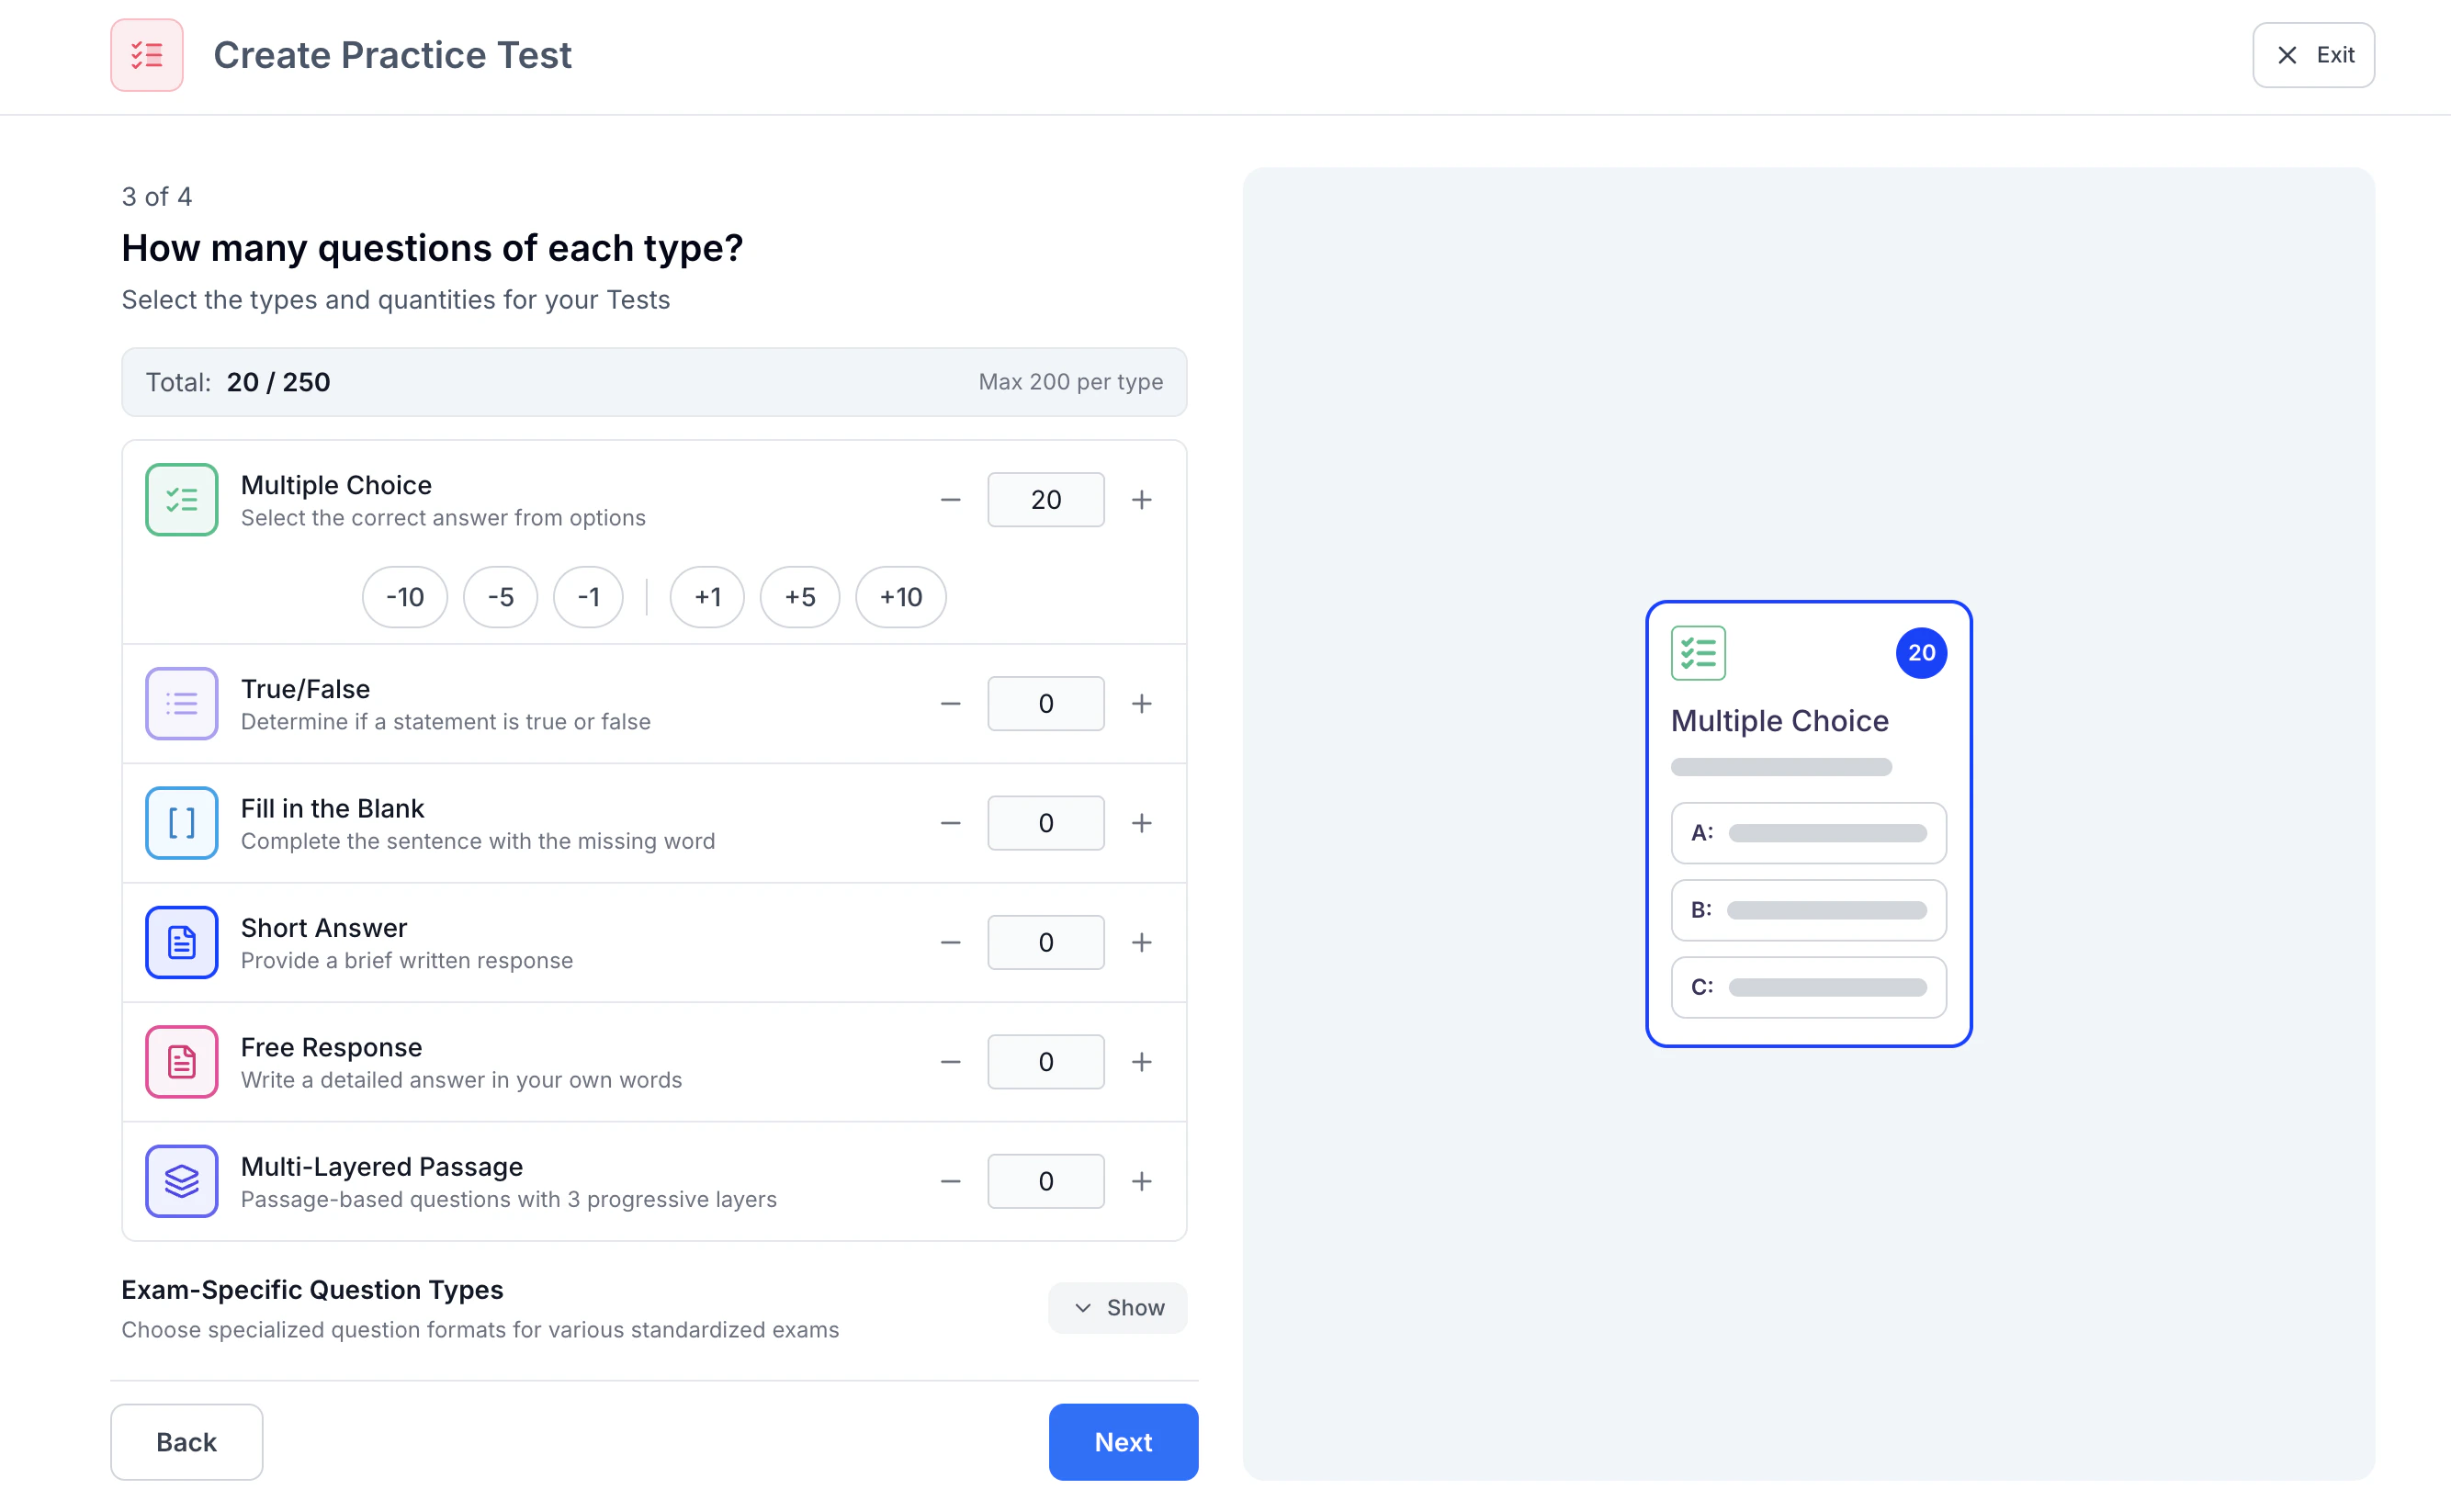
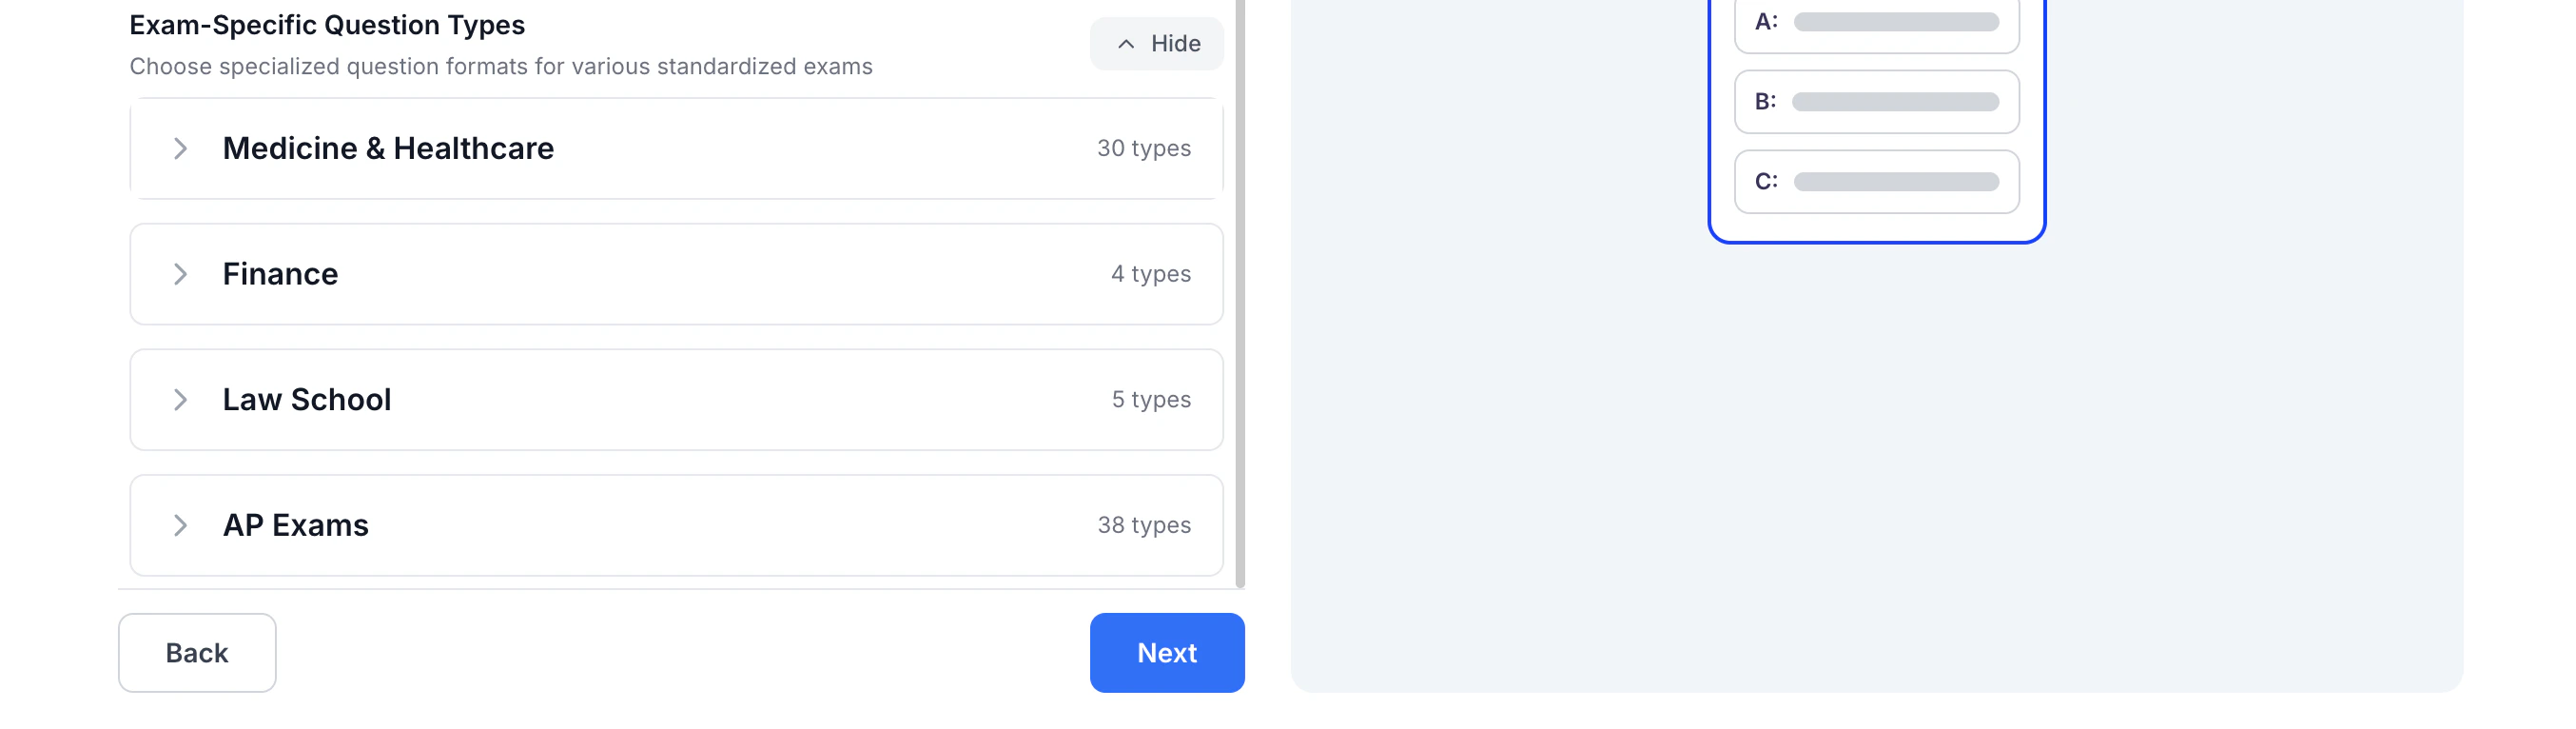
- Under Exam-Specific Question Types, you can choose the exam you are preparing for (e.g., USMLE Step 1, MCAT, NCLEX, AP Exams, and more) to generate questions that align with real exam formats.
- Each selected question type will appear in its own box on the right-hand side, with the number of questions displayed in a blue circle in the top-right corner.
- Now you can add additional optional settings:
Name your Practice Test by typing in the box under What would you like to name your test? If you leave this blank, don’t worry, we will name your practice test for you.
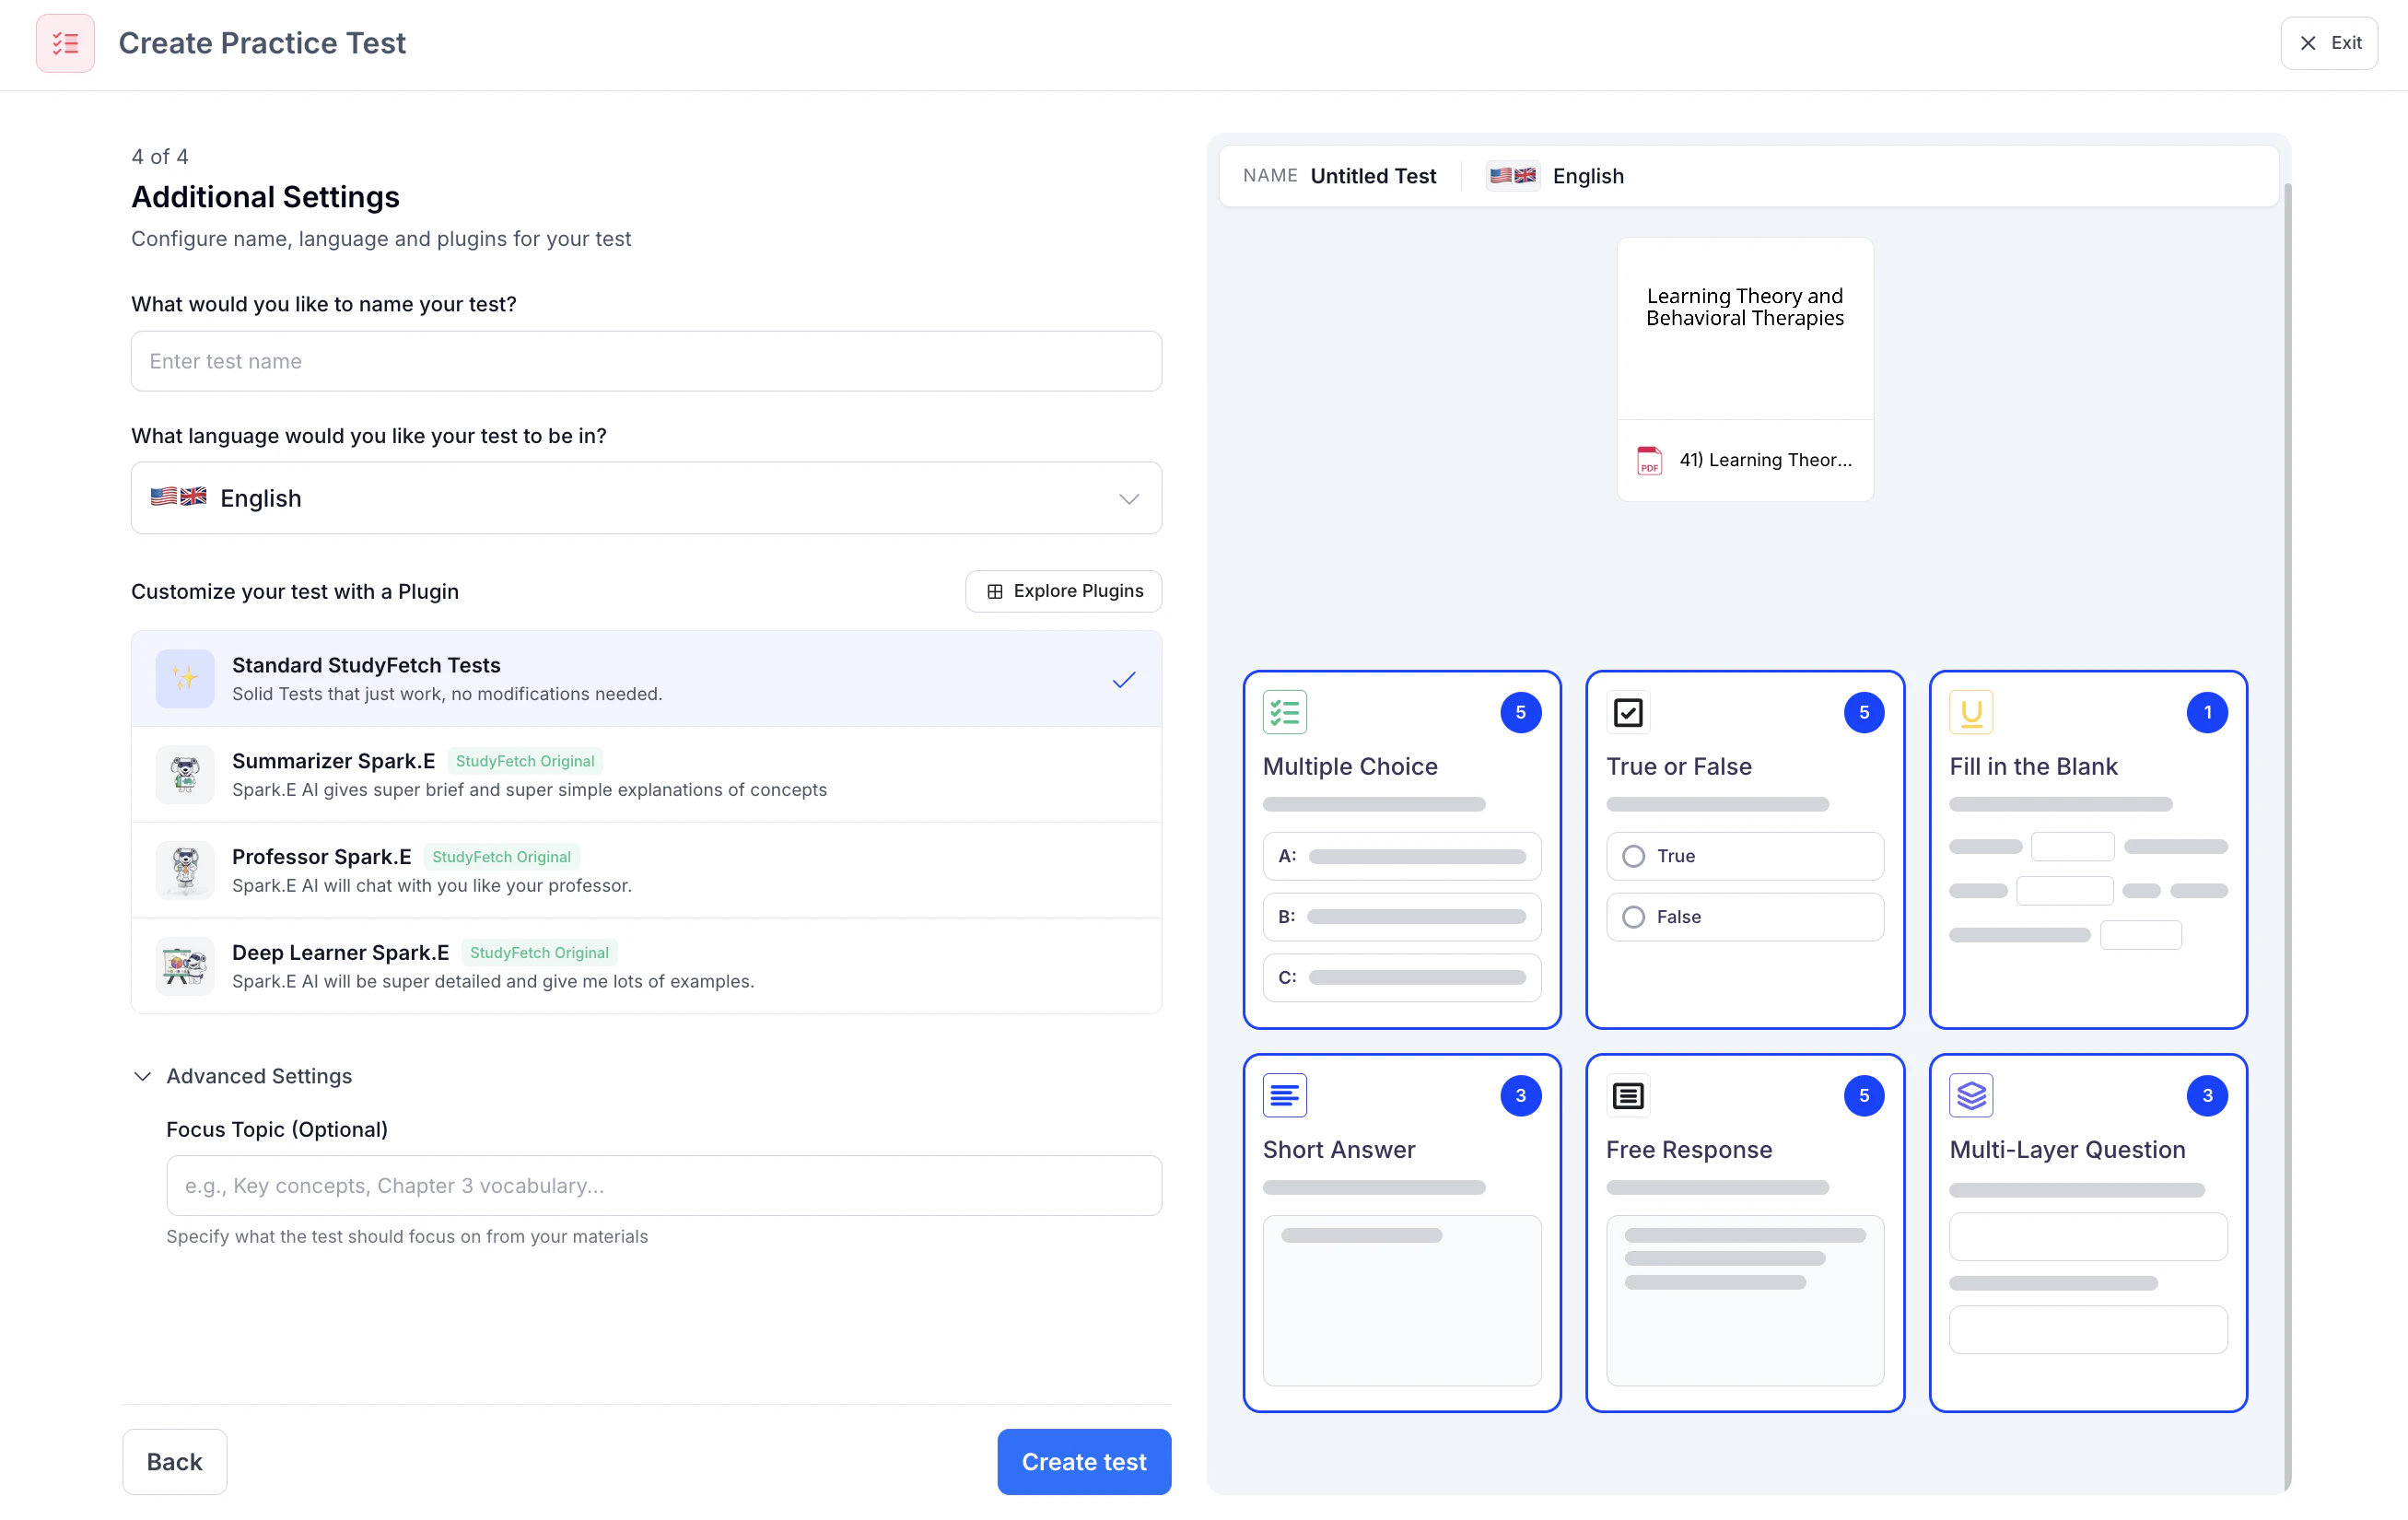
Choose the language you want your practice test to be in by clicking the box under What language would you like your test to be in? and selecting your preferred language from the list.
Select a customization plugin by selecting one from the list under Customize your test with a Plugin or click Explore Plugins to use a plugin not listed or create your own.
To ensure your practice test is tailored to your learning goals, specify a focus topic in the box under Focus Topic (optional) - Lastly, select Create test and StudyFetch will automatically generate your customized practice test!

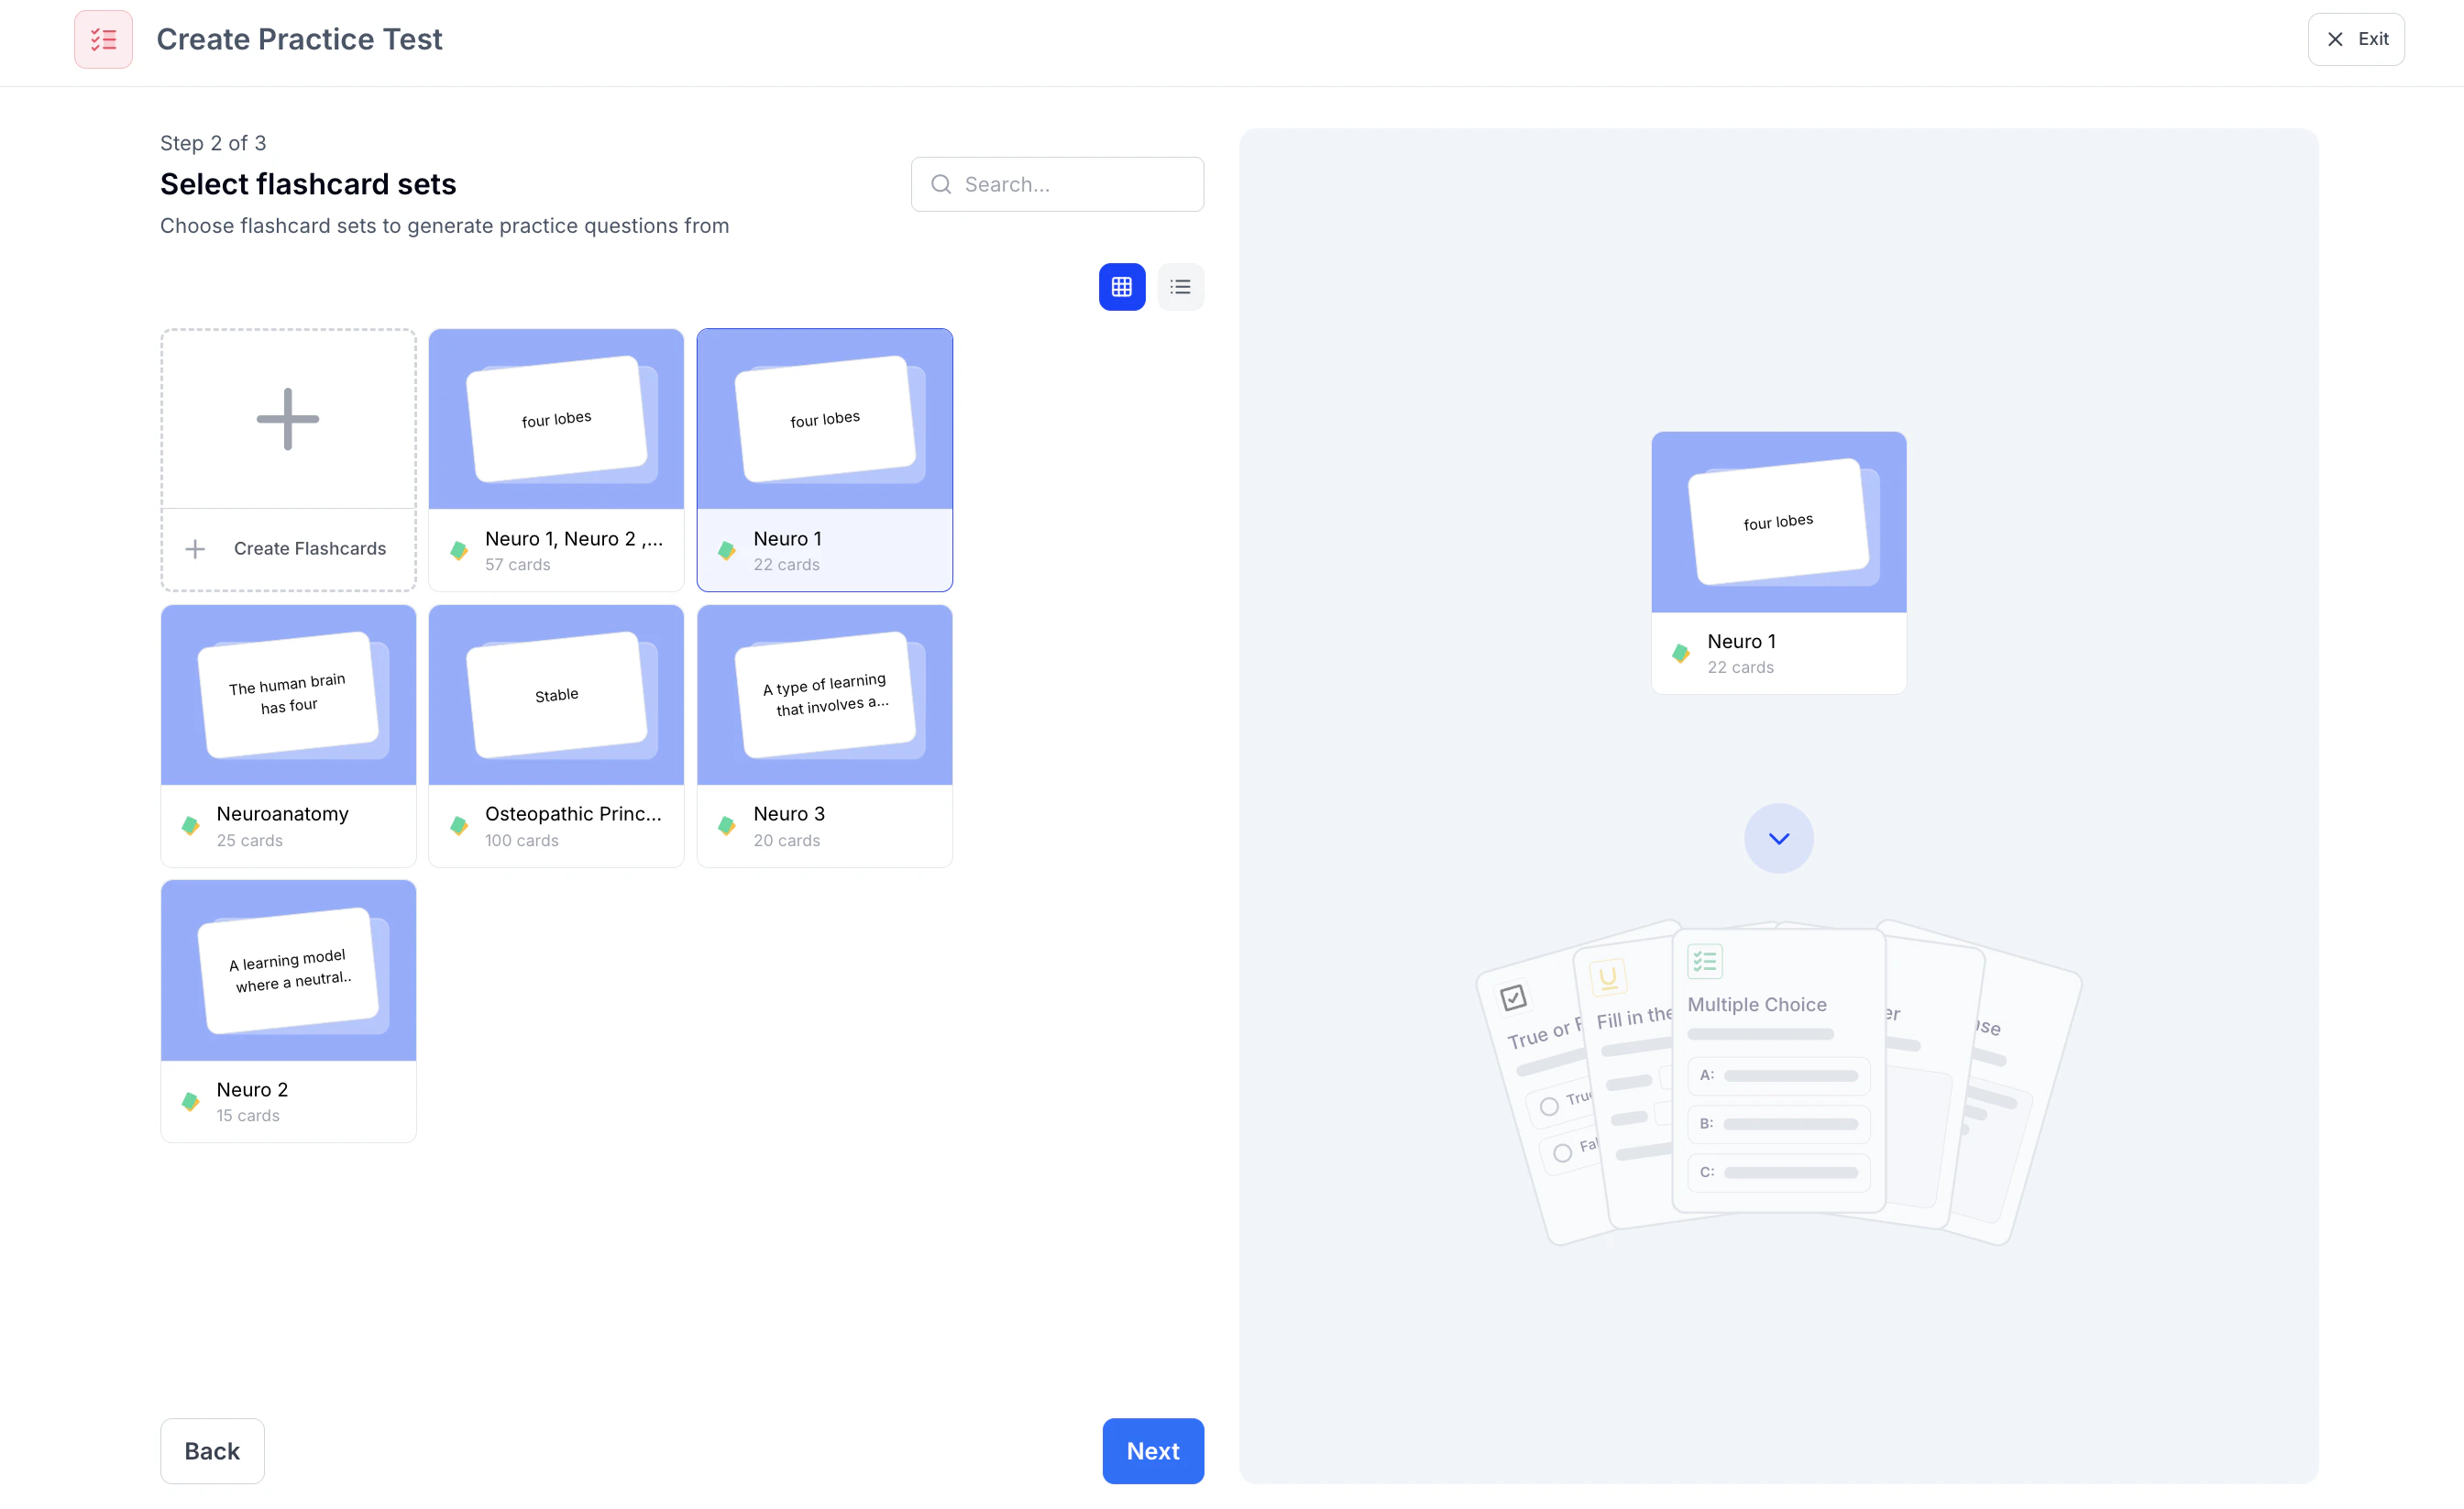
Method 2: Create from Flashcards
- Select Create from Flashcards if you want to create a practice test from your flashcards
- Choose the existing flashcard set(s) you want to use for your practice test, or select + Create Flashcards to generate a new set. Once your selection is complete, click Next to continue.
- Name your Practice Test by typing in the box under What would you like to name your test? If you leave this blank, don’t worry, we will name your practice test for you.
 Creating a practice test from flashcards automatically generates a 20-question multiple choice test. For more advanced customization options, use the Create from Materials method.
 - Lastly, select Create test and StudyFetch will automatically generate your customized practice test!
Taking Your Test
Step 1: Choose your Layout
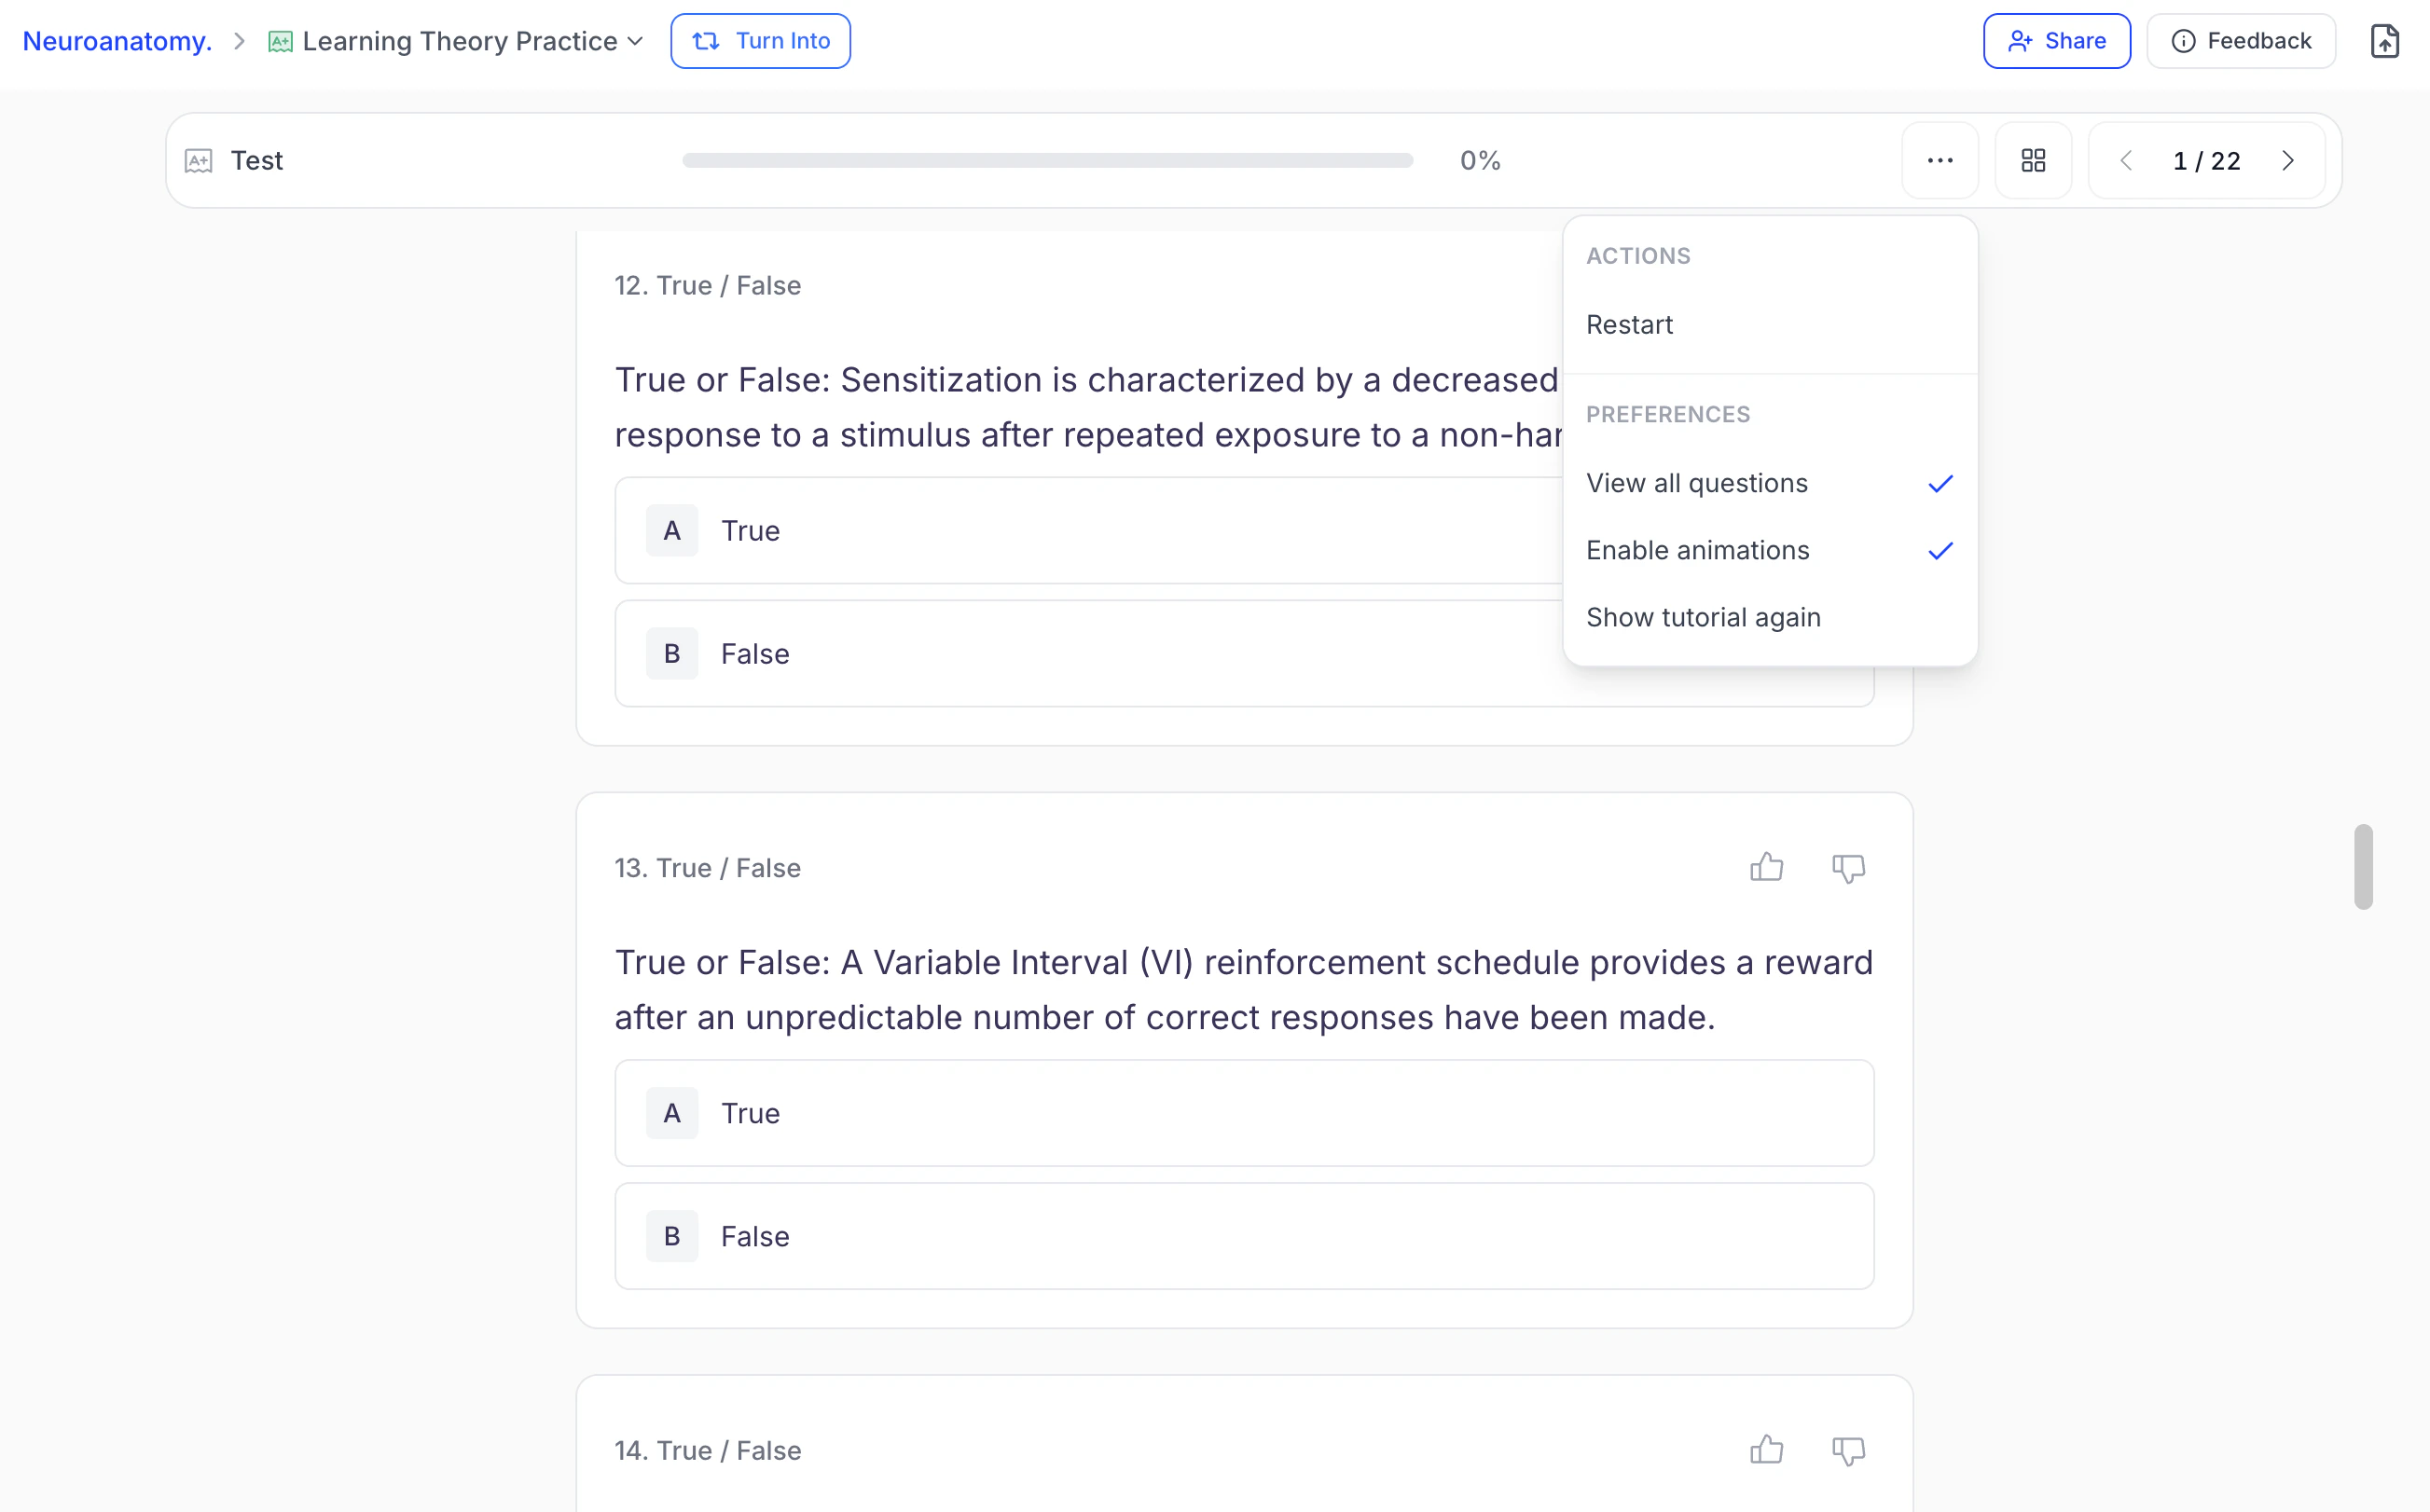
- By default, questions are presented one at a time. To view all practice test questions at once, select the … (Settings) button and choose View all questions.
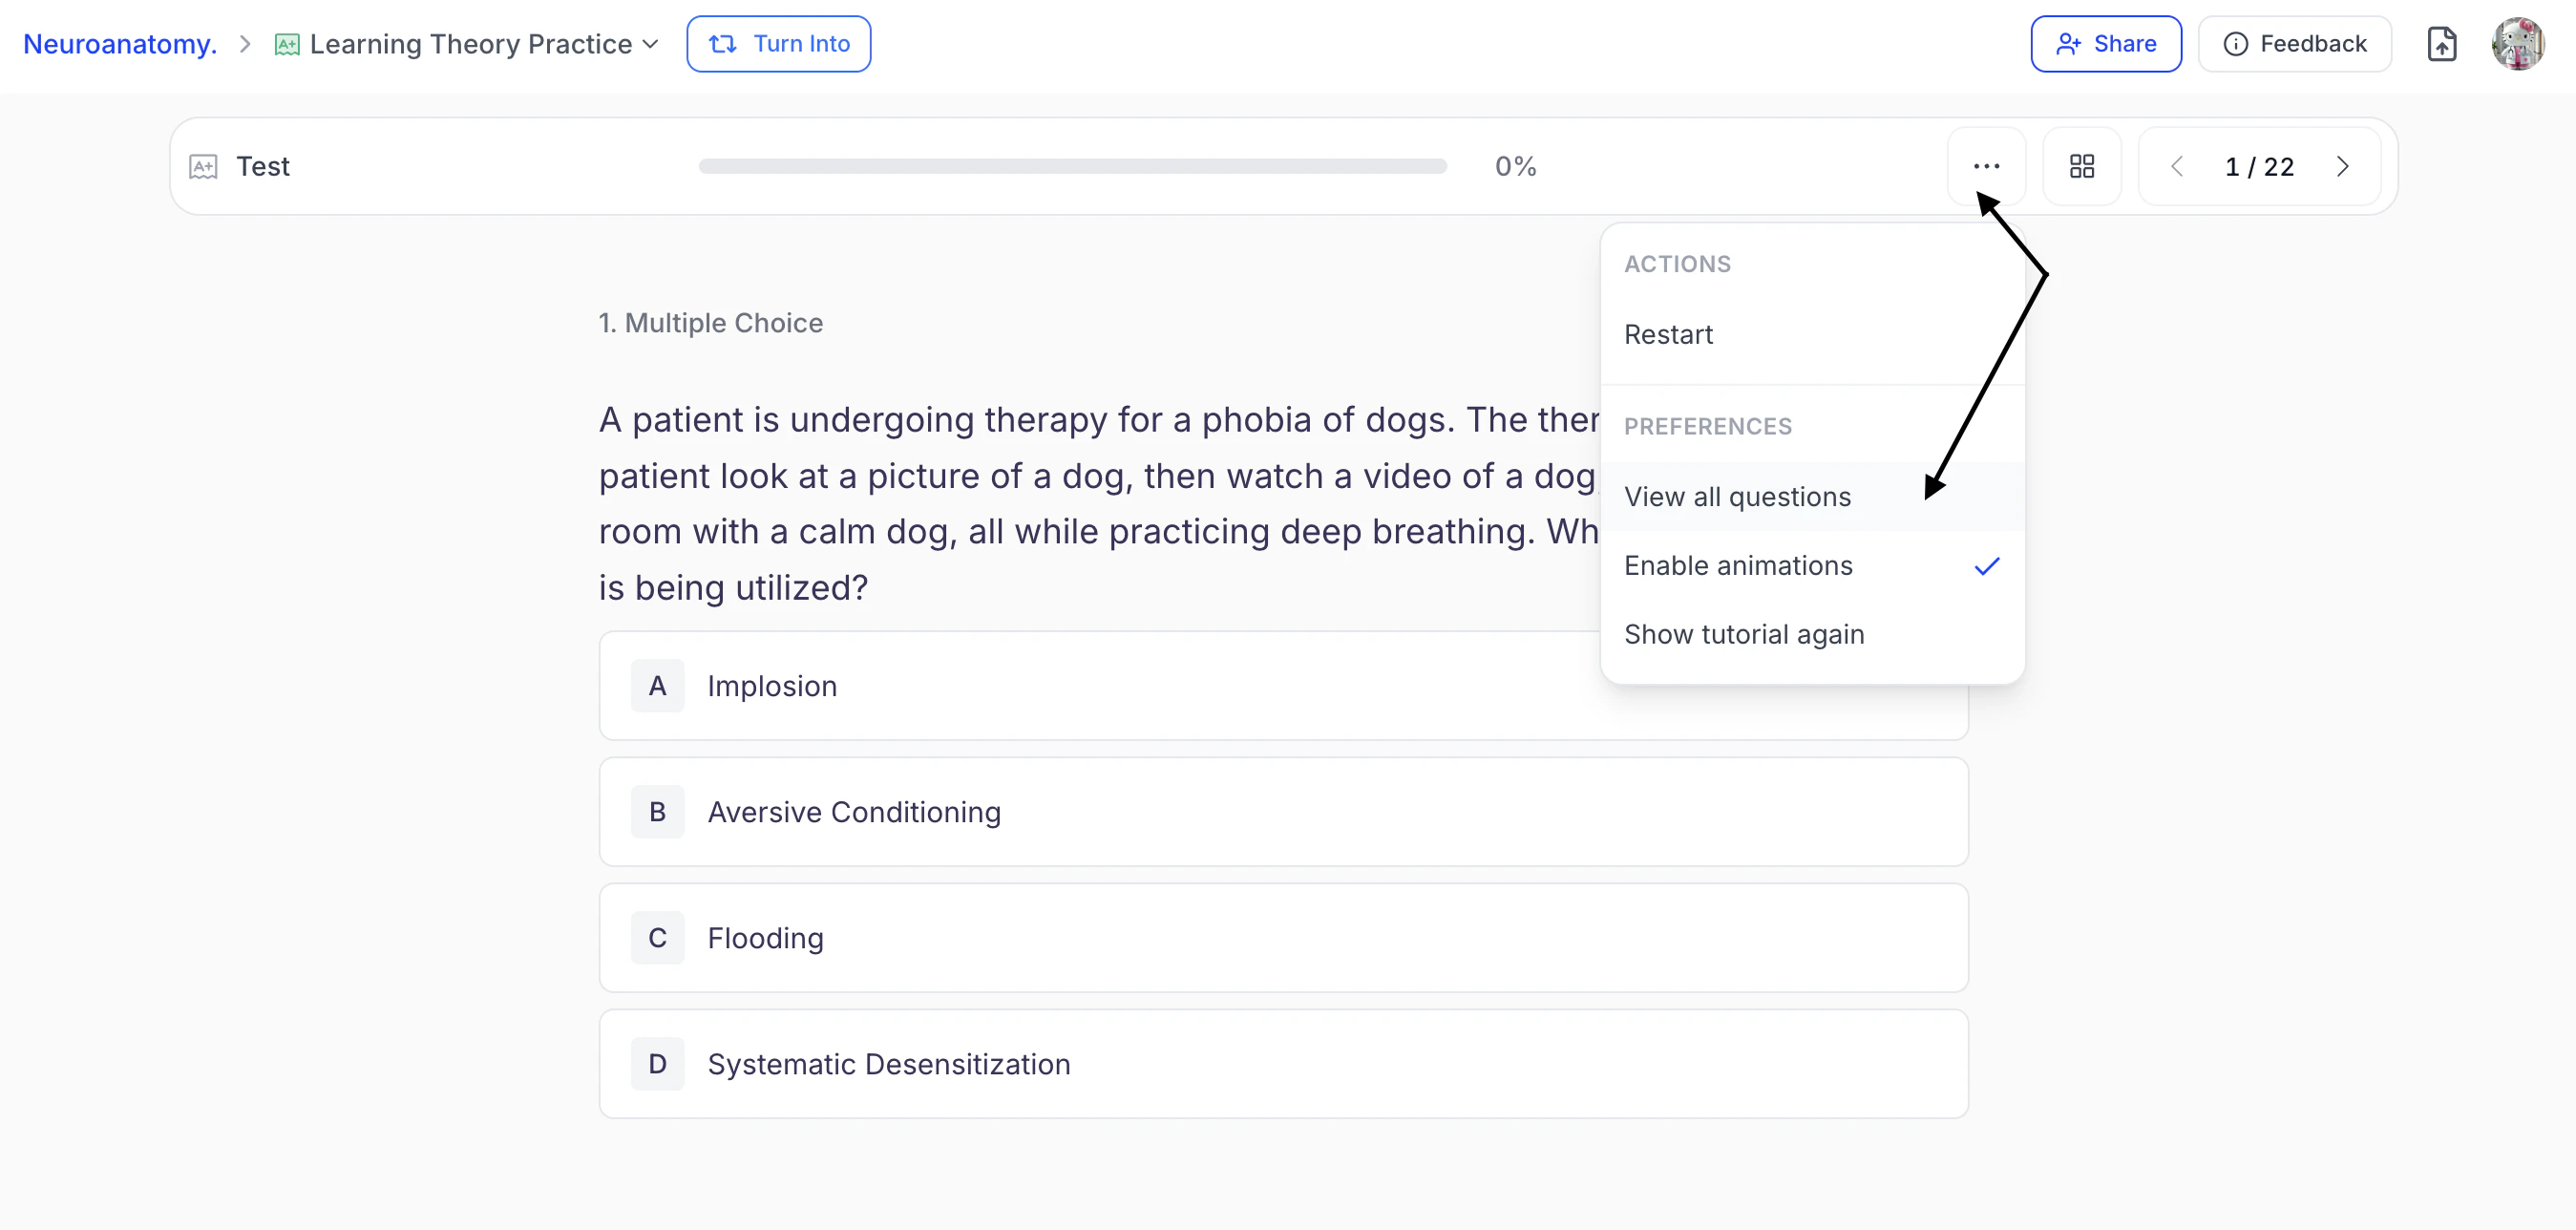
- A checkmark will appear next to View all questions, allowing you to scroll through and view all questions simultaneously.
- To return to single-question view, select the … (Settings) button again and click View all questions to remove the checkmark.
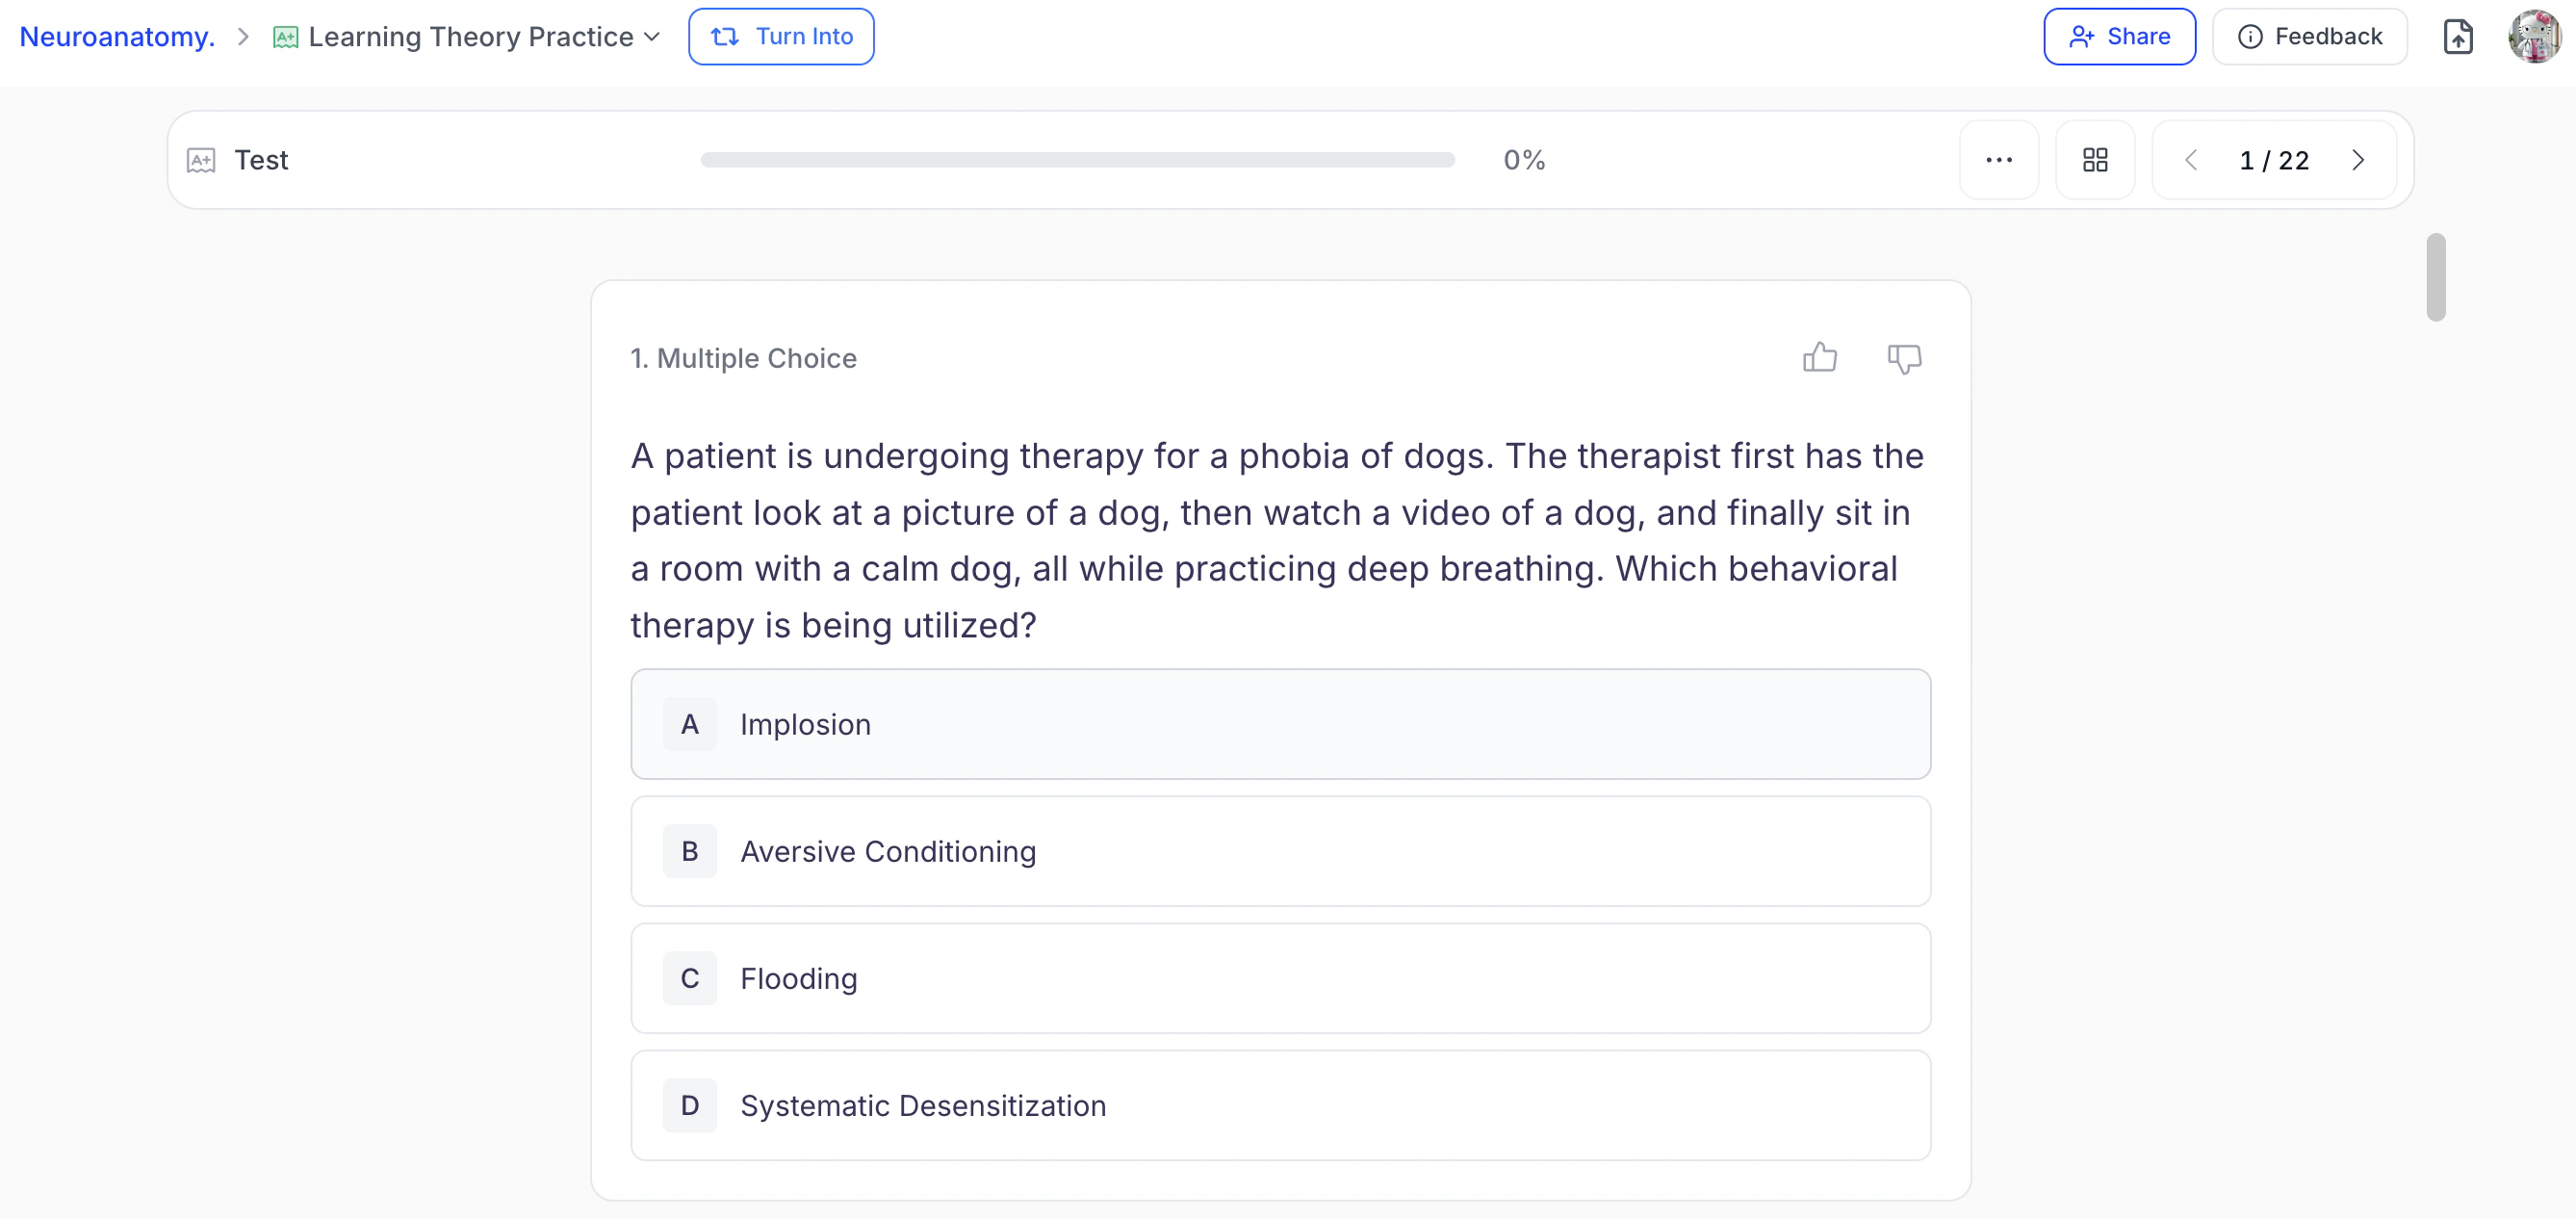
Step 2: Answer Questions
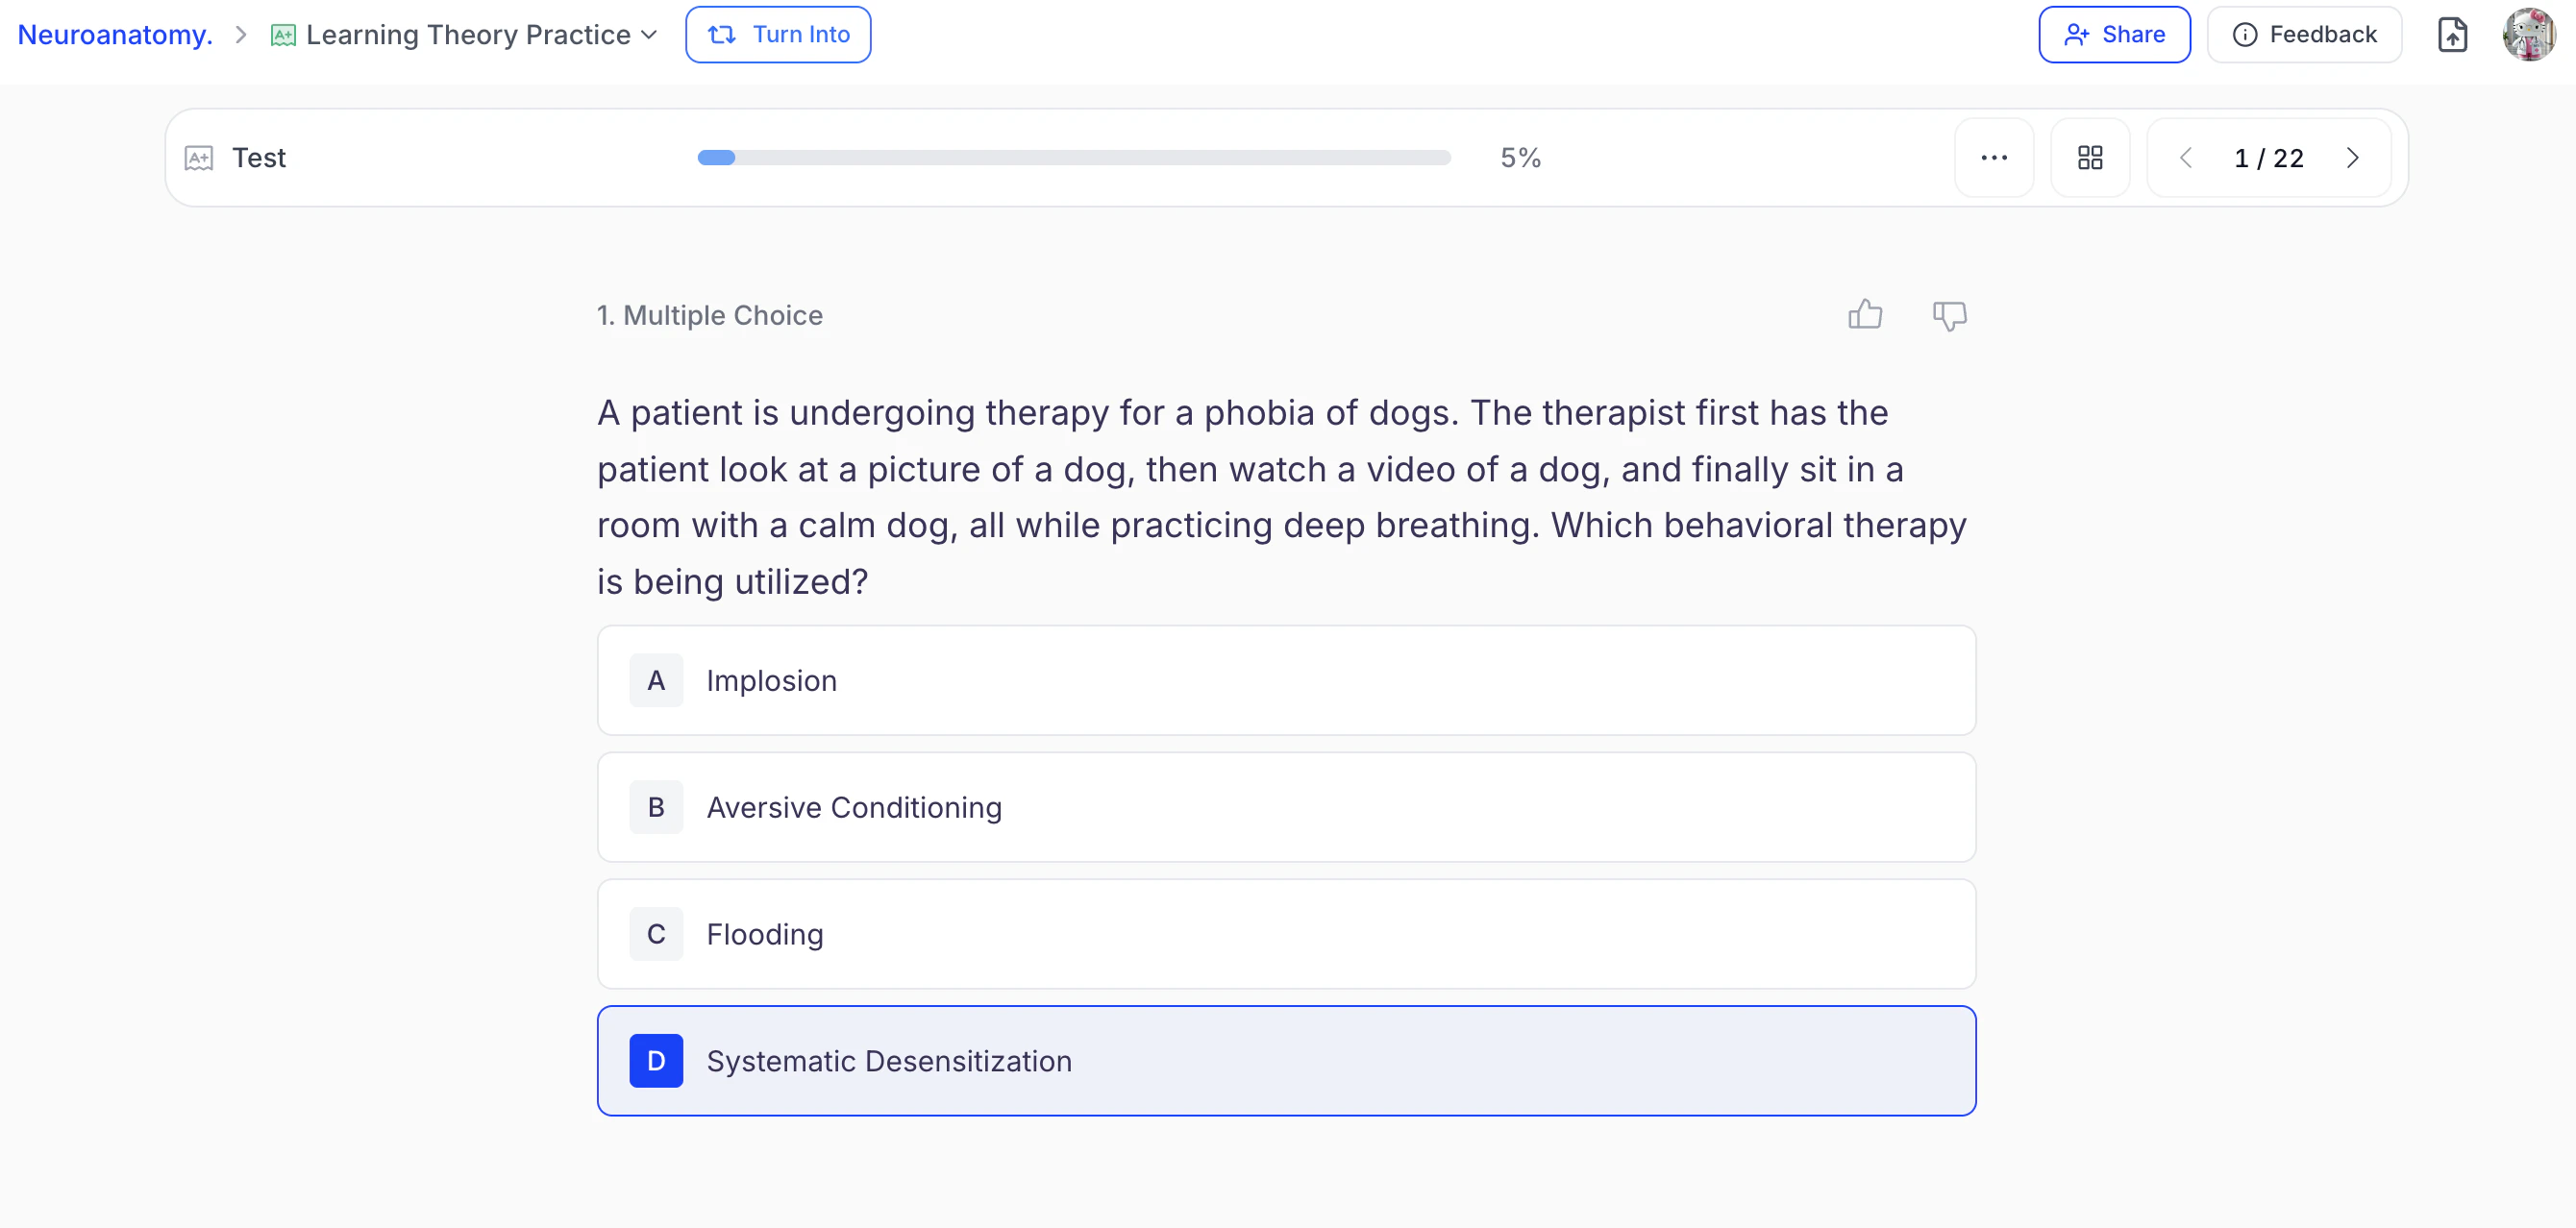
- Choose your answer by selecting an option or entering your response in the answer field when indicated.
- When entering a typed response, click Submit to confirm your answer.

- In single-question view, the next question appears automatically after answering. However, you can return to any question and make changes at any time before submitting your test.
- In View All Questions mode, scroll to move to the next questions.
Step 3: Navigation tools
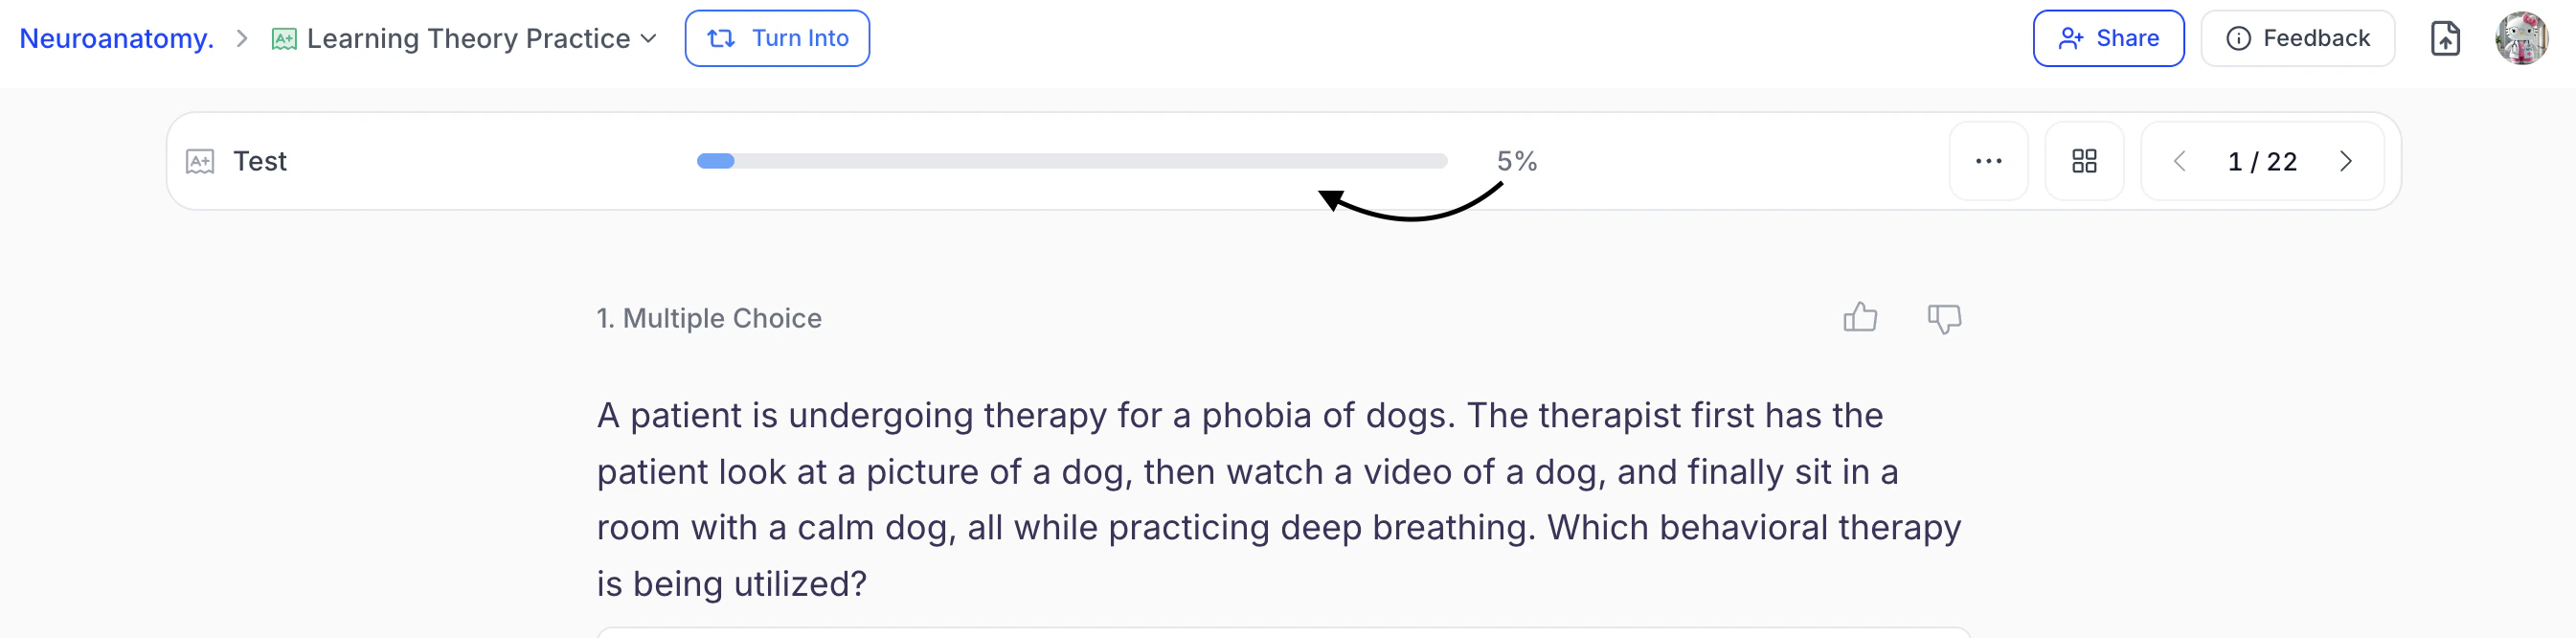
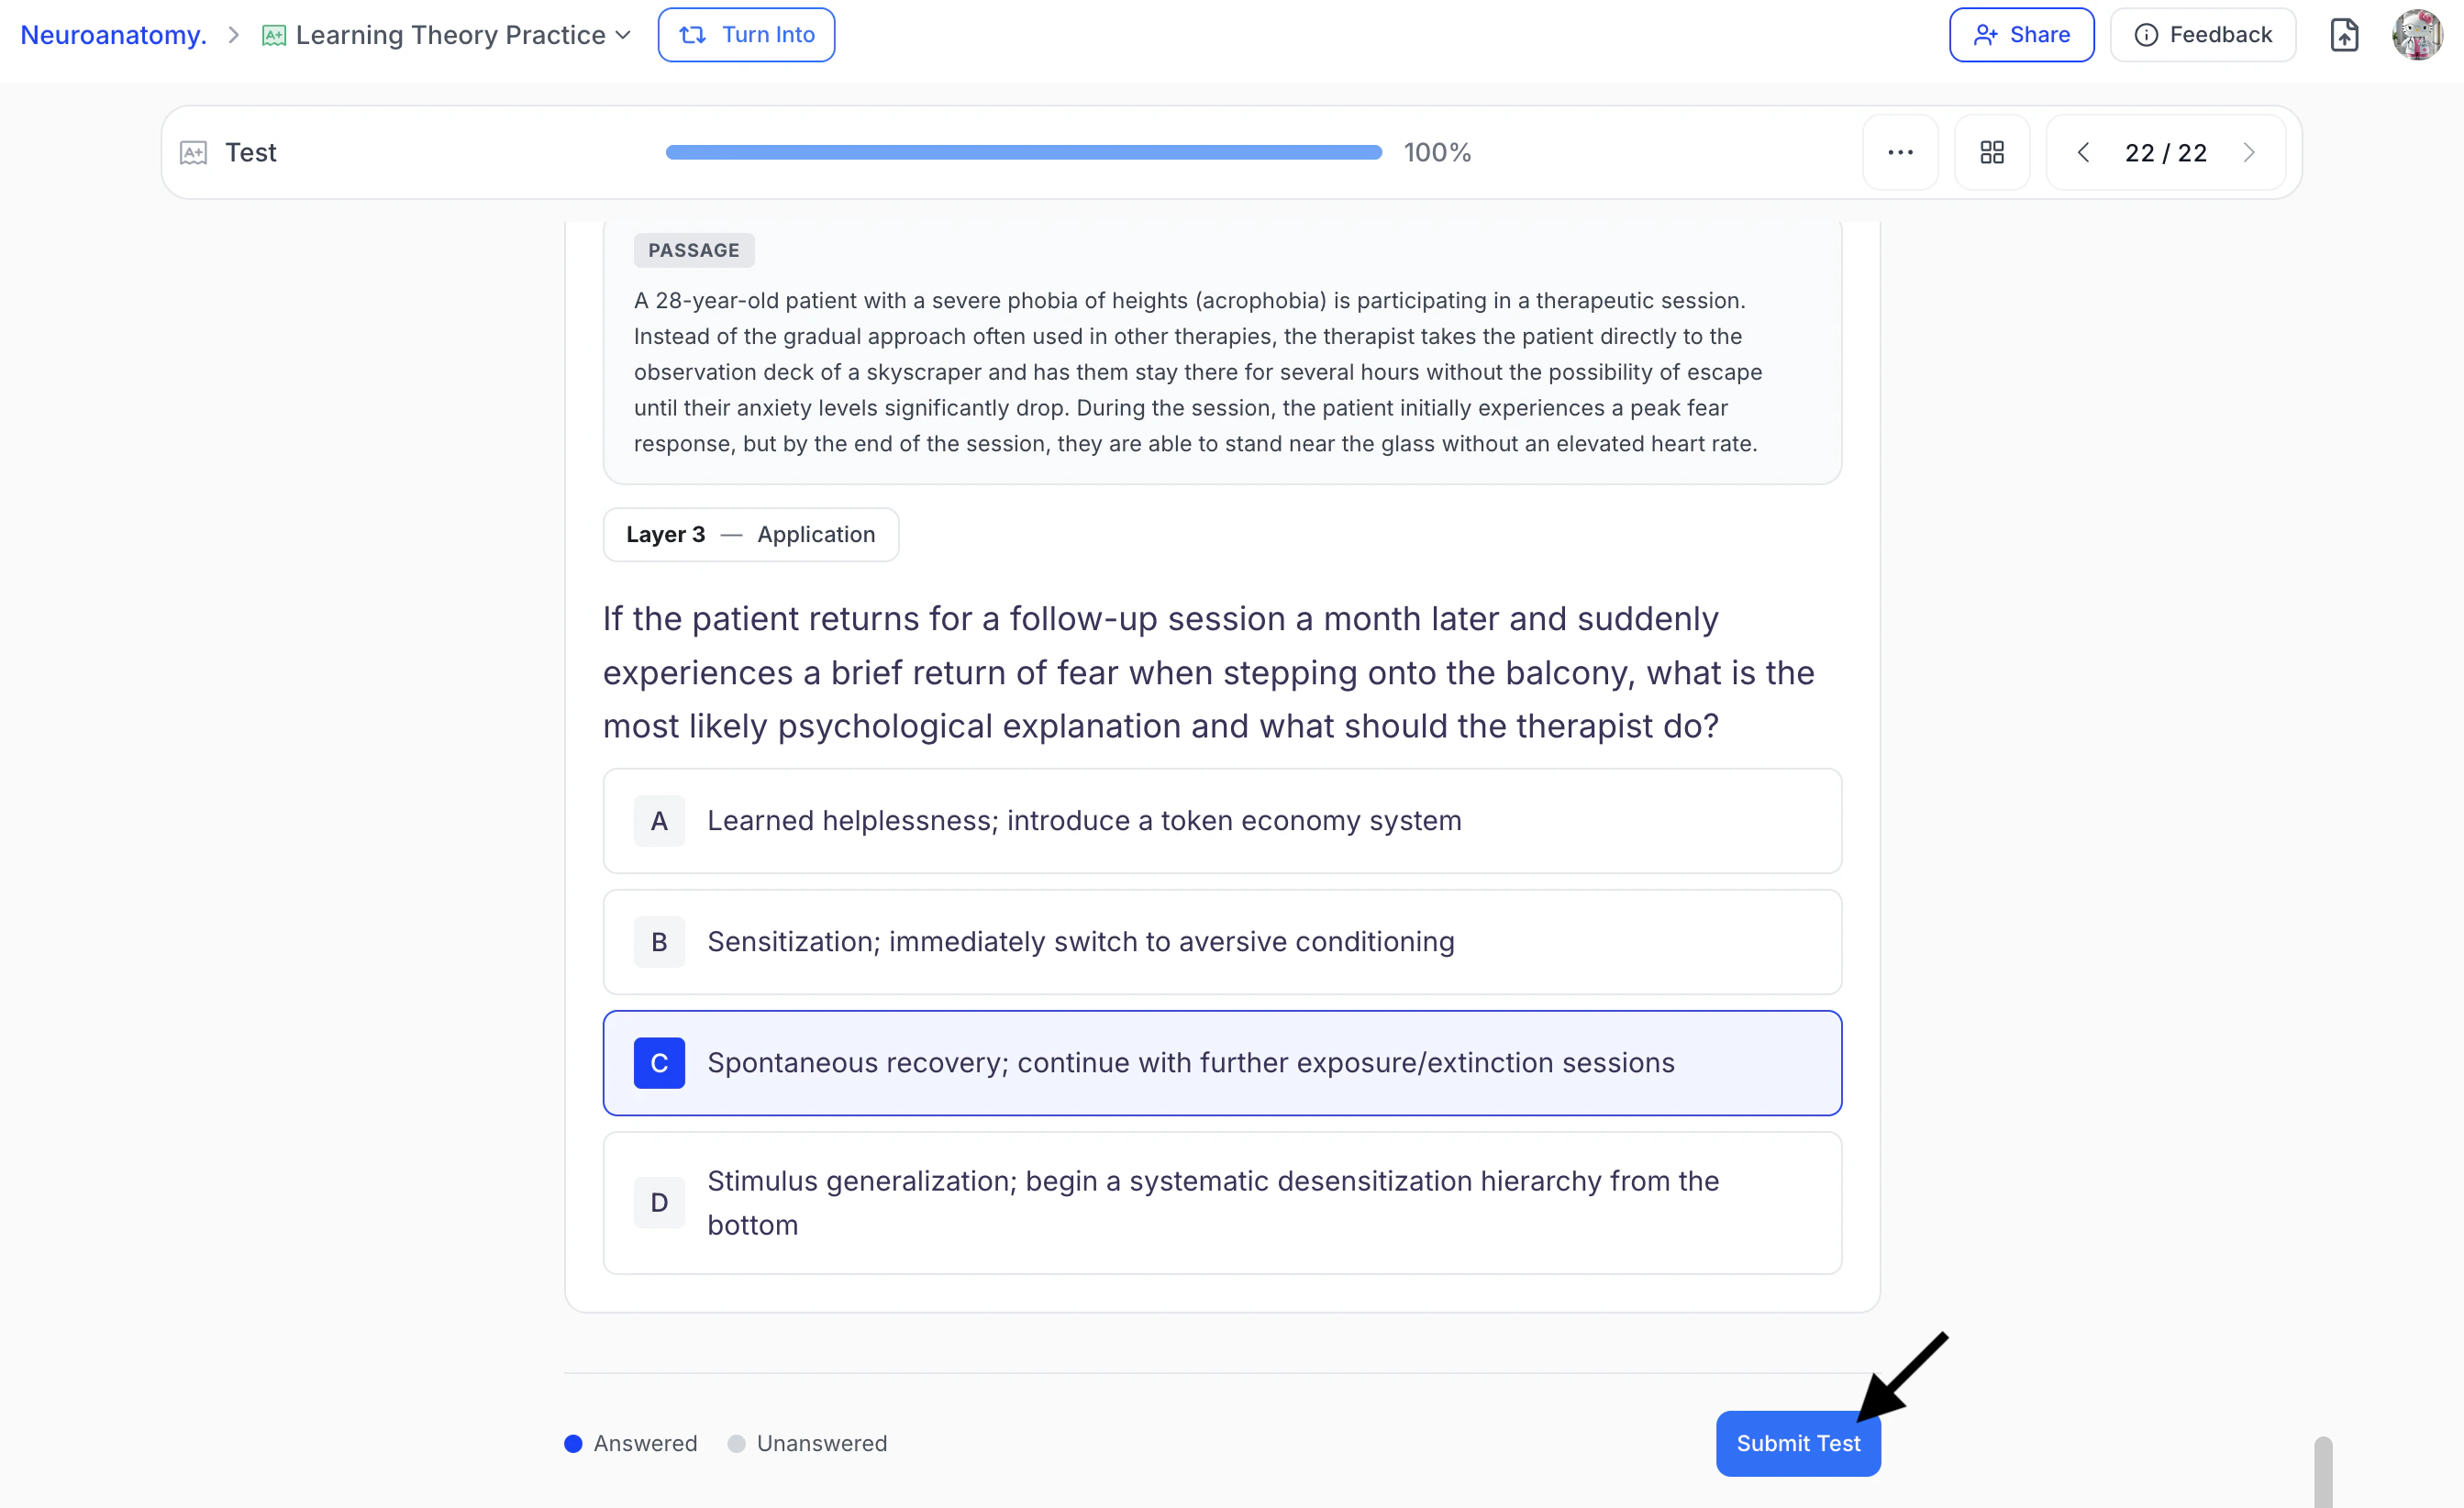
- A progress bar at the top of the practice test fills as you answer questions, with your completion percentage shown on the right.
- Use the ← → arrow keys or the < (Previous) and >(Next) buttons found on the top right of your toolbar to move between questions. Answer in any order you like.
- To view question-by-question progress, select the View All button to the right of the Settings button.

- Numbered rectangles will appear, representing each question. Answered questions are shaded in blue, while unanswered questionsremain unshaded .

- Click any rectangle to jump directly to that question.
- If you want to restart your practice test, select the settings button from the top toolbar and click Restart.

- If you are sure you want to restart your practice test, select Restart.

Step 3: Submit and View Your Score
- Once you’ve answered all the questions, click Submit Test.
- If you need to review or modify your answers, select Cancel. If you are ready to have your test graded, click Submit.

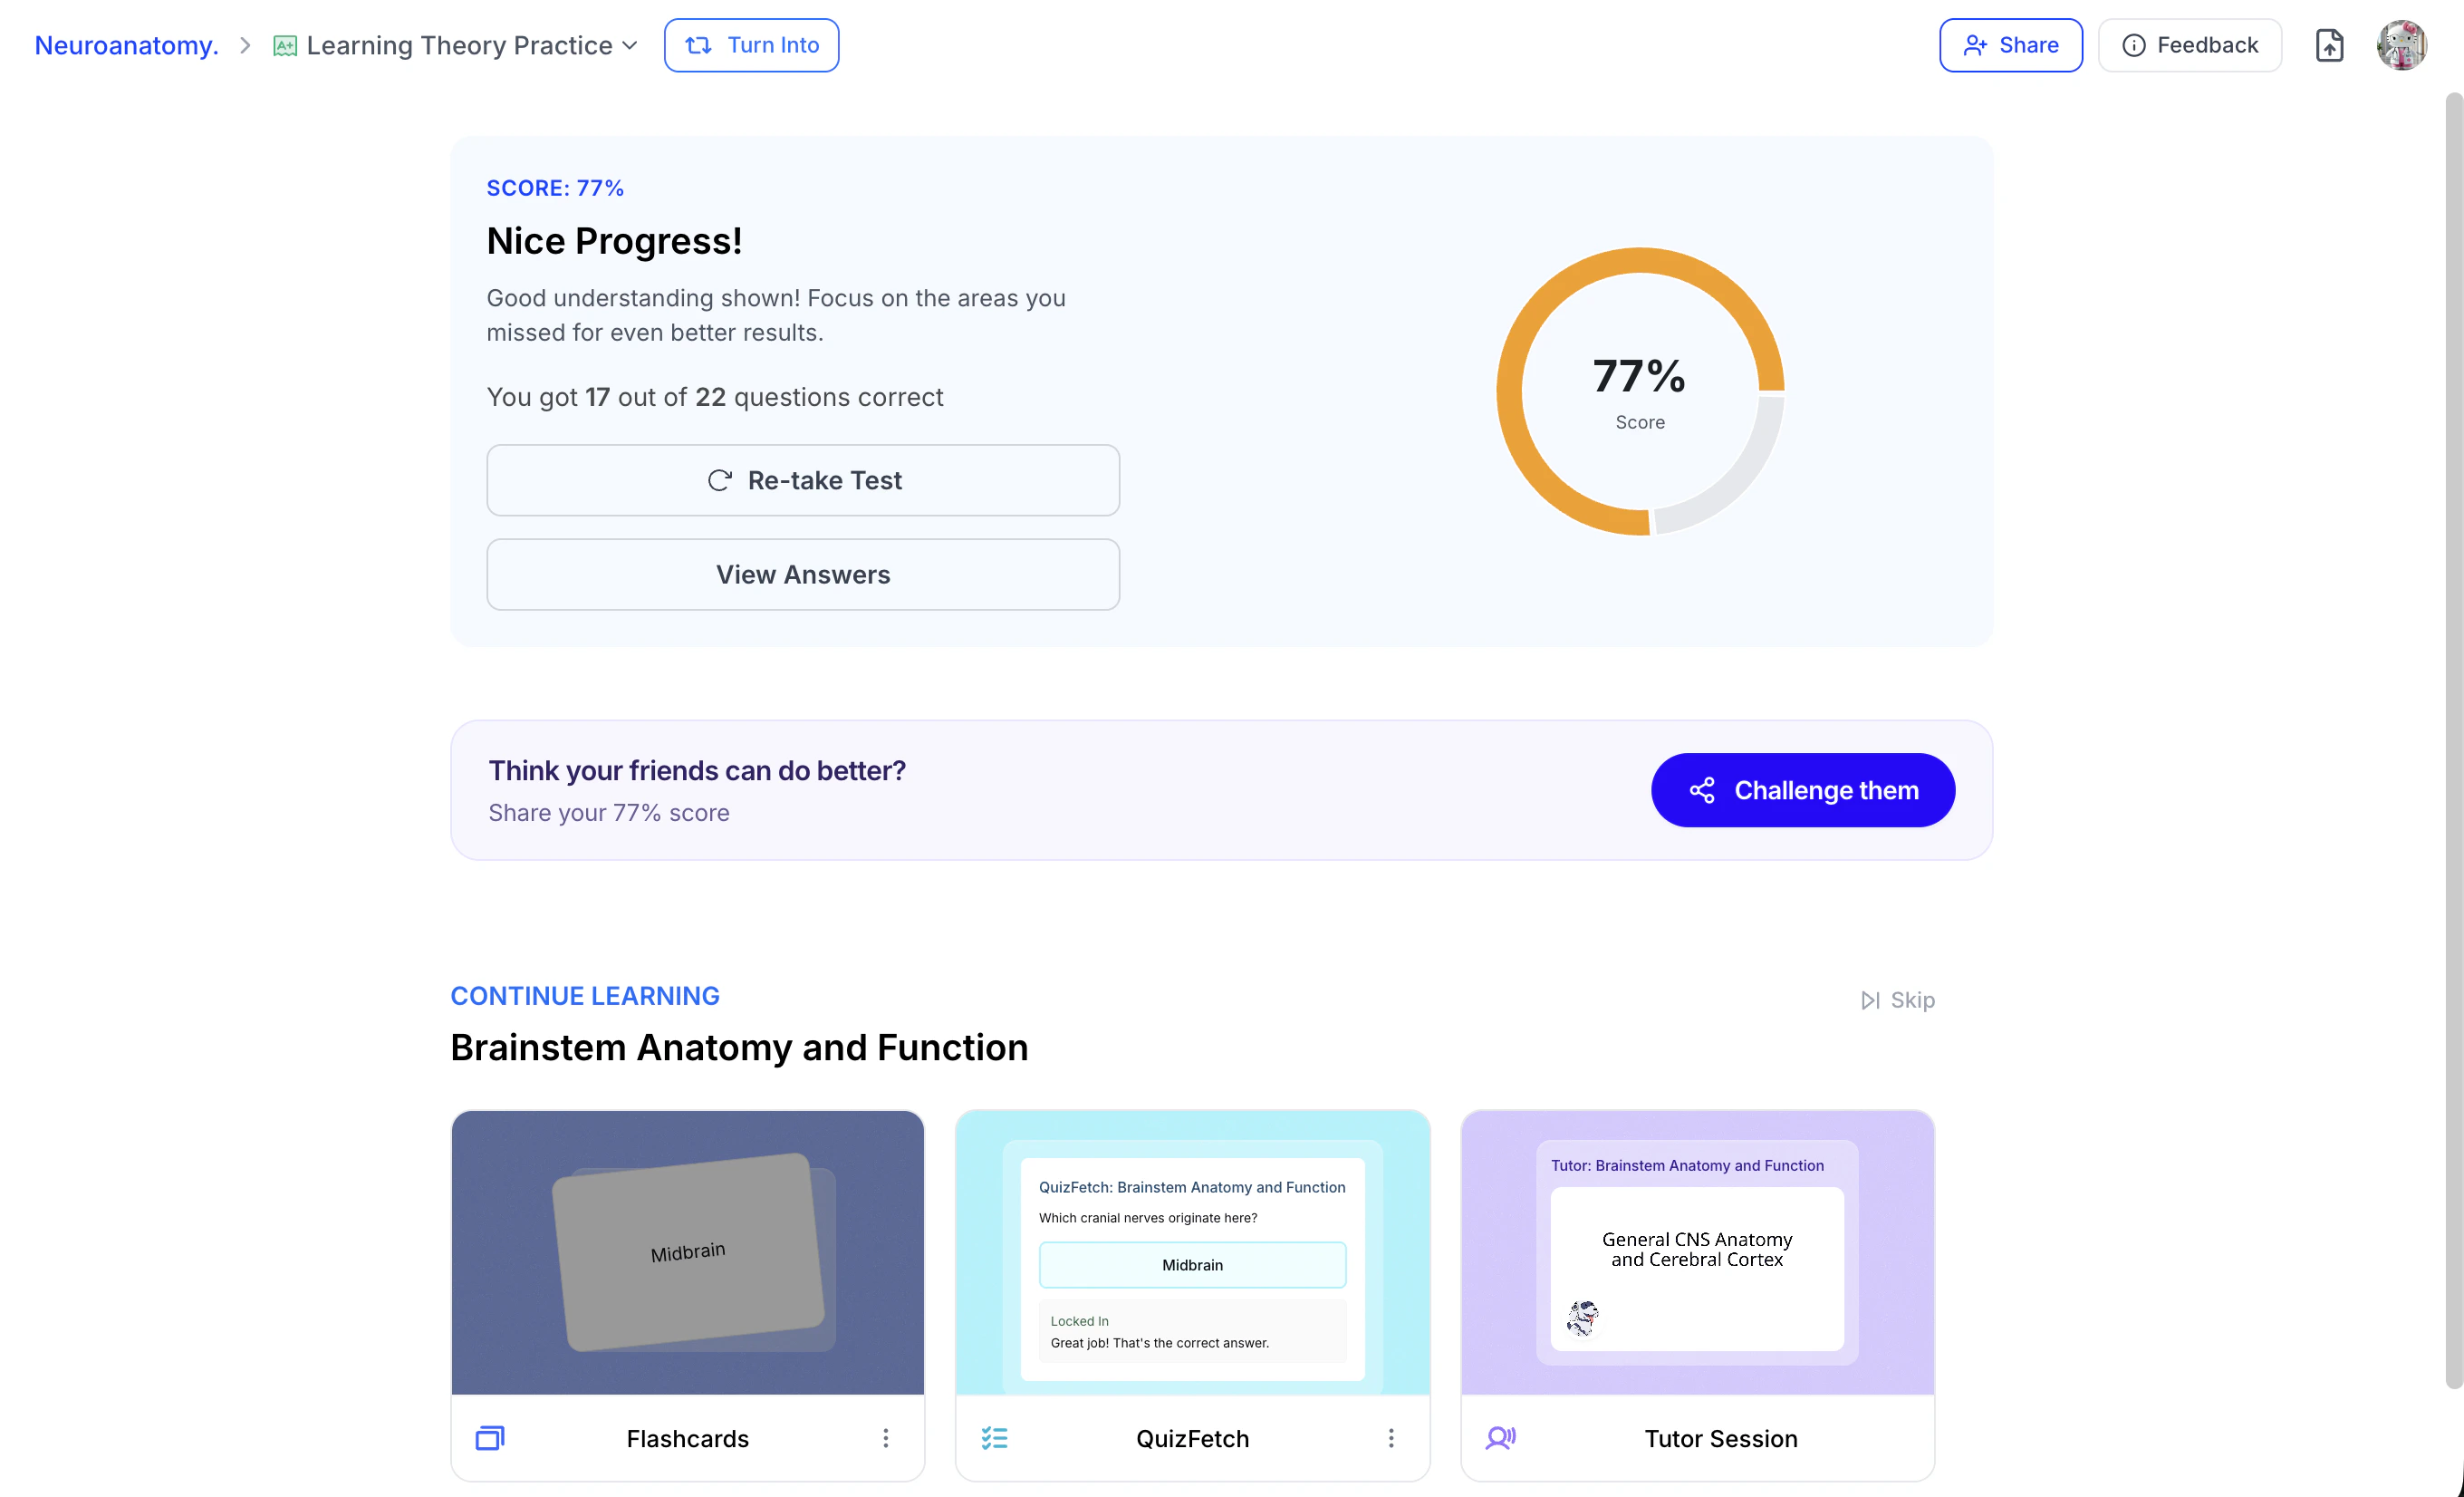
- StudyFetch will instantly grade your test and provide a complete breakdown of your results.

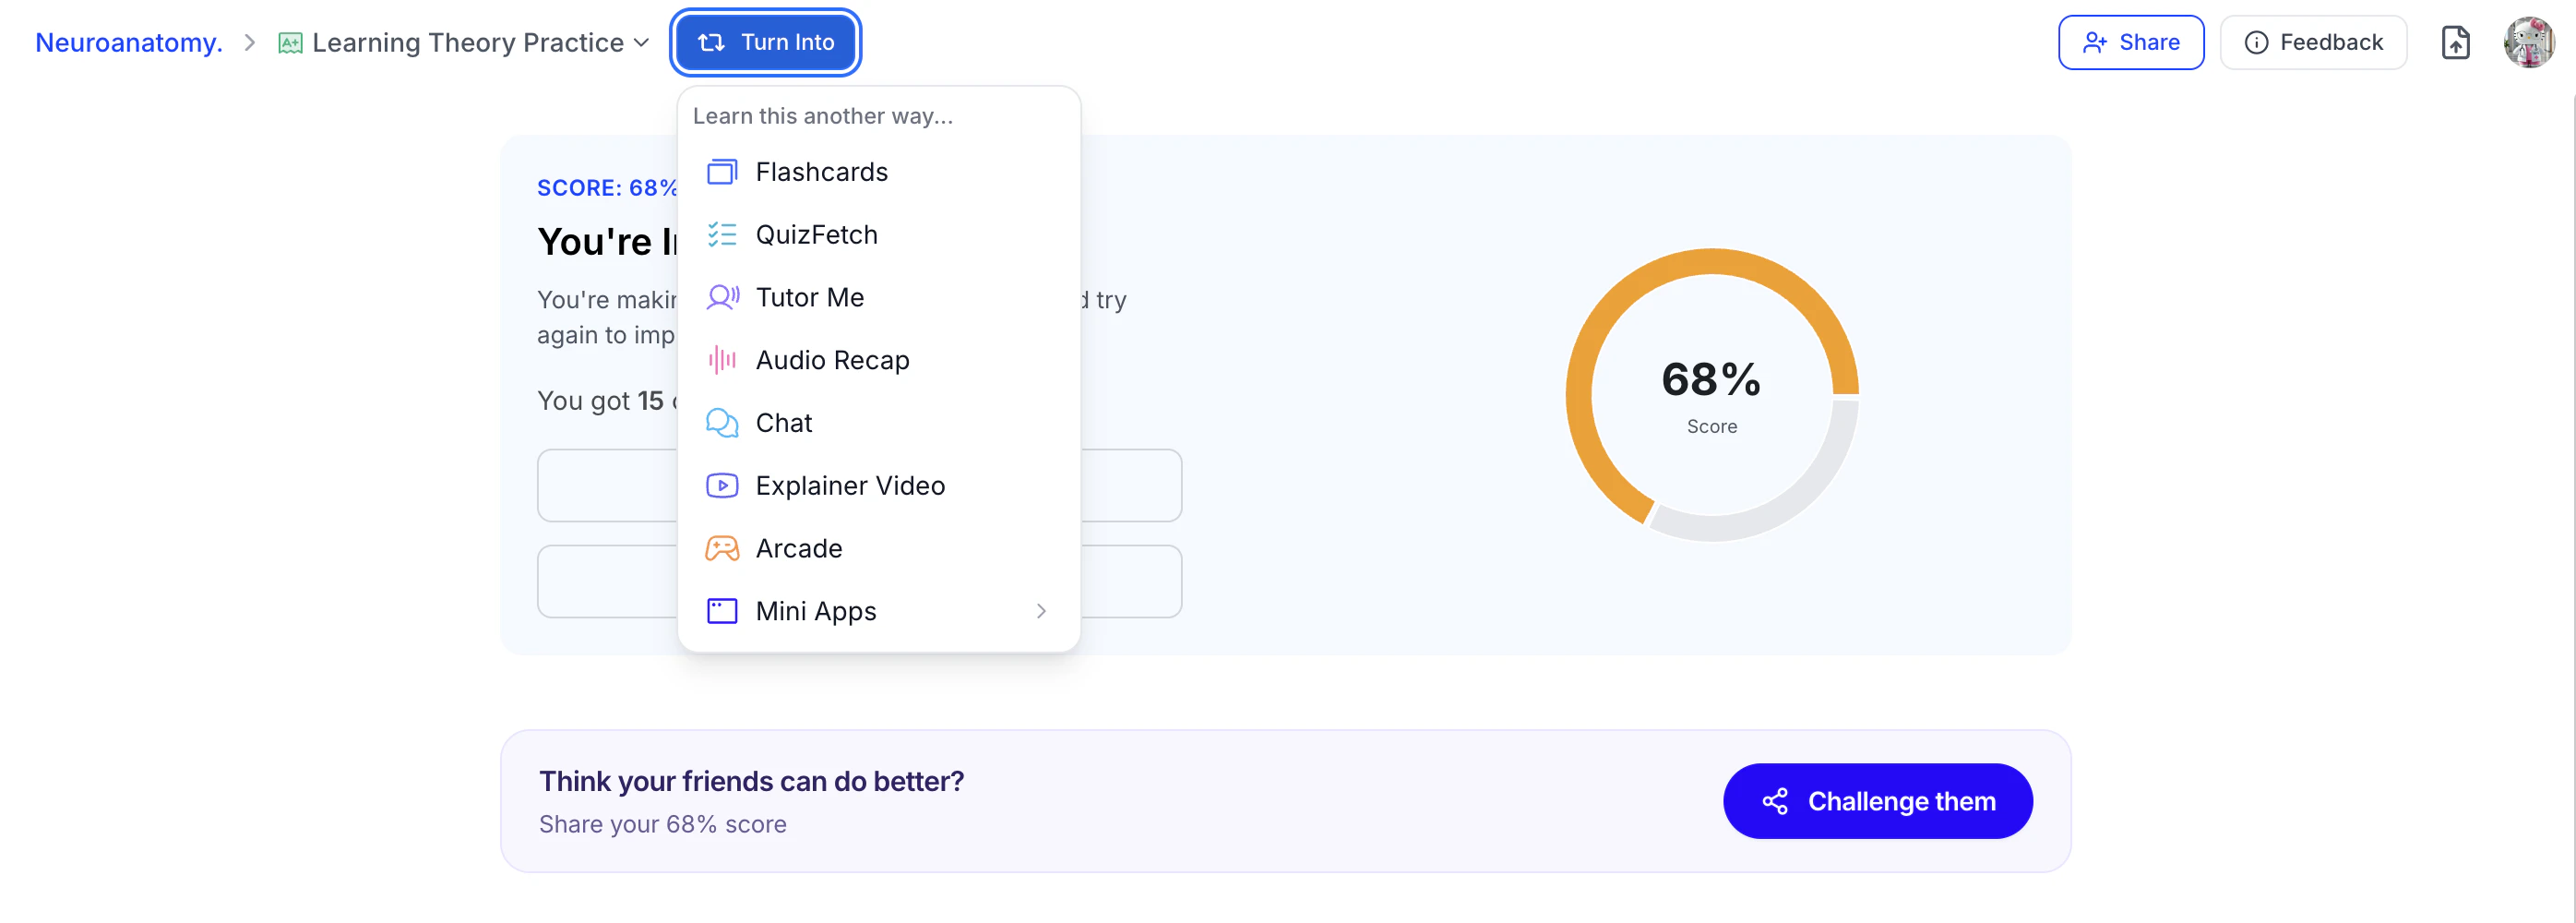
- After grading is complete you will see your score percentage and amount of questions answered correctly.
Step 4: Review Your Results and Learn with Spark.E
- Select View Answers to start reviewing your practice test performance.
- You can now scroll to view all of your answers and see whether each response is correct or incorrect.
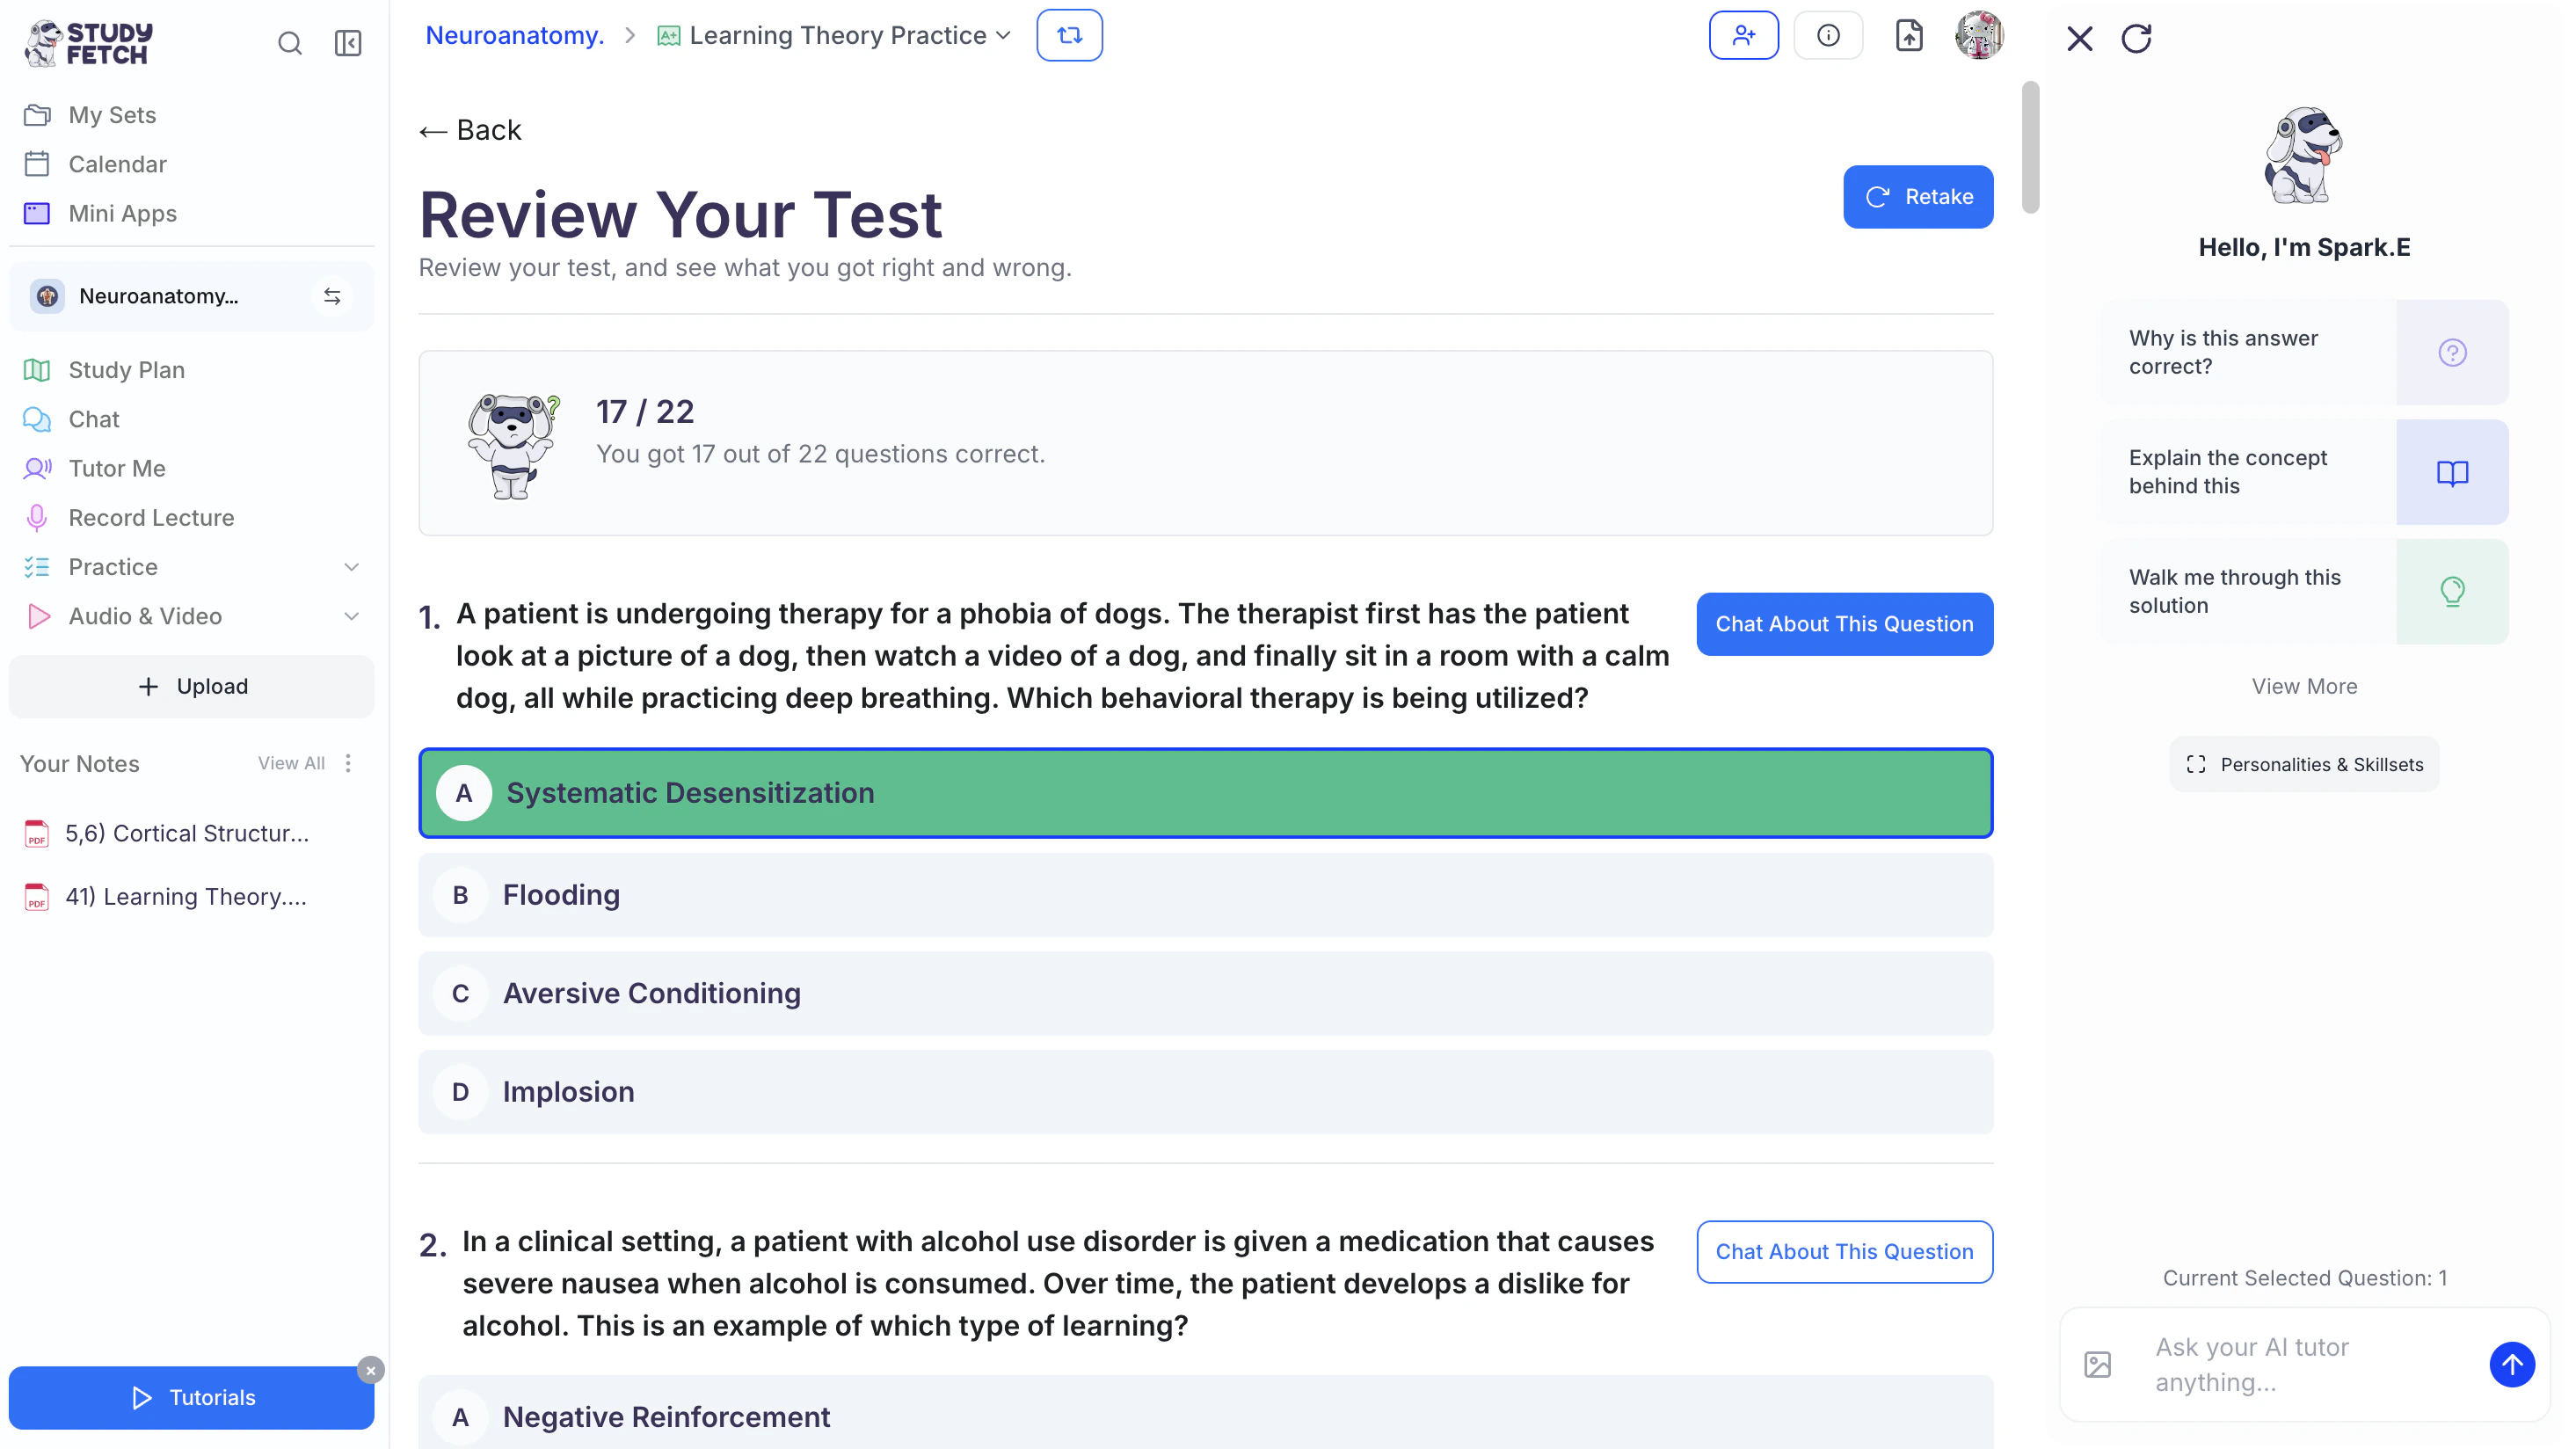
- Use the Spark.E Chat on the right side to ask questions or explore topics in more depth. First, select Chat About This Question next to a specific question.
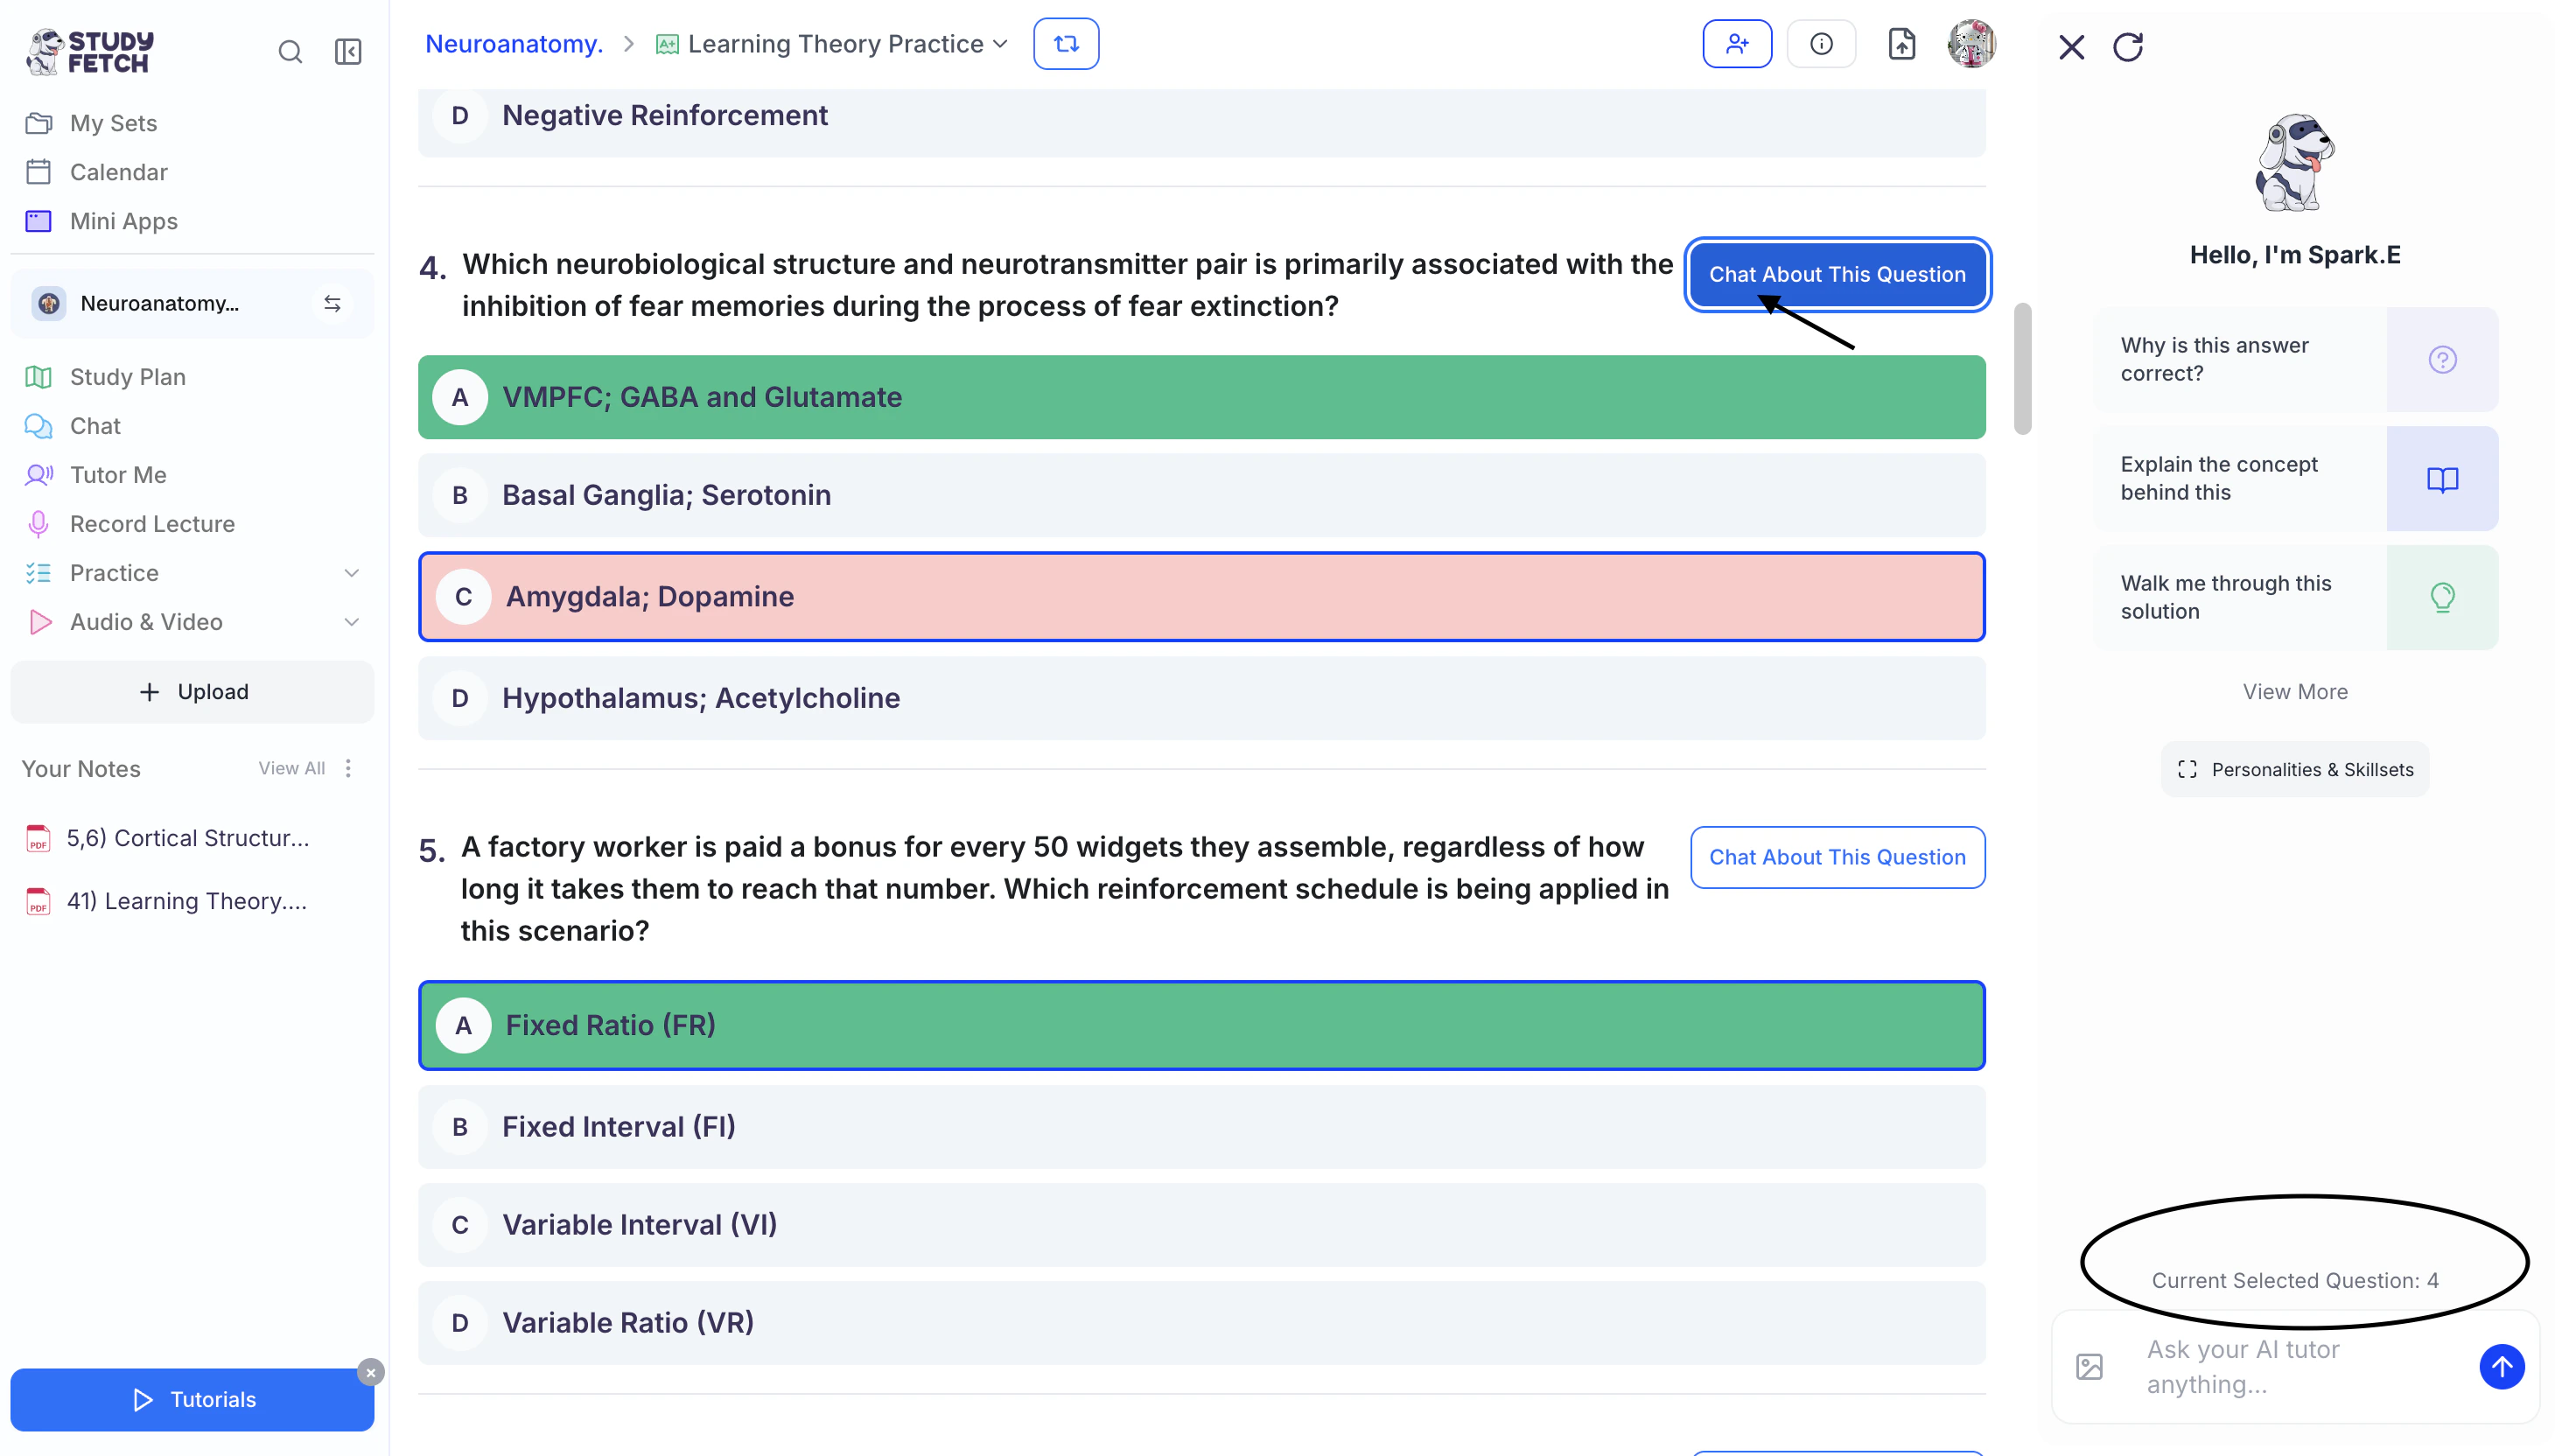
- Then type your message in the chat box and press Enter,
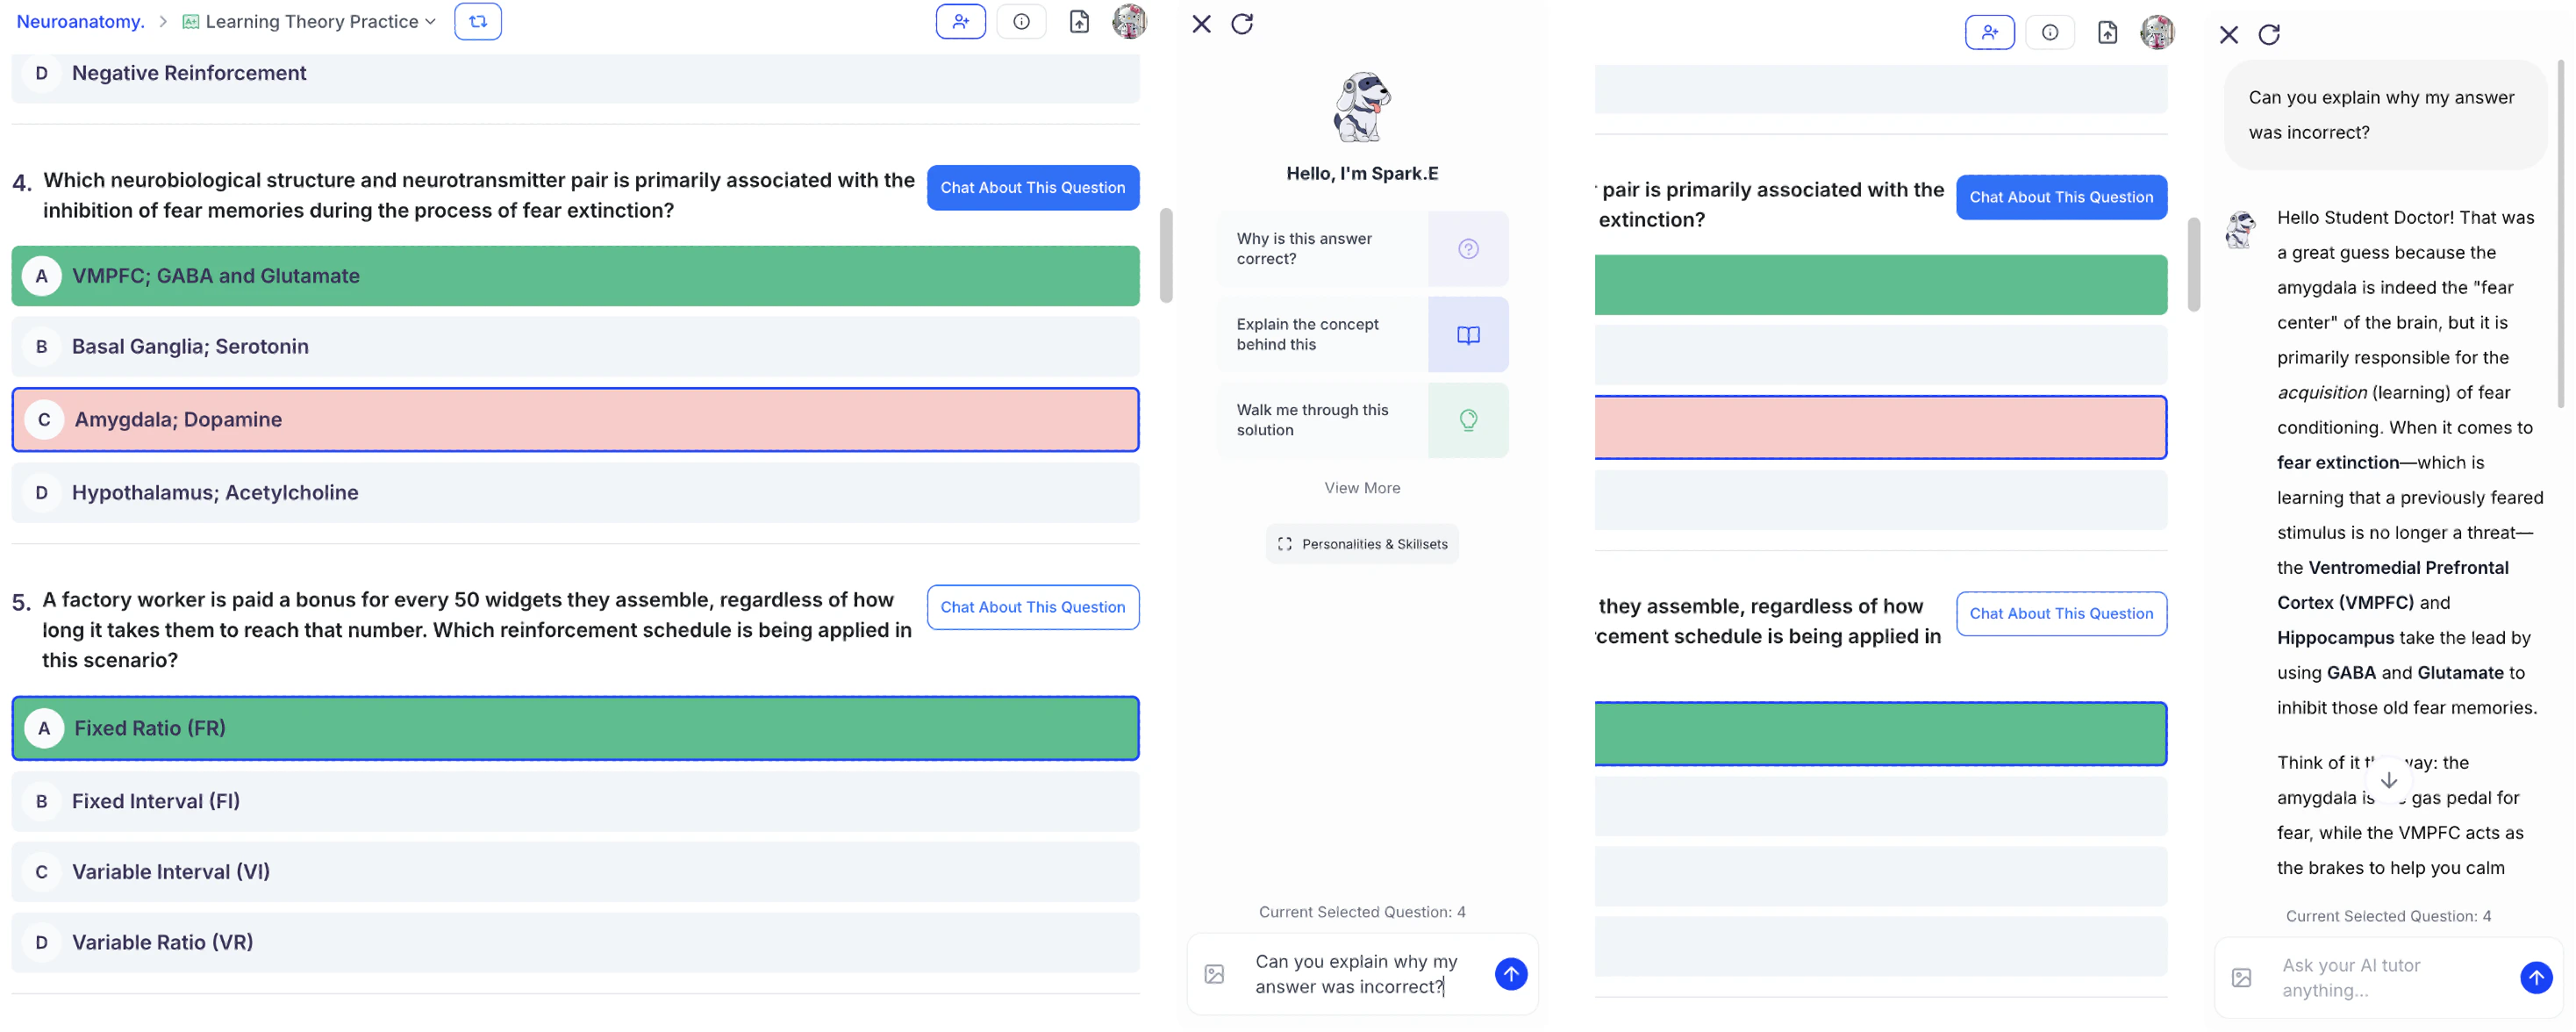
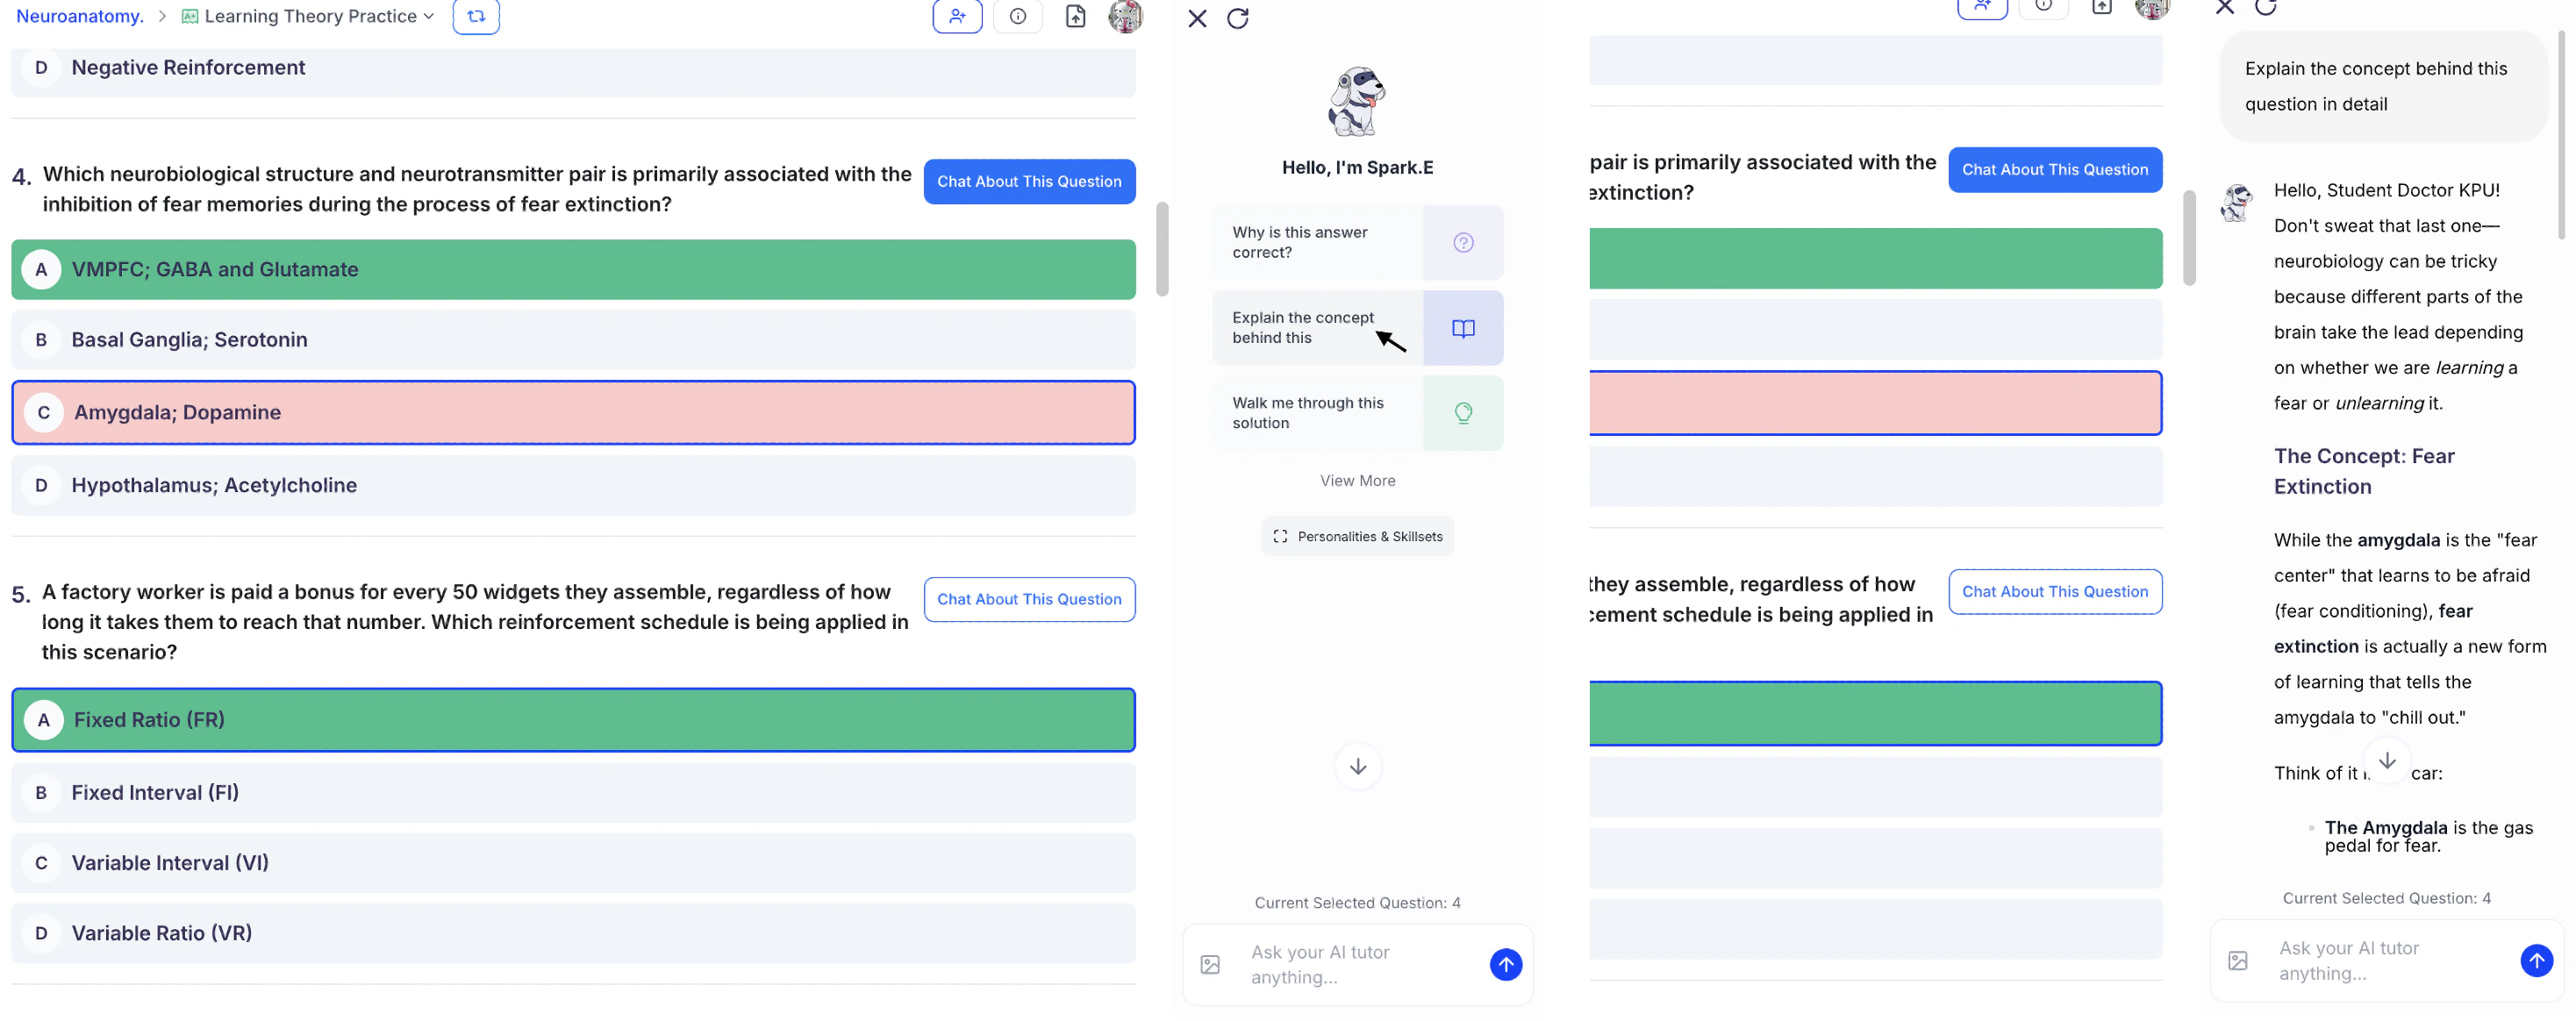
- Spark.E will provide detailed, personalized responses tailored to your learning style.
Step 5: Retake Your Test
Use your results to guide targeted study, then reattempt the practice test to reinforce mastery.- In the Review Your Test page, click Retake from the top right, or..

- To retake a completed test that you are not currently reviewing, first navigate to the Test feature page. From the left-hand side of your dashboard, click Practice, then select Test.
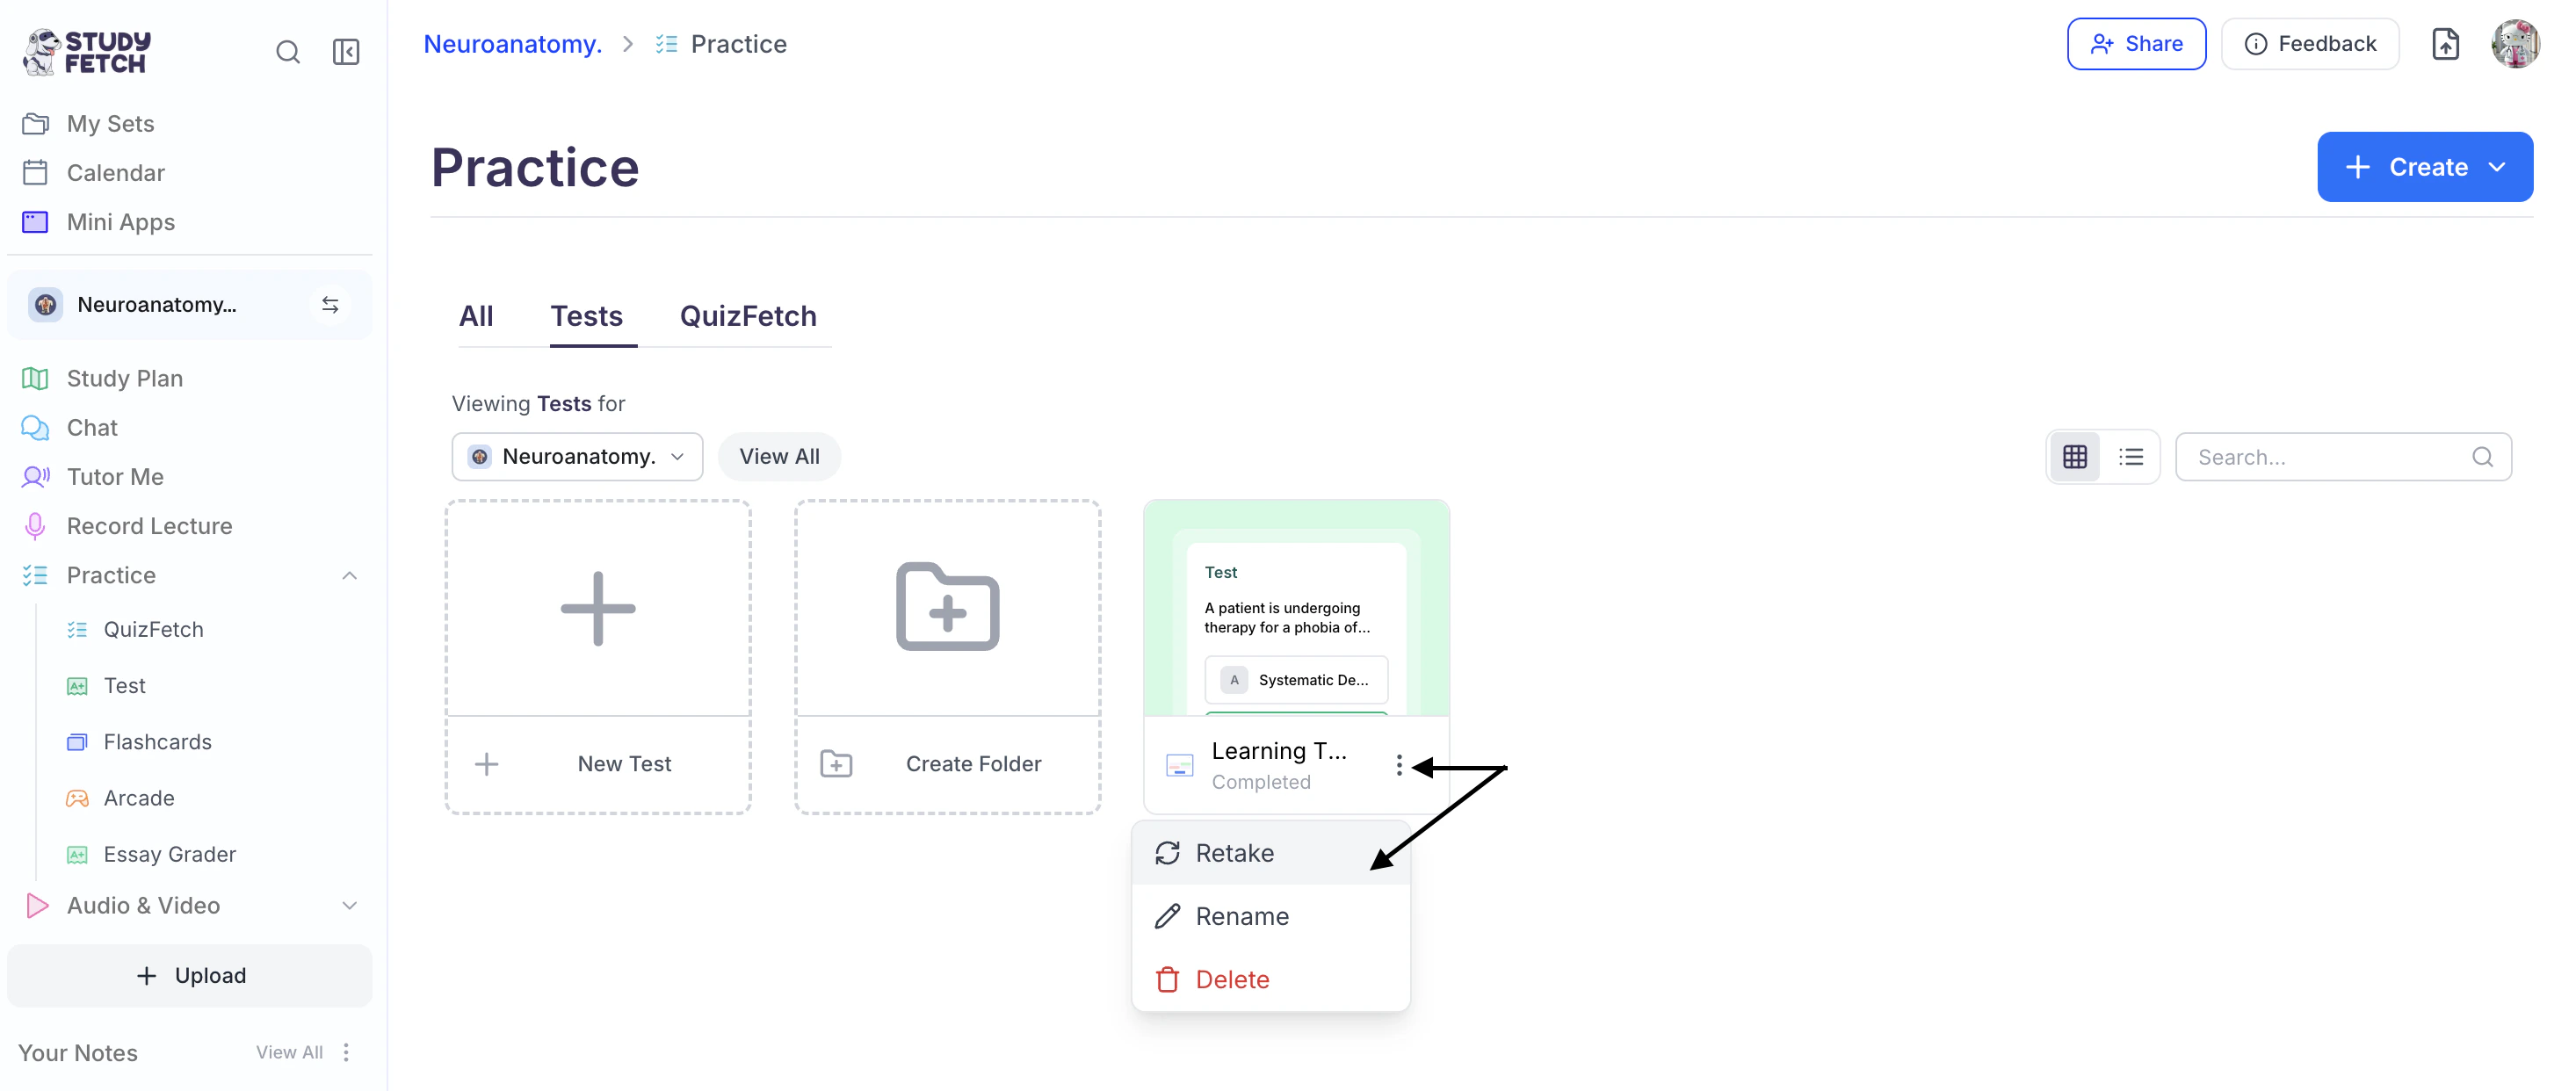
- Select the ⋮ button to the right of the desired test name and choose Retake.
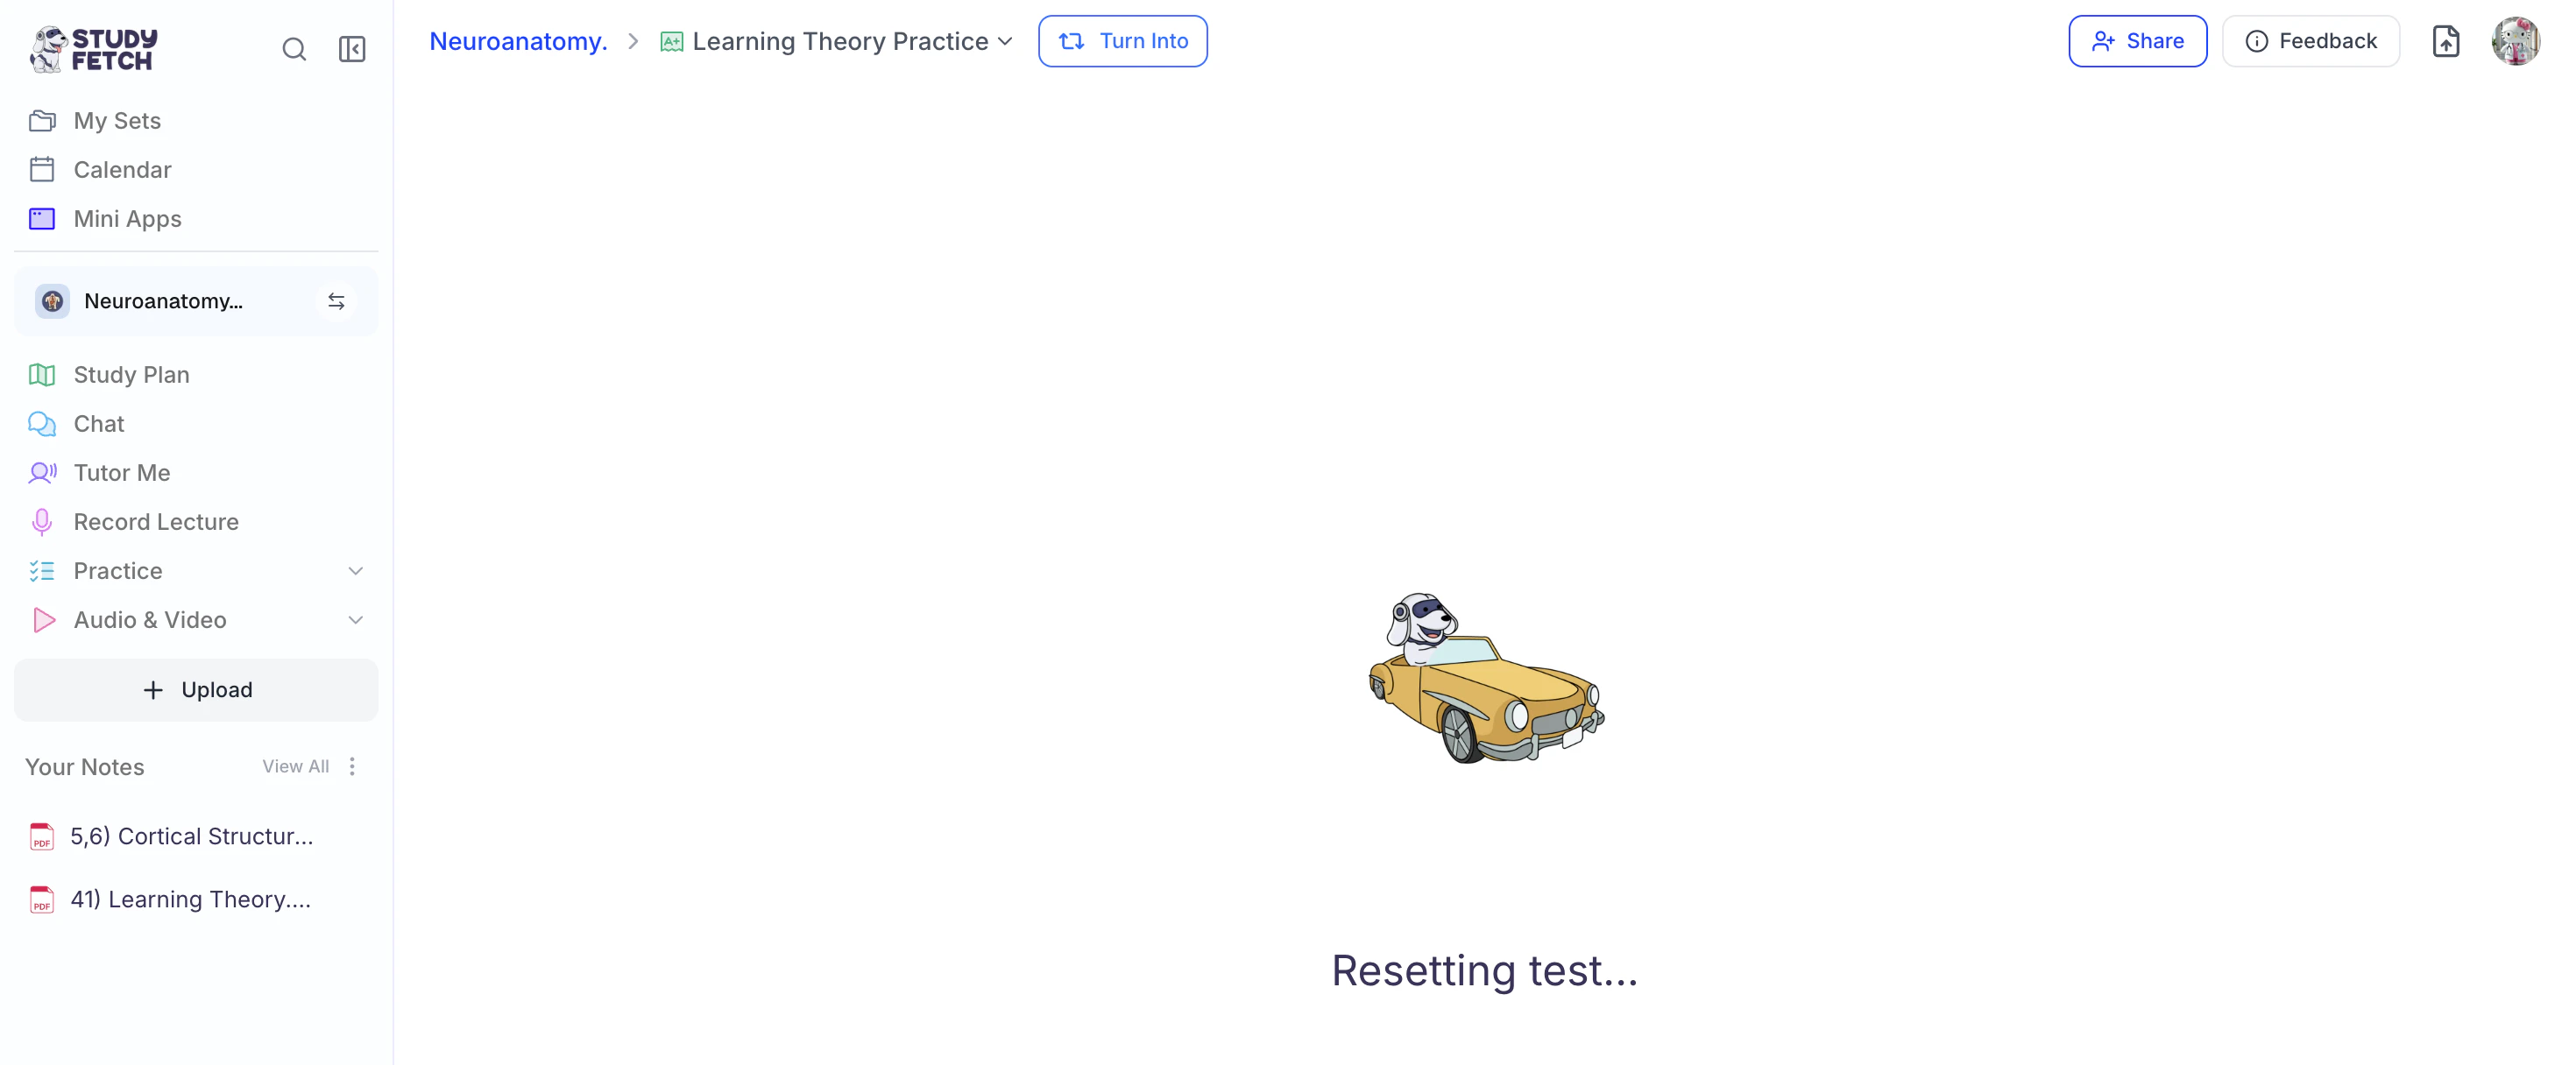
- StudyFetch will now reset your test!
Managing your Test
Rate Your Questions
How do you like your practice test questions? Let us know what is working and what isn’t. The more feedback provided, the better future questions become over time.- Use the thumbs up or thumbs down buttons located in the top right above each question to provide feedback on your AI-generated practice test questions.
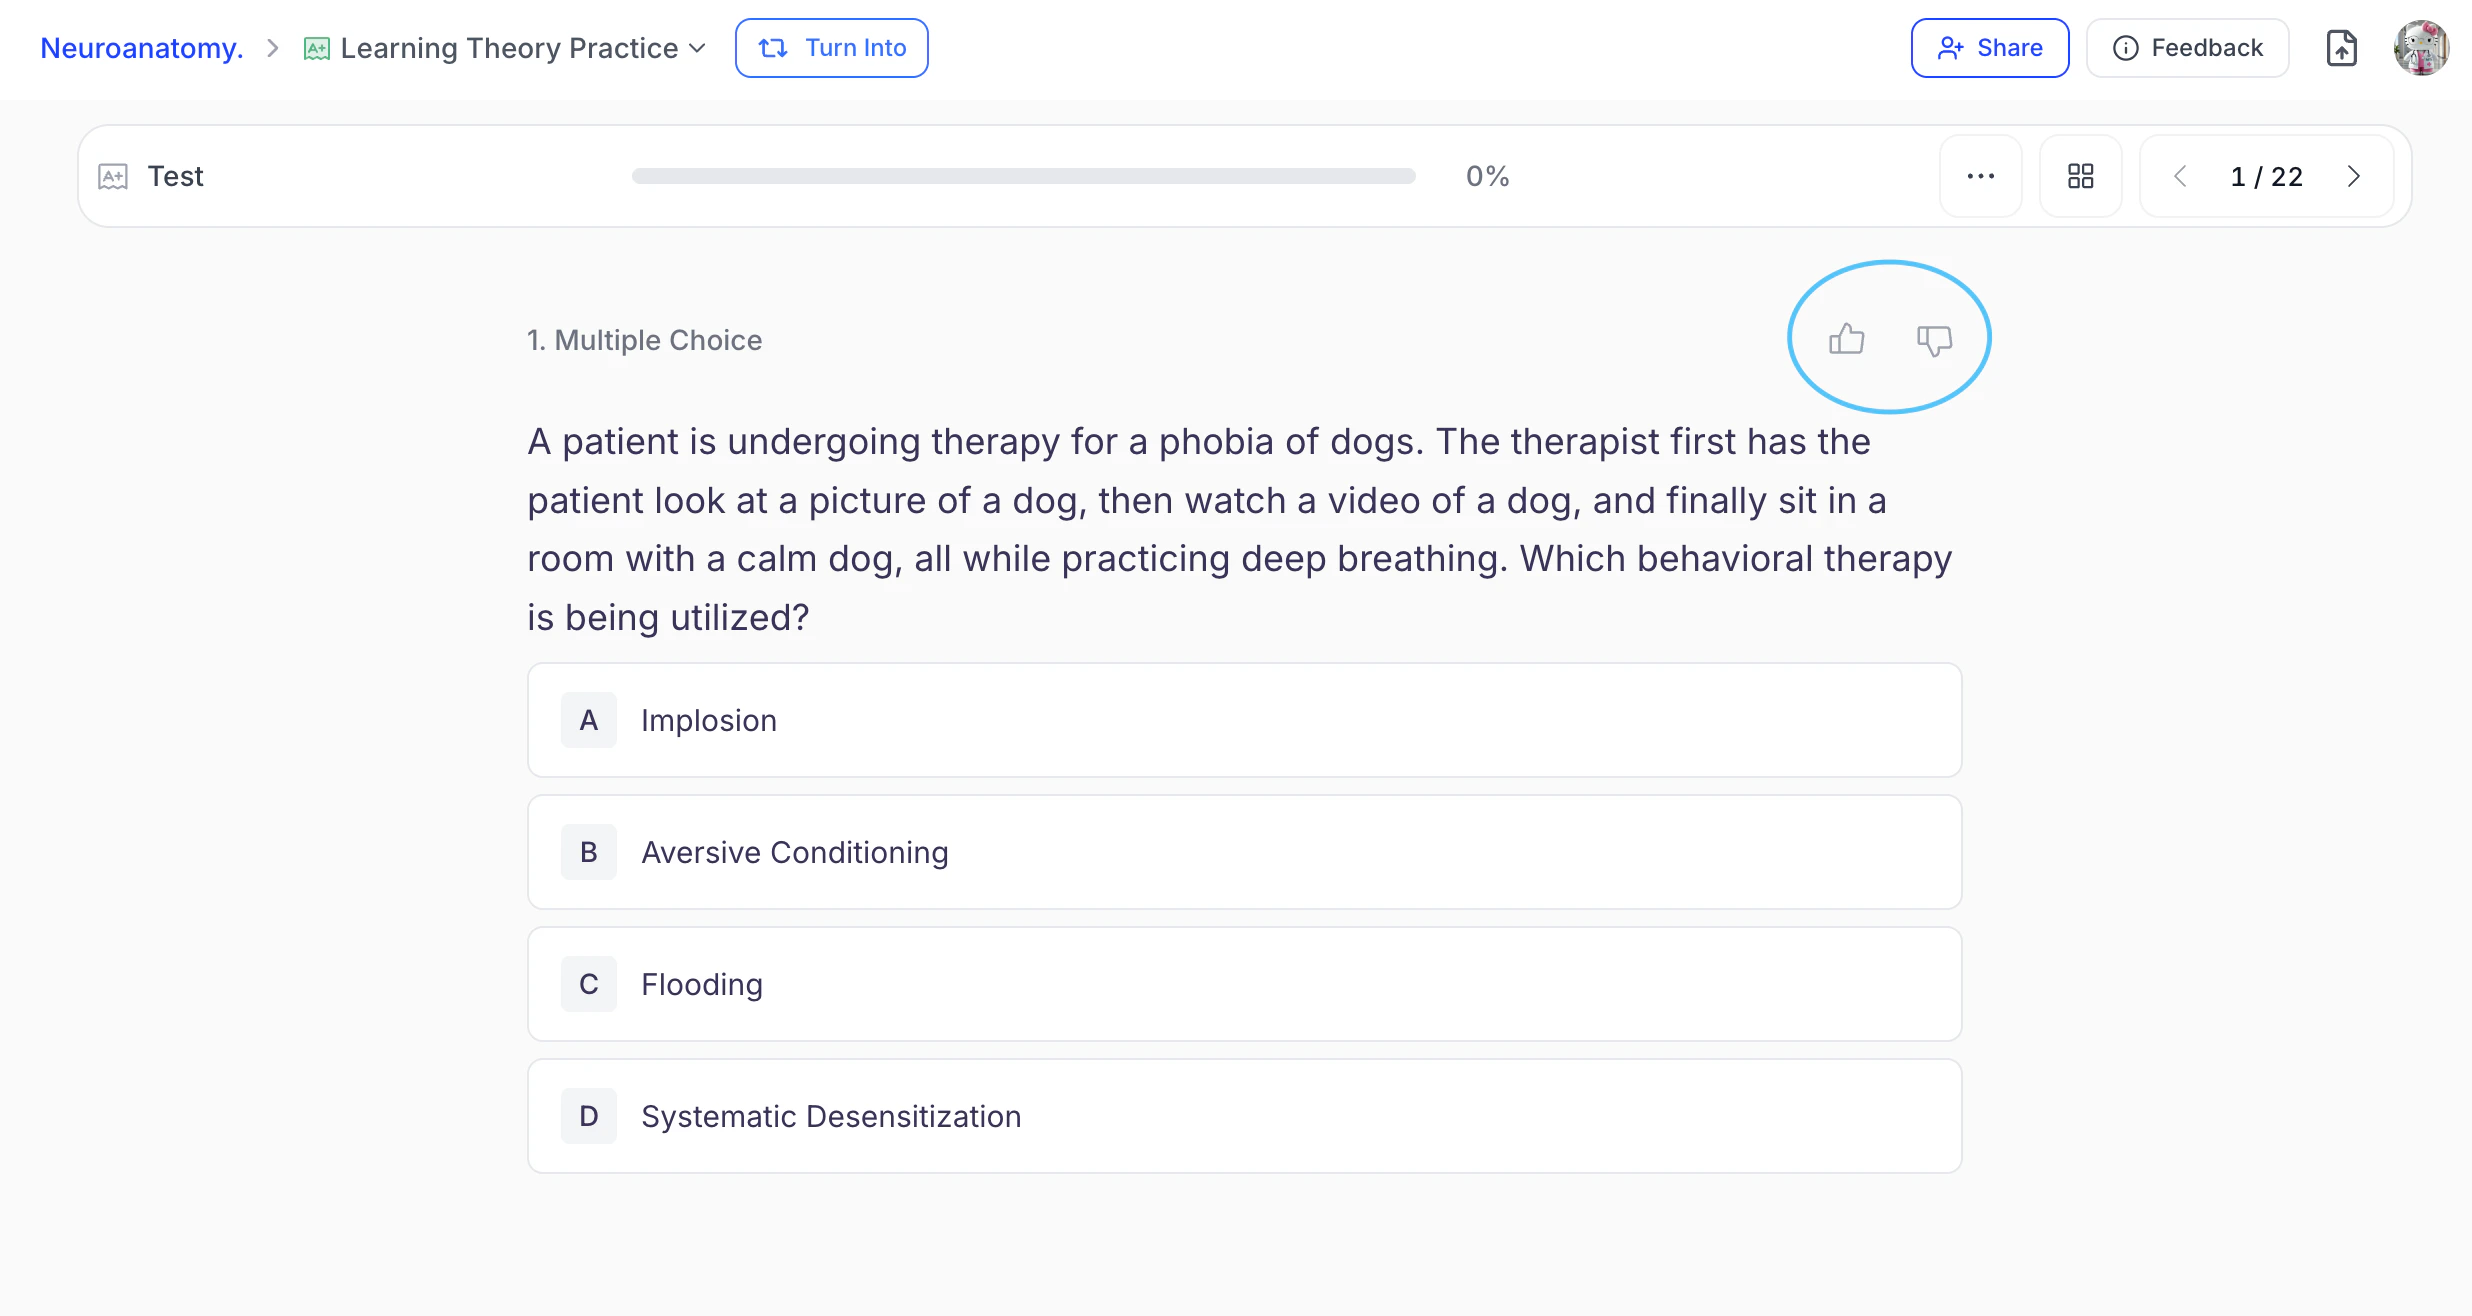
- A thumbs up indicates the question contains helpful content, while a thumbs down indicates the content needs improvement.
Changing the Name of Your Test
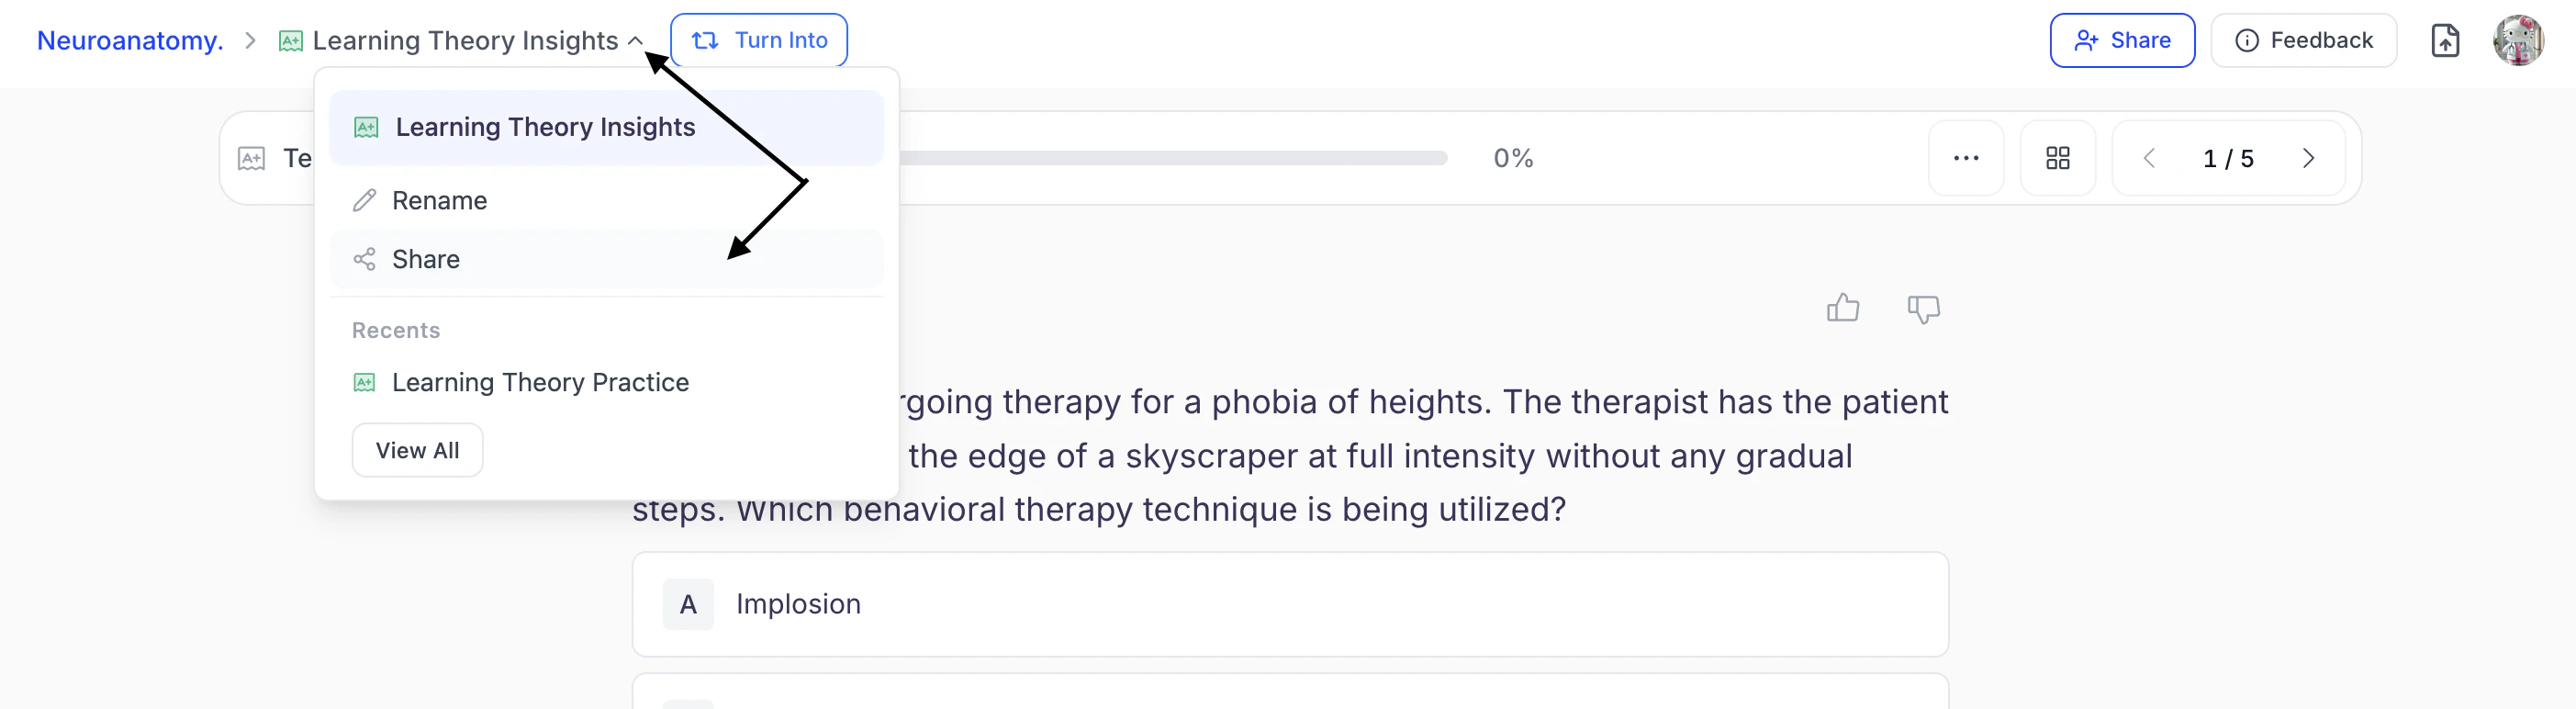
Test names can be updated While Taking a Test or from the Test Feature Page. Choose the method that works best for you: While Taking a Test:- Click the downward arrow to the right of your test name and then click Rename.
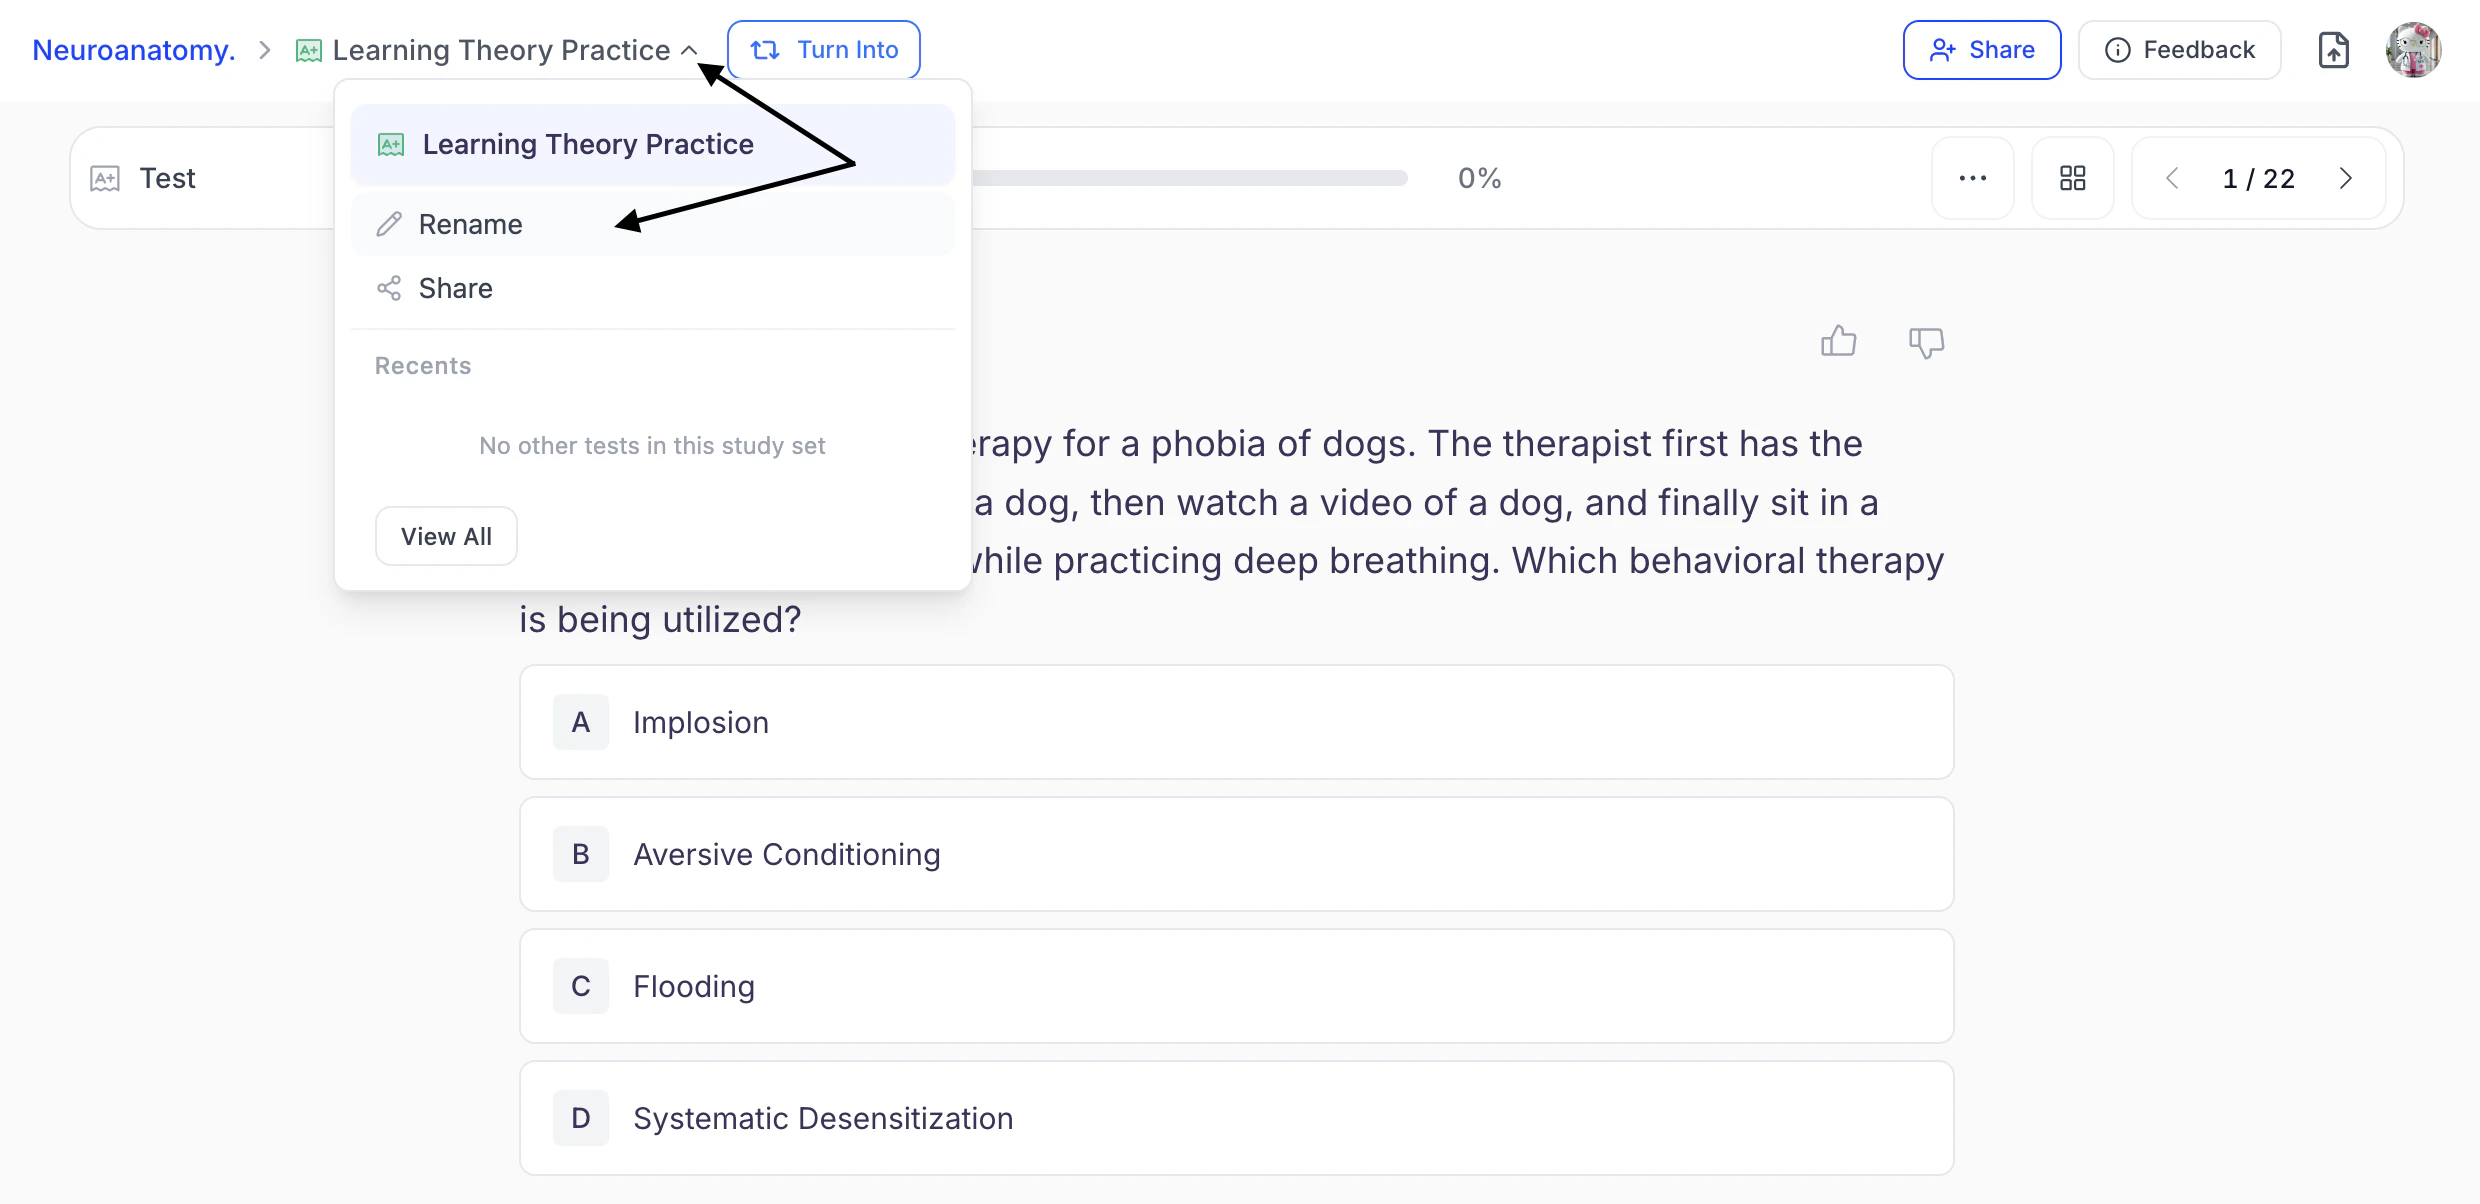
- You can edit the existing name or enter a new name for your test in the Name field. When done click Save.

- First navigate to the Test feature page. From the left-hand side of your dashboard, click Practice, then select Test.
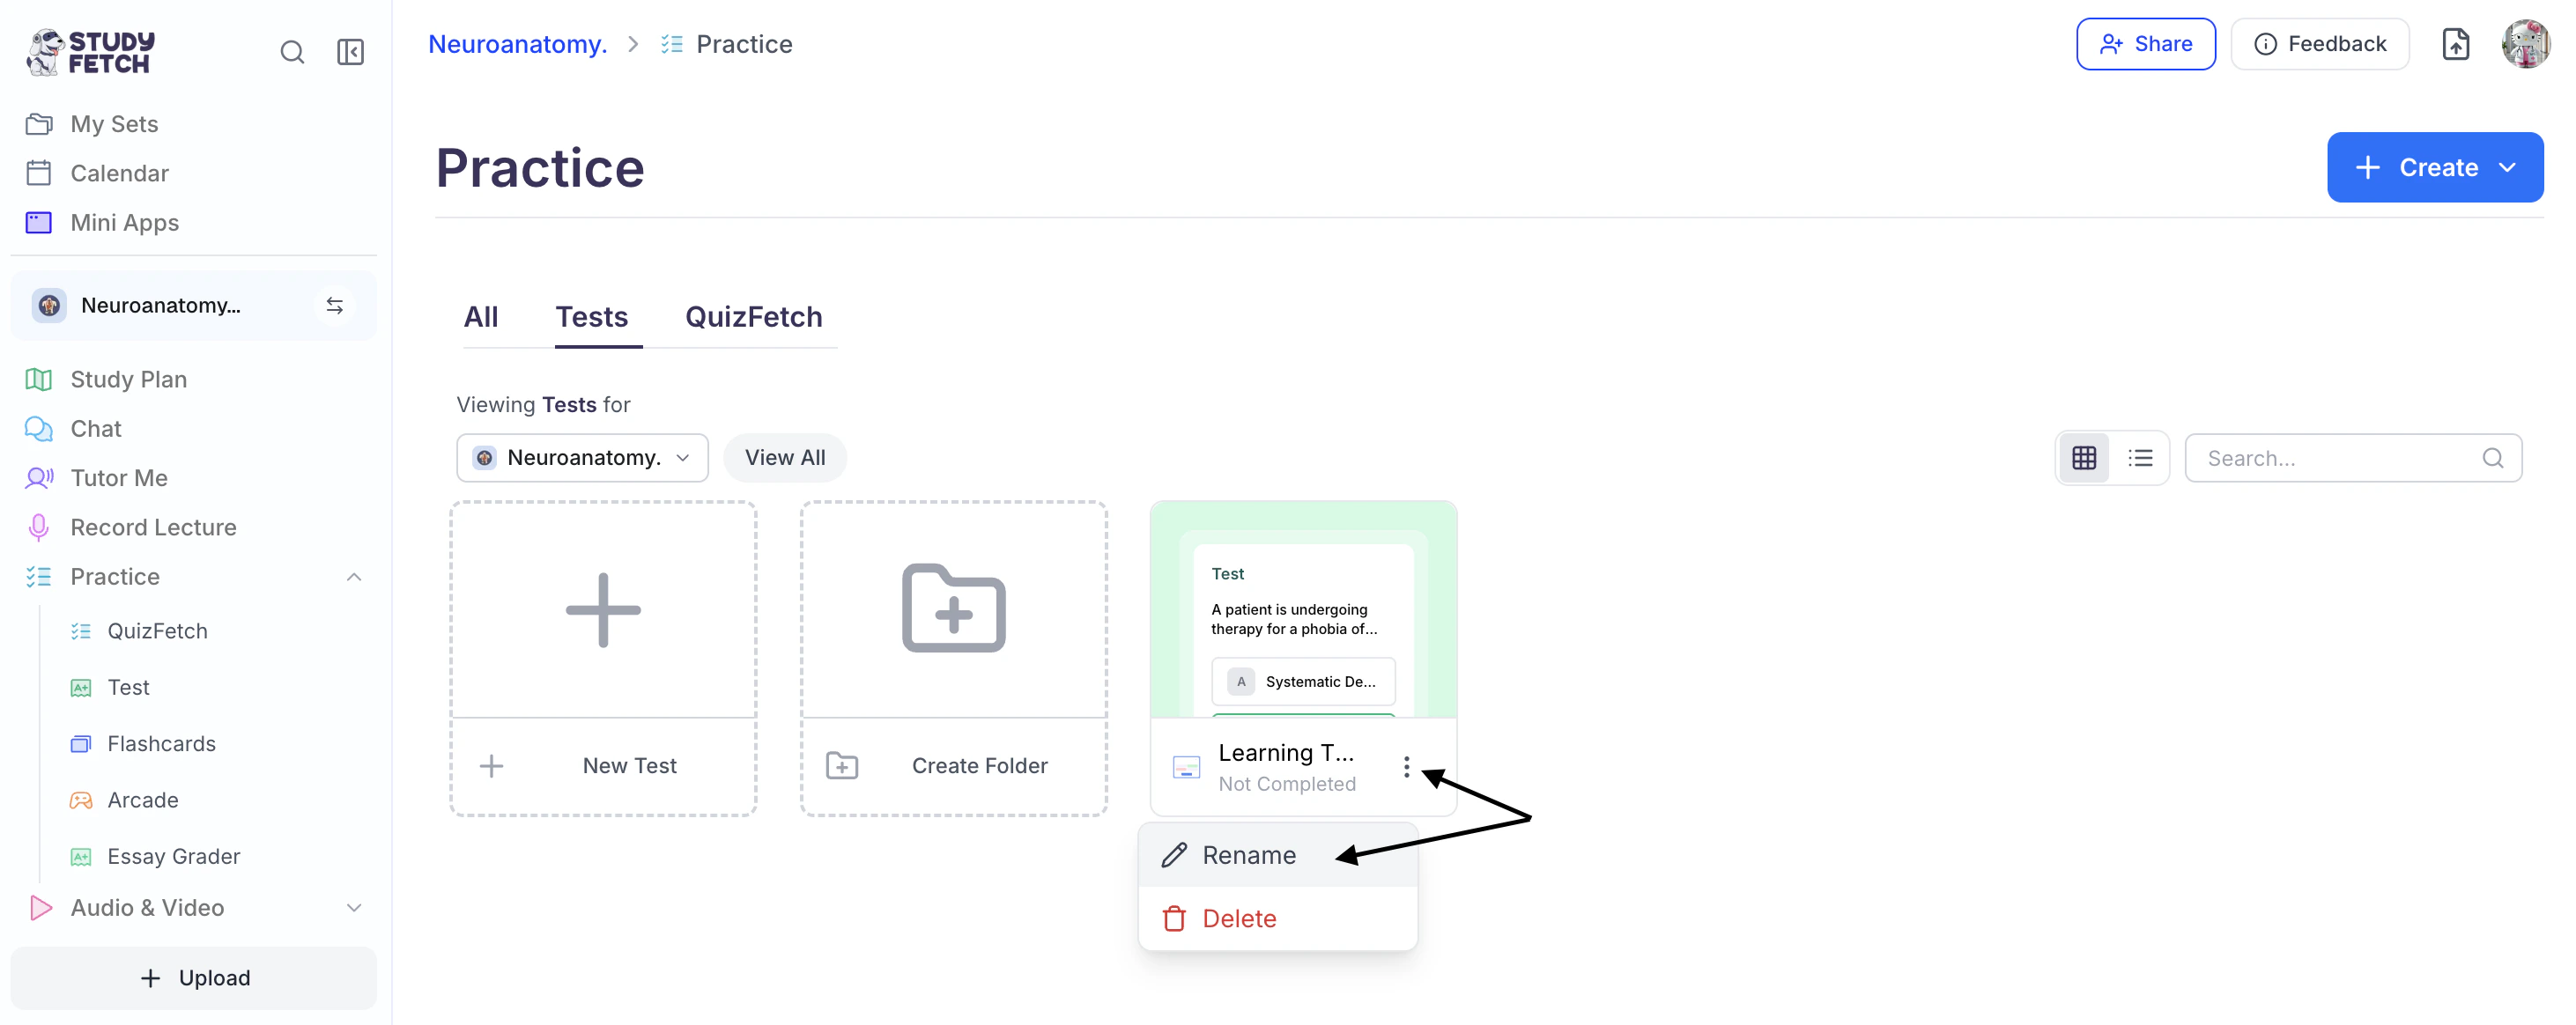
- Select the ⋮ button to the right of the desired test name and choose Rename.
- You can edit the existing name or enter a new name for your test in the Title field. When done click Update.

Share Your Test
Found your test helpful? Share it during the test or from the Test Results page, and optionally include your score to challenge friends or highlight your achievement. During a Test:- Click the downward arrow next to your test name, then select Share.
- Copy the link by clicking directly on the URL under Share link, or select Copy Link from the bottom left corner. You can now share the copied link.

- To share directly through supported apps:

- Select the WhatsApp icon to share via WhatsApp.
- Select the Telegram icon to share via Telegram.
- Select the Text icon to share through your preferred messaging app.
- Want to share your test with results, click Challenge them within the Think your friends can do better? field.

- Next, choose how you would like to share:
- Select Help a Friend to share your practice test without your result information.

- Select Challenge to share your test with your score and see if a friend can beat it.

- Select Celebrate to share your test result and highlight your achievement.

- Select Help a Friend to share your practice test without your result information.
- Finally, select Copy Link or share directly through supported apps:

- Select the WhatsApp icon to share via WhatsApp.
- Select the Telegram icon to share via Telegram.
- Select the Text icon to share through your preferred messaging app.
Delete Your Test
- First navigate to the Test feature page. From the left-hand side of your dashboard, click Practice, then select Test.
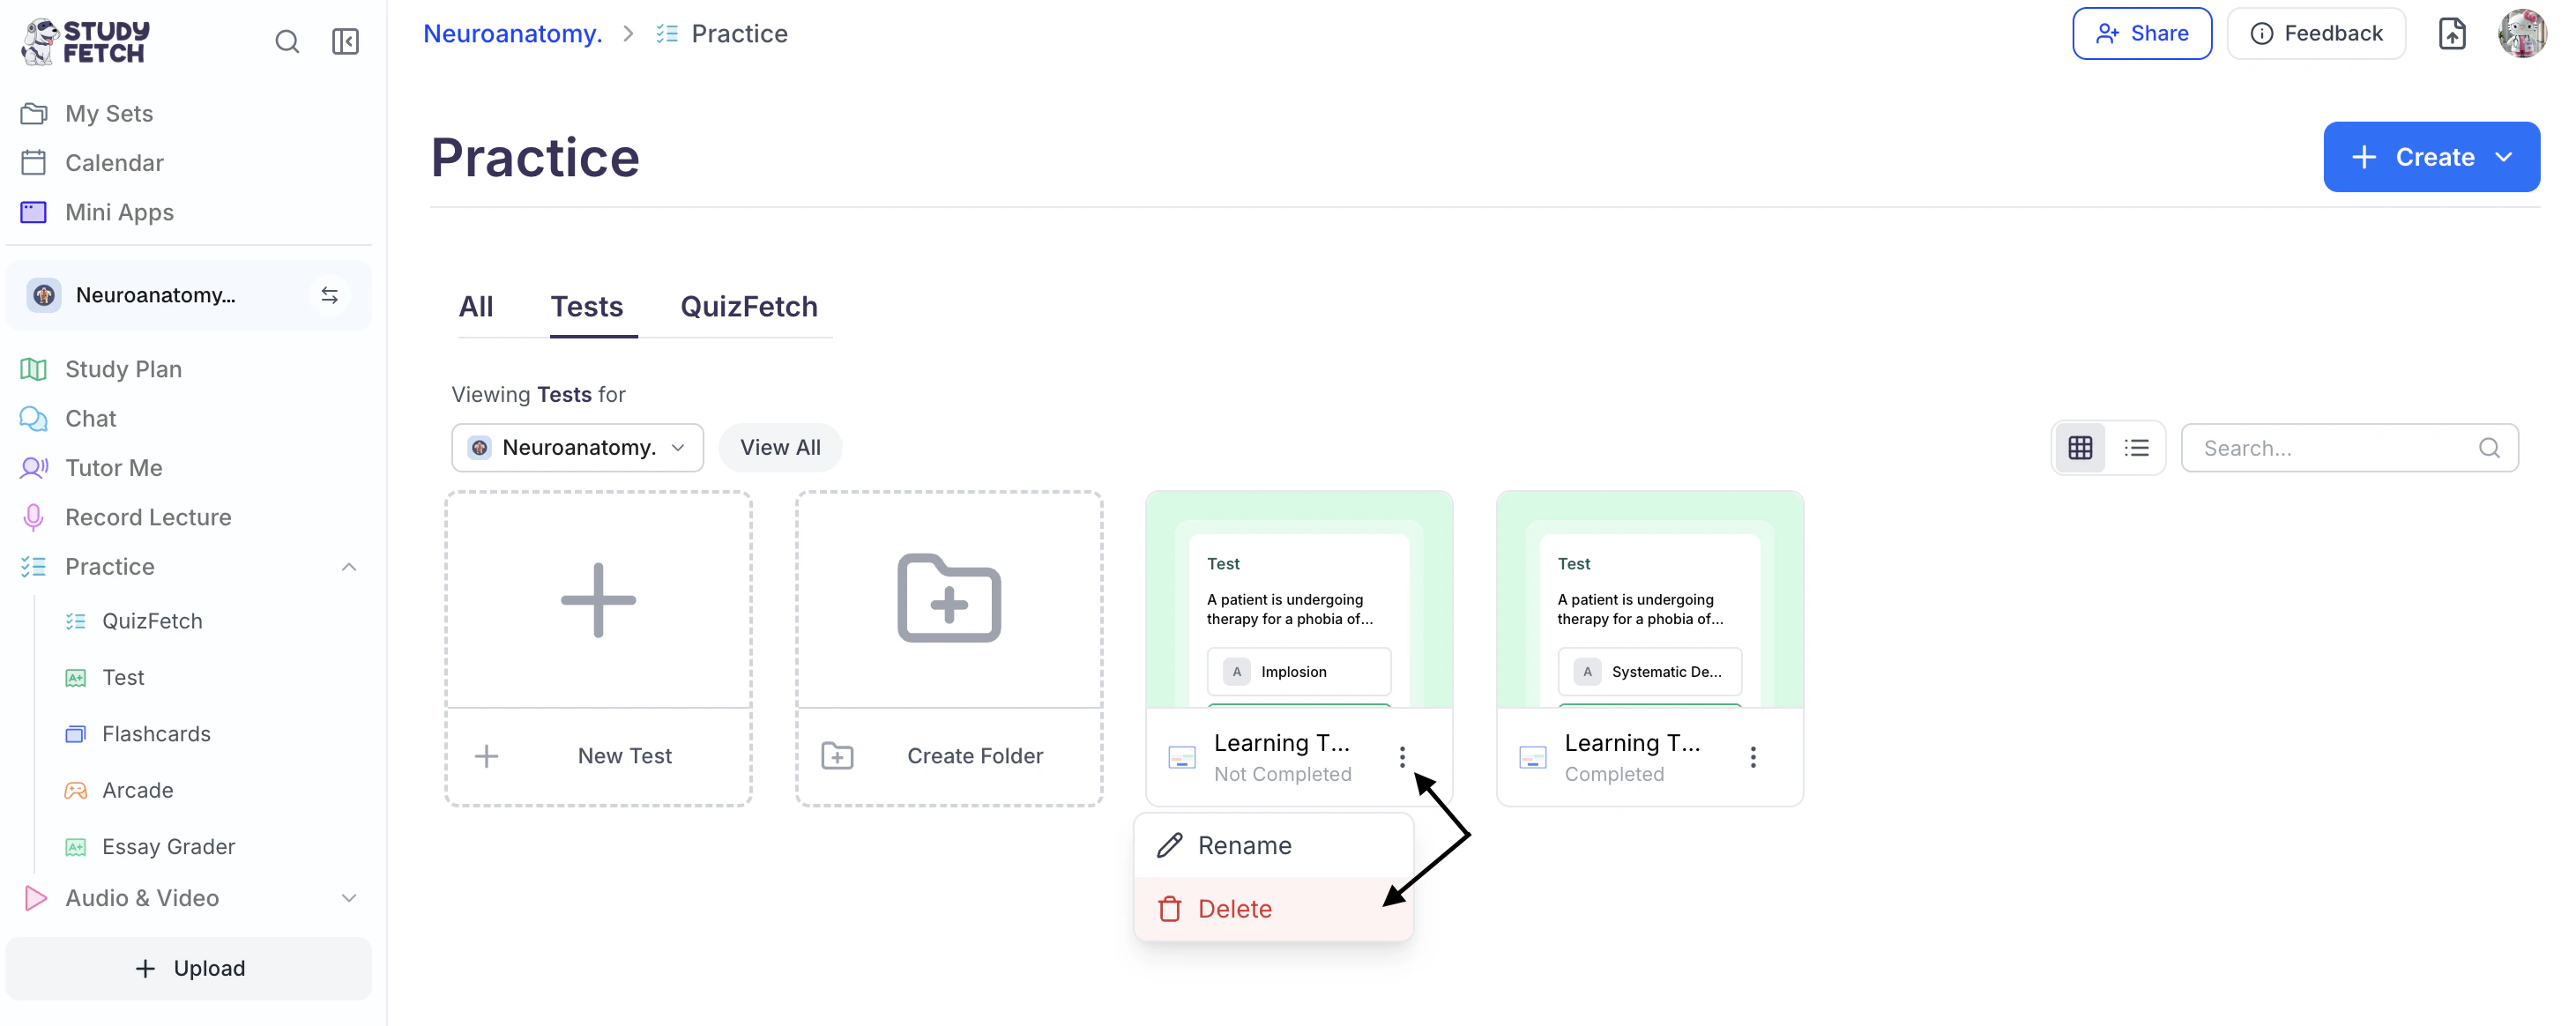
- Select the ⋮ button to the right of the desired test name and choose Delete.
- If you are sure you want to delete this test, select OK.

Test Features and Benefits
- Customizable Question Types: Choose from multiple choice, free response, fill-in-the-blank, and more
- Targeted Testing: Focus on specific topics or broader subject areas
- Immediate Feedback: Get instant grading and explanations for each question
- AI-Powered Review: Ask Spark.E to explain concepts you didn’t understand
- Exam Preparation: Practice with formats similar to standardized tests
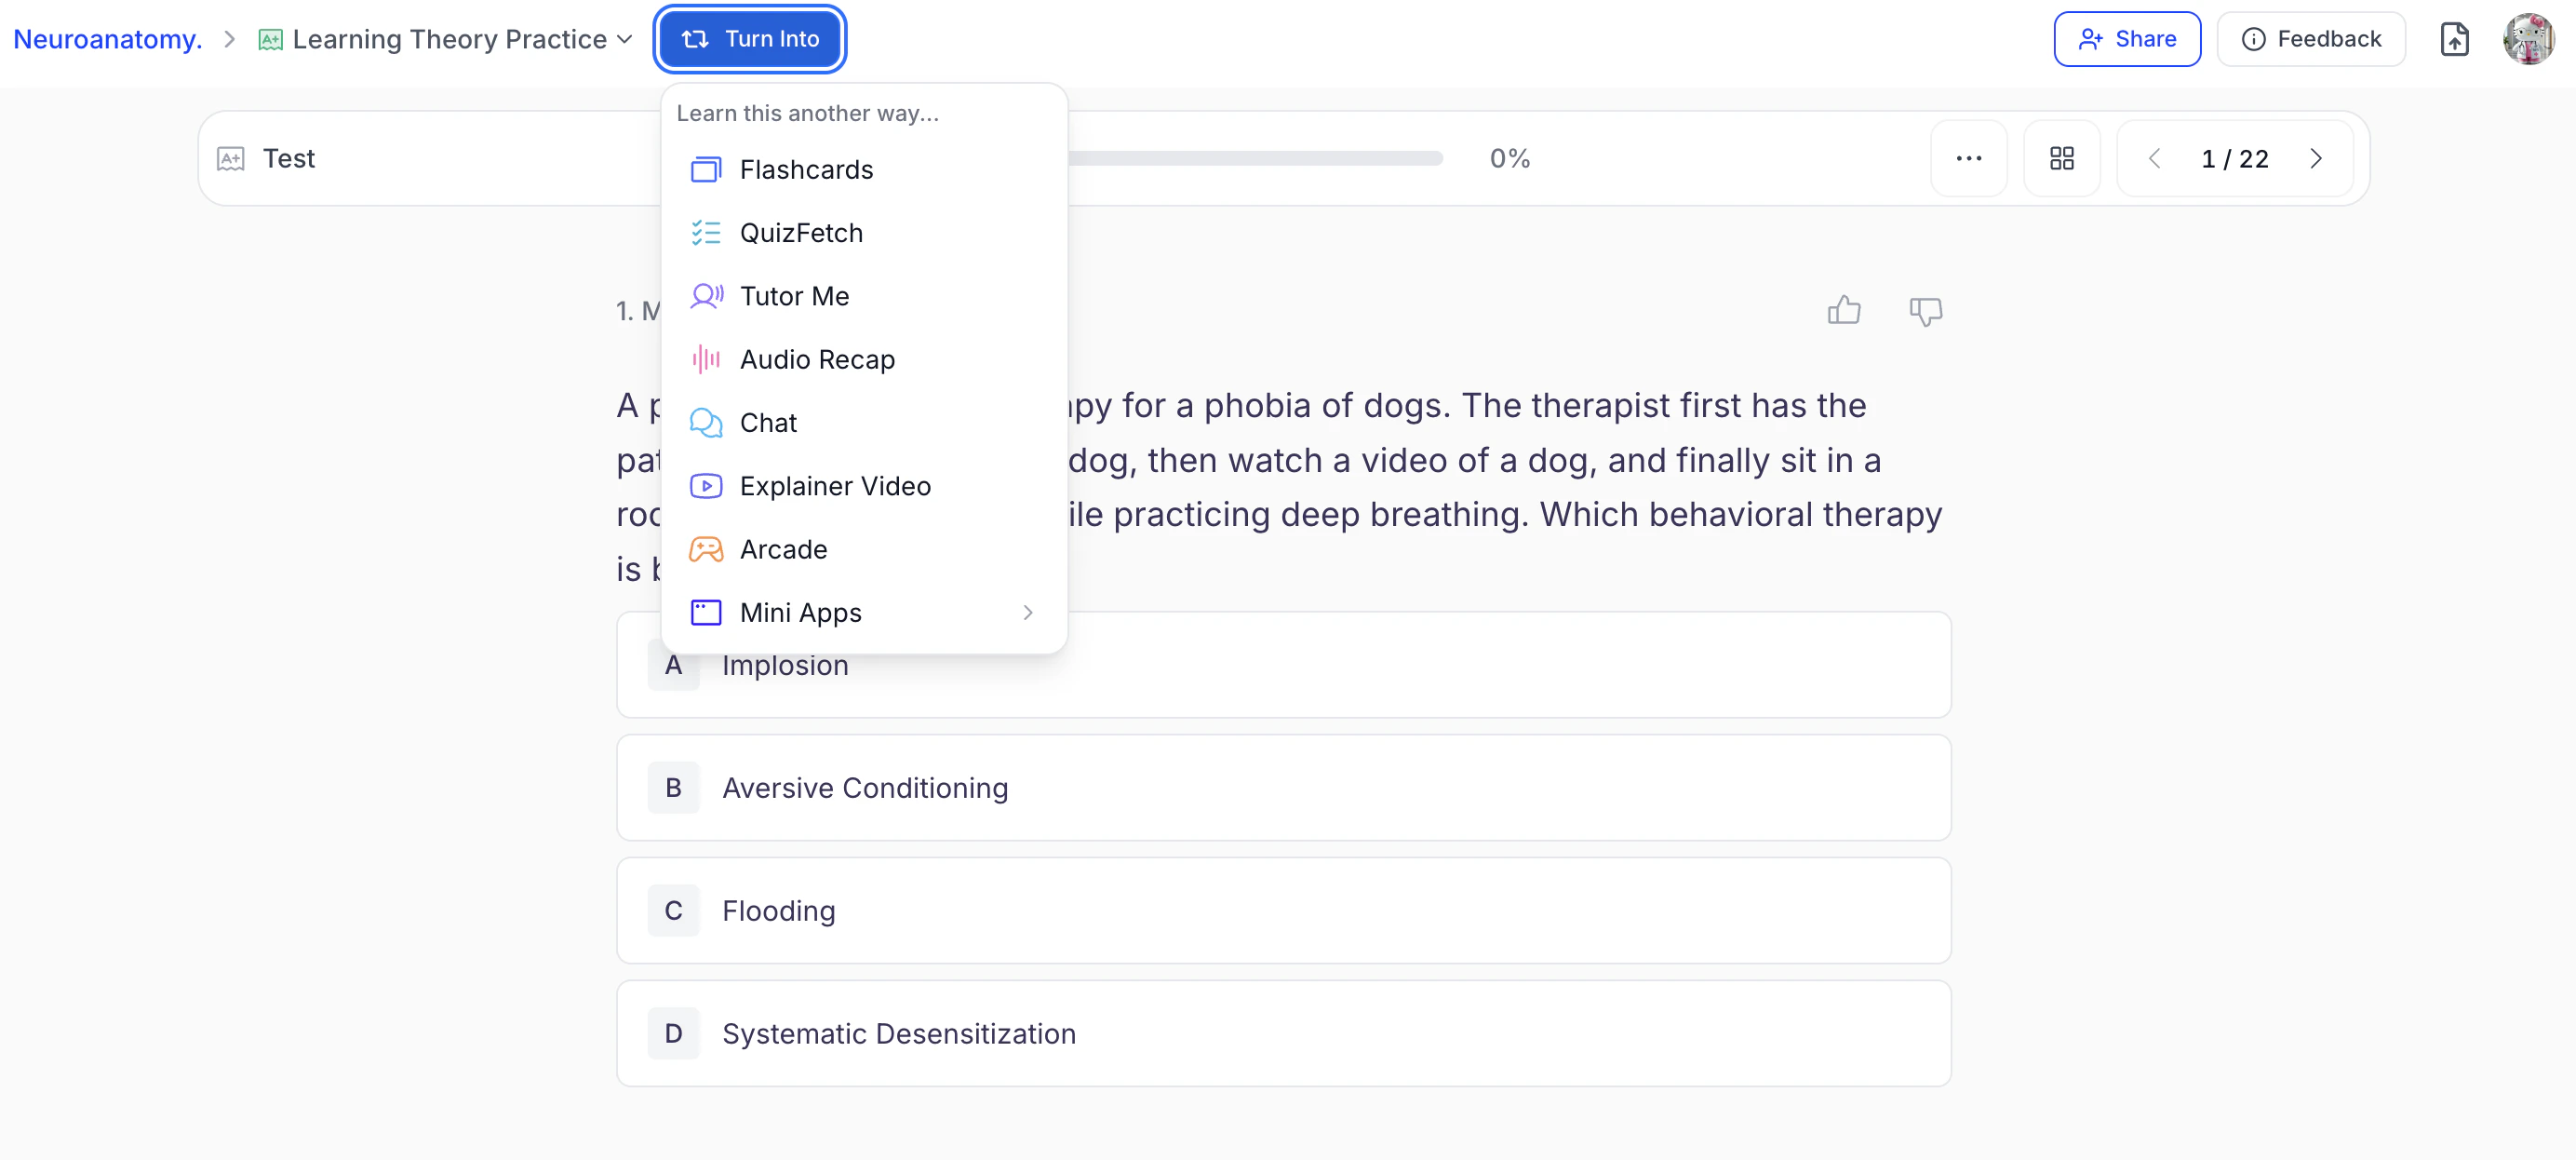
- Integration with Other Tools: Your tests can be used to generate flashcards, quizzes, and other study materials. You can create new study resources directly from your test by selecting Turn Into at the top of the Test Results page
Related Features
After using the Test feature, you may want to:- Try QuizFetch for a more game-like testing experience
- Create Flashcards to memorize concepts you struggled with
- Generate Notes for topics that need further review