Introduction
Study Sets are the foundation of your learning experience on StudyFetch. They contain all your study materials and enable you to generate AI-powered study aids like notes, flashcards, and practice tests.Creating a New Study Set
-
On the lefthand side of your Dashboard > click on the Select a Study Set dropdown > choose + New Study Set
Uploading Study Materials
-
Add your materials by selecting any of the options. There are plenty of ways to upload and use your study materials. Just pick the option that works best for you
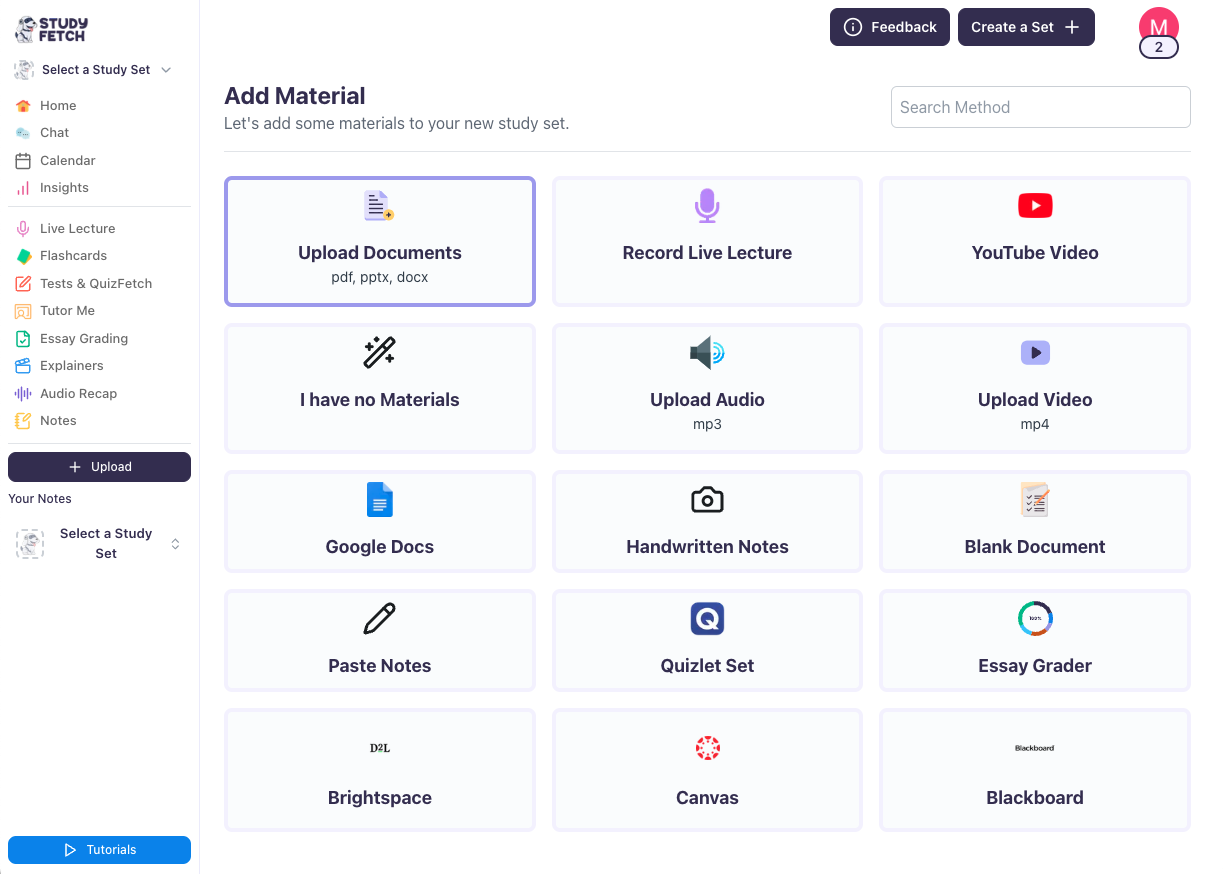
Material Upload Options
- Upload Documents – Add school-provided modules like PDFs, DOCX, PPTX, TXT, PNG, and JPEG.
- Record Live Lecture – Capture and transcribe your live lectures effortlessly.
- YouTube Video – Simply paste the link, and we’ll take care of the rest.
- I have no materials – No Materials? No Problem\! Just tell Spark.E what you want to learn, and we’ll generate the content for you\!
- Upload Audio – Attach your pre-recorded lessons in MP3 format.
- Upload Video – Upload MP4 files of your recorded lessons.
- Google Docs – Link your Google Account to upload files directly—no downloads, no wasted storage\!
- Handwritten Notes – Snap a picture, and Spark.E will generate digital notes for you—no need to scan\!
- Blank Document – Start taking notes while listening to your lesson in real-time.
- Paste Notes – Already have notes saved? Just paste them in, and we’ll organize them for you\!
- Quizlet Set – Paste your Quizlet link, and we’ll use it as a reference.
- Essay Grader – Get instant feedback on your writing with our built-in essay grading tool.
- Brightspace, Canvas, Blackboard – If your school isn’t using StudyFetch yet, we’ll generate an email template to help you request its integration\!
Step-by-Step Guide
1. Upload Your Materials
-
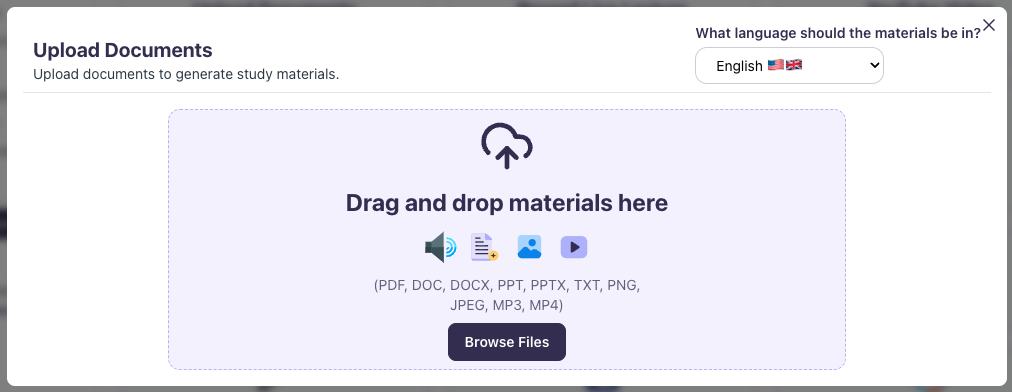
In this example we’ll use Upload Documents. Upload your document here.
2. Select Study Features
-
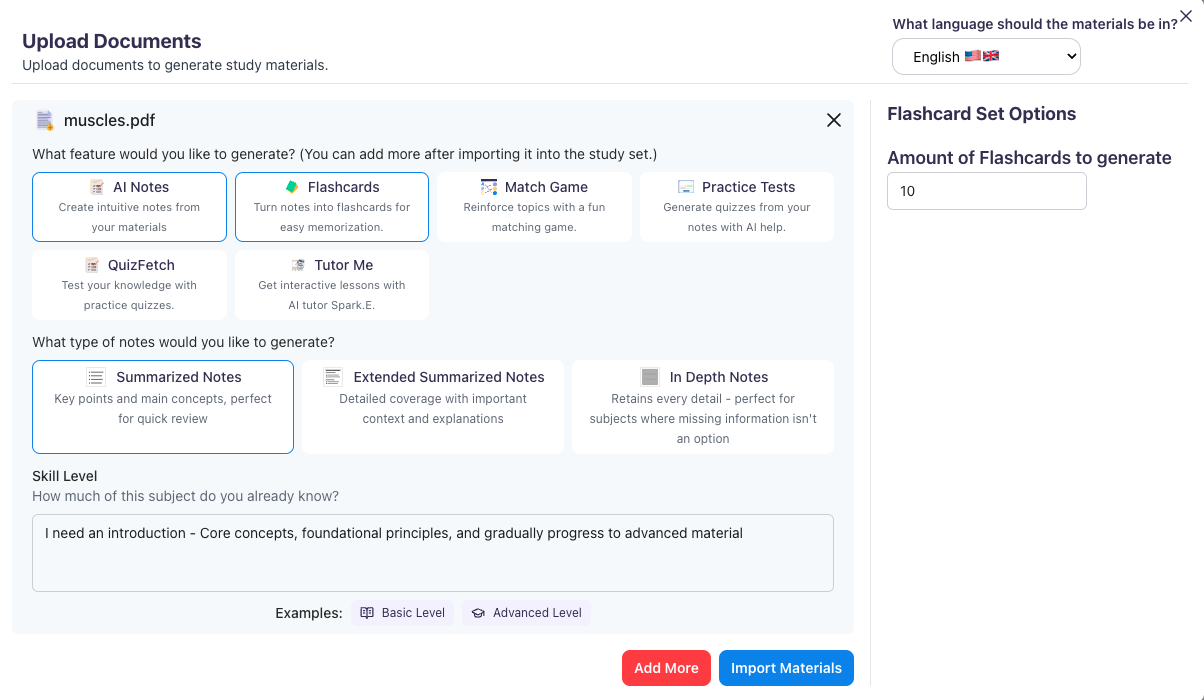
Once your document has been uploaded, choose the type of features you want to generate, you may choose one or more. In this case, click AI Notes and Flashcards. You may customize the type of Notes you want. You may also select the Skill Level and the number of Flashcards you want to generate.
3. Name and Customize Your Study Set
-
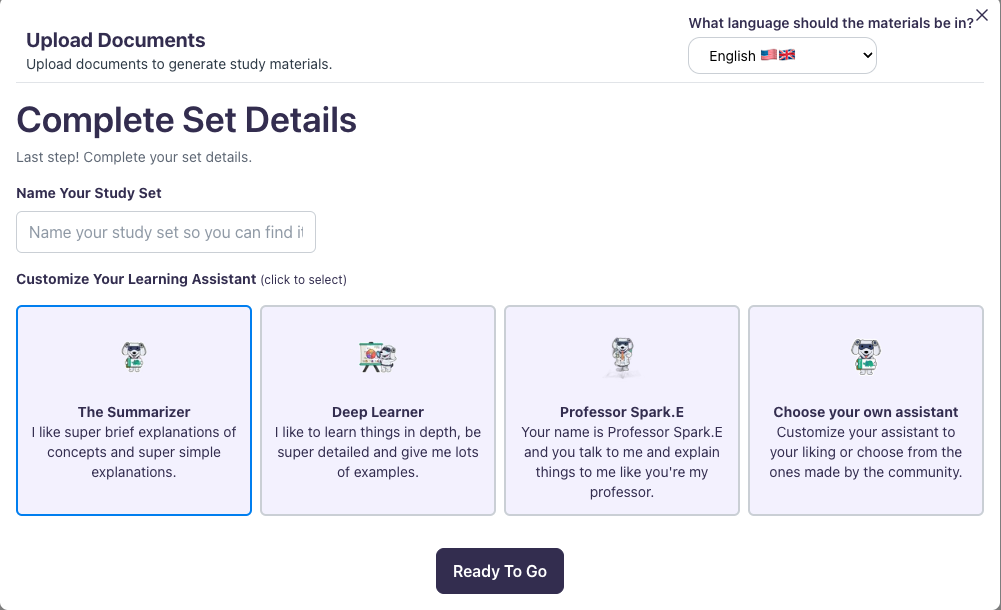
Name your Study Set and customize your own learning assistant.
4. Processing Materials
Wait for your materials to be uploaded.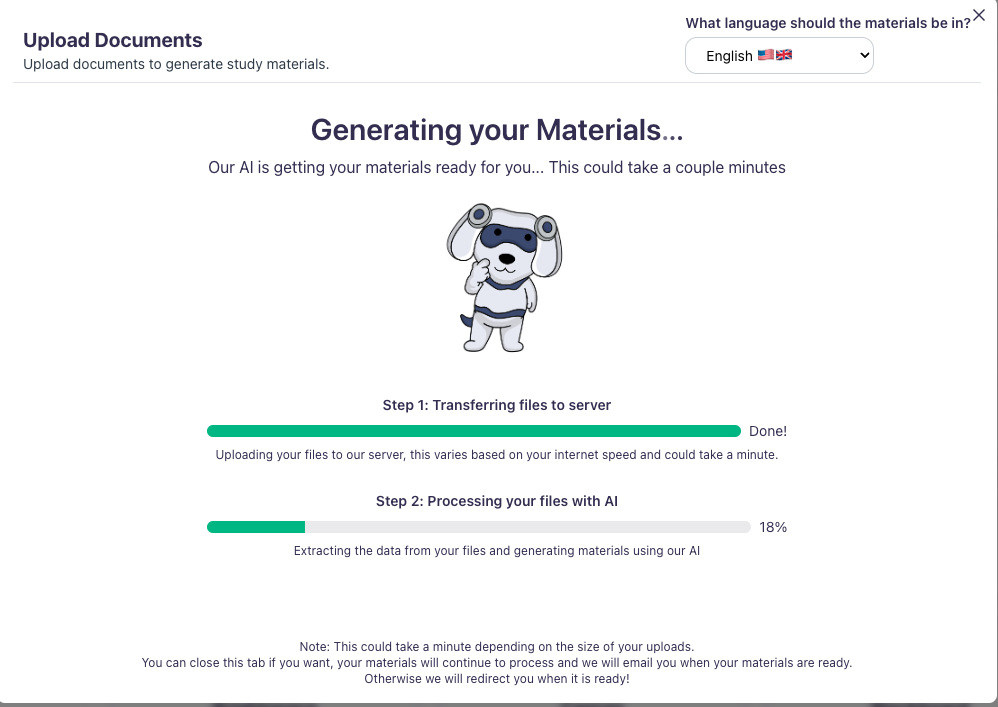
Using Your Study Set
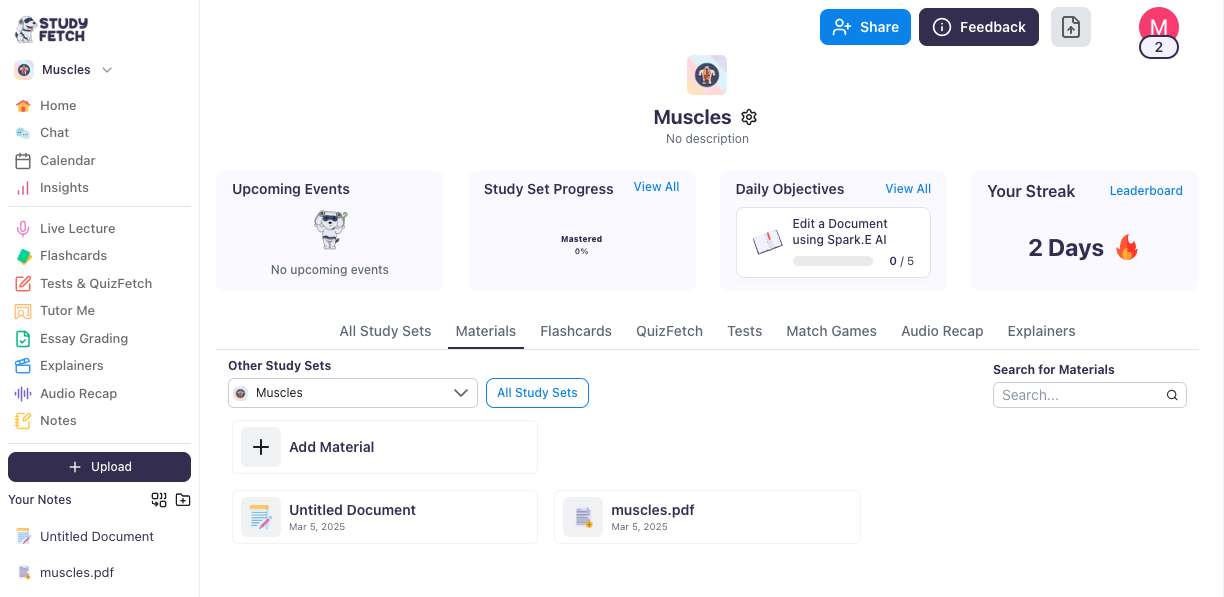
1. Viewing Generated Materials
-
You will see your materials imported here.
2. Working with Generated Notes
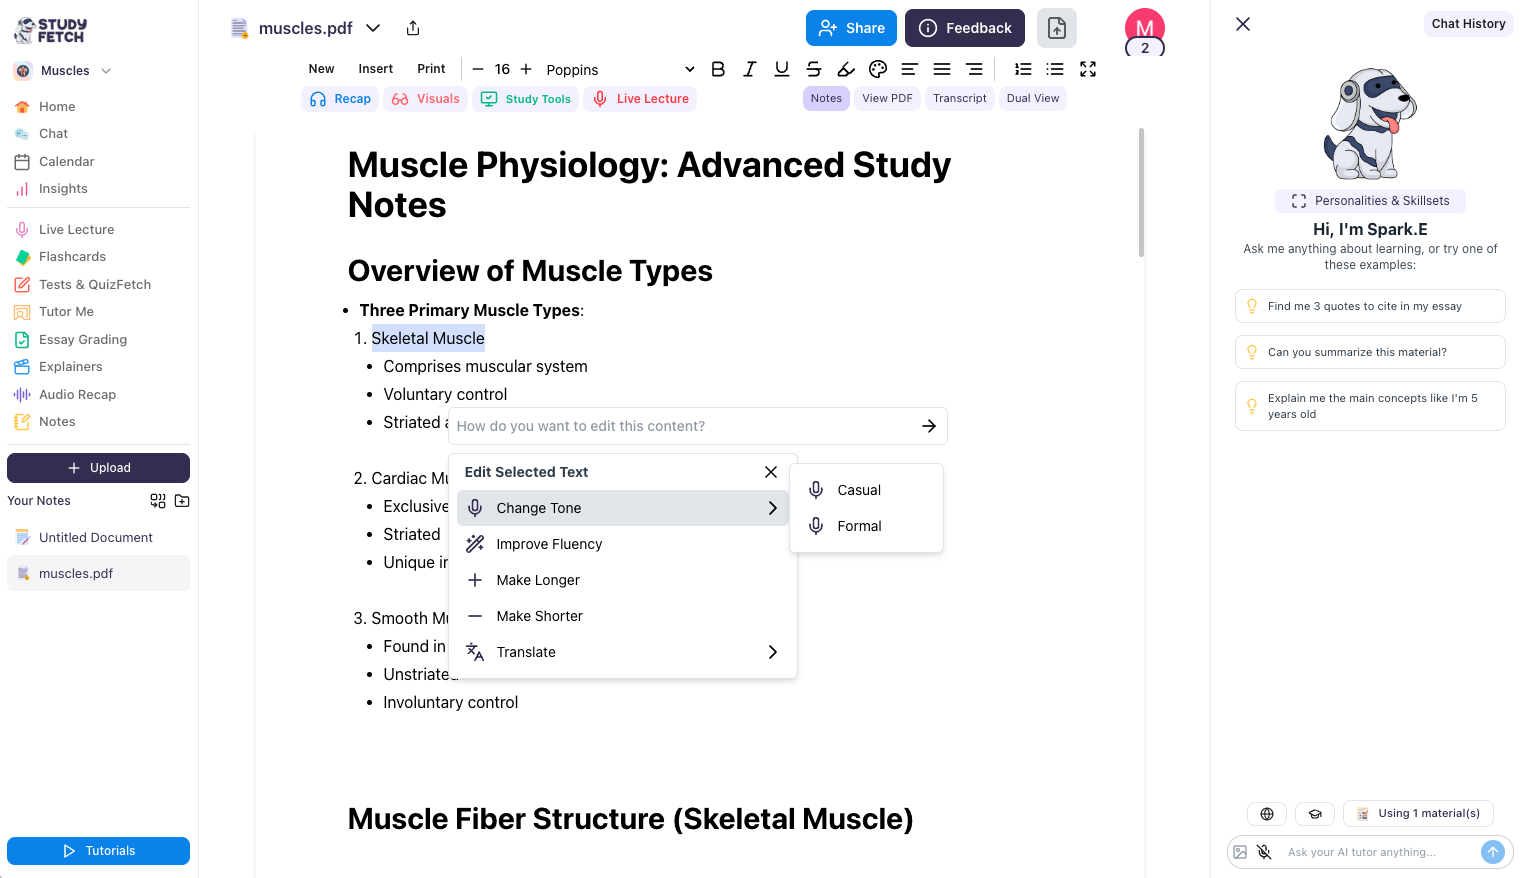
-
Click on the material you imported. You will see the notes generated for you, which is editable.
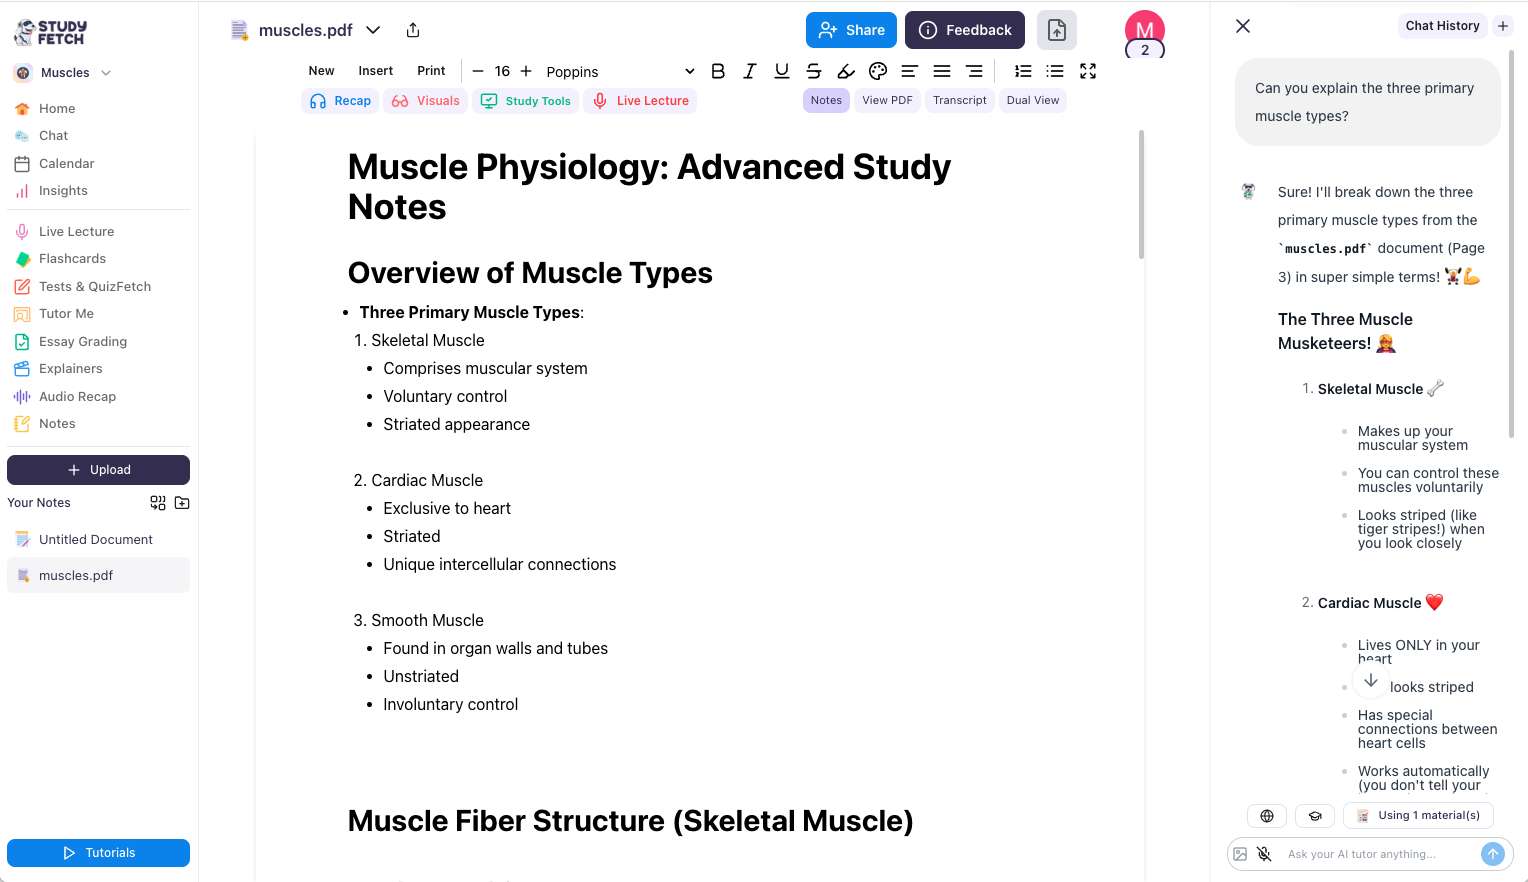
3. Using Spark.E AI Assistant
-
On the righthand side, you may ask the Spark.E chatbot questions about your material.
Generating Additional Study Tools
1. Accessing Study Tools
-
To generate other features, go to the Study Tools button.

2. Creating Flashcards
-
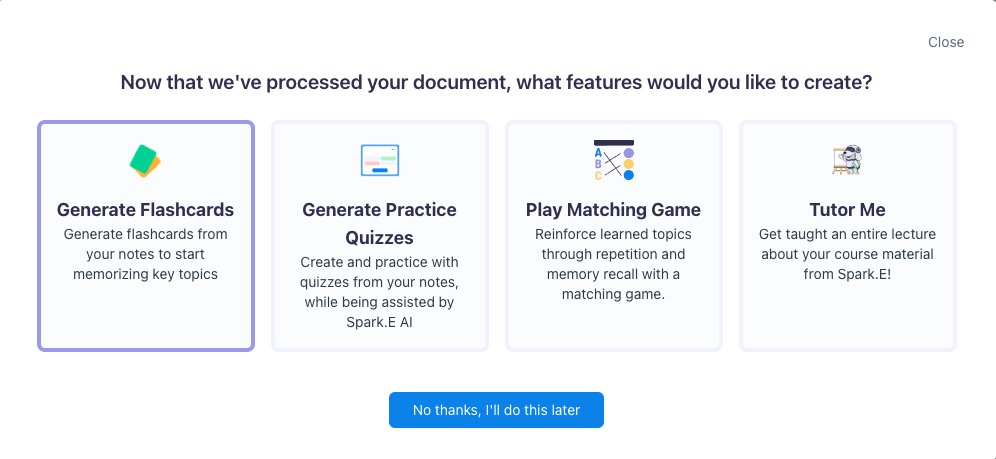
In this case, click on Generate Flashcards.
-
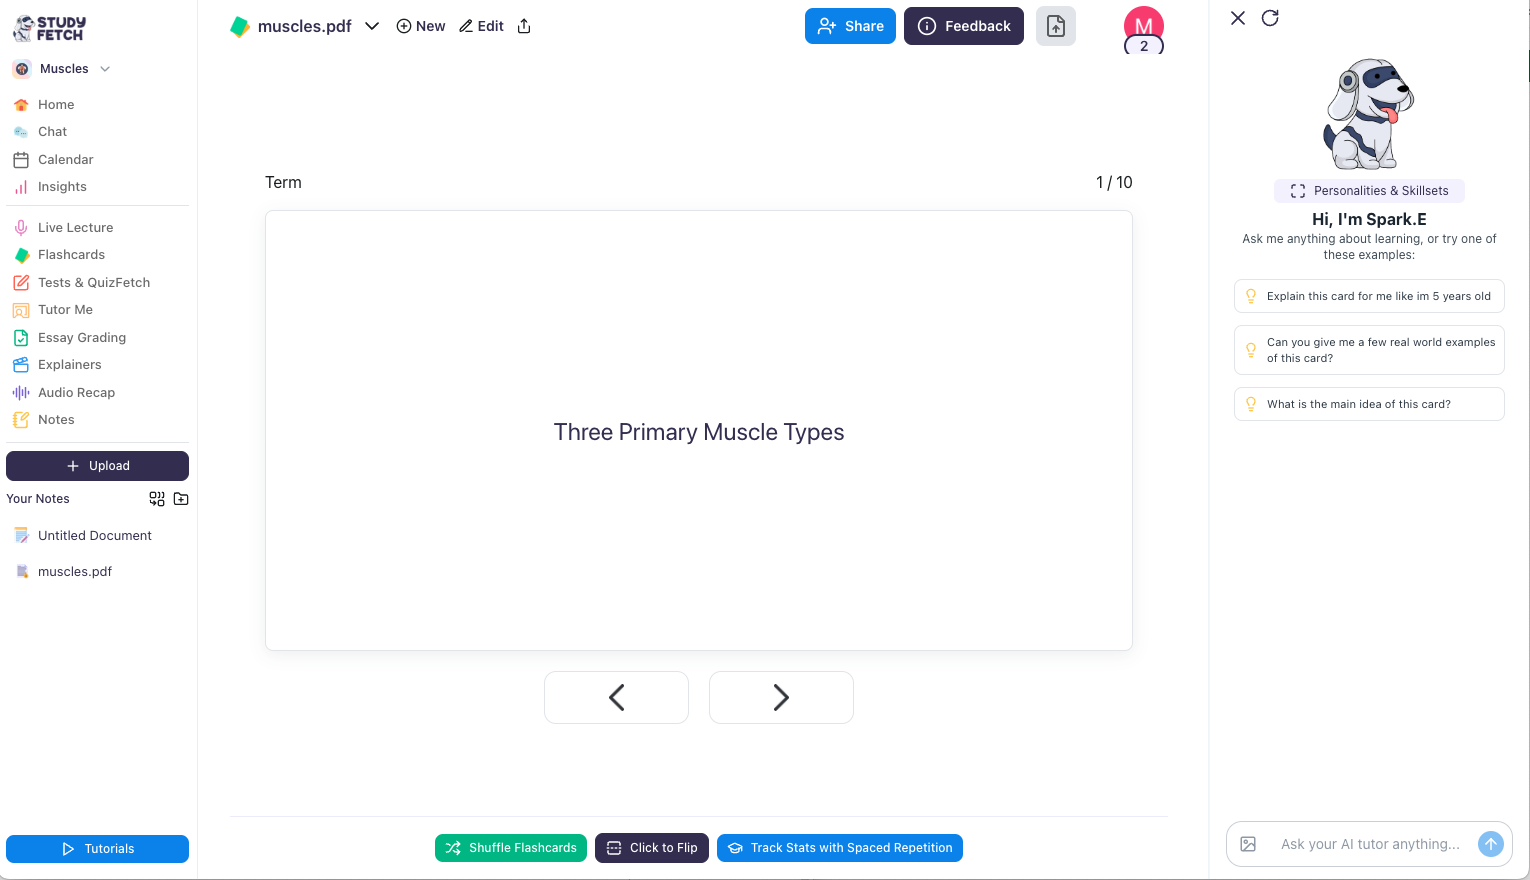
Then, your Flashcards will be automatically generated.
Managing Your Study Sets
-
To view your Study Sets, go to the upper left corner > click on the Select a Study Set dropdown > then, choose View All Study Sets
Next Steps
Now that you’ve created a Study Set, you can:- Generate Flashcards to memorize key concepts
- Create Practice Tests to assess your knowledge
- Use Audio Recap to review material on the go
- Organize your Study Sets into folders