

How to Organize Study Sets Into Folders
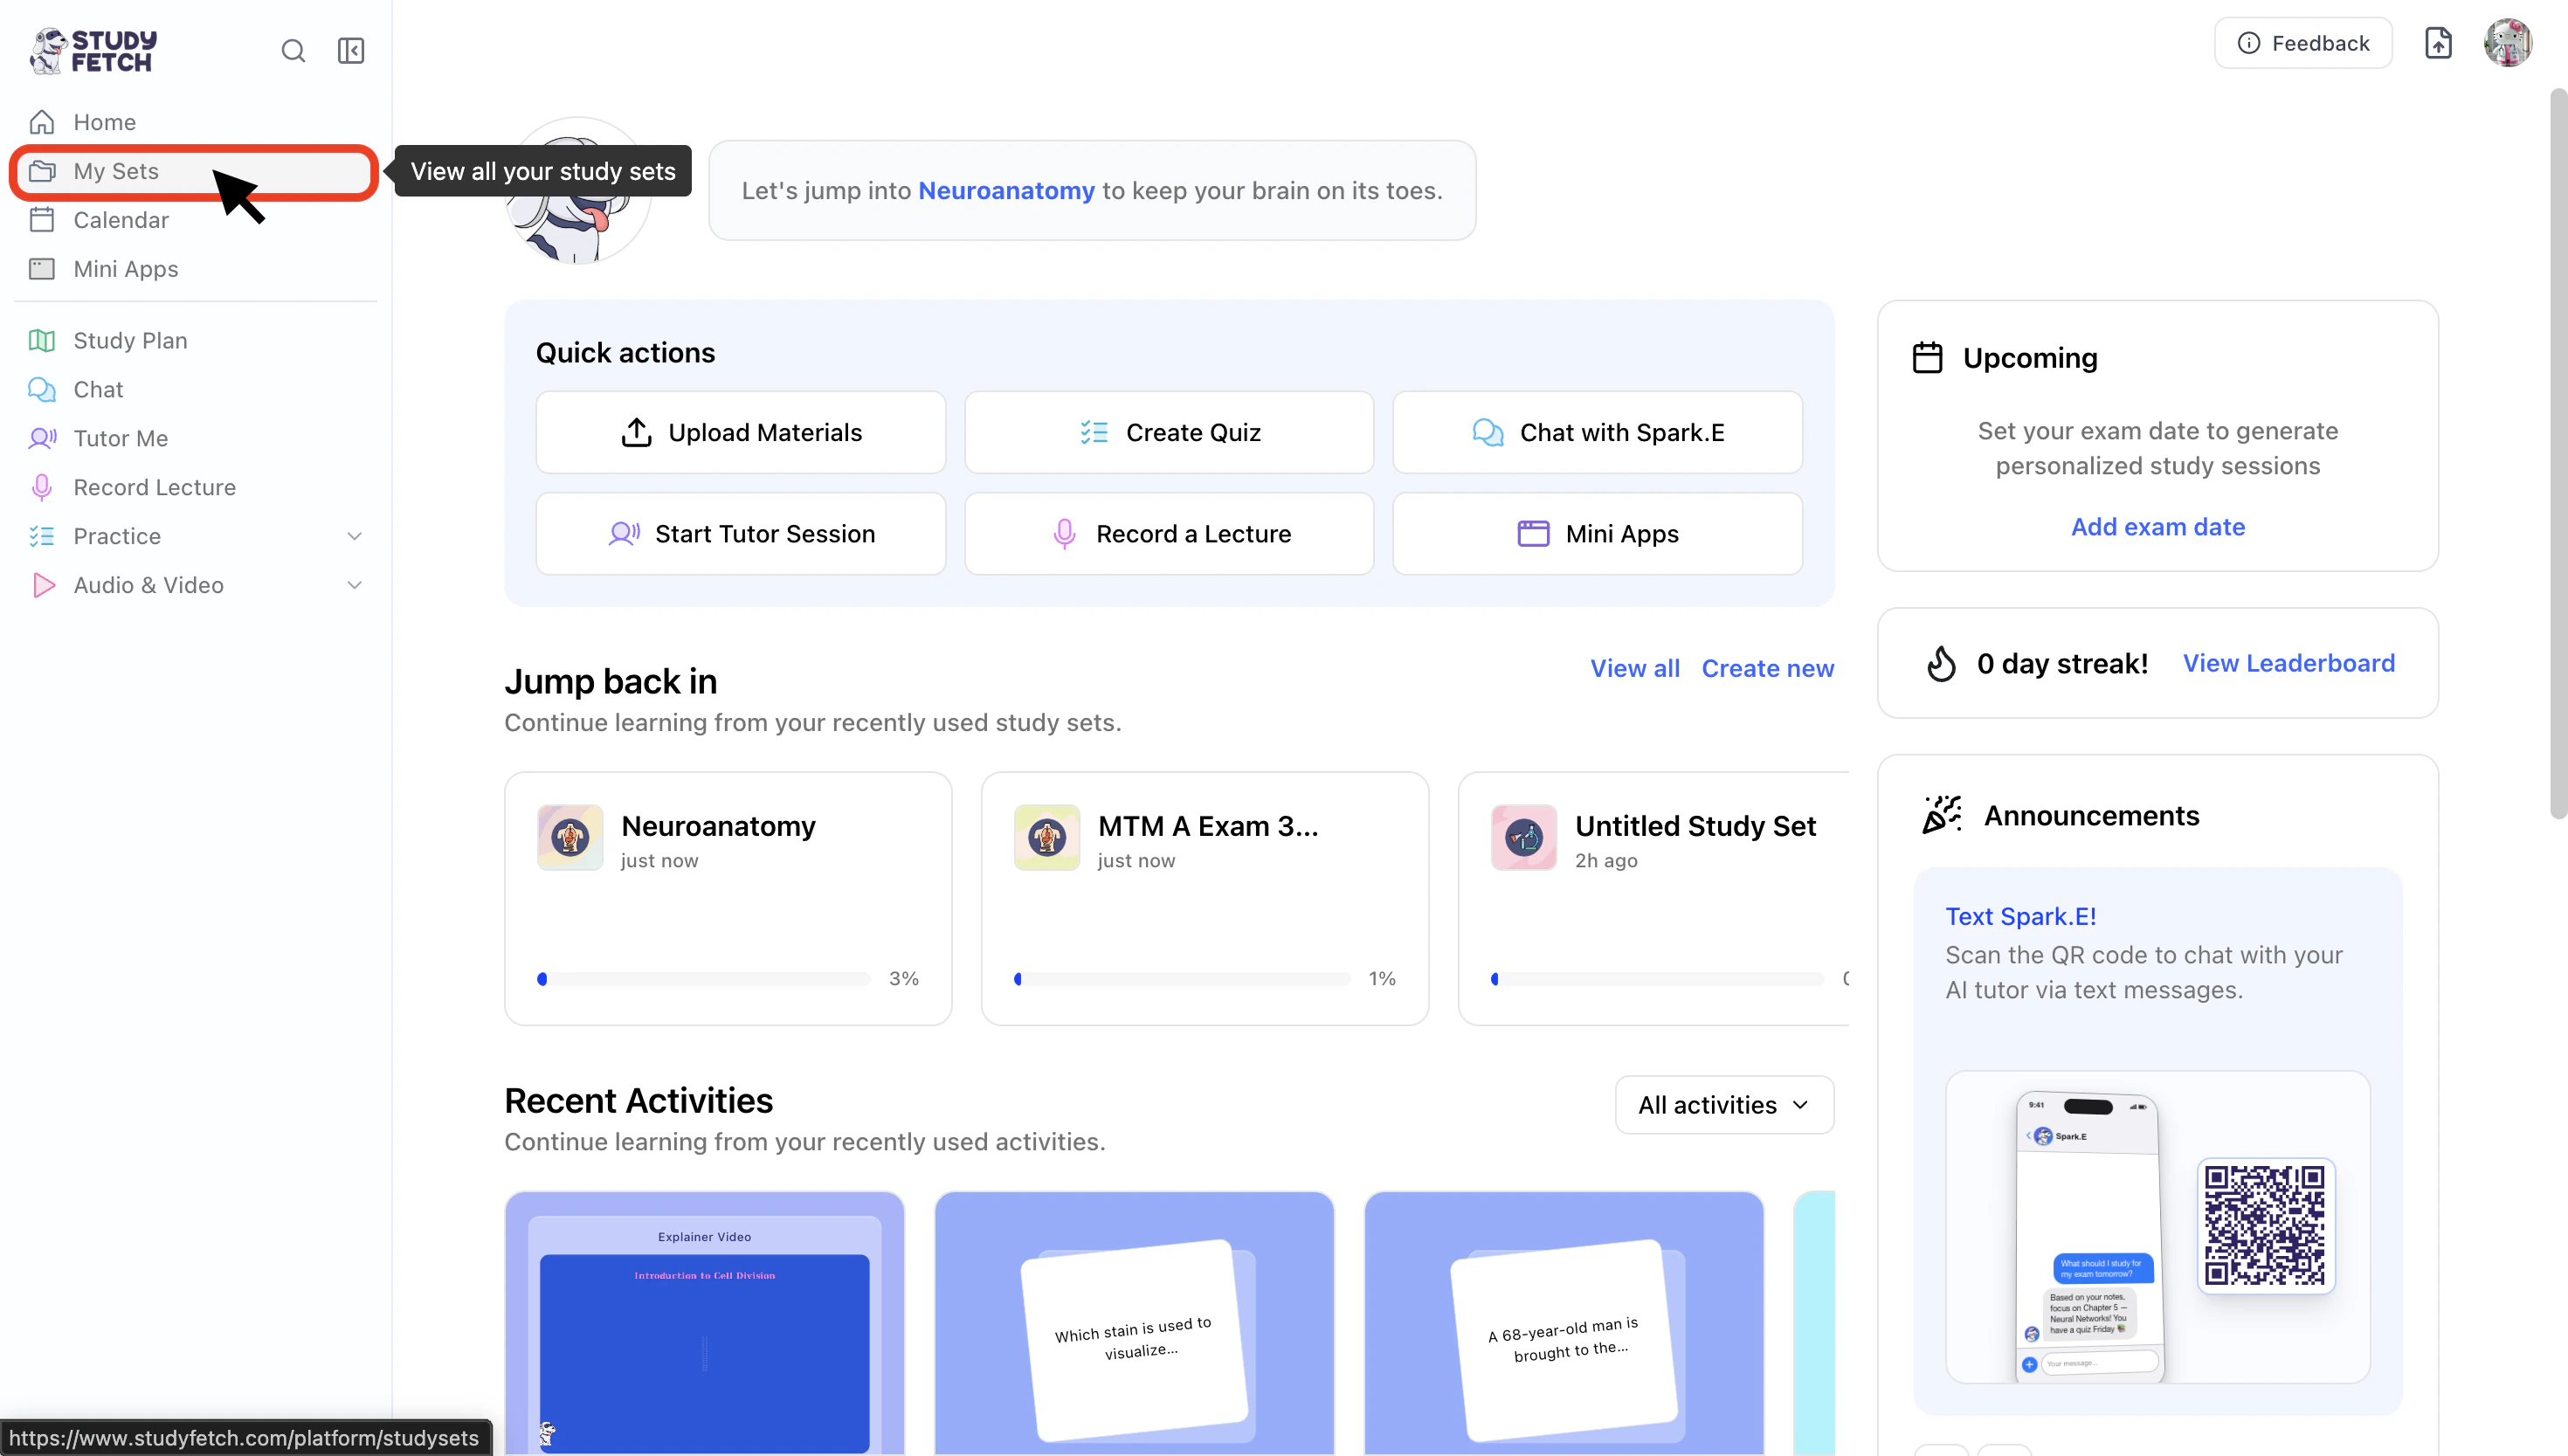
- On the left-hand side of your Dashboard click My Sets.
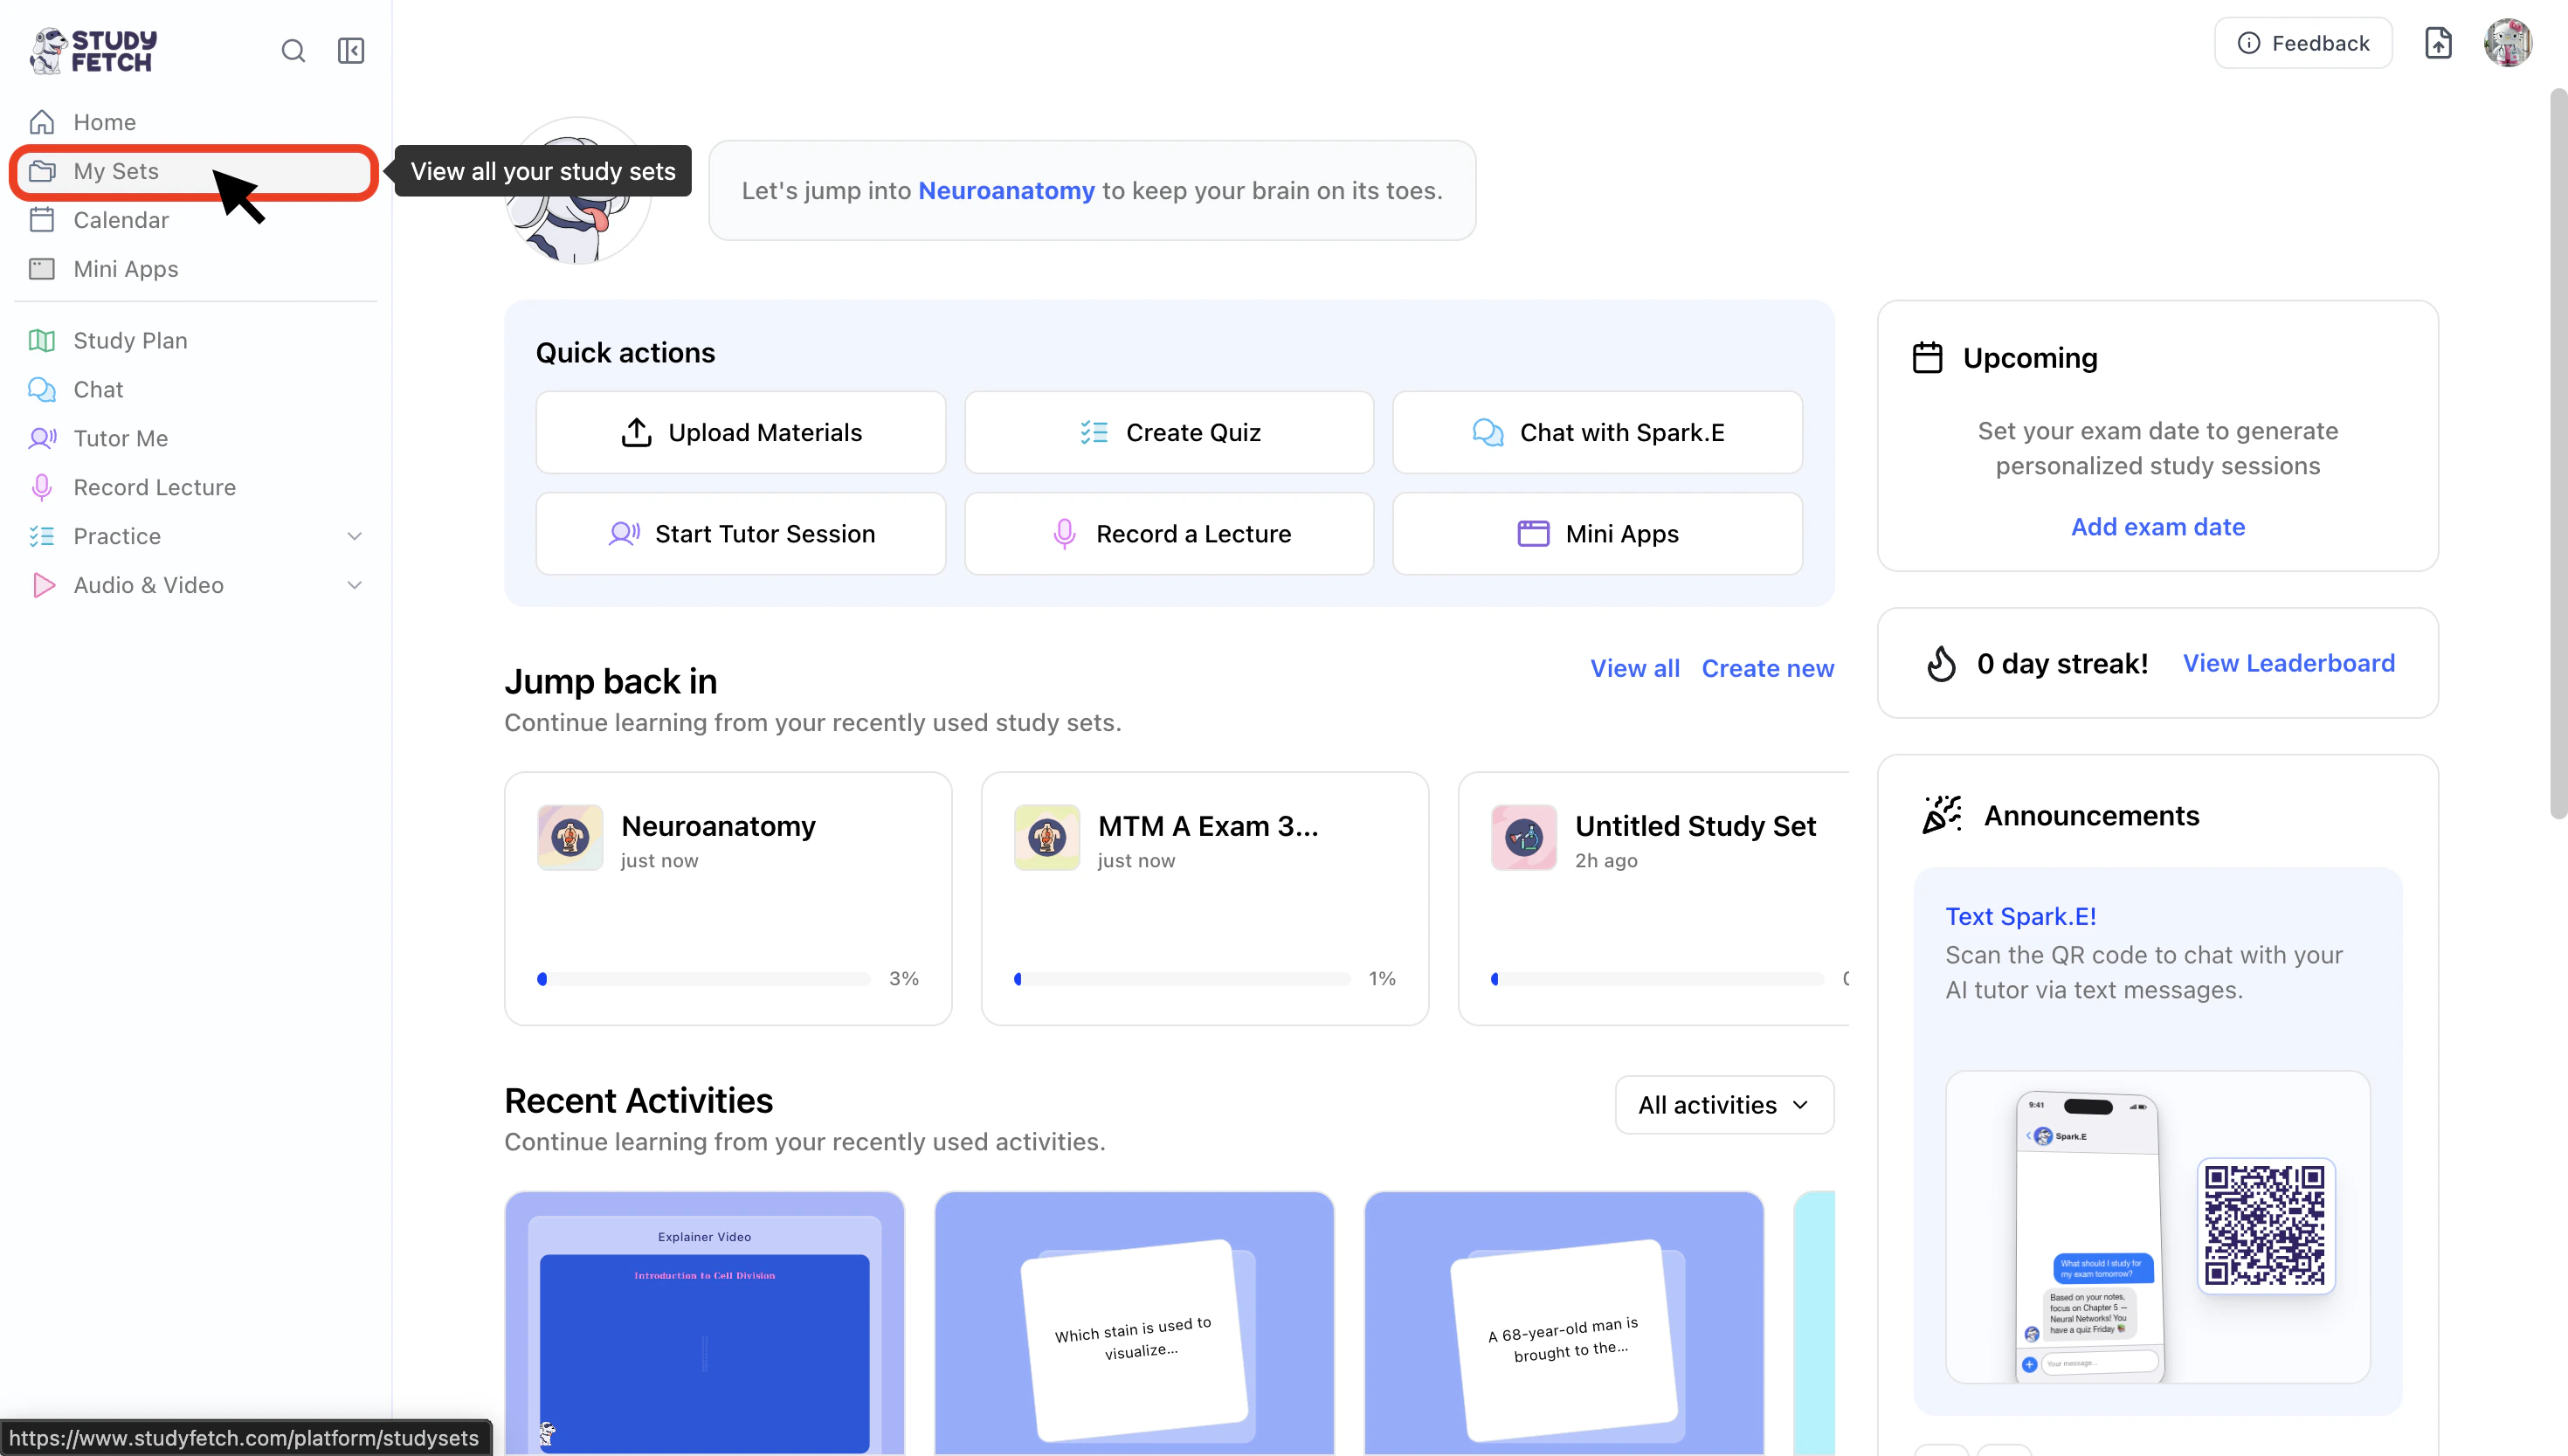
- To create a folder, select Create Folder from the top left.
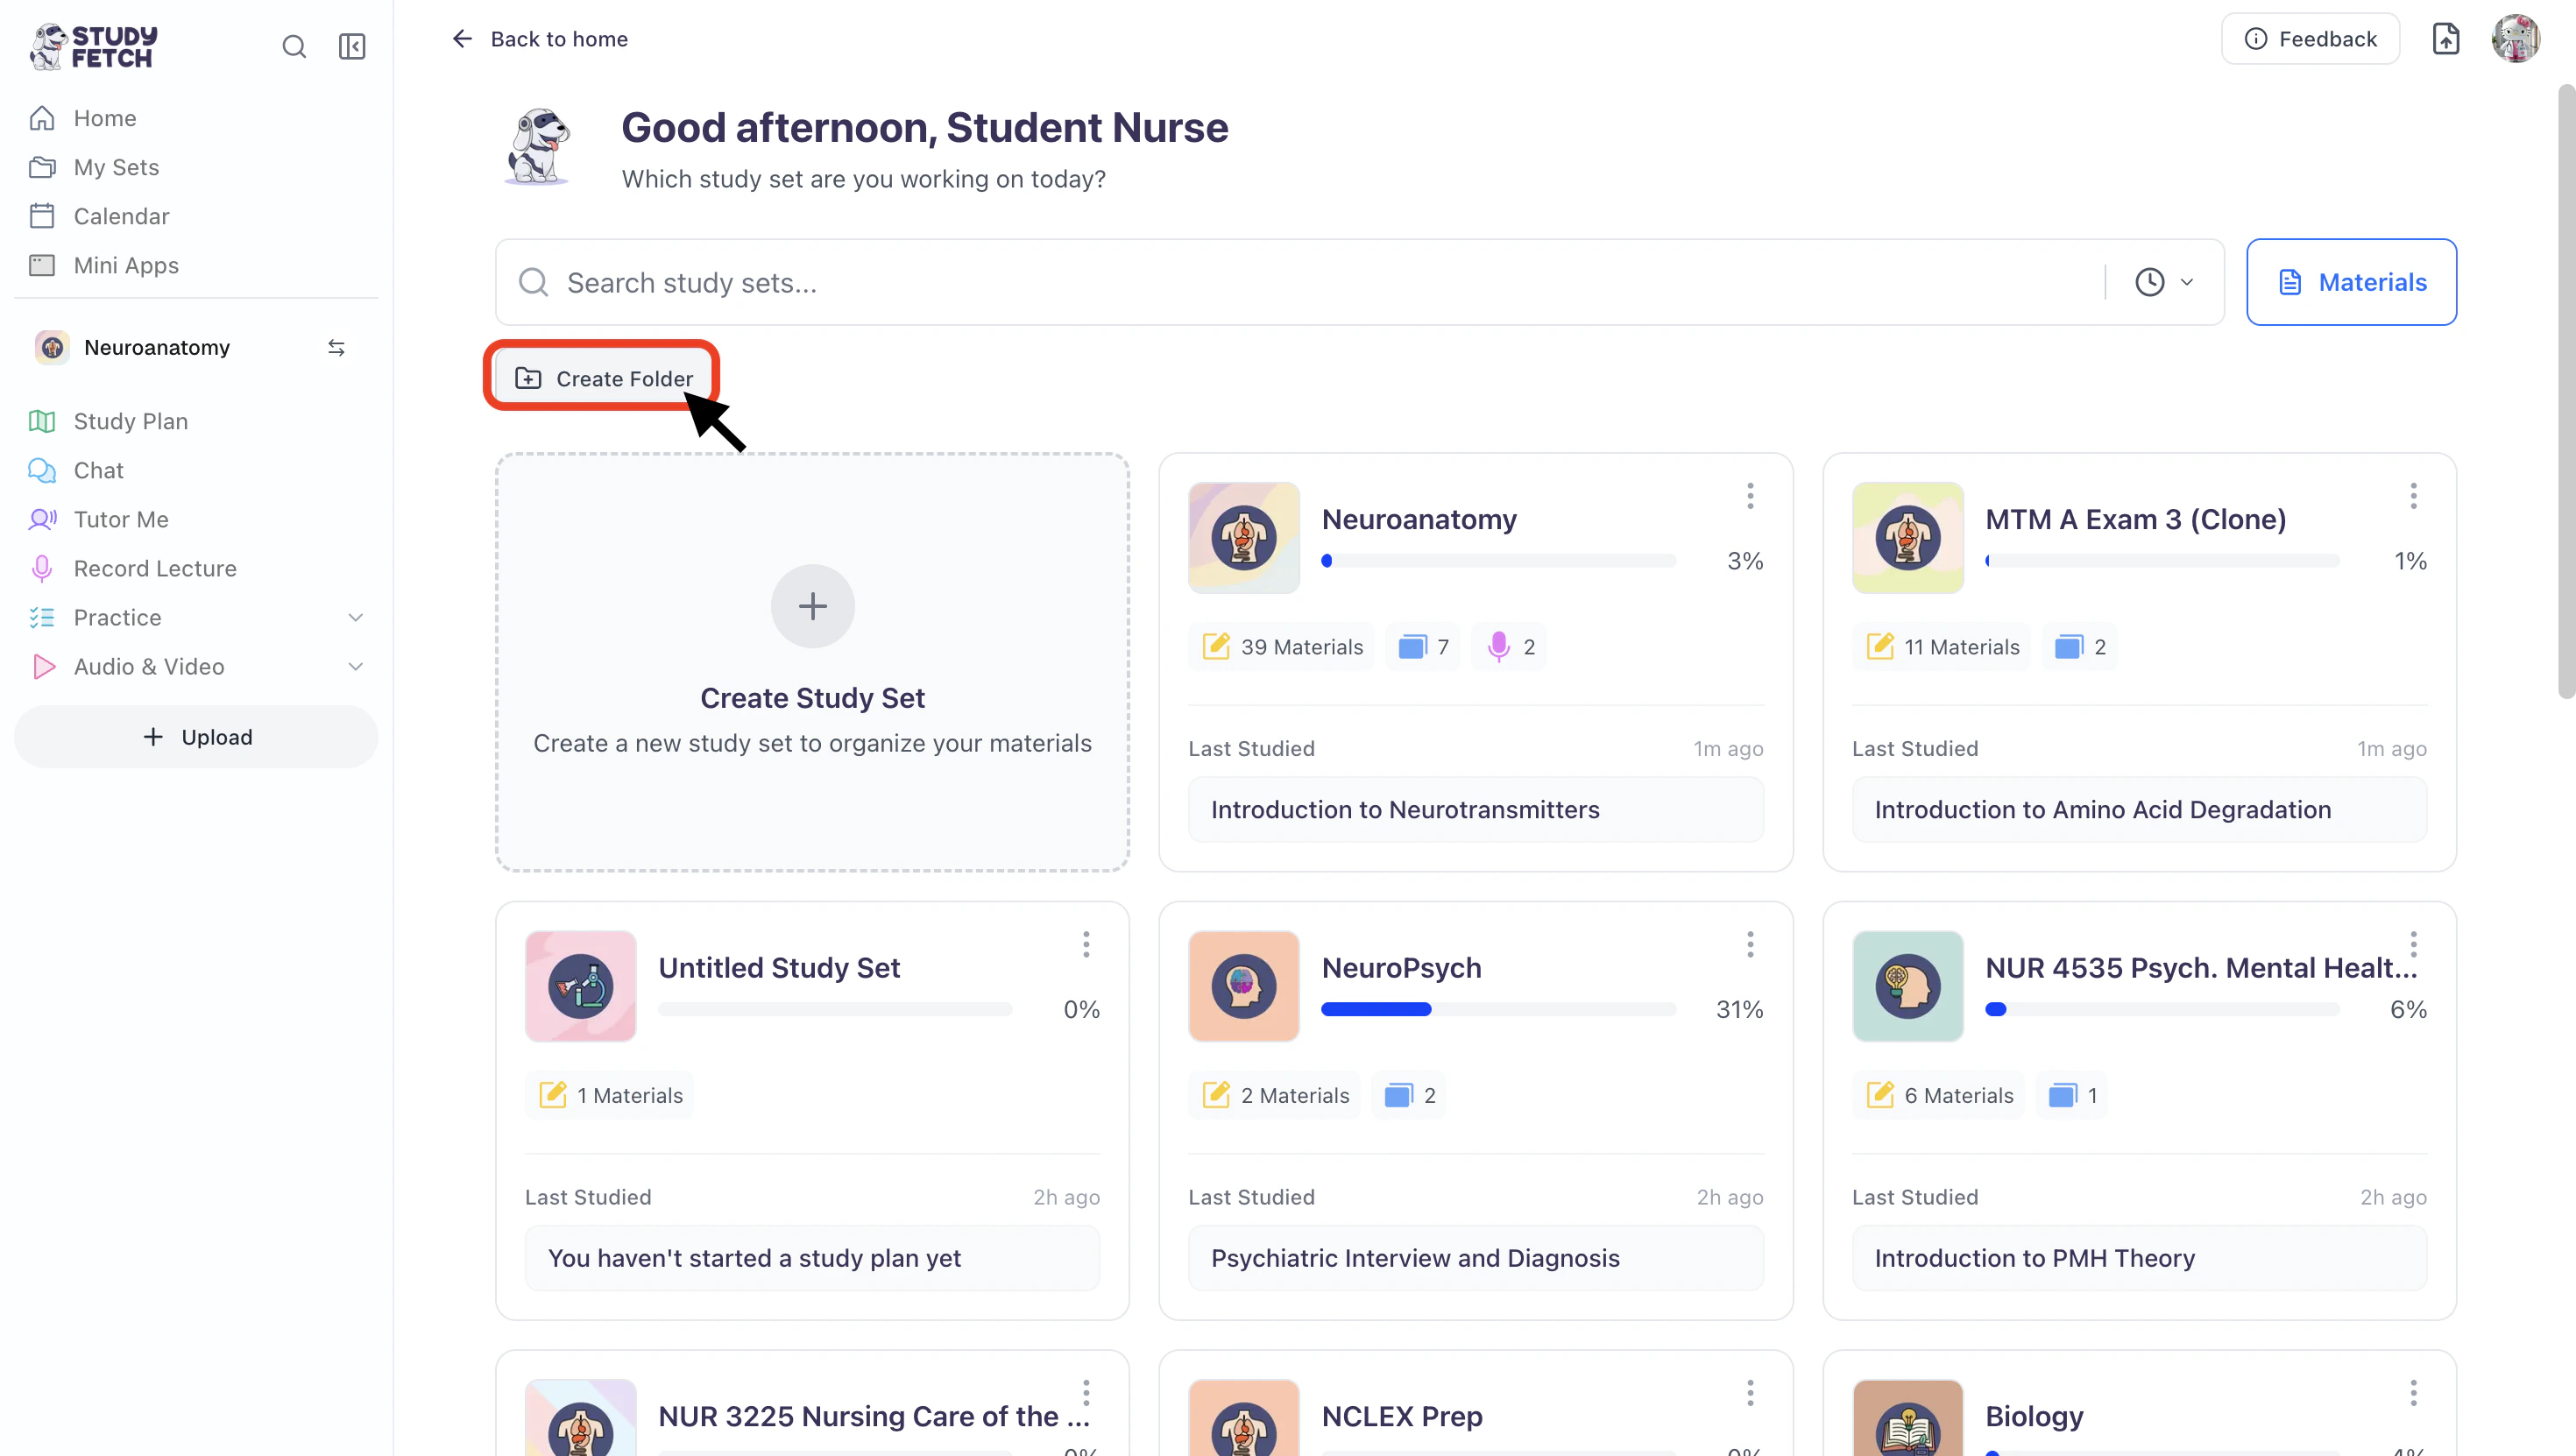
- Start by entering a name for the folder in the Name field.
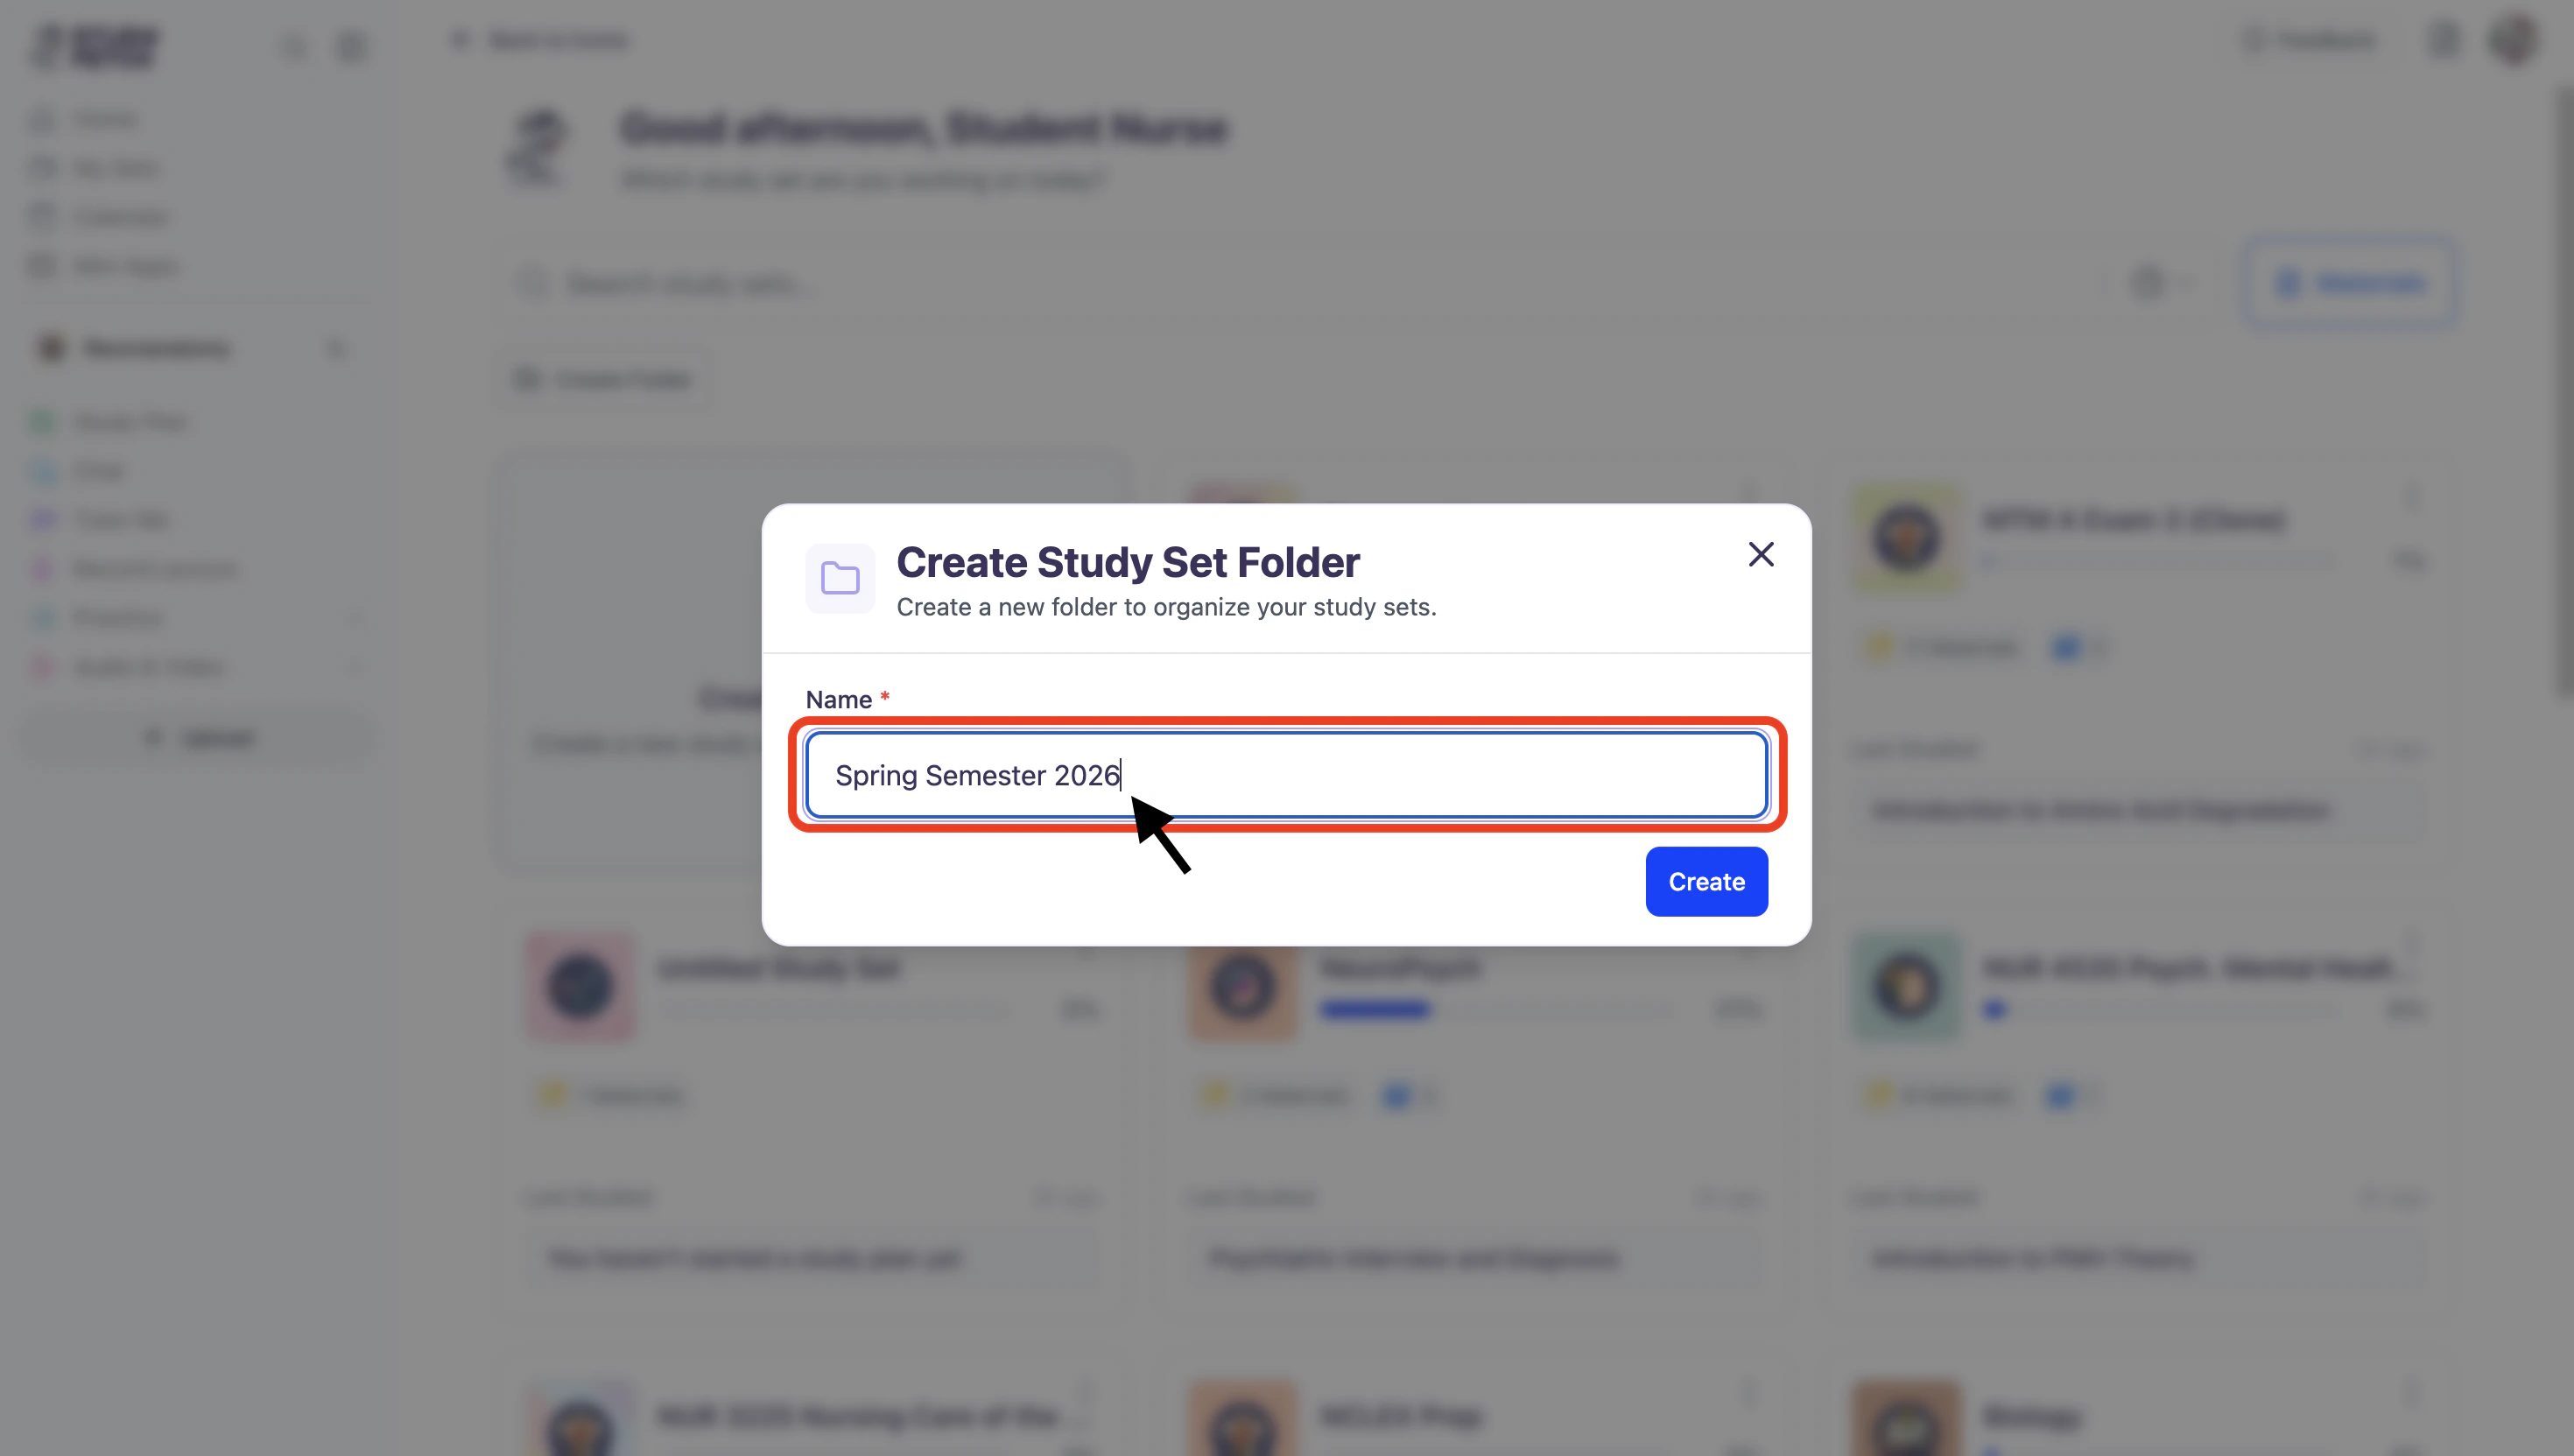
- Then click Create and your newly created folder will now be visible on your Study Set page.
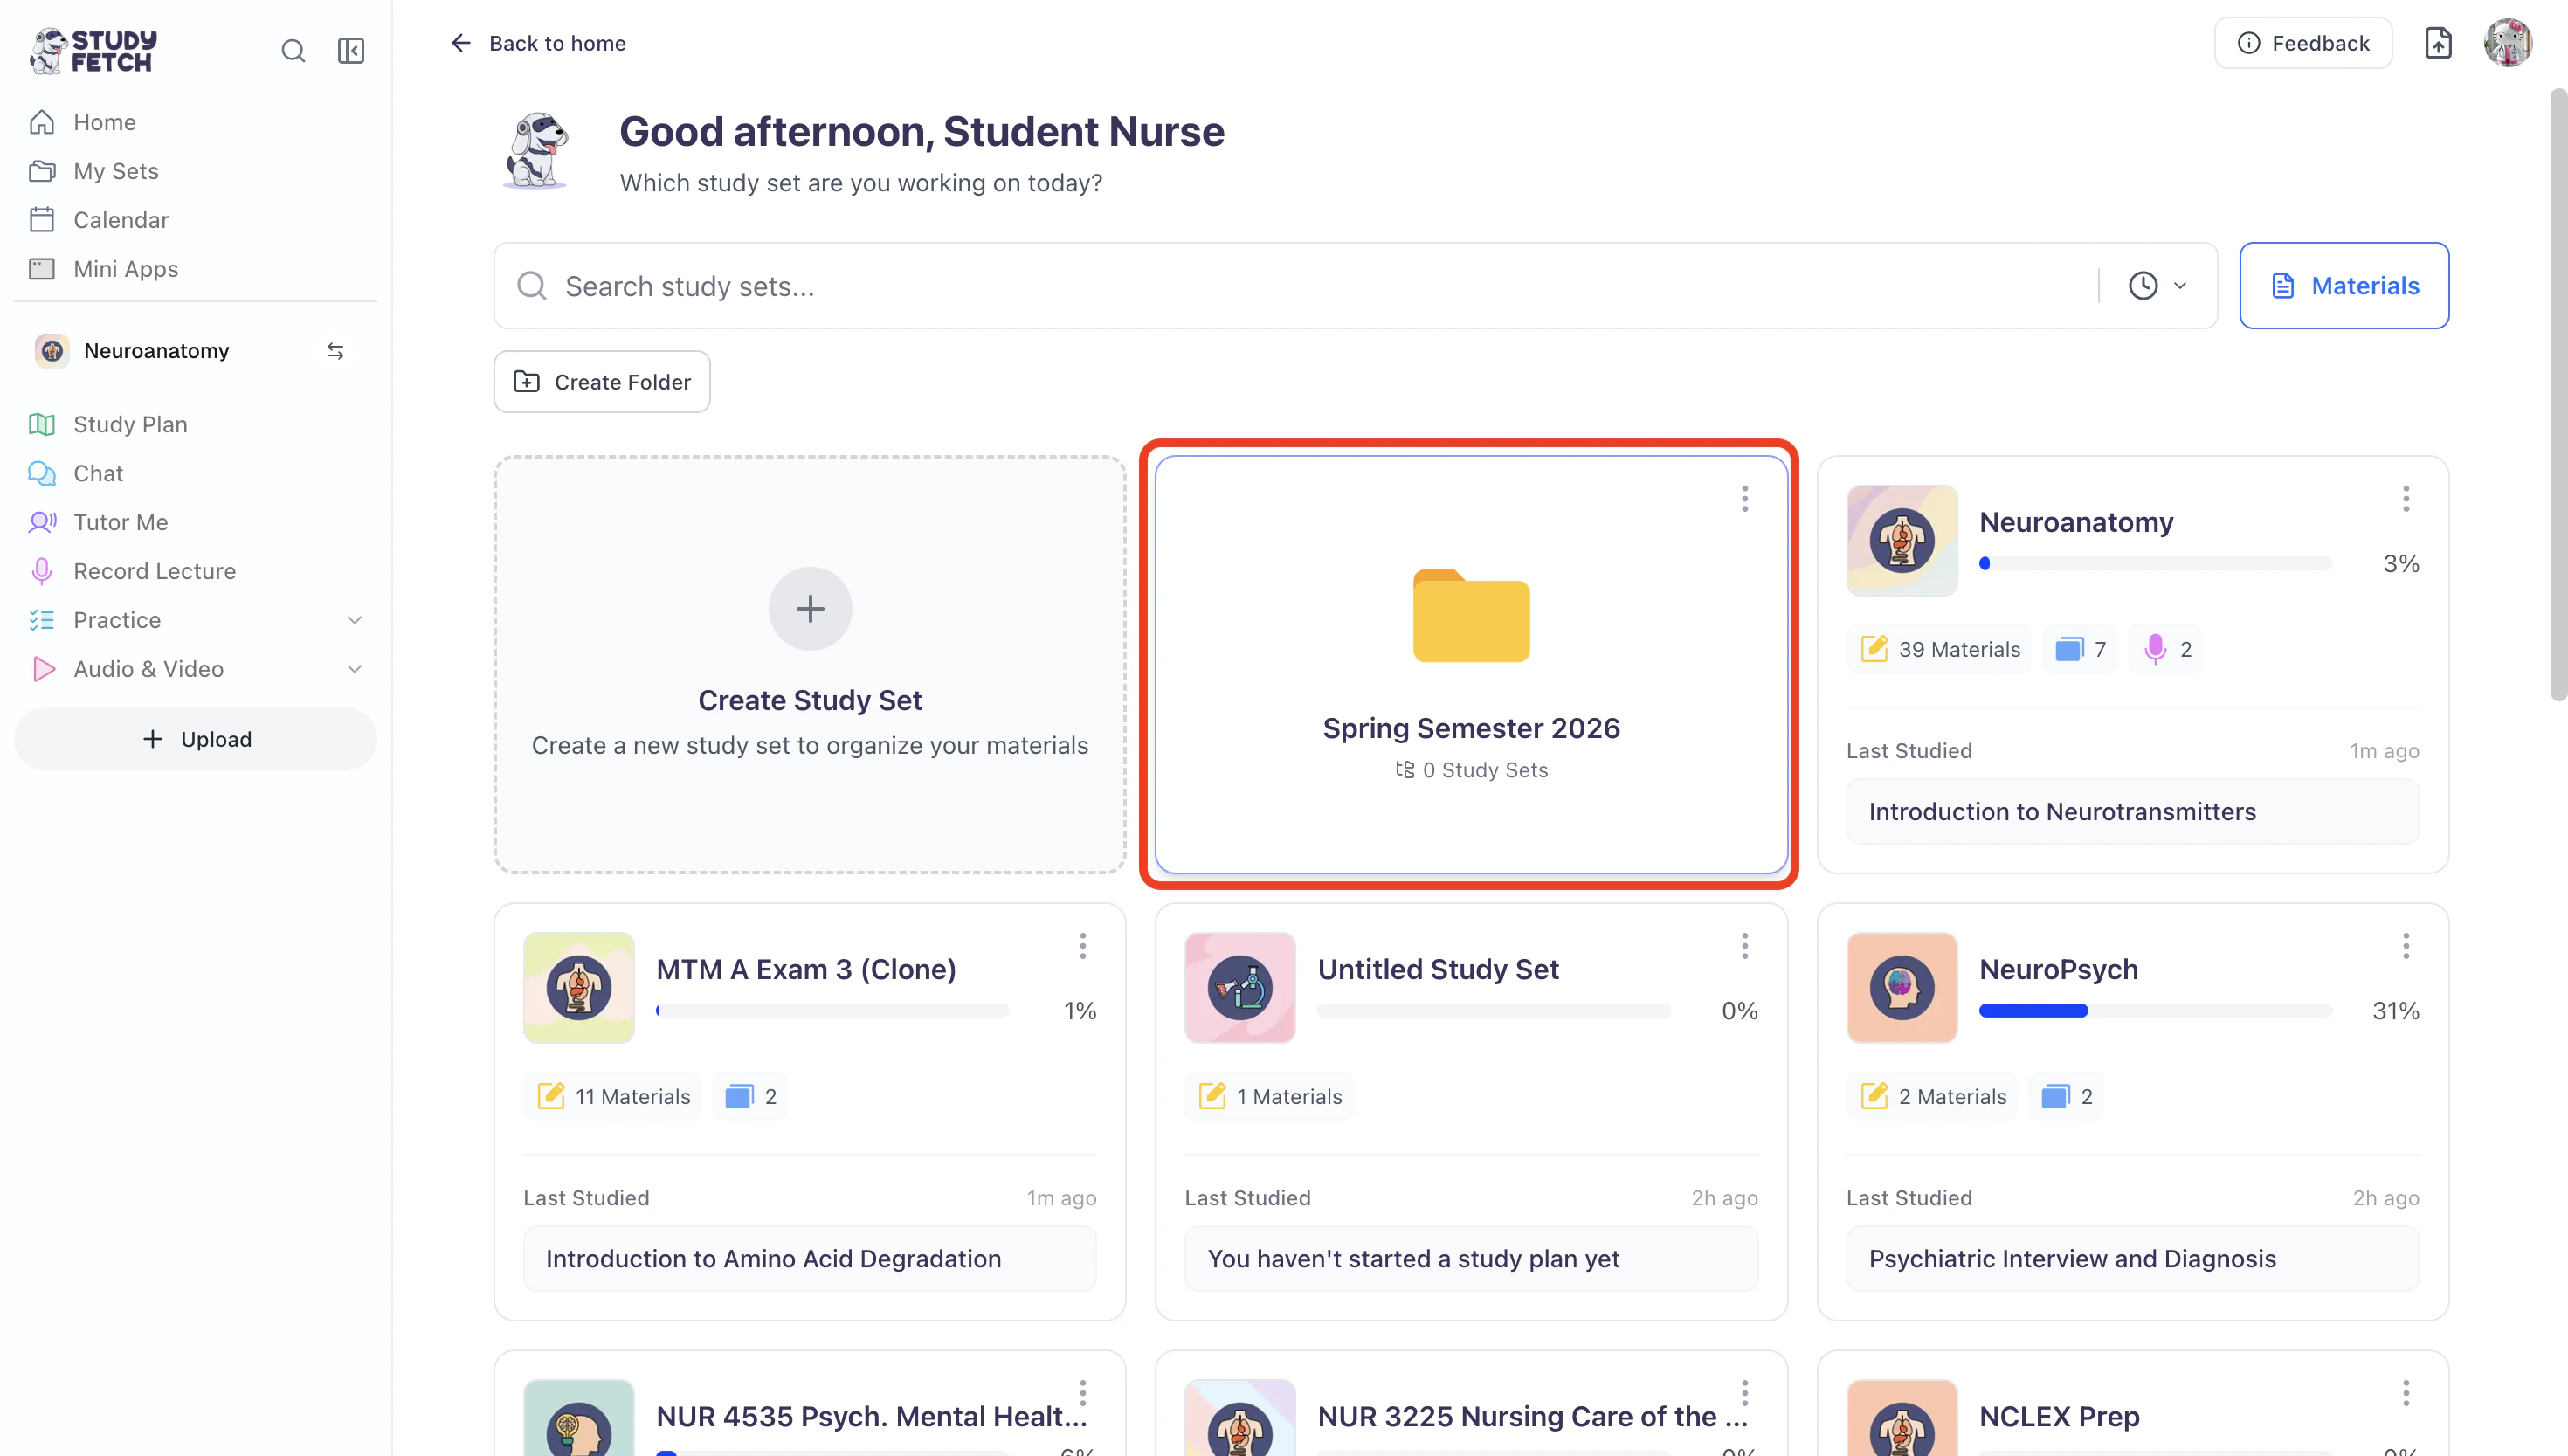
- To organize your Study Sets into specific folders, simply drag and drop the desired Study Set to its corresponding folder.
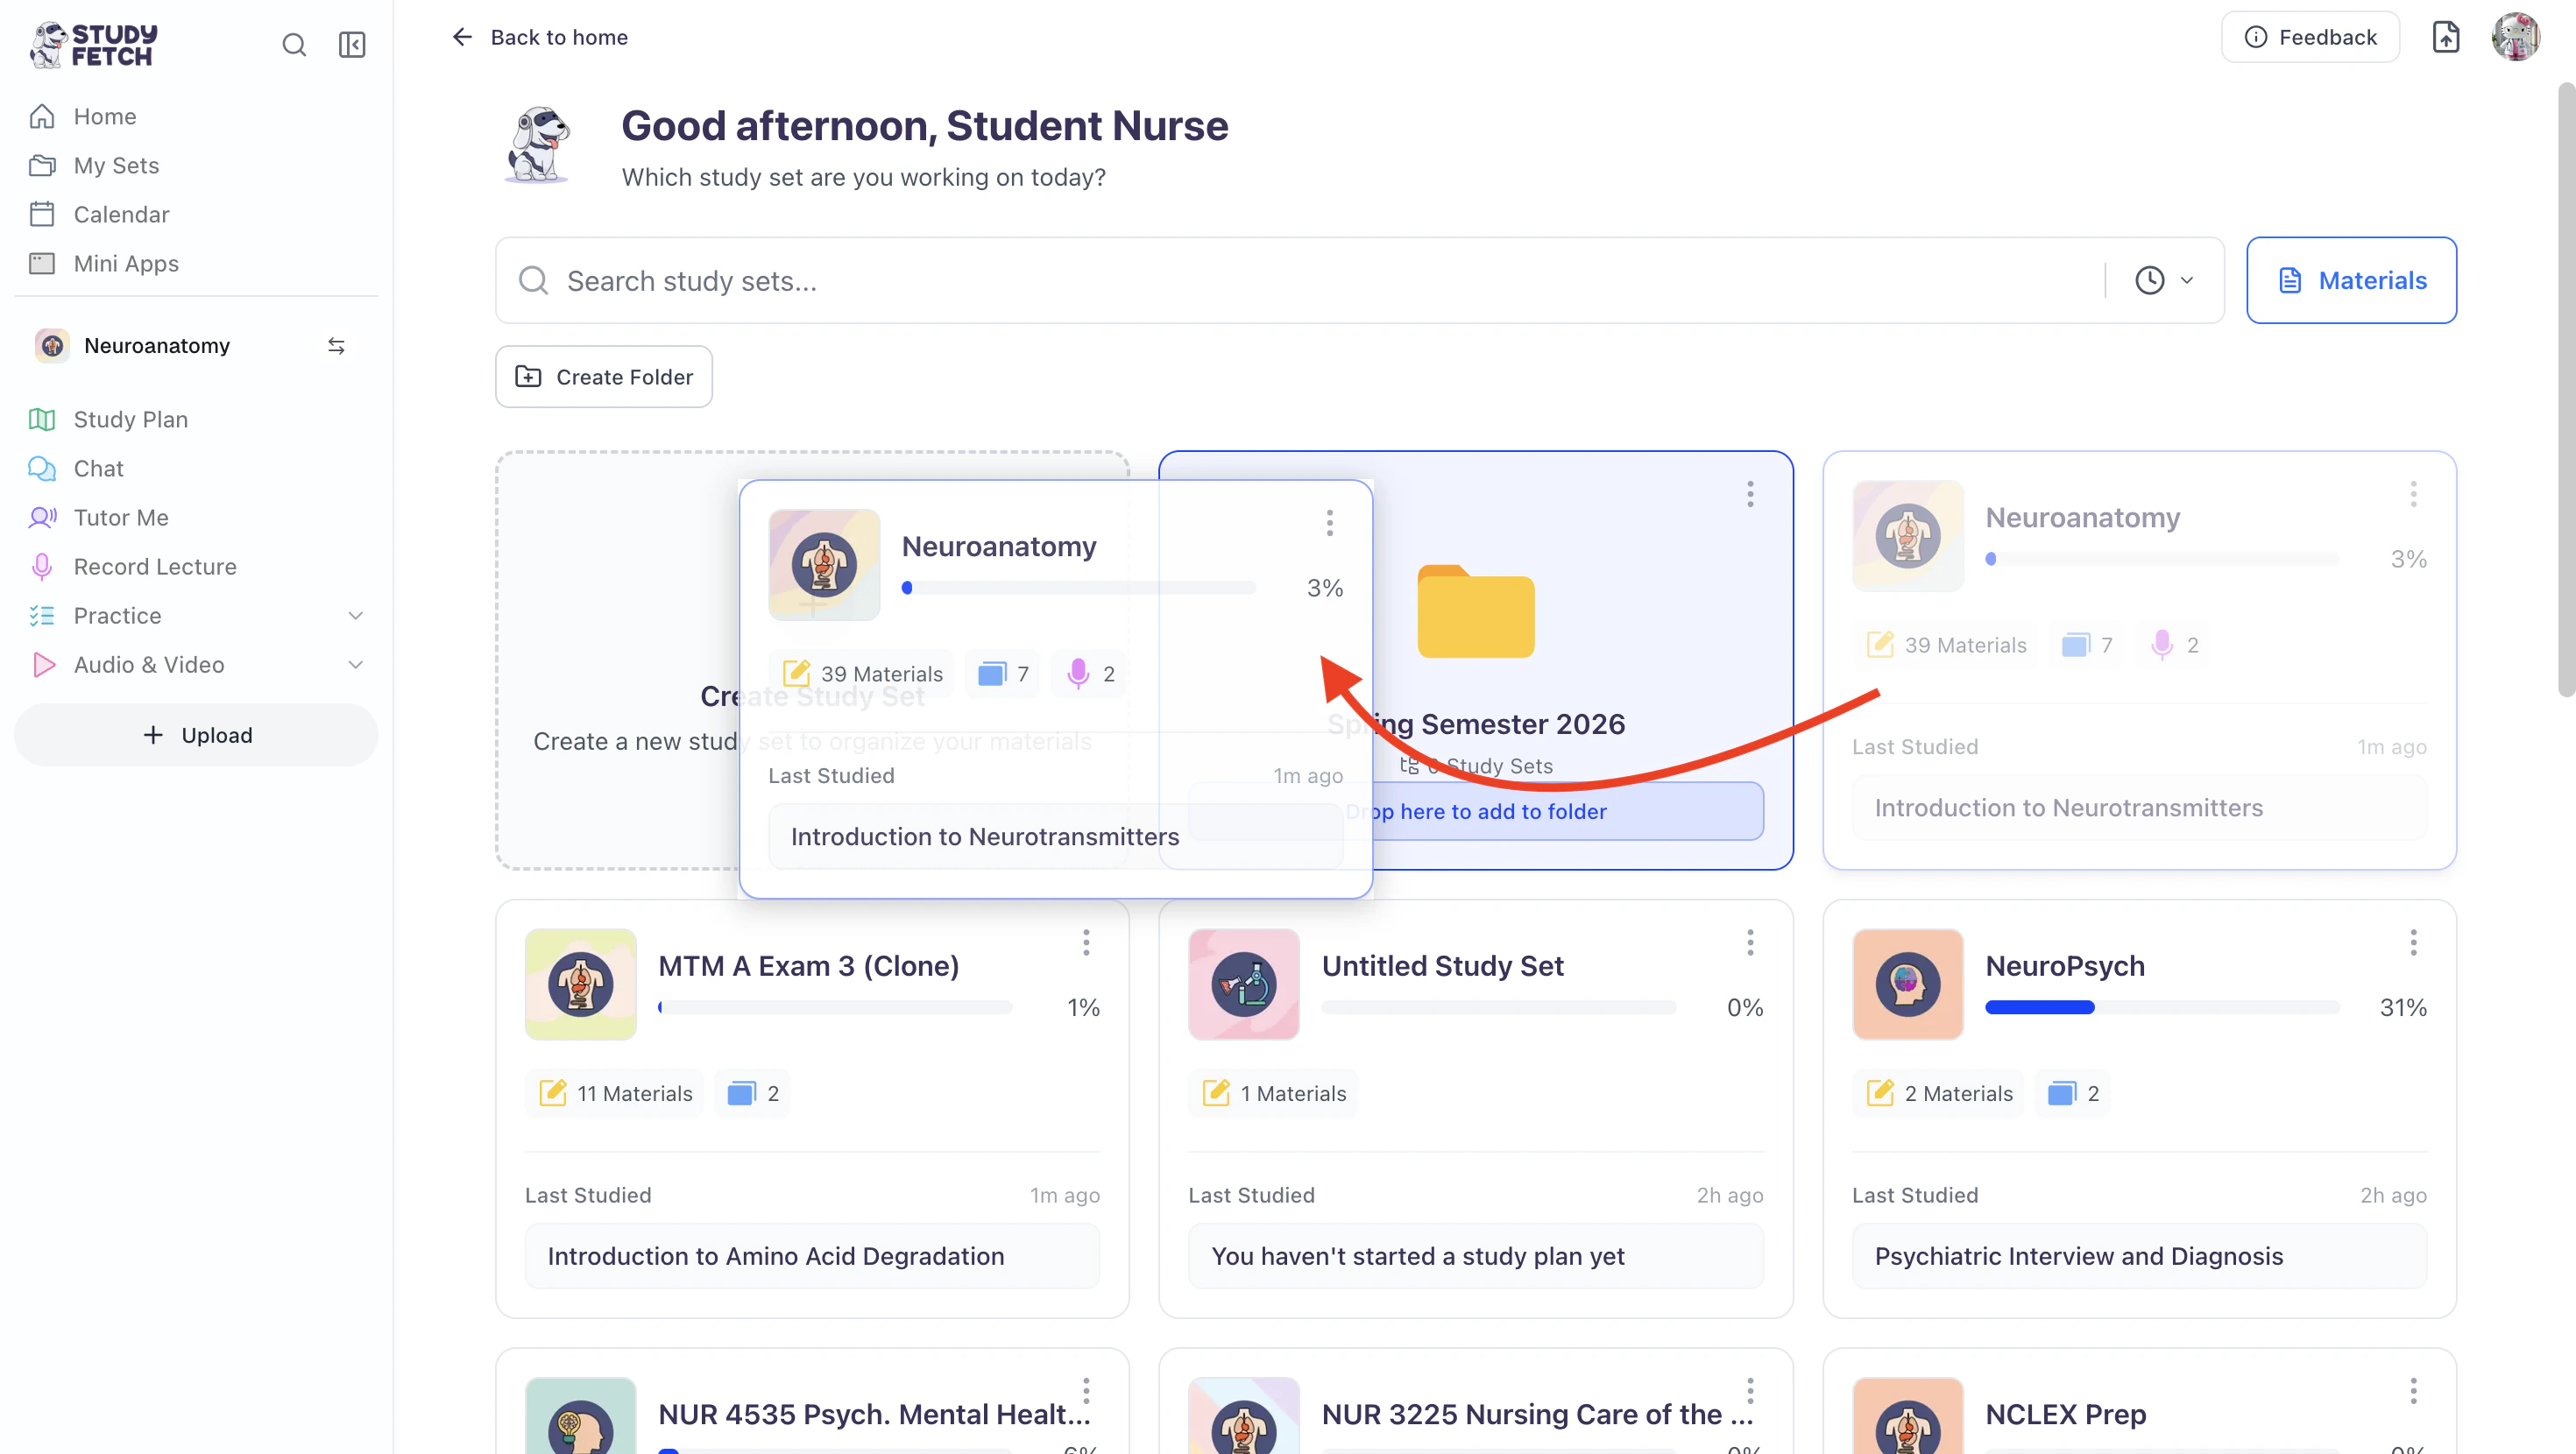
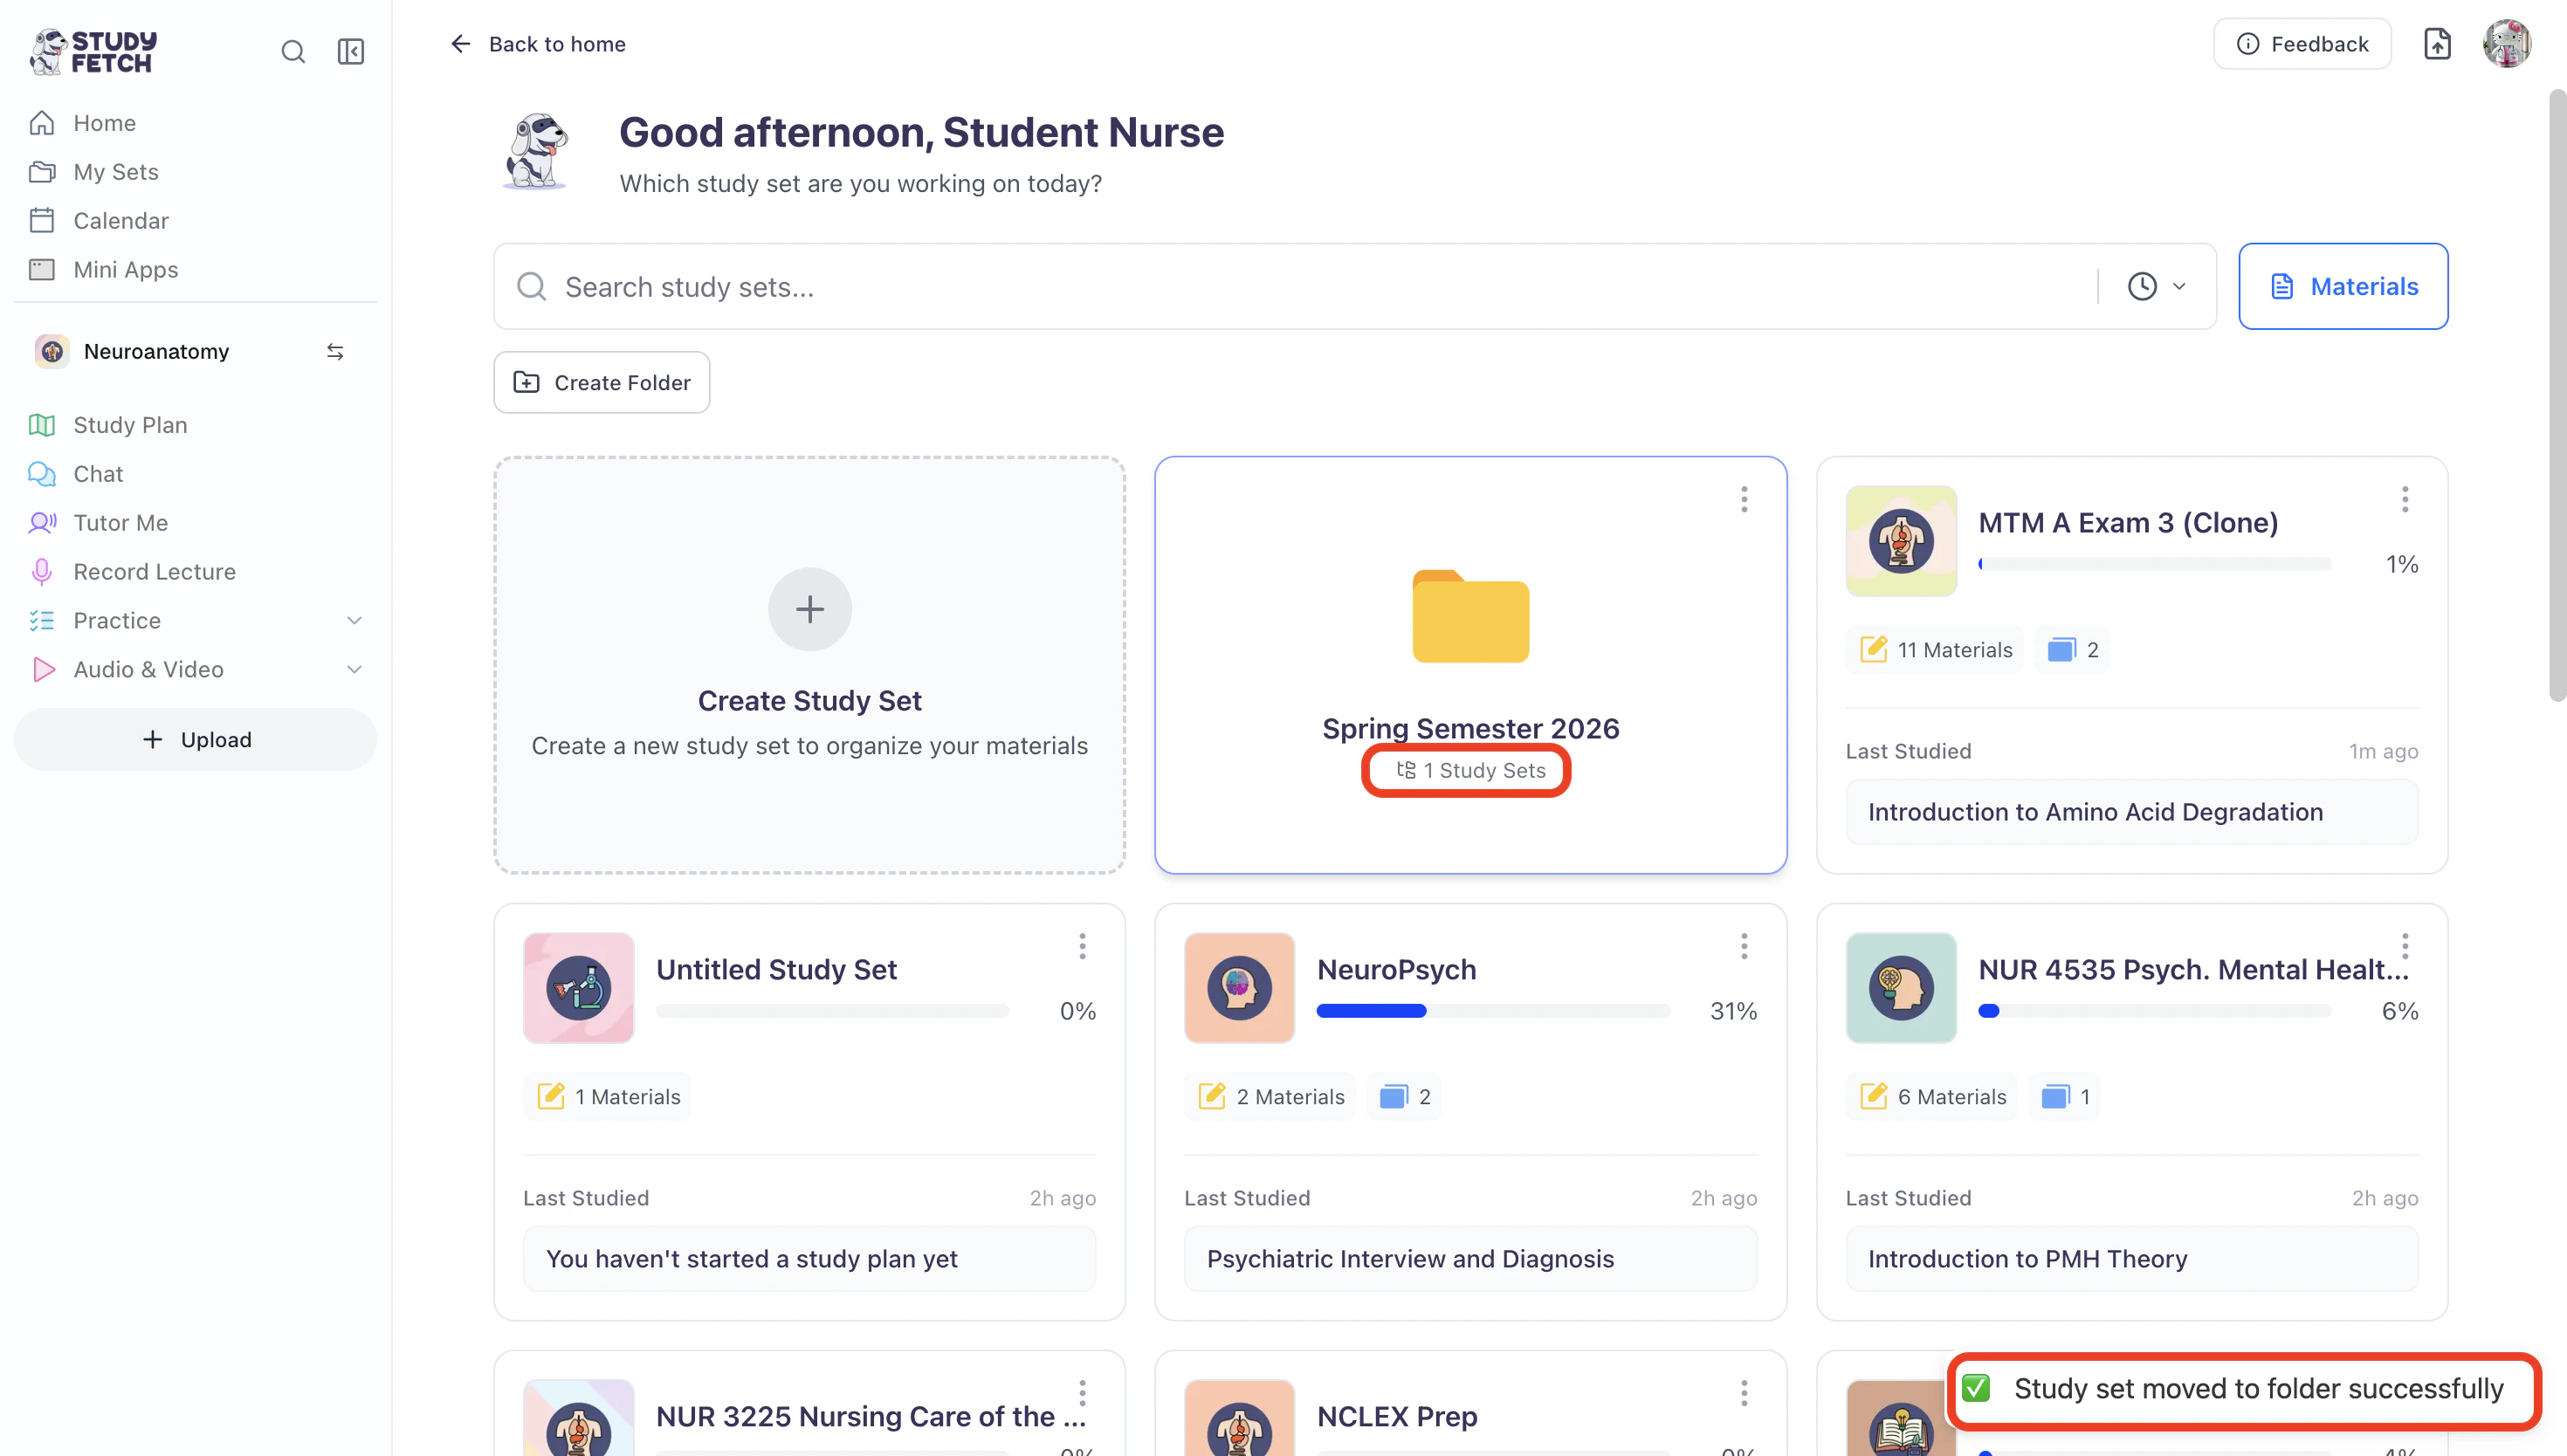
- After you move desired Study Sets into their corresponding folders, a pop-up will appear in the bottom right confirming that the Study Set has been successfully moved. The number of Study Sets in the folder description will also be updated accordingly.
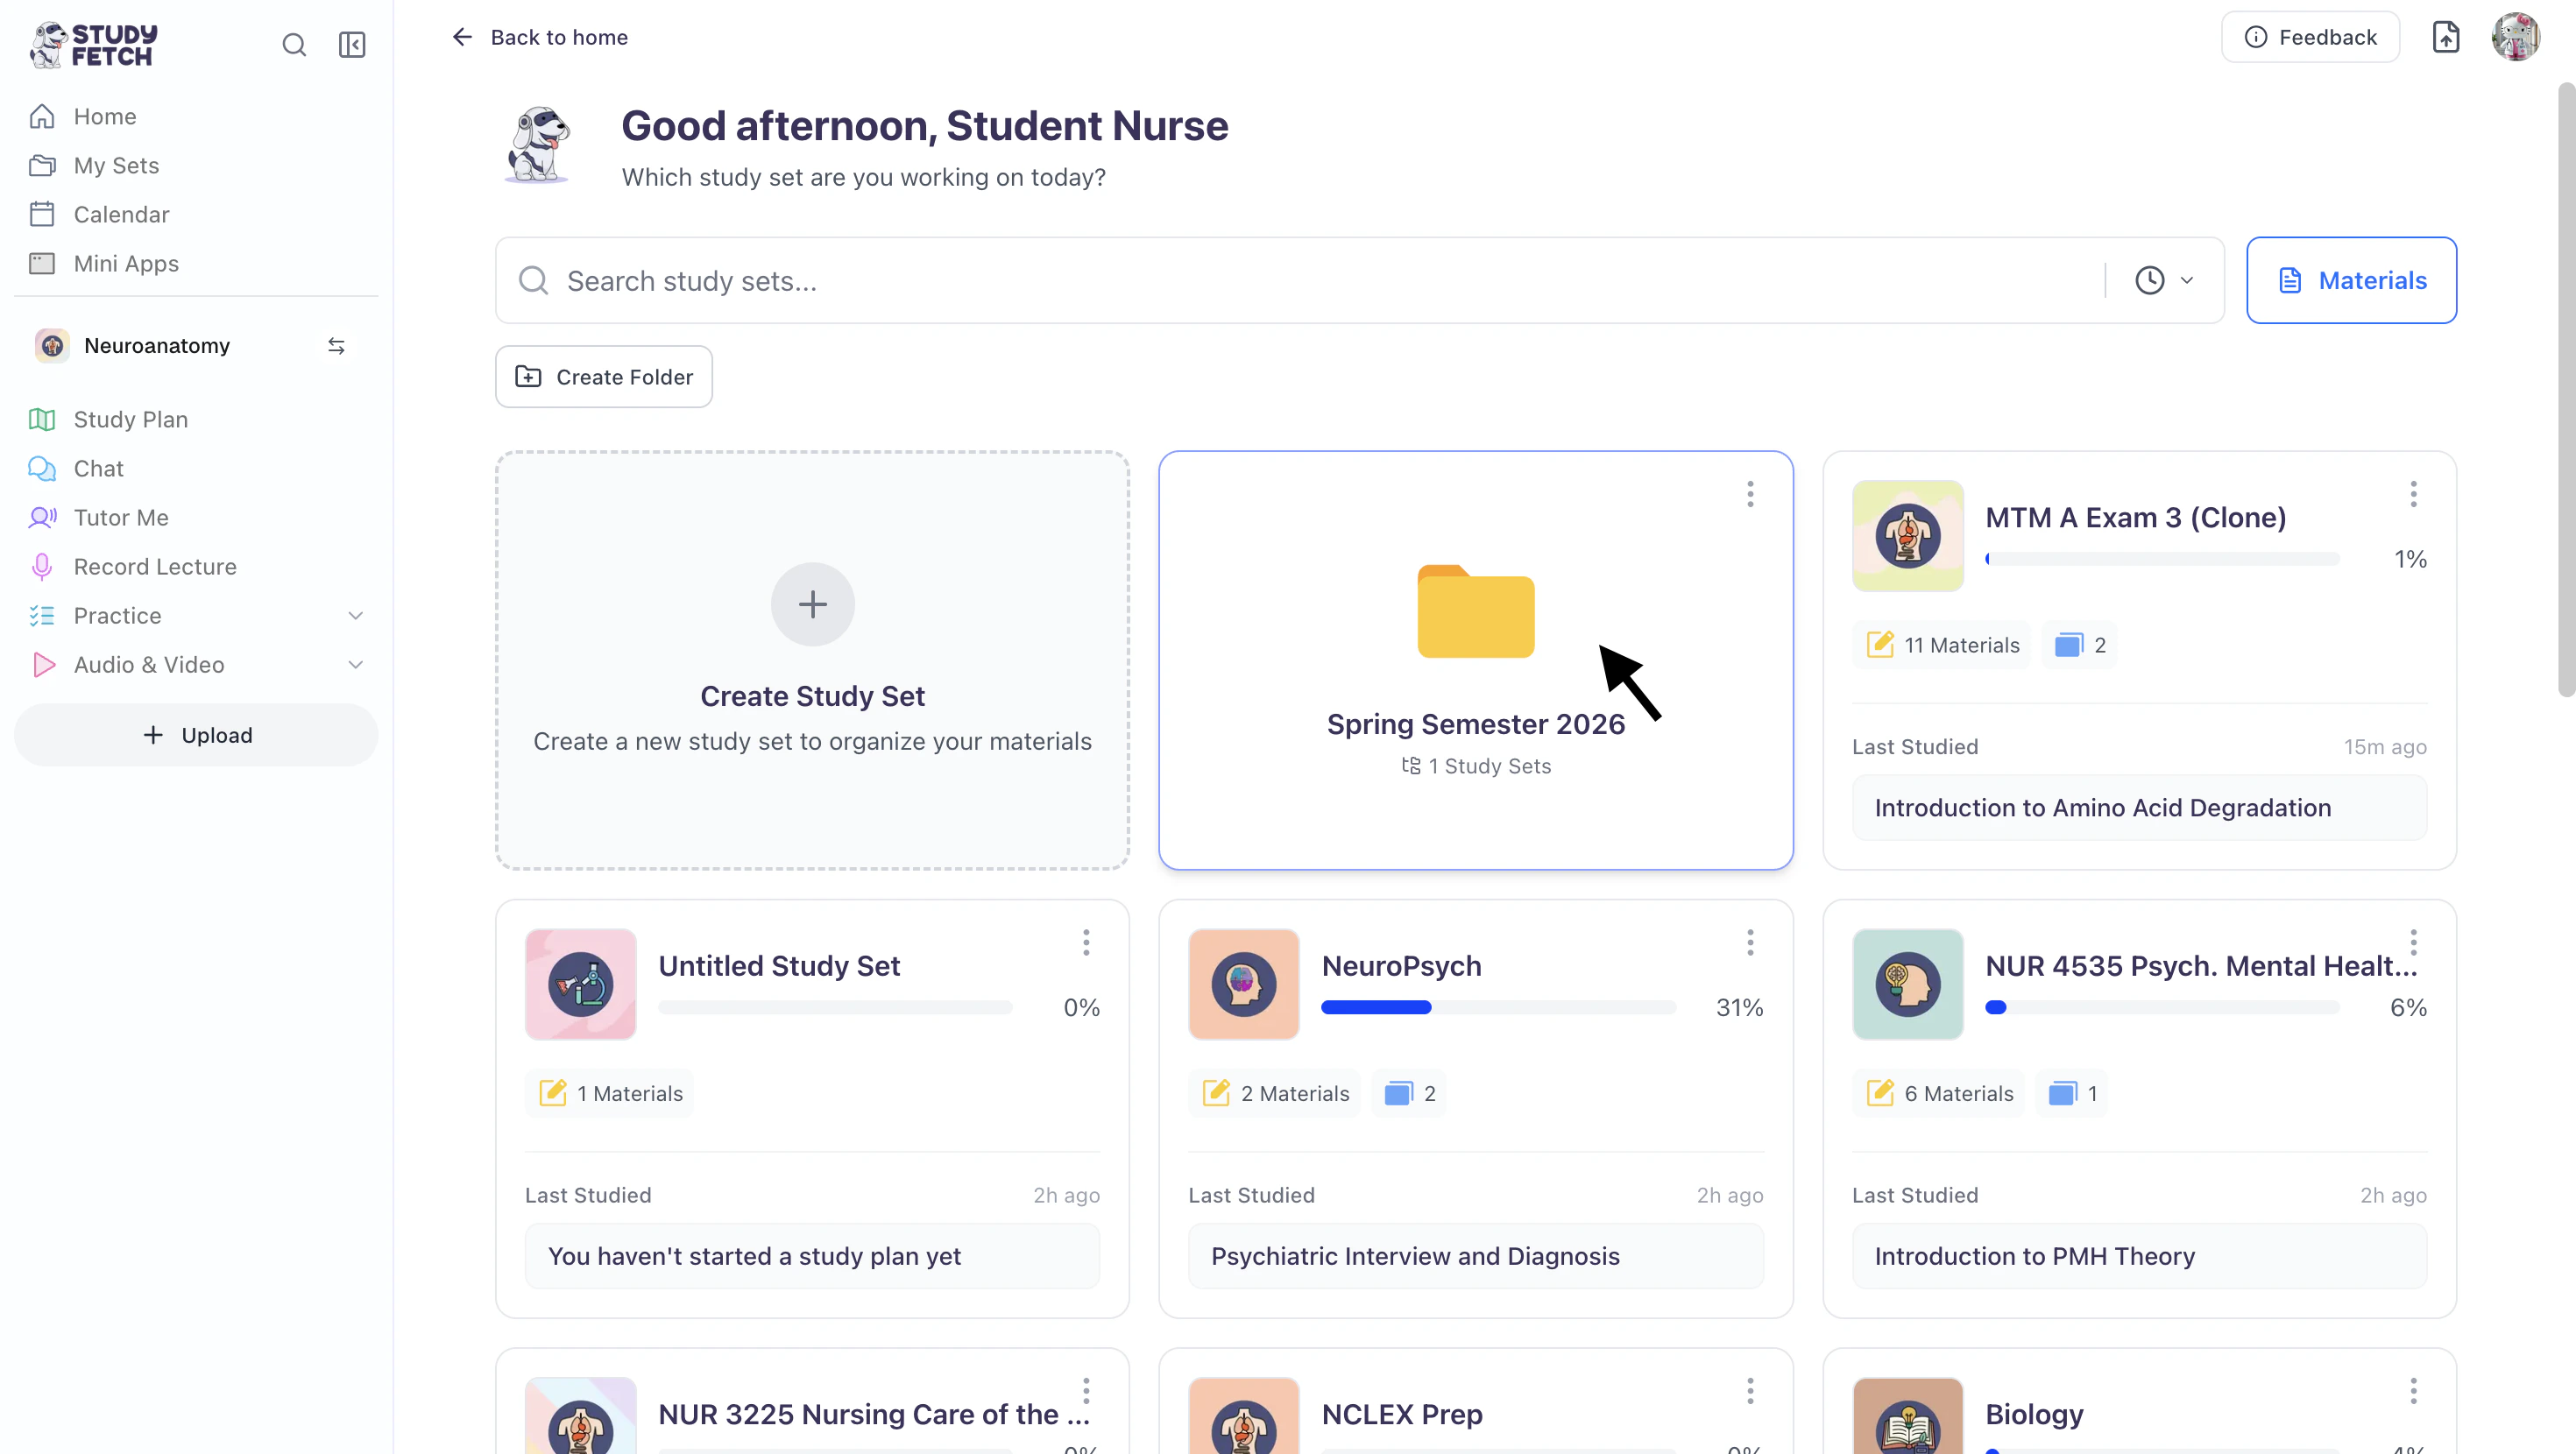
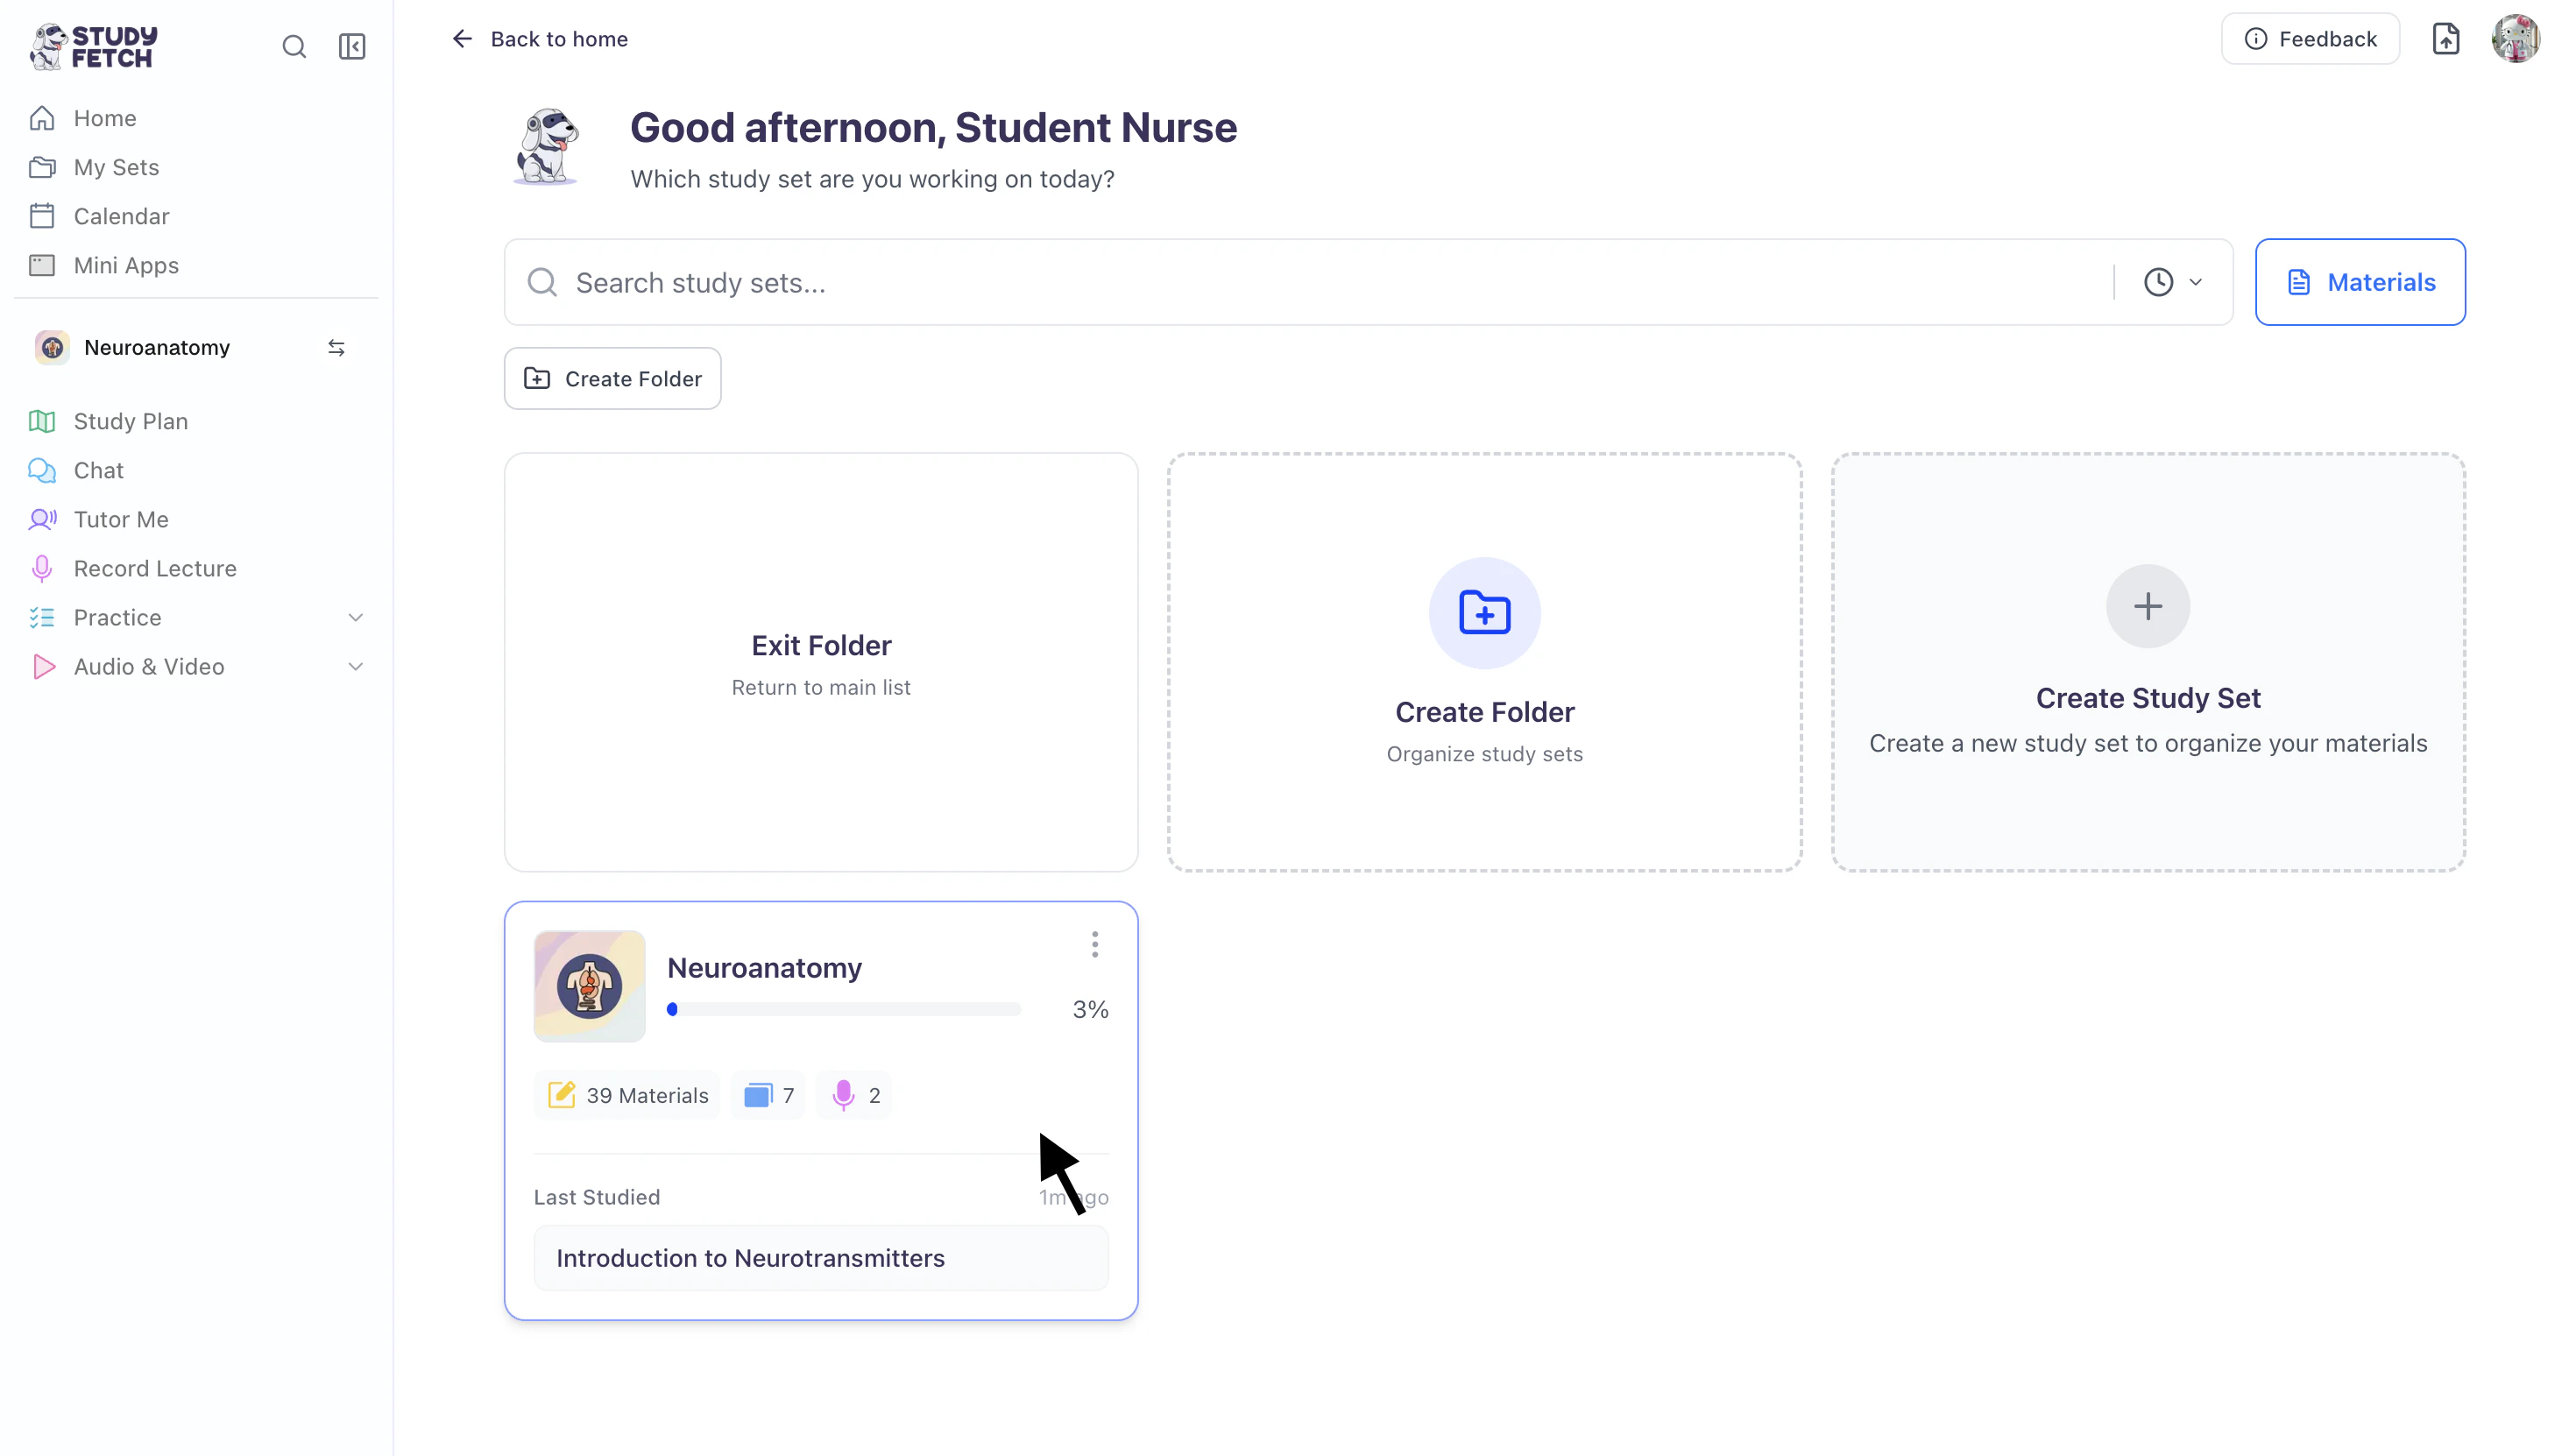
- To view all Study Sets within a folder, simply click on the desired folder.
- Once you enter the folder, all Study Sets will appear.
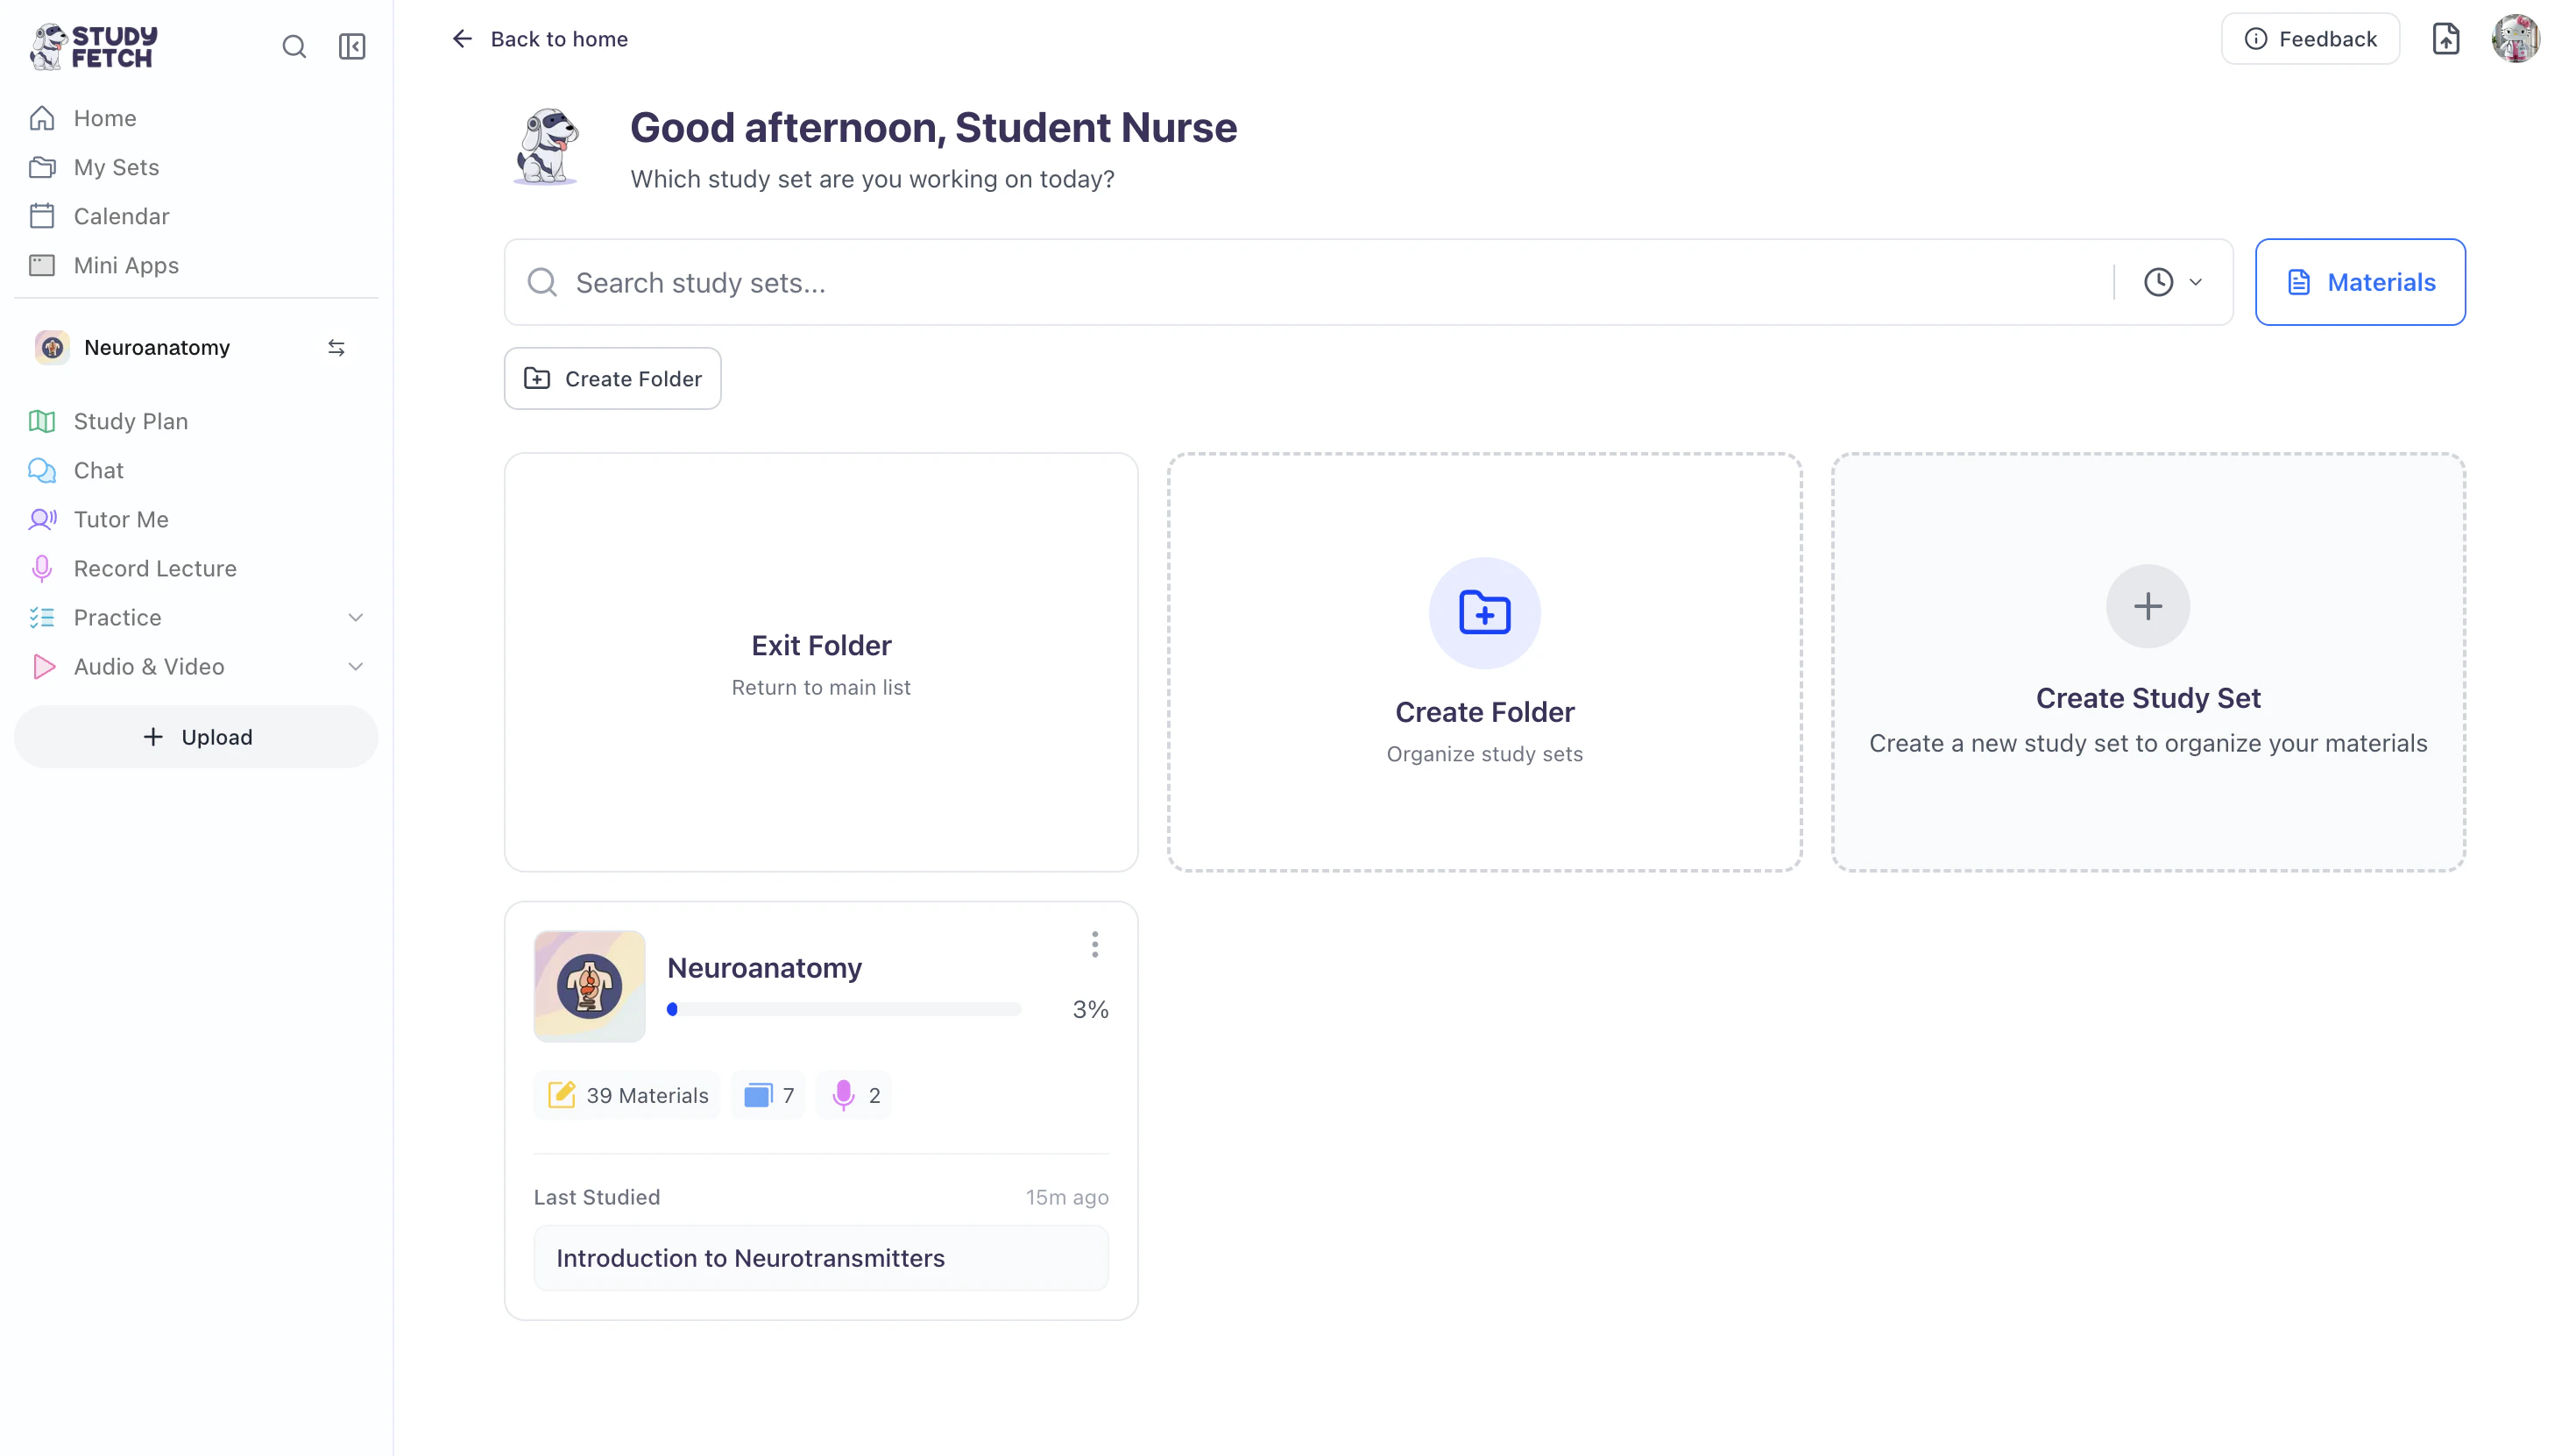
- You can return to the previous screen main list by selecting Exit Folder, or…
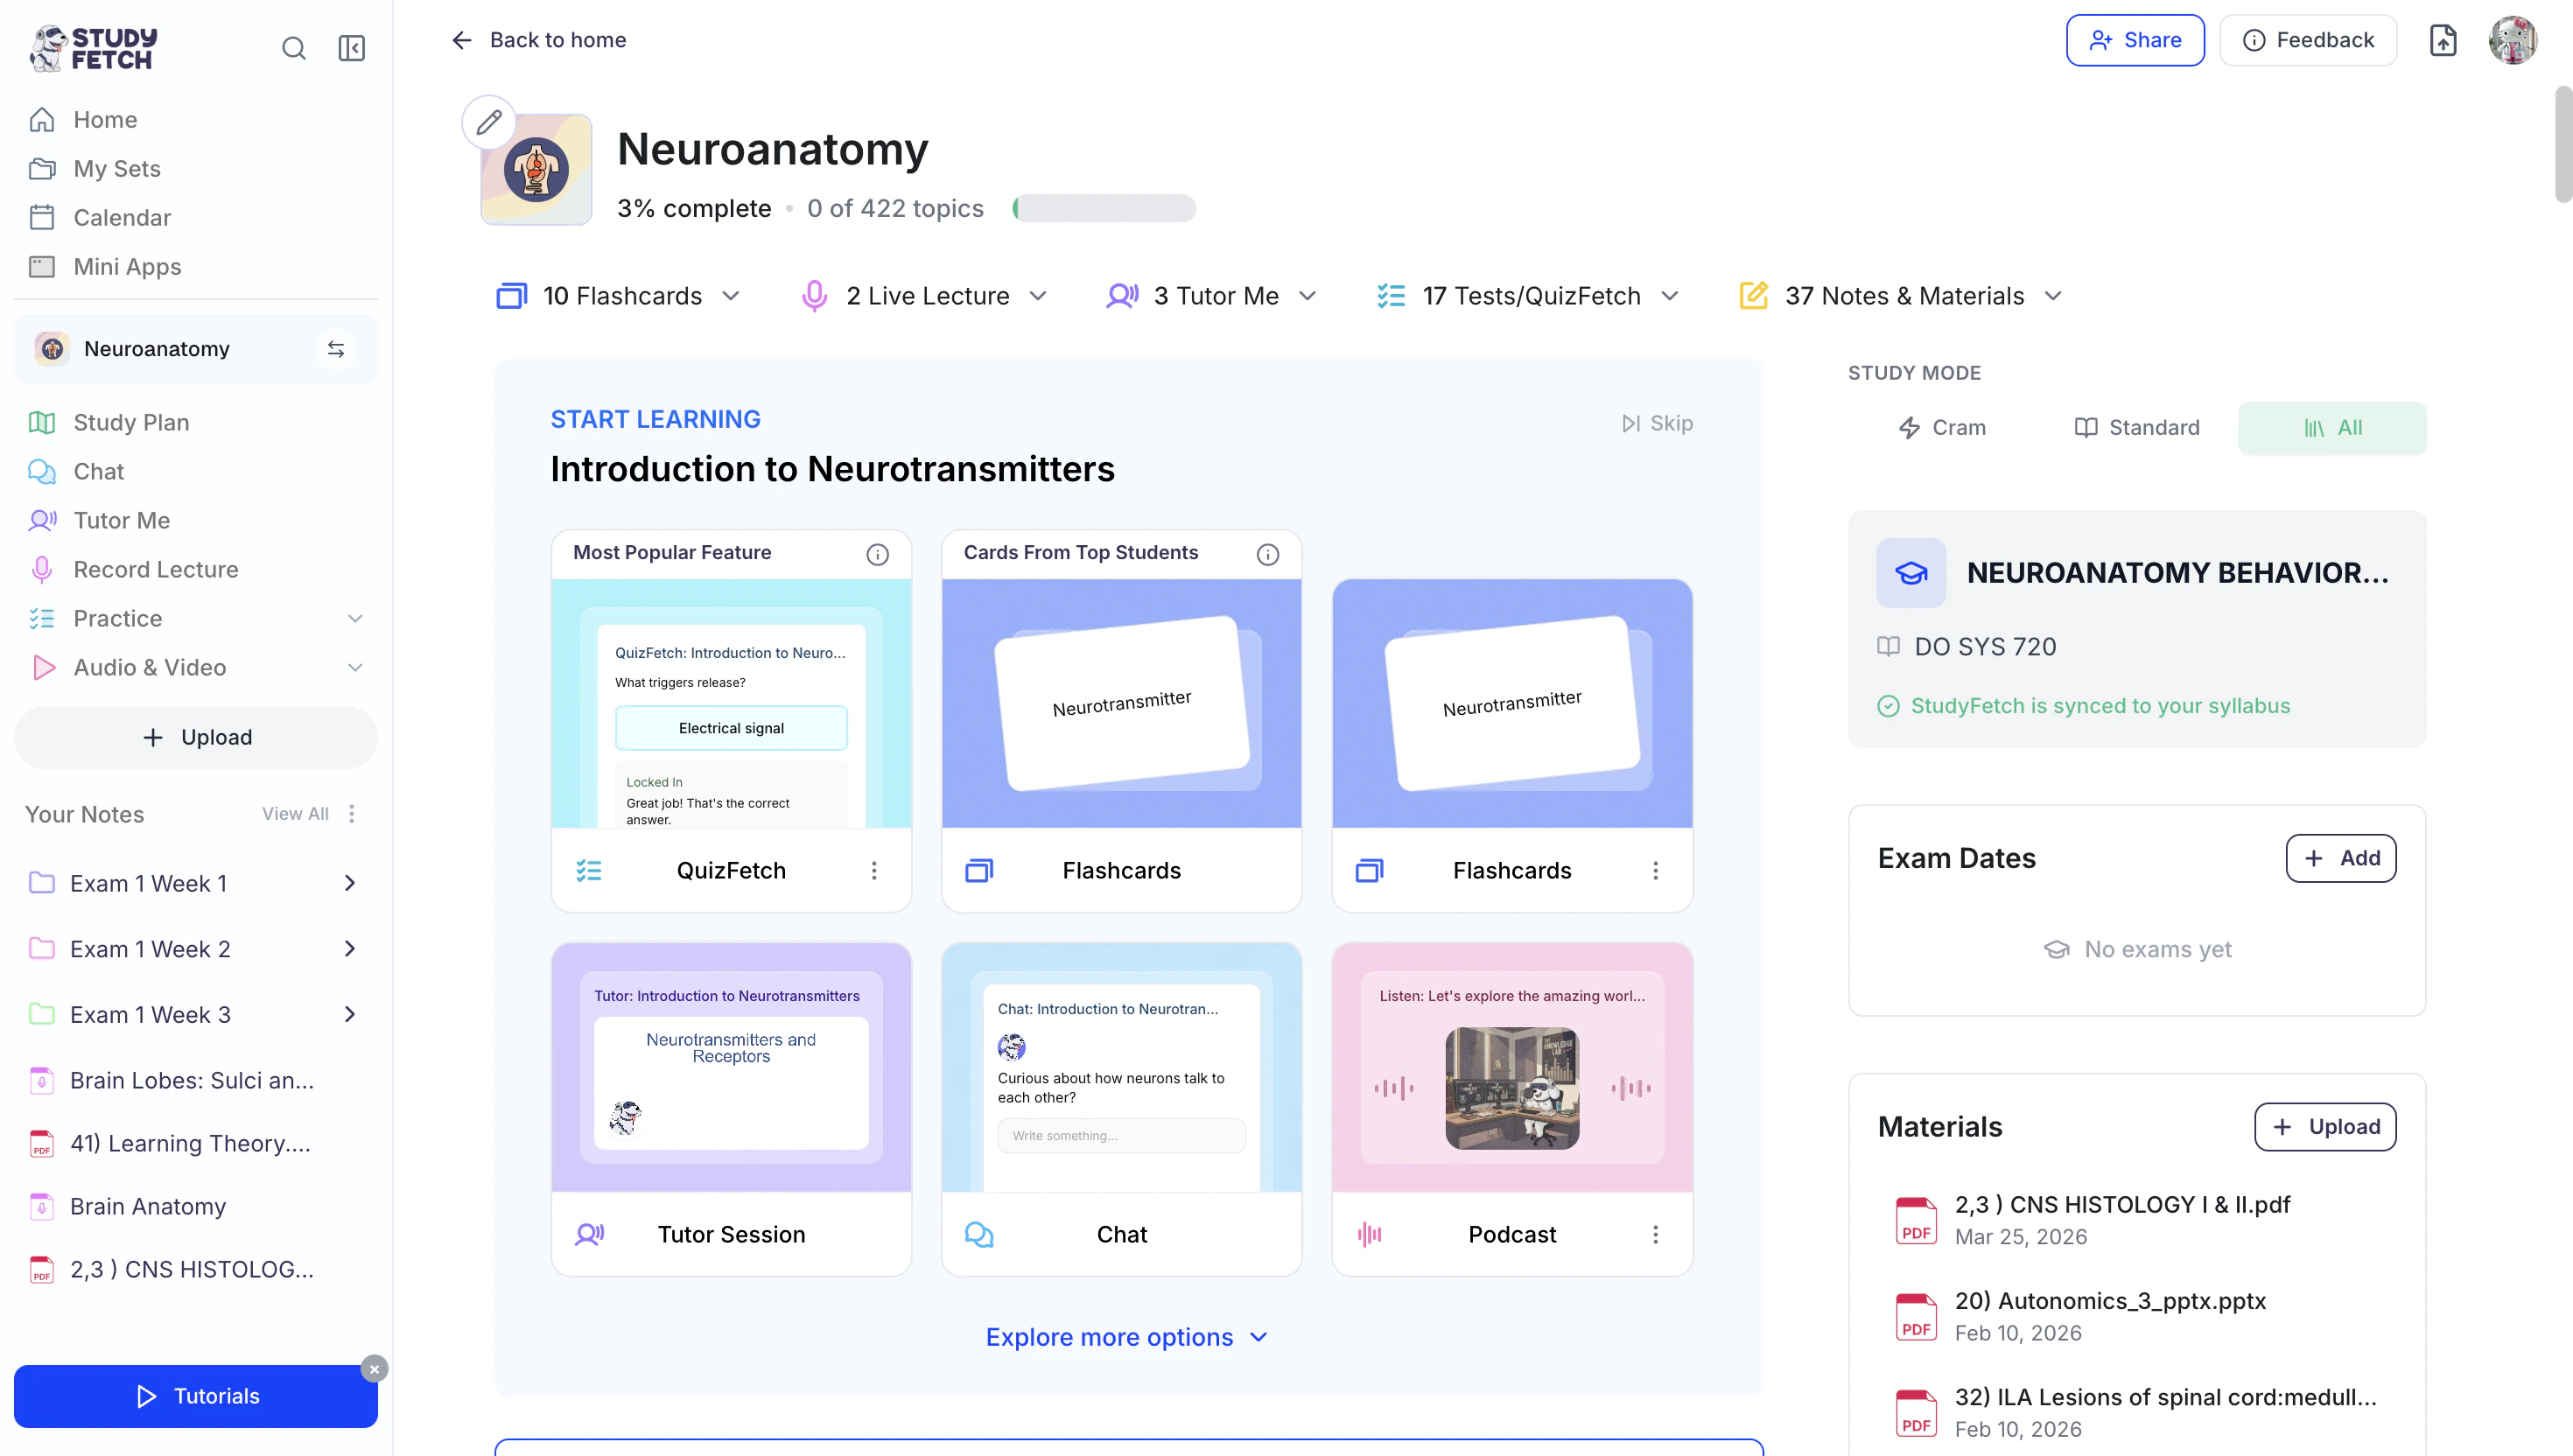
- To open a Study Set, simply click on it
and you’ll be taken to the selected Study Set’s home dashboard.
Managing Your Folders
Rename Your Folder
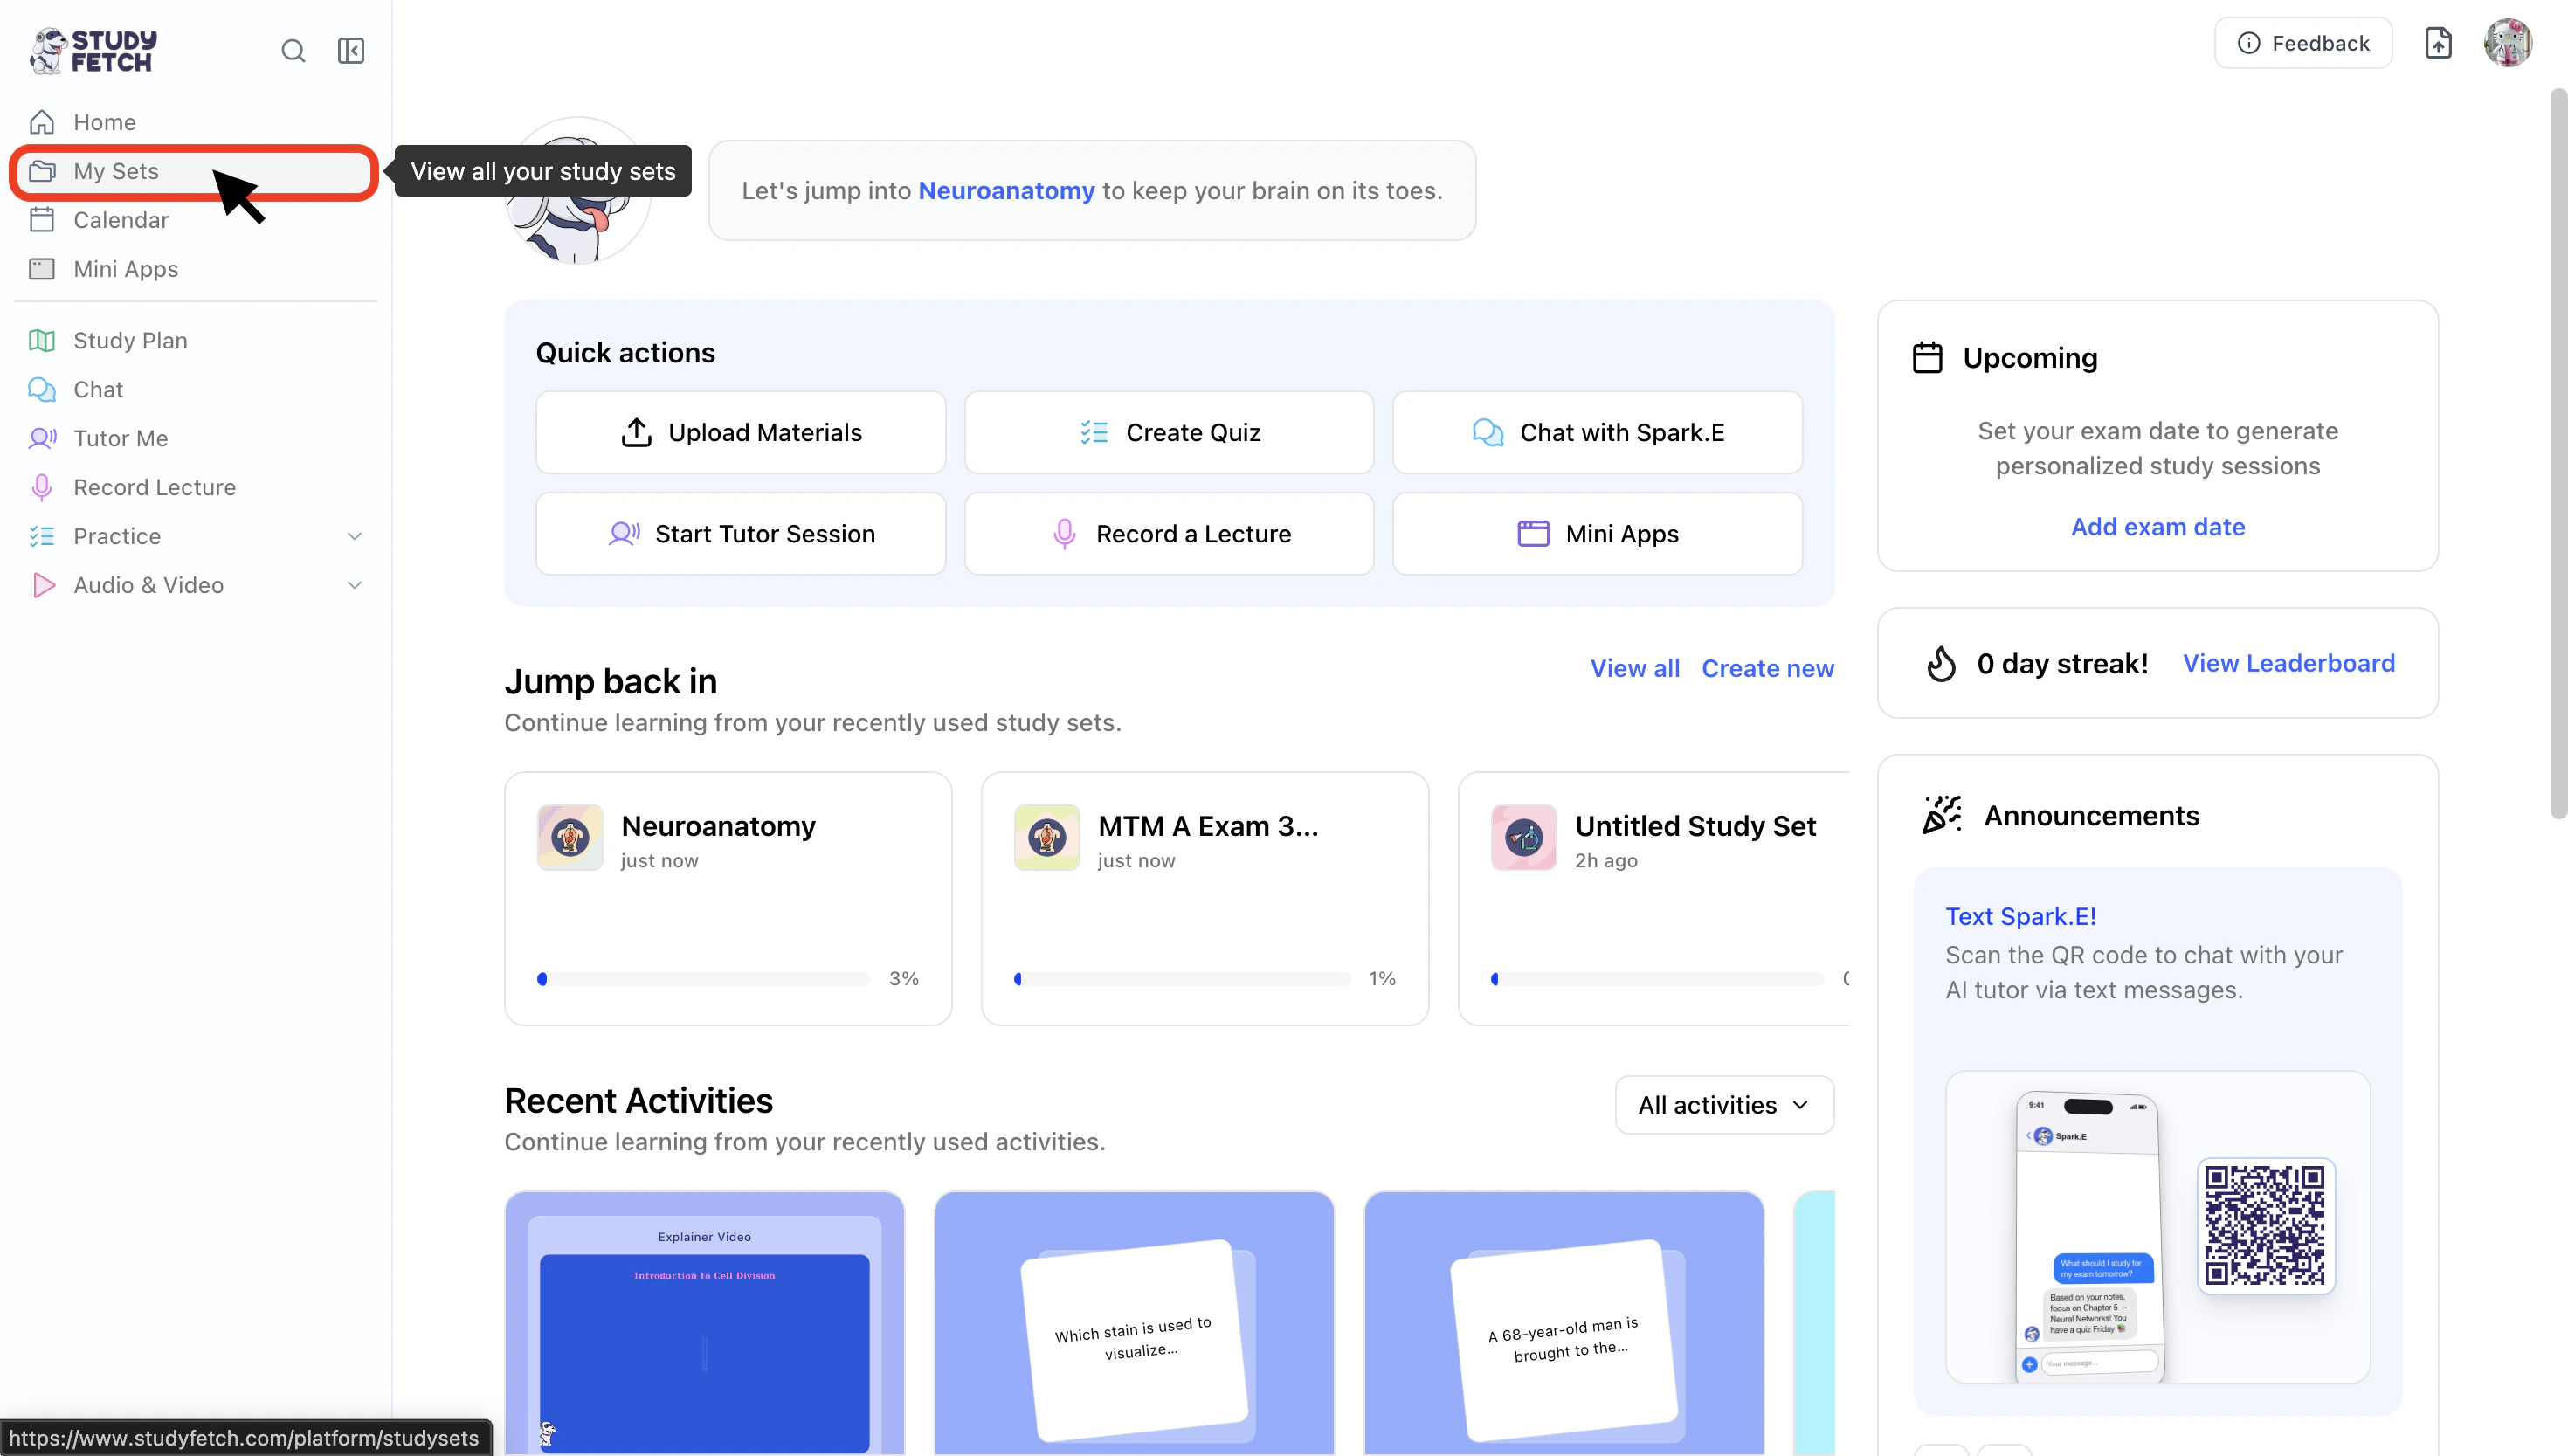
- On the left-hand side of your Dashboard click My Sets.
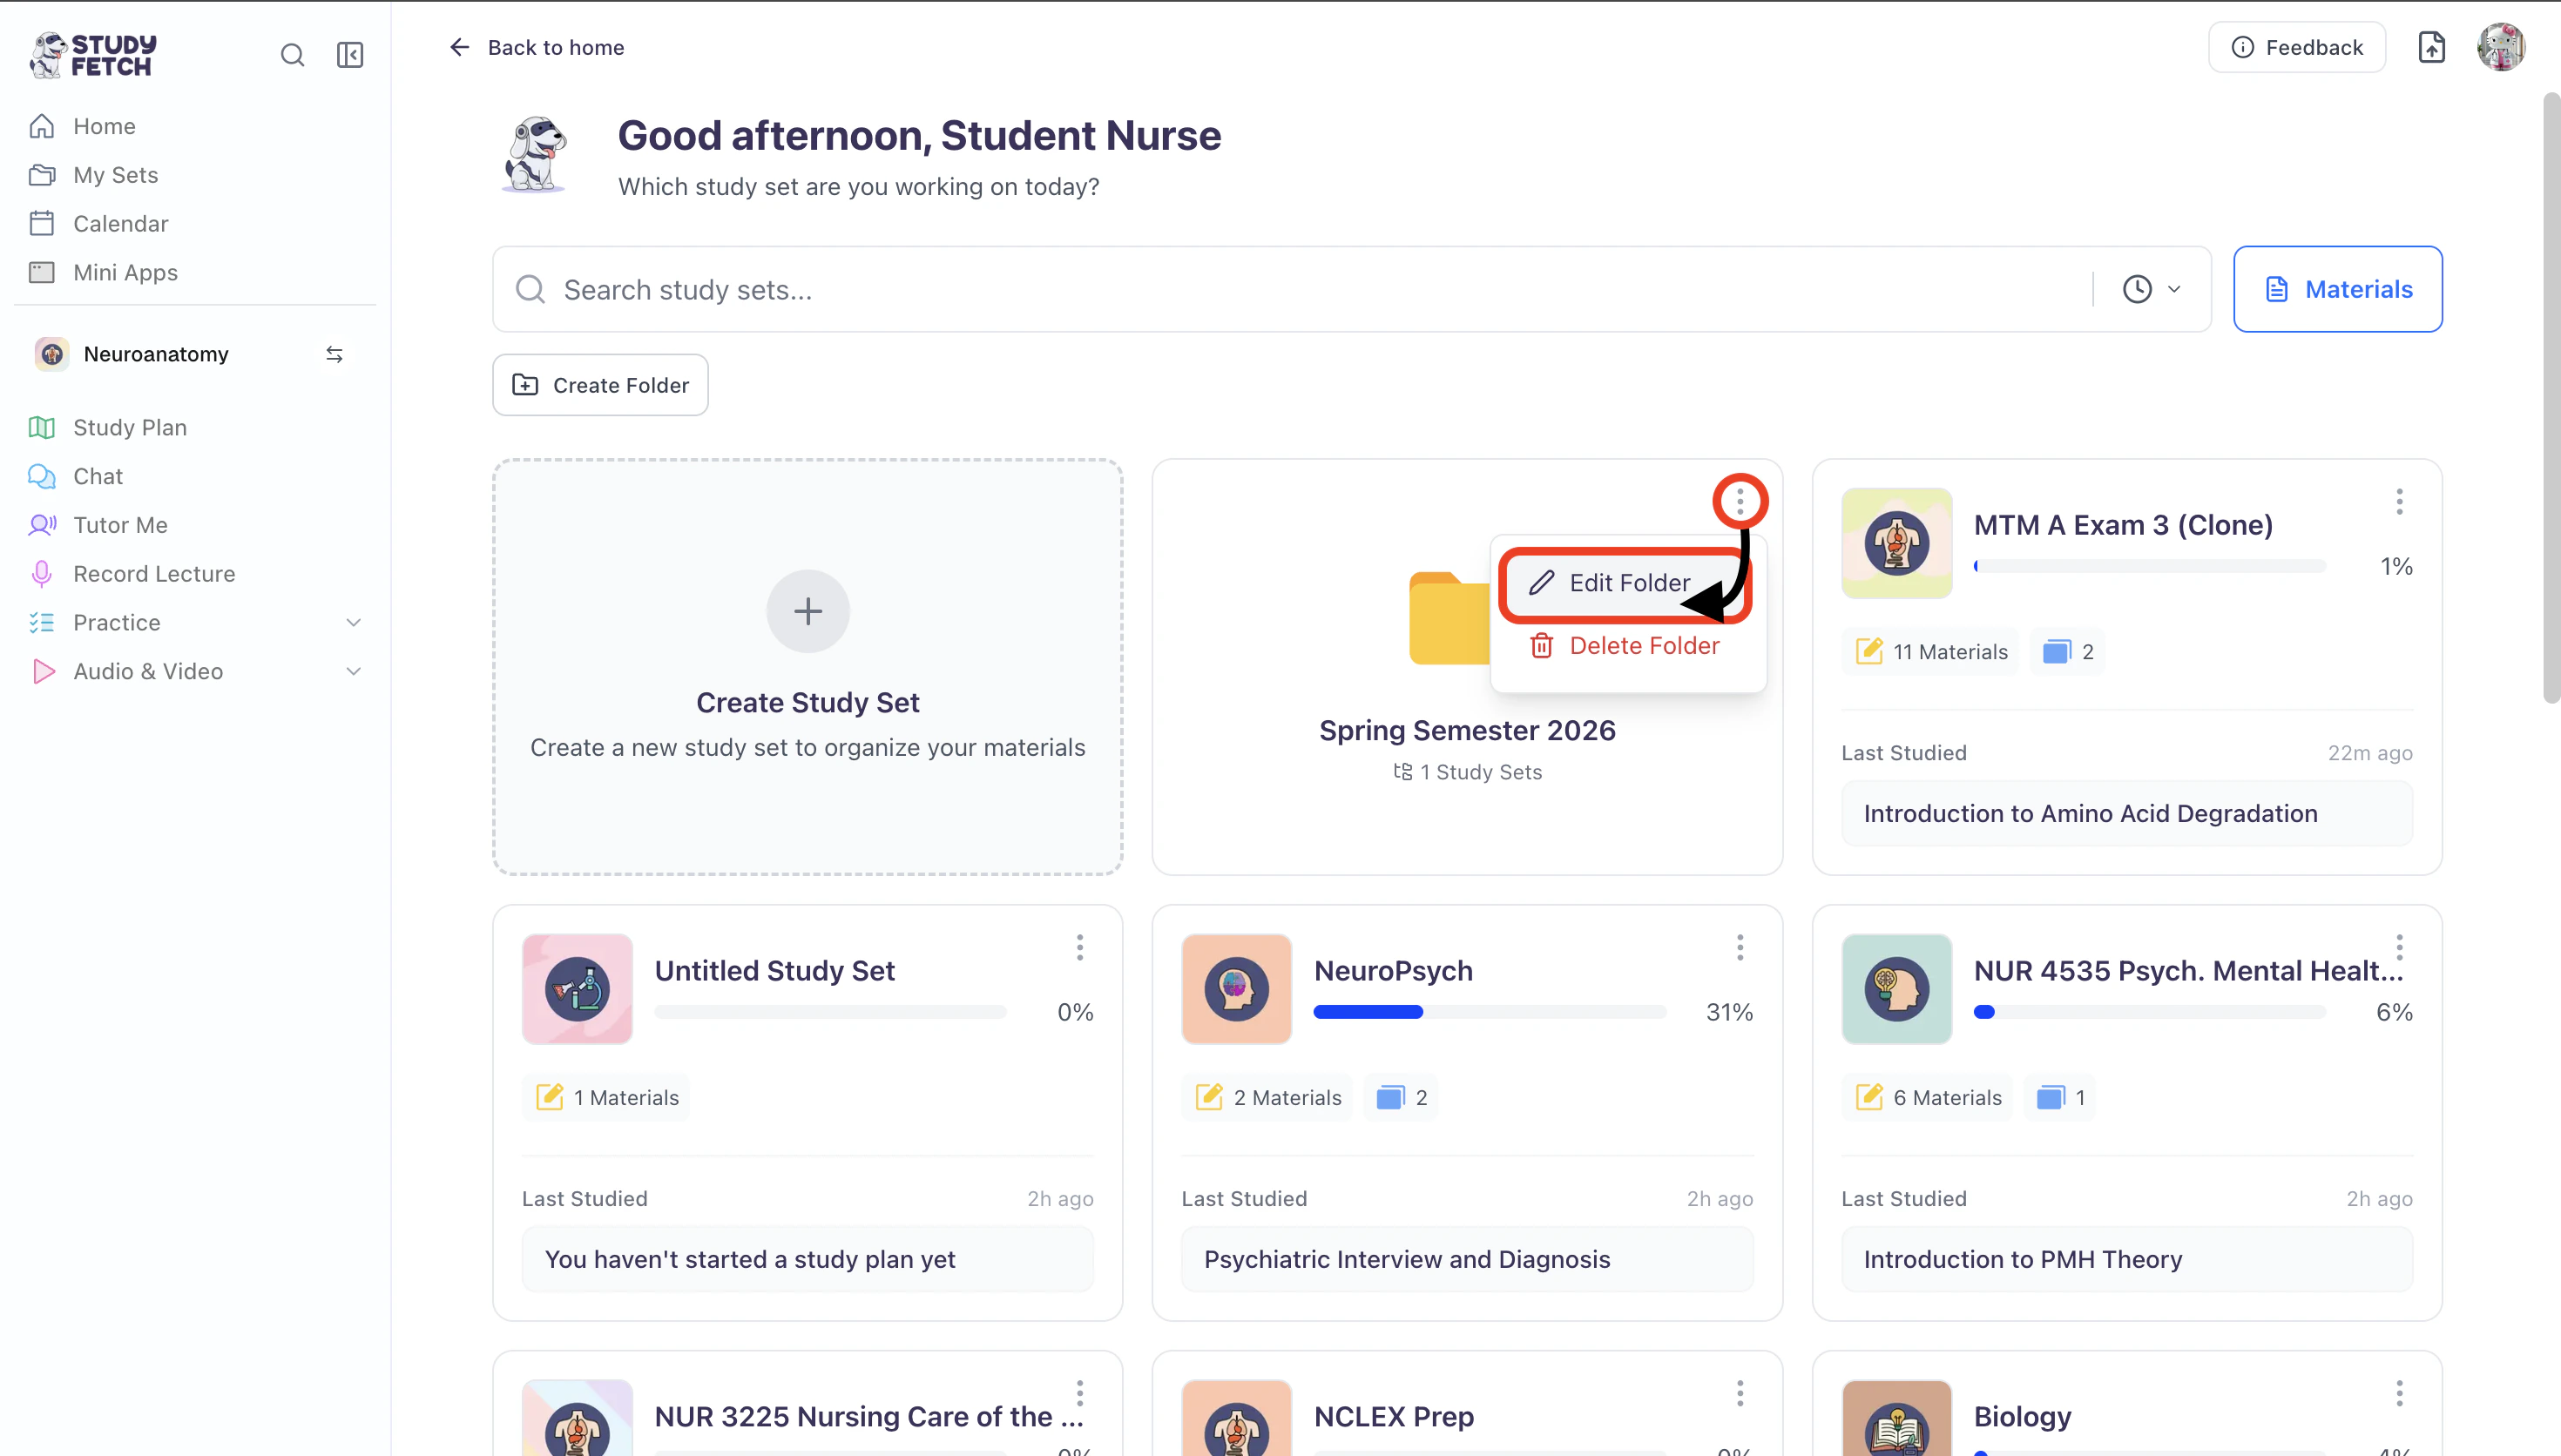
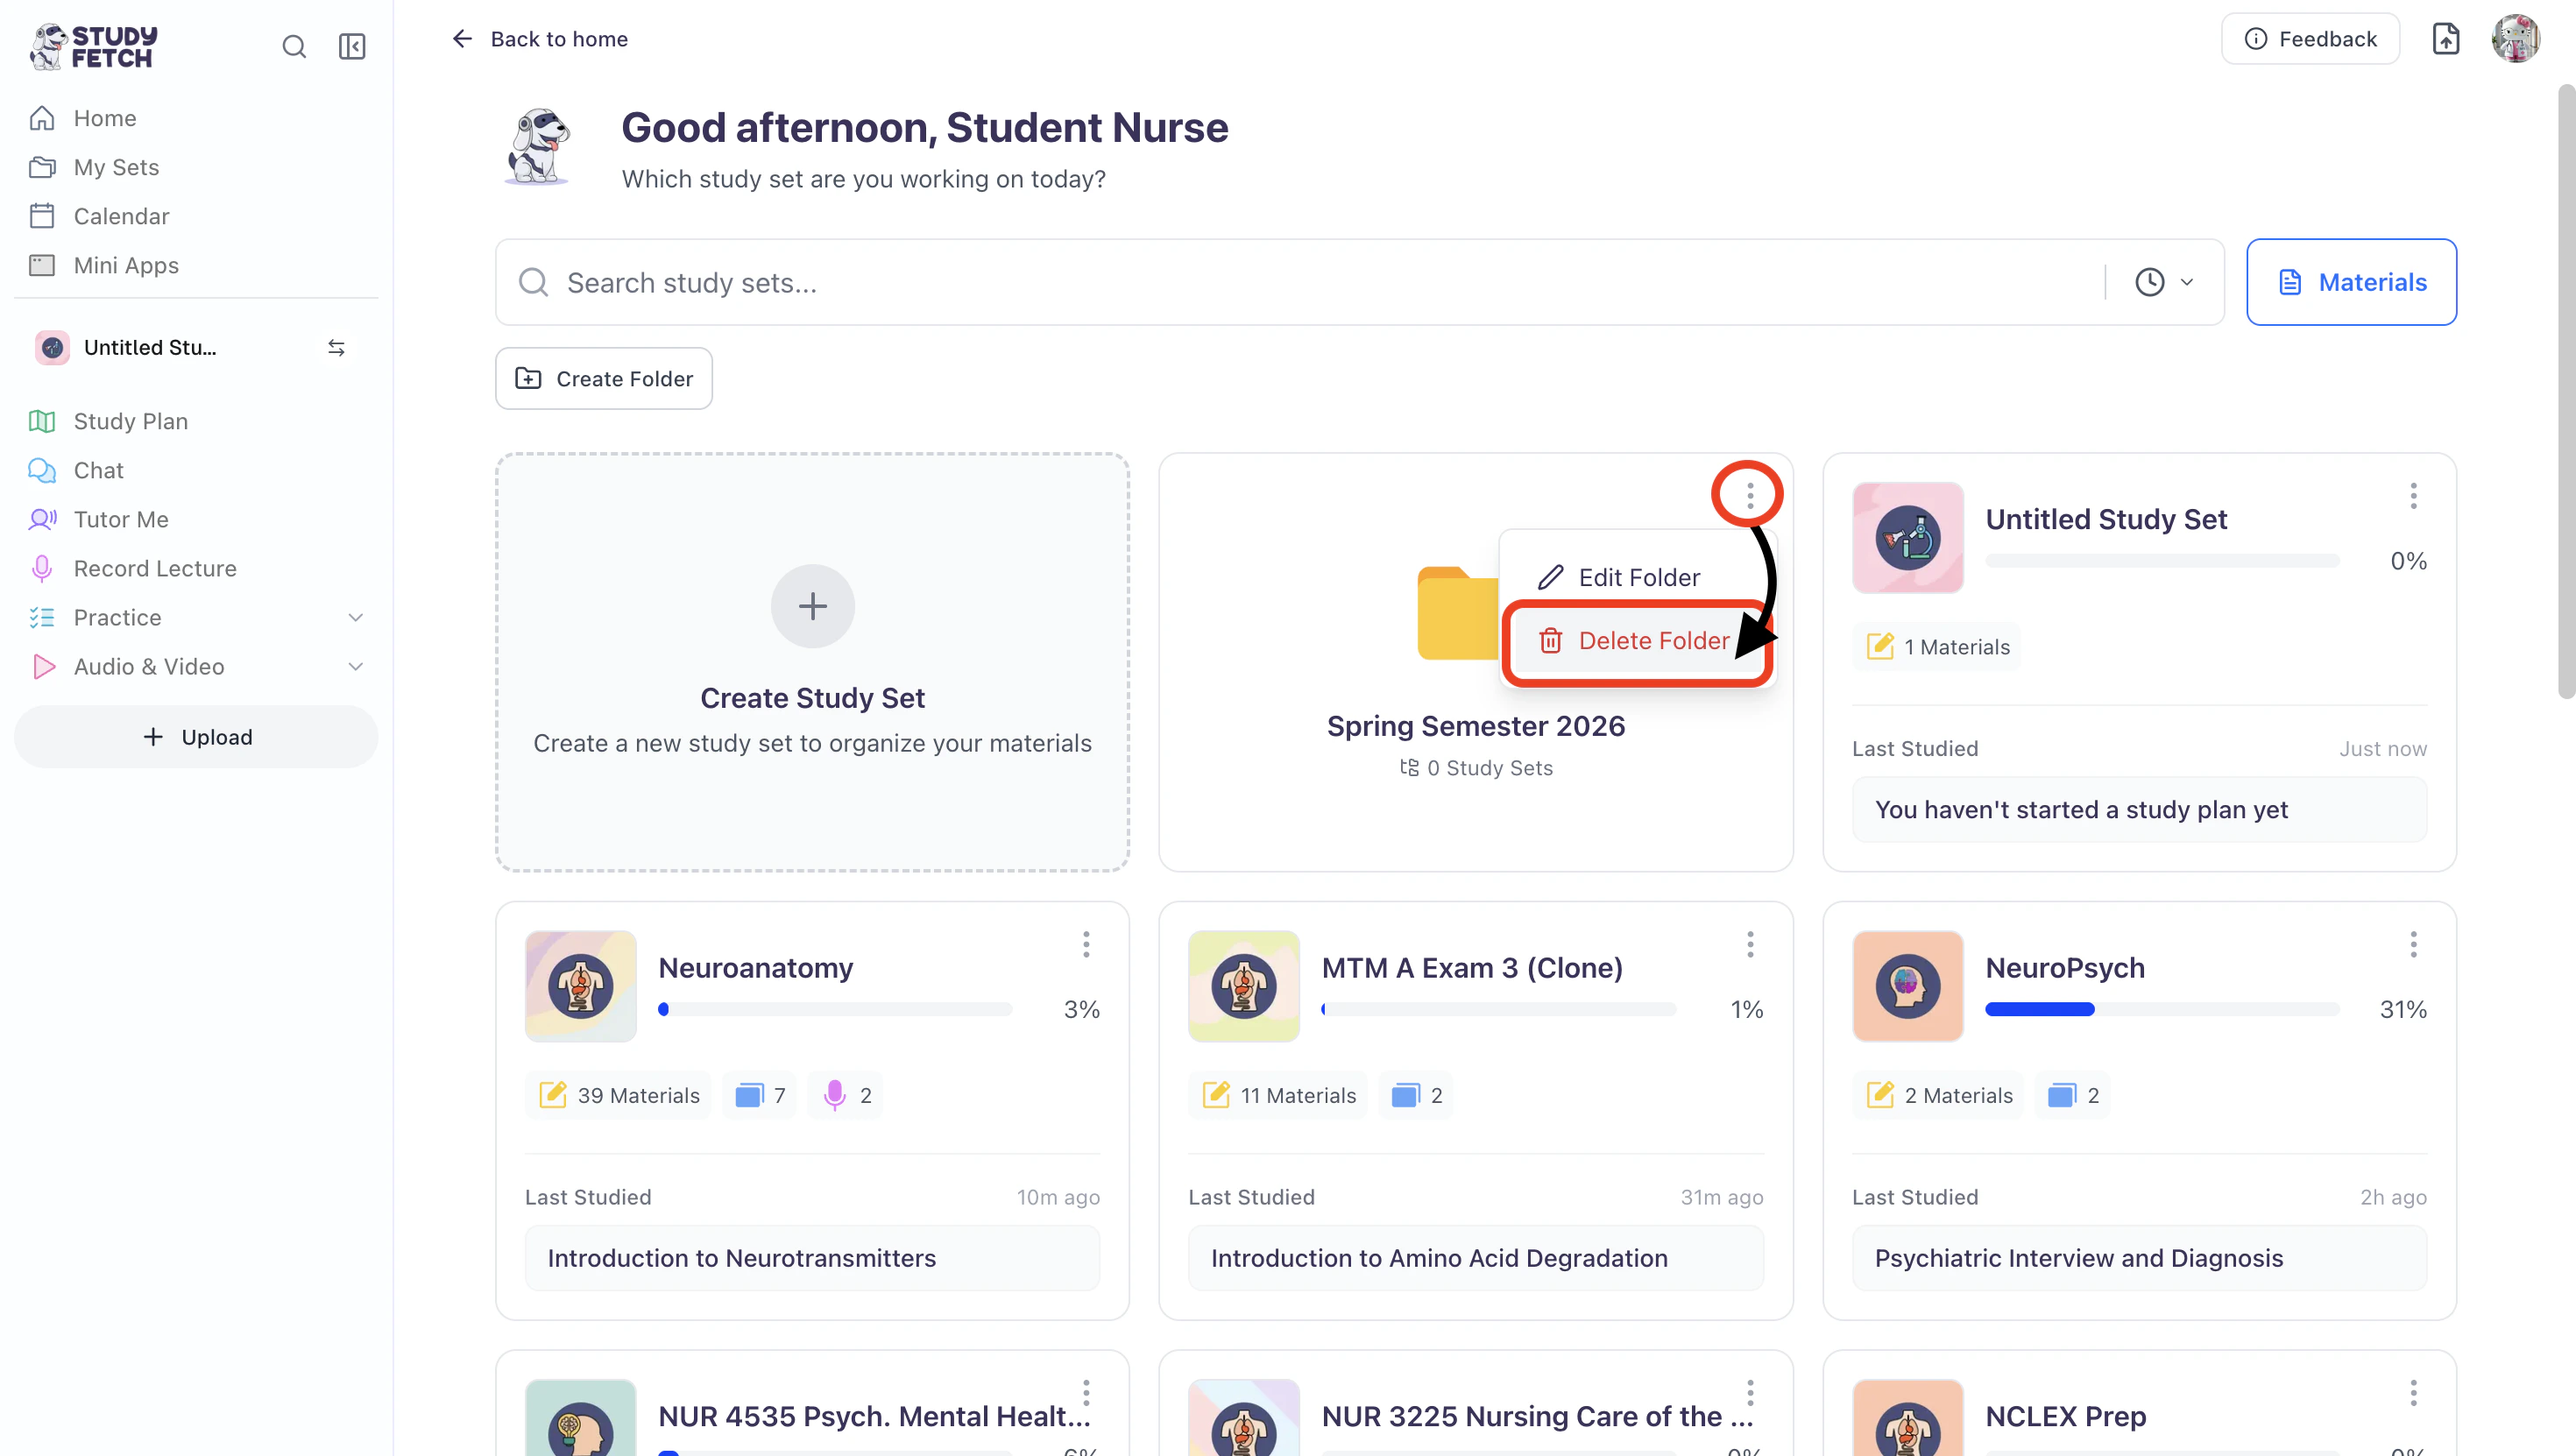
- Next, click the ⋮ icon in the top right corner of the folder you want to rename, then select Edit Folder.
- You can edit the existing name or enter a new name in the Name field.
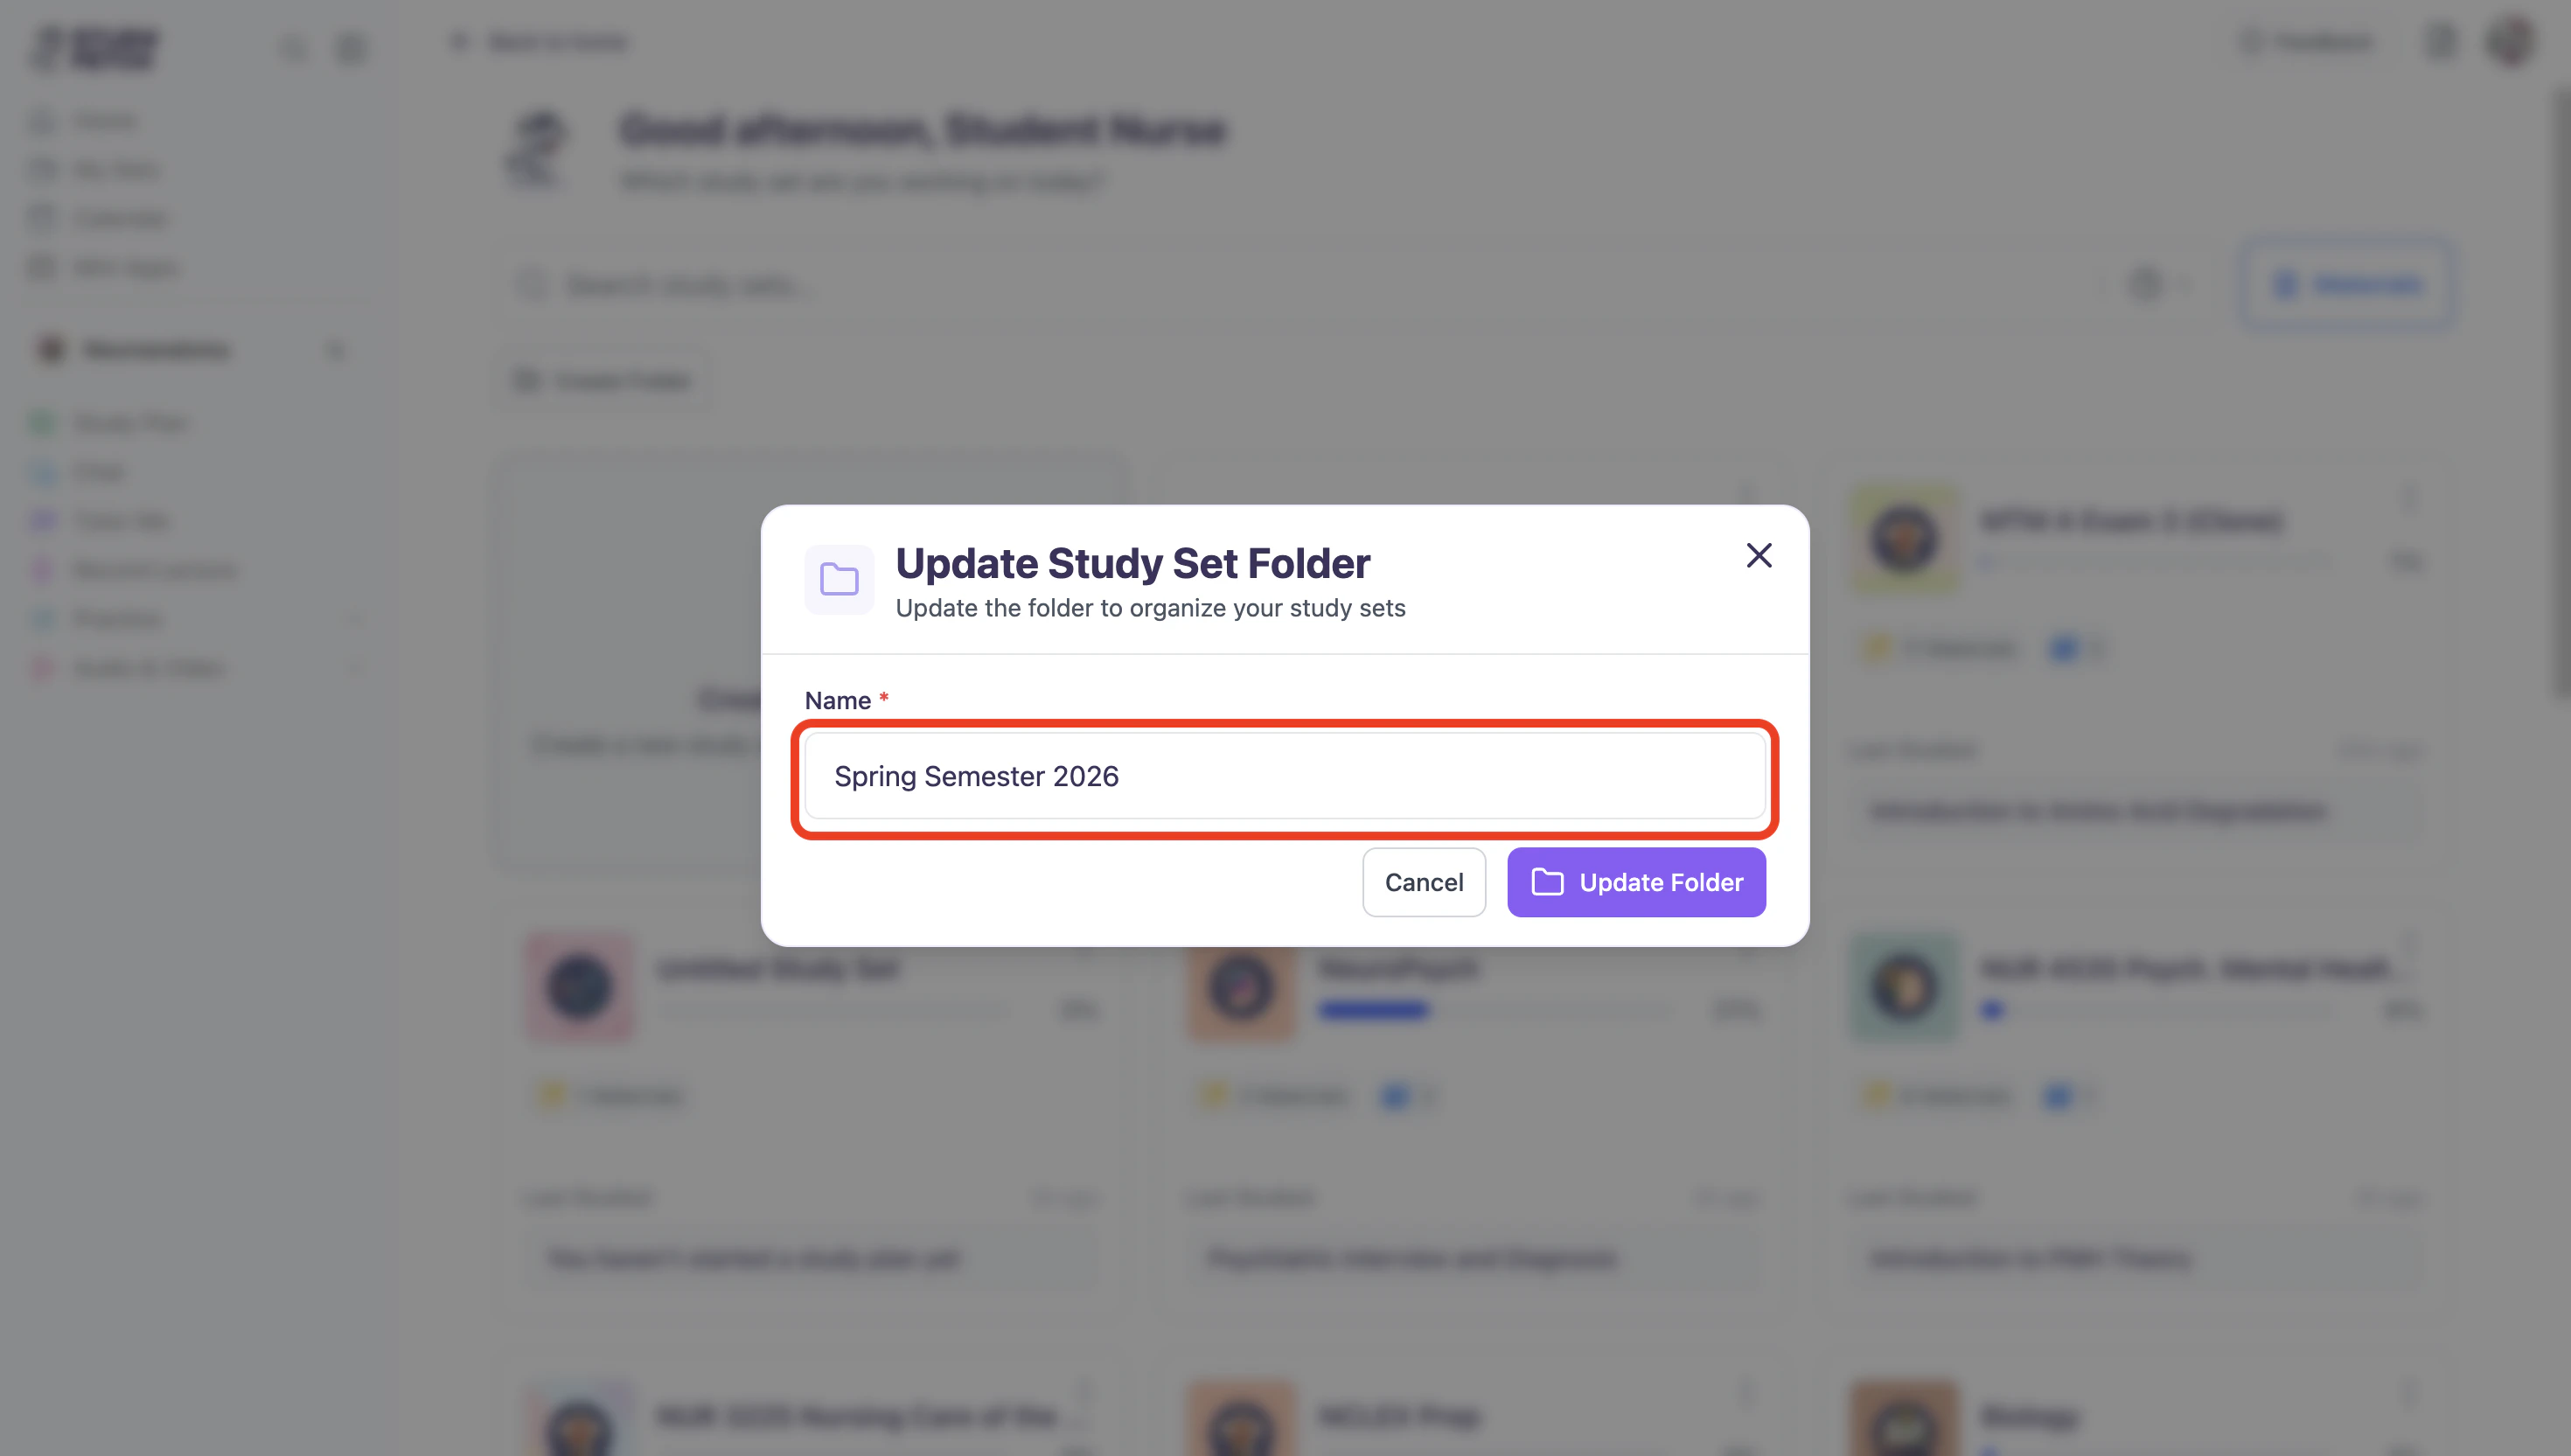
- When done click Update Folder.
Delete Your Folder
- On the left-hand side of your Dashboard click My Sets.
- Next, click the ⋮ icon in the top right corner of the folder you want to rename, then select Delete Folder.
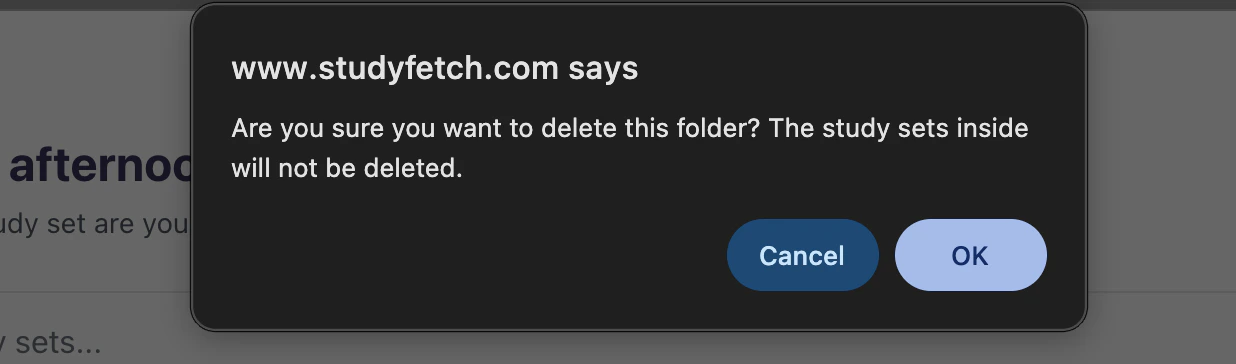
- If you are sure you want to delete this folder, select OK.
Next Steps
After creating a folder you may want to:- Upload your materials and Create Study Sets.
- Create notes for more comprehensive study materials.
- Try QuizFetch for a fun, interactive way to test your knowledge.